Page 158 of 251

Engine Oil
Changing the Oil and Filter
Always change the oil and filter according to the time and distance (miles/kilometers) recommenda-
tions in the maintenance schedule.
The oil and filter collect contami- nants that can damage your engine if
they are not removed regularly.
Changing the oil and filter requires
special tools and access from
underneath the vehicle. The vehicle should be raised on a service station-
type hydraulic lift for this service.
Unless you have the knowledge and
proper equipment, you should have
this maintenance done by a skilled
mechanic.
1. Run the engine until it reaches
normal operating temperature,
then shut it off.
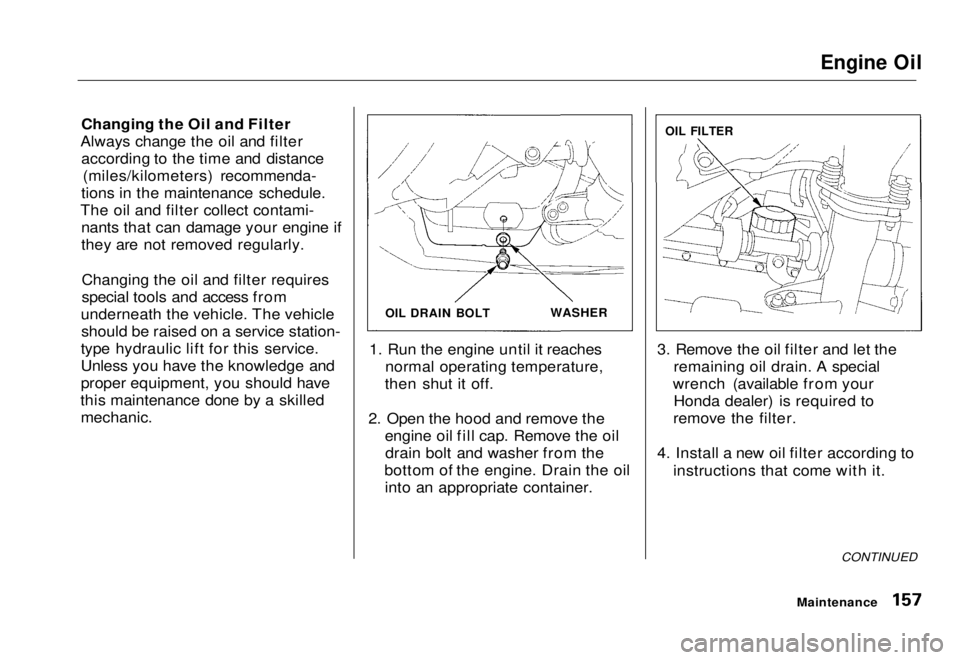
2. Open the hood and remove the engine oil fill cap. Remove the oildrain bolt and washer from the
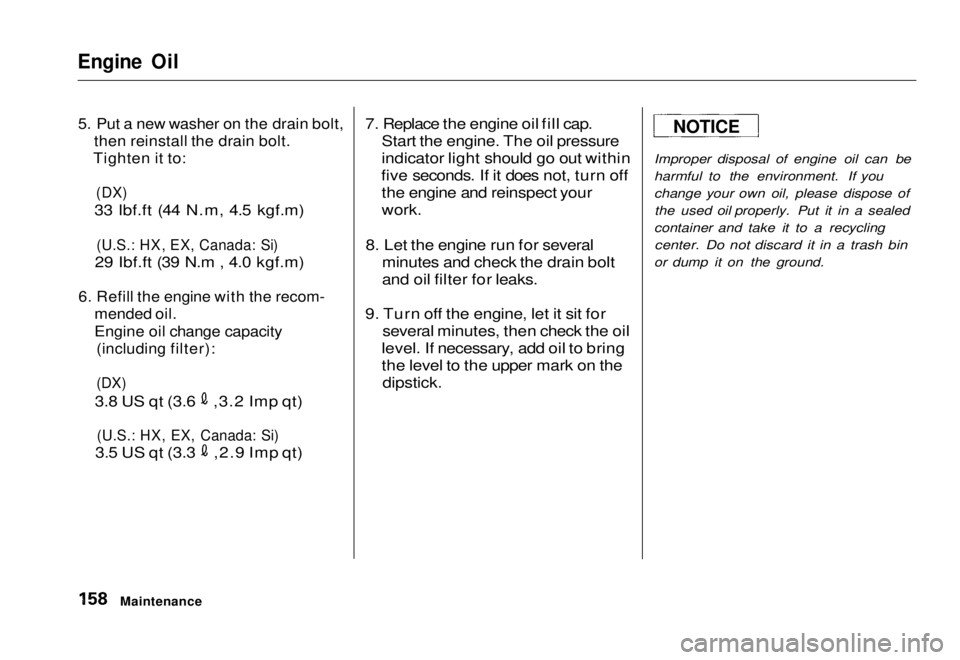
bottom of the engine. Drain the oil into an appropriate container. 3. Remove the oil filter and let the
remaining oil drain. A special
wrench (available from your Honda dealer) is required to
remove the filter.
4. Install a new oil filter according to instructions that come with it.
CONTINUED
Maintenance
OIL DRAIN BOLT
WASHER
OIL FILTERMain Menu Table of Contents s t
Page 159 of 251

Engine Oil
5. Put a new washer on the drain bolt,
then reinstall the drain bolt.
Tighten it to:
(DX)
33 lbf.ft (44 N.m, 4.5 kgf.m)
(U.S.: HX, EX, Canada: Si)
29 Ibf.ft (39 N.m , 4.0 kgf.m)
6. Refill the engine with the recom-
mended oil.
Engine oil change capacity
(including filter):
(DX)
3.8 US qt (3.6 ,3.2 Imp qt)
(U.S.: HX, EX, Canada: Si)
3.5 US qt (3.3 ,2.9 Imp qt) 7. Replace the engine oil fill cap.
Start the engine. The oil pressure
indicator light should go out within
five seconds. If it does not, turn off the engine and reinspect your
work.
8. Let the engine run for several minutes and check the drain bolt
and oil filter for leaks.
9. Turn off the engine, let it sit for several minutes, then check the oil
level. If necessary, add oil to bring
the level to the upper mark on the
dipstick.
Improper disposal of engine oil can be
harmful to the environment. If you
change your own oil, please dispose of
the used oil properly. Put it in a sealed
container and take it to a recycling
center. Do not discard it in a trash bin
or dump it on the ground.
Maintenance
NOTICEMain Menu Table of Contents s t
Page 167 of 251

Transmission Fluid, Brake and Clutch Fluid
5-speed Manual Transmission
Check the fluid level with the
transmission at normal operating
temperature and the vehicle sitting
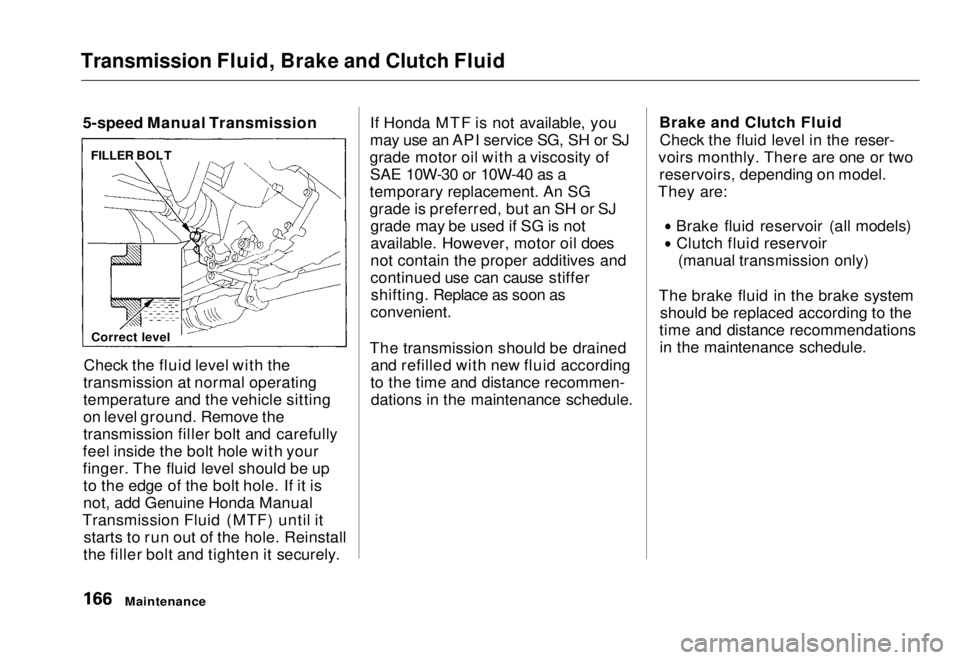
on level ground. Remove the
transmission filler bolt and carefully
feel inside the bolt hole with your
finger. The fluid level should be up to the edge of the bolt hole. If it is
not, add Genuine Honda Manual
Transmission Fluid (MTF) until it starts to run out of the hole. Reinstall
the filler bolt and tighten it securely. If Honda MTF is not available, you
may use an API service SG, SH or SJ
grade motor oil with a viscosity of SAE 10W-30 or 10W-40 as a
temporary replacement. An SG
grade is preferred, but an SH or SJ grade may be used if SG is not
available. However, motor oil does
not contain the proper additives and
continued use can cause stiffershifting. Replace as soon as
convenient.
The transmission should be drained and refilled with new fluid according
to the time and distance recommen- dations in the maintenance schedule. Brake and Clutch Fluid
Check the fluid level in the reser-
voirs monthly. There are one or two reservoirs, depending on model.
They are:
Brake fluid reservoir (all models)Clutch fluid reservoir (manual transmission only)
The brake fluid in the brake system should be replaced according to the
time and distance recommendations in the maintenance schedule.
Maintenance
FILLER BOLT
Correct levelMain Menu Table of Contents s t