Page 119 of 452

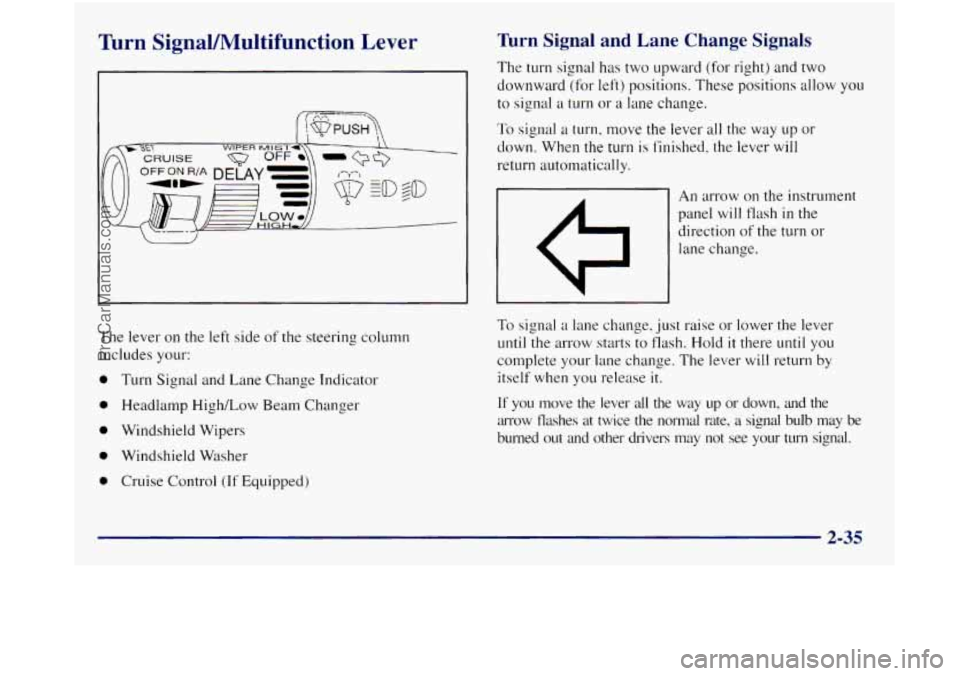
Turn SignaVIWultifunction Lever Turn Signal and Lane Change Signals
The turn signal has two upward (for right) and two
downward (for left) positions. These positions allow you
to signal
a turn or a lane change.
To signal a turn, move the lever all the way up or
down. When
the turn is finished, the lever will
return automatically.
An arrow on the instrument
panel will flash
in the
direction
of the turn or
lane change.
The lever on the left side
of the steering column
includes your:
0 Turn Signal and Lane Change Indicator
0 Headlamp High/Low Beam Changer
0 Windshield Wipers
0 Windshield Washer
0 Cruise Control (If Equipped)
To signal a lane change, just raise or lower the lever
until the arrow starts to flash. Hold it there
until you
complete your lane change. The lever will return by
itself when you release it.
If you move the lever all the way up or down, and the
arrow flashes at twice the normal rate,
a signal bulb may be
burned out and other drivers may not see your
turn signal.
2-35
ProCarManuals.com
Page 120 of 452
If a bulb is burned out, replace it to help avoid an
accident. If the arrows don’t go on at all when you
signal
a turn, check for burned-out bulbs and a blown
fuse (see “Fuses and Circuit Breakers”
in the Index).
Headlamp HighLow-Beam Changer
To change the headlamps from low to high beam or high
to low beam, pull the multifunction lever all the way
toward
you. Then release it.
When the high beams are
on, this light
on the
instrument panel also will
be on.
Windshield Wipers
You control the windshield
wipers
by turning the knob
with the wiper
symbol on it.
For a single wiping cycle, turn the knob to MIST. Hold
it there until the wipers start, then let
go. The wipers will
stop after one cycle.
If you want more cycles, hold the
knob on MIST longer.
You can set
the wiper speed for a long or short delay
between wipes. This can be very useful
in light rain or
snow. Turn the knob to choose the delay time. The
closer to
LOW, the shorter the delay.
2-36
ProCarManuals.com
Page 245 of 452

During your trip, check occasionally to be sure that the
load is secure, and that the lamps and any trailer brakes
are still working.
Following Distance
Stay at least twice as far behind the vehicle ahead as you
would when driving your vehicle without
a trailer. This
can help
you avoid situations that require heavy braking
and sudden turns.
Passing
You’ll need more passing distance up ahead when
you’re towing a trailer. And, because you’re a good deal
longer,
you’ll need to go much farther beyond the
passed vehicle before you can return to
your lane.
Backing Up
Hold the bottom of the steering wheel with one hand.
Then, to move the trailer
to the left, just move that hand
to the left.
To move the trailer to the right, move your
hand to the right. Always back up slowly and, if
possible, have someone guide you.
Making Turns
I NOTICE:
Making very sharp turns while trailering could
cause the trailer to come in contact with the
vehicle. Your vehicle could be damaged. Avoid
making very sharp turns while trailering.
When you’re turning with a trailer, make wider turns than
normal. Do this
so your trailer won’t strike soft shoulders,
curbs, road signs, trees or other objects. Avoid jerky or
sudden maneuvers. Signal well in advance.
Turn Signals When Towing a Trailer
The arrows on your instrument panel will flash
whenever
you signal a turn or lane change. Properly
hooked up, the trailer lamps will also flash, telling other
drivers you’re about to turn, change lanes or stop.
When towing a trailer, the arrows on your instrument
panel
will flash for turns even if the bulbs on the trailer are
burned out. Thus,
you may think drivers behind you are
seeing your signal when they are not. It’s important to
check occasionally
to be sure the trailer bulbs are
still working.
ProCarManuals.com
Page 332 of 452
Front Turn Signal Lamps
/c
1. Remove the two screws at the inside edge
of the
parkinghurn signal lamp assembly.
2. Remove the lamp assembly by swinging it out from
the inside edge and sliding
it out at the outside edge.
3. Squeeze the tab on the side of the lamp socket while
turning the socket to the left.
4. Pull the socket out of the
lamp assembly.
5. Push in gently on the bulb, turn it to the left and
remove
it from the socket.
6. Put the new bulb into the socket, gently press in on
the bulb and
turn it to the right until it is tight.
7. Put the socket back into the lamp assembly and turn
it to the right until it locks.
8. Put the parkinghrn signal lamp assembly back into
the vehicle and tighten the screws.
6-42
ProCarManuals.com
Page 333 of 452
Front Turn Signal Lamps
(Composite Headlamps)
1. Remove the four screws
and take out the
parking/turn signal
lamp assembly.
2. Squeeze the tab on the side of the lamp socket while
turning the socket
to the left.
4. Push in gently on the bulb, turn it to the left and
remove
it from the socket.
5. Put the new bulb into the socket, gently press in on
the bulb and turn it to the right until it
is tight.
6. Put the socket back into the lamp assembly and turn
it to the right until it locks.
7. Put the parkinghrn signal lamp assembly back into
the vehicle and tighten the four screws.
6-43
ProCarManuals.com
Page 334 of 452
Front Sidemarker Lamps (Composite Headlamps)
1. Remove the four screws
and pull out the
parkinghrn signal
lamp assembly.
2. Reach through the opening and turn the sidemarker
bulb socket to the left and remove it.
3.
4. Put a new bulb into the socket and push it in until it
5. Put the socket back into the sidemarker assembly
is
tight.
and turn it to the right to tighten it.
6. Replace the parkinghrn signal lamp assembly and
tighten the screws.
ProCarManuals.com