1998 GMC SAVANA tire pressure
[x] Cancel search: tire pressurePage 172 of 388
The anti-lock system can change the brake pressure faster
than any driver could. The computer is programmed
to
make the most of available tire and road conditions.
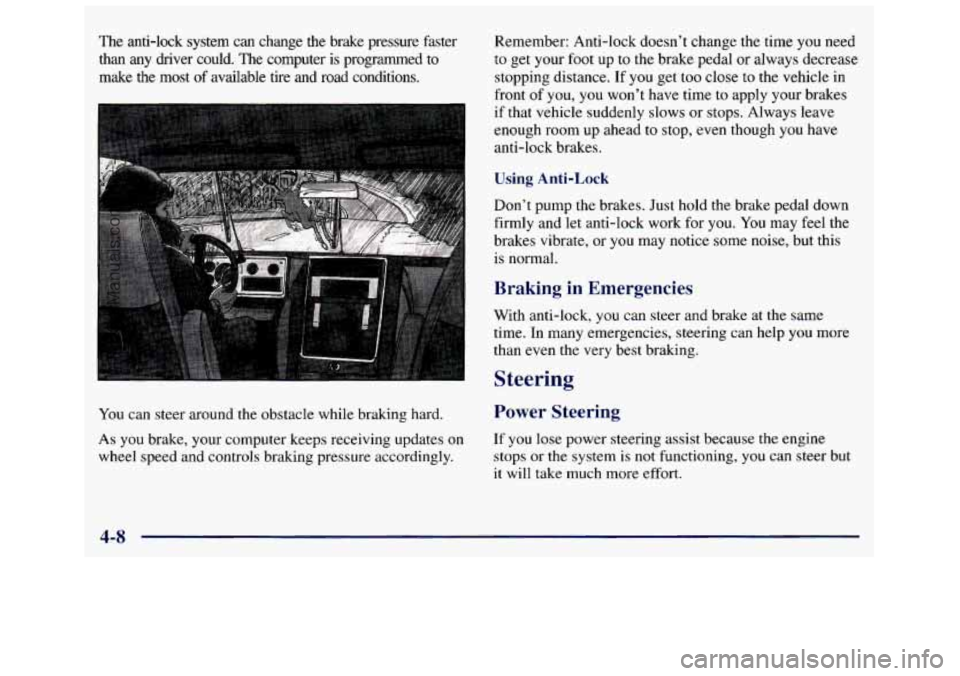
You can steer around the obstacle while braking hard.
As you brake, your computer keeps receiving updates on
wheel
speed and controls braking pressure accordingly. Remember: Anti-lock doesn’t
change the time
you need
to get your foot up to the brake pedal or always decrease
stopping distance.
If you get too close to the vehicle in
front of you, you won’t have time to apply your brakes
if that vehicle suddenly slows or stops. Always leave
enough room up ahead
to stop, even though you have
anti-lock brakes.
Using Anti-Lock
Don’t pump the brakes. Just hold the brake pedal down
firmly and let anti-lock work for
you. You may feel the
brakes vibrate, or you may notice some noise, but this
is normal.
Braking in Emergencies
With anti-lock, you can steer and brake at the same
time. In many emergencies, steering can help you more
than even the very best braking.
Steering
Power Steering
If you lose power steering assist because the engine
stops or
the system is not functioning, you can steer but
it will take much more effort.
4-8
ProCarManuals.com
Page 181 of 388
Wet brakes can cause accidents. They won’t work
as well in a quick stop and may cause pulling to
one side.
You could lose control of the vehicle.
After driving through a large puddle
of water or
a car wash, apply your brake pedal lightly until
your brakes work normally.
Hydroplaning
Hydroplaning is dangerous. So much water can build up
under your tires that they can actually ride
on the water.
This can happen if the road is wet enough and you’re
going fast enough. When your vehicle
is hydroplaning,
it has little or no contact with the road.
Hydroplaning doesn’t happen often. But
it can if your
tires do not have much tread or if
the pressure in one or
more is low. It can happen
if a lot of water is standing on
the road. If you can see reflections from trees, telephone
poles
or other vehicles, and raindrops “dimple” the
water’s surface, there could be hydroplaning. Hydroplaning
usually happens at higher speeds. There
just isn’t a hard and fast rule about hydroplaning. The
best advice is to slow down when it is raining.
Driving Through Deep Standing Water
I NOTICE:
If you drive too quickly through deep puddles or
standing water, water can come in through your
engine’s air intake and badly damage your
engine. Never drive through water that is slightly
lower than the underbody of your vehicle.
If you
can’t avoid deep puddles or standing water, drive
through them very slowly.
Some Other Rainy Weather Tips
0 Besides slowing down, allow some extra following
distance. And be especially careful when
you pass
another vehicle. Allow yourself more clear
room
ahead, and be prepared to have your view restricted
by road spray.
0 Have good tires with proper tread depth. (See
“Tires” in the Index.)
4-17
ProCarManuals.com
Page 184 of 388
The exit speed is usually posted.
Reduce your speed according to your speedometer,
not
to your sense of motion. After driving for any distance
at higher speeds, you
may tend to think you are going
slower than you actually are.
Before Leaving on a Long Trip
Make sure you’re ready. Try to be well rested. If you
must start when you’re not fresh
-- such as after a day’s
work
-- don’t plan to make too many miles that first part
of the journey. Wear comfortable clothing and shoes you
can easily drive
in.
Is your vehicle ready for a long trip? If you keep it
serviced and maintained, it’s ready to go. If it needs
service, have
it done before starting out. Of course,
you’ll find experienced and able service experts
in GM
dealerships all across North America. They’ll be ready
and willing to help if you need
it.
Here are some things you can check before a trip:
0
0
0
0
0
0
a
Windshield Washer Fluid: Is the reservoir full? Are
all windows clean inside and outside?
Wiper Blades: Are they in good shape?
Fuel, Engine Oil, Other Fluids: Have you checked
all levels?
Lamps: Are they all working? Are the lenses clean?
Tires: They are vitally important to a safe,
trouble-free trip.
Is the tread good enough for
long-distance driving? Are the tires all inflated
to the
recommended pressure?
Weather Forecasts: What’s the weather outlook
along your route?
Should you delay your trip a short
time to avoid a major storm system?
Maps: Do you have up-to-date maps?
4-20
ProCarManuals.com
Page 191 of 388
Loading Your Vehicle
COLD TIRE PRESSURE
00
00
00
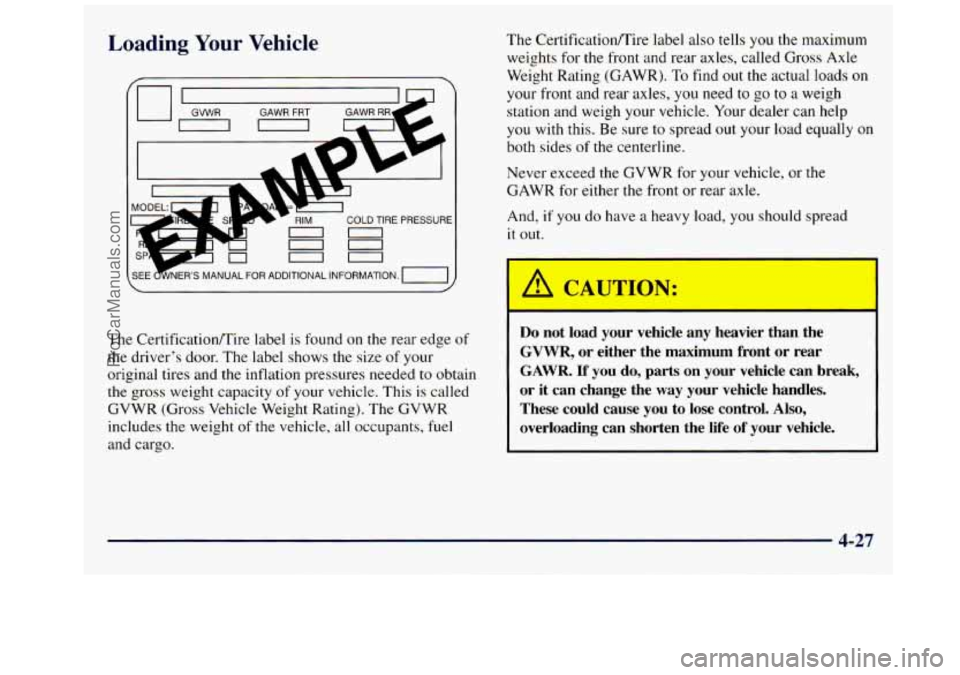
The Certificationmire label is found on the rear edge of
the driver’s door. The label shows the size of your
original tires and the inflation pressures needed to obtain
the gross weight capacity
of your vehicle. This is called
GVWR (Gross Vehicle Weight Rating). The GVWR
includes the weight
of the vehicle, all occupants, fuel
and cargo. The
Certificationrnire label also tells
you the maximum
weights for the front and rear axles, called Gross Axle
Weight Rating (GAWR). To find
out the actual loads on
your front and rear axles, you need to go to a weigh
station and weigh your vehicle. Your dealer can help
you with this. Be sure to spread out your load equally on
both sides of the centerline.
Never exceed the GVWR for your vehicle, or the
GAWR for either the front or rear axle.
And,
if you do have a heavy load, you should spread
it out.
I
1
Do not load your vehicle any heavier than the
GVWR, or either the maximum front or rear
GAWR. If
you do, parts on your vehicle can break,
or it can change the way your vehicle handles.
These could cause you
to lose control. Also,
overloading can shorten the life of your vehicle.
4-27
ProCarManuals.com
Page 241 of 388
Section 6 Service and Appearance Care
Here you will find information about the care of your vehicle. This section begins with service and fuel information,
and then it shows how to check important fluid and lubricant levels. There is also technical information about your
6-2
6-3
6-5
6-5
6-7
6-8
6- 11
6- 12
6- 16
6-
17
6-2 1
6-2 1
6-24
6-25
6-25
6-26
6-27
6-3
1
vehicle, and a part devoted to its appearance care.
Service
Fuel (Gasoline Engine)
Fuels in Foreign Countries (Gasoline Engines)
Filling Your Tank (Gasoline Engine)
Filling a Portable Fuel Container
Checking Things Under the Hood
Noise Control System Engine Oil (Gasoline Engine)
Air Cleaner (Gasoline Engines)
Automatic Transmission Fluid
Rear Axle
Engine Coolant
Radiator Pressure Cap
Thermostat
Power Steering Fluid
Windshield Washer Fluid
Brakes
Battery
6-32
6-32
6-40
6-4
1
6-5 1
6-5 1
6-55
6-56
6-57
6-57
6-57
6-59
6-60
6-6
1
6-66
6-67
6-69 Bulb
Replacement
Halogen Bulbs
Windshield Wiper Blade Replacement
Tires Appearance Care
Cleaning the Inside
of Your Vehicle
Cleaning the Outside of Your Vehicle
Cleaning Aluminum Wheels (If Equipped)
Cleaning Tires
Sheet Metal Damage
Finish Damage
Appearance Care Materials Chart
Vehicle Identification Number (VJN)
Electrical System
Replacement Bulbs
Capacities and Specifications
Normal Maintenance Replacement Parts
6-1
ProCarManuals.com
Page 281 of 388
2.
3.
4.
5.
6.
7.
Press down on the blade assembly pivot locking tab.
Pull down on the blade assembly to release it from
the wiper arm hook.
Remove the insert from the blade assembly. The
insert has two notches at one end that
are locked by
bottom claws of the blade assembly. At the notched
end, pull the insert from the blade assembly.
To install the new wiper insert, slide the notched
end last, into the end with two blade claws. Slide
the insert all the way through the blade claws at the
opposite end.
Be sure that the notches are locked by the bottom
claws. Make sure that all other claws are properly
locked on both sides of the insert slot.
Put the blade assembly pivot in the wiper arm
hook. Pull up until the pivot locking tab locks in
the hook slot.
Carefully lower the wiper arm and blade assembly
into the windshield.
Tires
Your new vehicle comes with high-quality tires made by
a leading tire manufacturer.
If you ever have questions
about your
tire warranty and where to obtain service, see
your
GM Warranty booklet for details.
Poorly maintained and improperly used tires
are dangerous.
Overloading your tires can cause
overheating
as a result of too much friction.
You could have an air-out and
a serious
accident. See “Loading Your Vehicle” in
the Index.
Underinflated tires pose the same danger
as overloaded tires. The resulting accident
could cause serious injury. Check all tires
frequently to maintain the recommended
pressure. Tire pressure should be checked
when your tires are cold.
cut, punctured or broken by a sudden
impact
-- such as when you hit a pothole.
Keep tires at the recommended pressure.
Worn, old tires can cause accidents. If your
tread is badly worn, or
if your tires have
been damaged, replace them.
Overinflated tires are more likely to be
6-41
ProCarManuals.com
Page 282 of 388
Inflation -- Tire Pressure
The Certificationflire label, which is on the rear edge of
the driver’s door, shows the correct inflation pressures
for your tires when they’re cold.
“Cold” means your
vehicle has been sitting for at least three hours or driven
no more than
1 mile (1.6 km).
NOTICE:
Don’t let anyone tell you that underinflation or
overinflation is all right. It’s not. If your tires
don’t
hav.2 enough air (underinflation), you can
get the following:
Too much flexing
Too much heat
Tire overloading
0 Bad wear
Bad handling
Bad fuel economy.
NOTICE: (Continued)
NOTICE: (Continued)
If your tires have too much air (overinflation),
you can get the following:
Unusual wear
Bad handling
Rough ride
Needless damage from road hazards.
Check your tires once
a month or more. Also, check the
tire pressure
of the spare tire.
6-42
ProCarManuals.com
Page 283 of 388
How to Check
Use a good quality pocket-type gage to check tire
pressure. You can’t tell if your tires are properly inflated
simply by looking at them. Radial tires may look
properly inflated even when they’re underinflated.
Be sure to put the valve caps back on
the valve
stems. They help prevent leaks by keeping out dirt
and moisture.
Tire Inspection and Rotation
Tires should be rotated every 6,000 to 8,000 miles
(10 000 to 13 000 km). Any time you notice unusual
wear, rotate your tires as soon as possible and check
wheel alignment. Also check for damaged tires or
wheels. See “When It’s Time for New Tires” and
“Wheel Replacement” later in this section for more
information. If your vehicle has dual rear wheels,
also see “Dual Tire Operation” later
in this section. The purpose
of regular rotation is to achieve more
uniform wear for all tires
on the vehicle. The first
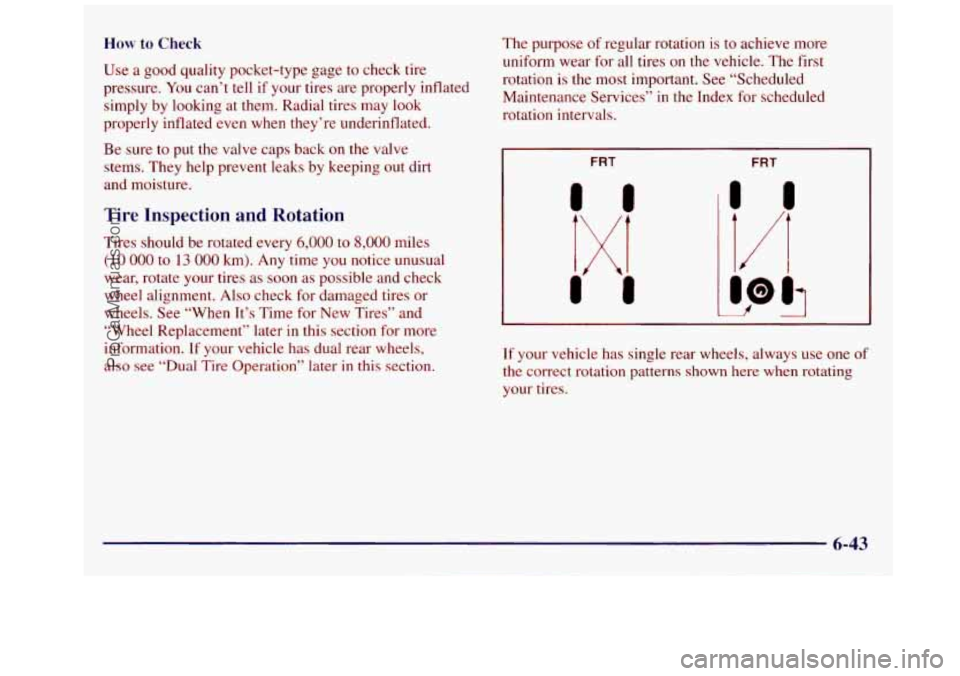
rotation is the most important. See “Scheduled
Maintenance Services” in the Index for scheduled
rotation intervals.
If
your vehicle has single rear wheels, always use one of
the correct rotation patterns shown
here when rotating
your tires.
6-43
ProCarManuals.com