1998 GMC SAVANA ECO mode
[x] Cancel search: ECO modePage 39 of 388

How does an air bag restrain?
In moderate to severe frontal or near-frontal collisions,
even belted occupants can contact the steering wheel or
the
instrument panel. Air bags supplement the protection
provided by safety belts. Air bags distribute
the force of
the impact more evenly over the occupant’s upper body, stopping
the occupant more gradually. But air bags would
not help
you in many types of collisions, including
rollovers, rear impacts and side impacts, primarily because
an occupant’s motion is not toward those air bags. Air
bags should never be regarded
as anything more than a
supplement to safety belts, and then only in moderate to
severe frontal or near-frontal collisions.
What will you see after an air bag inflates?
After an air bag inflates, it quickly deflates, so quickly
that some people may not even realize the air bag
inflated. Some components of the air bag module
-- the
steering wheel hub for the driver’s air bag, or the
instrument panel for the right front passenger’s
bag
-- will be hot for a short time. The parts of the bag
that come into contact with
you may be warm, but not
too hot
to touch. There will be some smoke and dust
coming from vents in the deflated air bags. Air bag
inflation doesn’t prevent the driver from seeing or from
being able to steer the vehicle, nor does
it stop people
from leaving the vehicle.
dta CAUTION:
When an air bag inflates, there is dust in the air.
This dust could cause breathing problems for
people with a history of asthma
or other
breathing trouble.
To avoid this, everyone in the
vehicle should get out as soon as it is safe to
do so.
If you have breathing problems but can’t get out
of the vehicle after an air bag inflates, then get
fresh air
by opening a window or door.
0
0
Air bags are designed to inflate only once. After they
inflate, you’ll need some new parts
for your air bag
system. If
you don’t get them, the air bag system
won’t be there
to help protect you in another crash.
A new system will include air bag modules and
possibly other parts.
The service manual for your
vehicle covers
the need to replace other parts.
Your vehicle is equipped with
a crash sensing and
diagnostic module, which records information about the air bag system.
The module records information
about the readiness of the system, when
the sensors are
activated and driver’s safety belt usage at deployment.
ProCarManuals.com
Page 58 of 388
w nen cnoosing a child restraint, be sure the child
restraint is designed to be used in a vehicle.
If it is, it
will have a label saying that it meets Federal Motor
Vehicle Safety Standards.
Then follow the instructions for the restraint.
You may
find these instructions on the restraint itself or in a
booklet, or both. These restraints use the belt system in
your vehicle, but the child also has to
be secured within
the restraint to help reduce the chance of personal injury.
The instructions that come with the infant or child
restraint will show you how to
do that. Both the owner’s
manual and the child restraint instructions are important,
so if either one of these is not available, obtain a
replacement copy from
the manufacturer.
Where to Put the Restraint (Except Cargo
Vans and Cab and Chassis Models)
Accident statistics show that children are safer if they
are restrained
in the rear rather than the front seat. We at
General Motors therefore recommend that you put your
child restraint in
a rear seat. If your vehicle has a front
passenger air bag,
never put a rear-facing child restraint
in the front passenger seat. Here’s why:
A child in a rear-facing child restraint can be
seriously injured or killed
if the right front
passenger’s air bag inflates, even if your vehicle
has reduced-force frontal air bags. This
is
because the back of the rear-facing child
restraint would be very close to the inflating
air
bag. If your vehicle has a right front passenger’s
air bag, always secure a rear-facing child
restraint in a rear seat.
You may secure
a forward-facing child restraint
in the right front seat, but before
you do, always
move the front passenger seat
as far back as it
will
go. It’s better to secure the child restraint in
a rear seat.
Wherever
you install it, be sure to secure the child
restraint properly.
Keep in mind that an unsecured child restraint can move
around
in a collision or sudden stop and injure people in
the vehicle. Be sure to properly secure any child
restraint
in your vehicle -- even when no child is in it.
1-50
ProCarManuals.com
Page 103 of 388
Windows
Manual Windows
To operate your manual windows, turn the hand crank
on each door to raise or lower your side door windows.
Power Windows (Option)
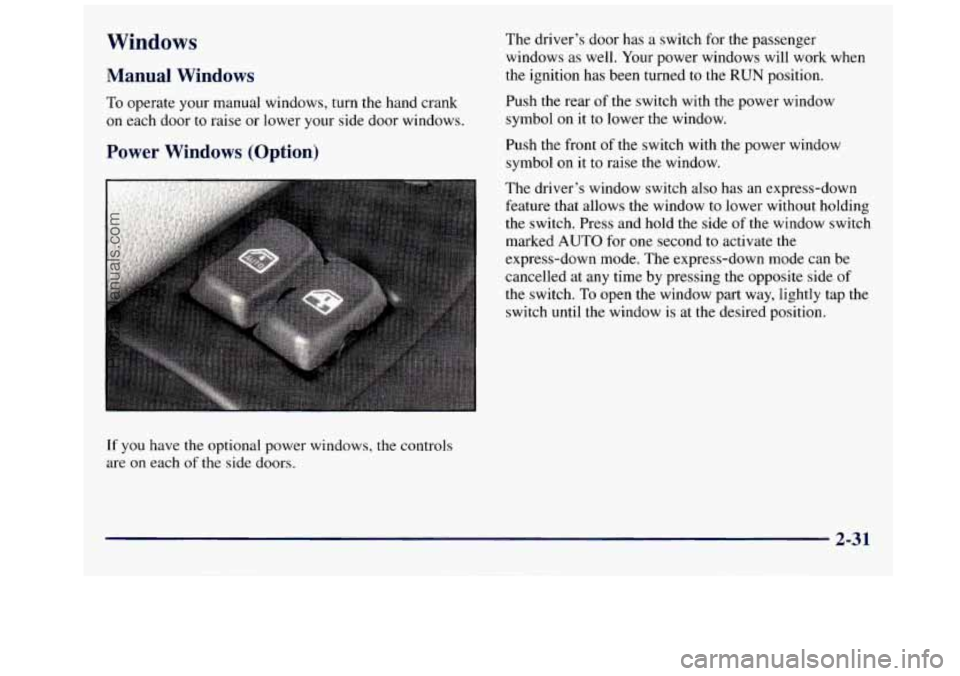
The driver’s door has a switch for the passenger
windows as well. Your power windows will work when
the ignition has been turned to the
RUN position.
Push the rear
of the switch with the power window
symbol on it to lower the window.
Push the front of the switch with the power window
symbol
on it to raise the window.
The driver’s window switch also has an express-down
feature that allows the window to lower without holding
the switch. Press and hold the side
of the window switch
marked AUTO for one second to activate the
express-down mode. The express-down mode can be
cancelled at any time by pressing the opposite side
of
the switch. To open the window part way, lightly tap the
switch until the window is at
the desired position.
If you have the optional power windows, the controls
are
on each of the side doors.
2-31
ProCarManuals.com
Page 112 of 388
Exterior Lamps
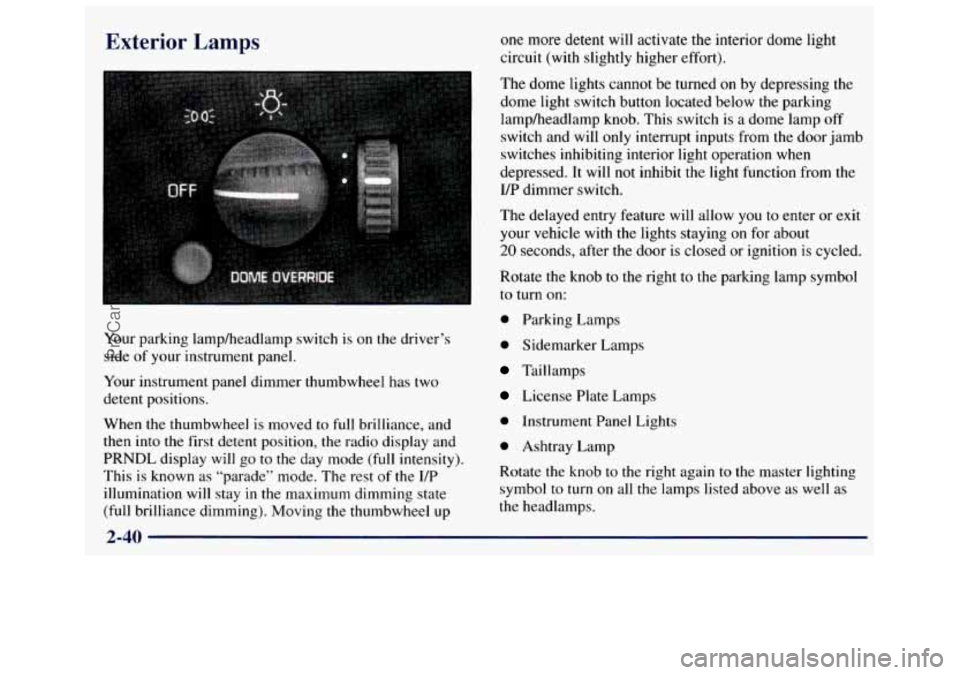
Your parking lamp/headlamp switch is on the driver’s
side
of your instrument panel.
Your instrument panel dimmer thumbwheel has two
detent positions.
When the thumbwheel is moved to full brilliance, and
then into the first detent position, the radio display and
PRNDL display
will go to the day mode (full intensity).
This is known as “parade” mode. The rest
of the UP
illumination
will stay in the maximum dimming state
(full brilliance dimming). Moving the thumbwheel up one
more detent will activate the interior dome light
circuit (with slightly higher effort).
The dome lights cannot be turned
on by depressing the
dome light switch button located below the parking
lampheadlamp knob. This switch is a dome lamp off
switch and will
only interrupt inputs from the door jamb
switches inhibiting interior light operation when
depressed. It will not inhibit
the light function from the
I/P dimmer switch,
The delayed entry feature will allow
you to enter or exit
your vehicle with the lights staying on for about
20 seconds, after the door is closed or ignition is cycled.
Rotate the knob to the right to the parking lamp symbol
to turn on:
0 Parking Lamps
0 Sidemarker Lamps
Taillamps
License Plate Lamps
0 Instrument Panel Lights
0 Ashtray Lamp
Rotate the knob
to the right again to the master lighting
symbol to turn on all the lamps listed above as well as
the headlamps.
2-40
ProCarManuals.com
Page 133 of 388

-
UTION:
-
Don’t keep driving if the oil pressure is low. If
you do, your engine can become so hot that it
catches fire. You
or others could be burned.
Check your oil
as soon as possible and have your
vehicle serviced.
[ NOTICE:
I I
Damage to your engine from neglected oil
problems can be costly and is not covered by
your warranty.
Security Light
SECURITY
This light will come on
briefly when you turn the ignition key
to START.
The light will stay
on until the engine starts. If the light
flashes, the Passlock@System has entered a tamper
mode. If the vehicle fails to start,
see “Passlock” in
the Index.
If the light comes on continuously while driving and
stays
on, there may be a problem with the Passlock
System. Your vehicle will
not be protected by Passlock,
and
you should see your GM dealer.
2-61
ProCarManuals.com
Page 139 of 388
w.
?# HEAT/DEFROST Use this setting to divide
airflow between the heater floor vents and windshield.
DEFROST This setting directs air through the
windshield defroster vents. This setting is useful when
you have fog or ice on the windshield.
Heater/Air Conditioning Controls
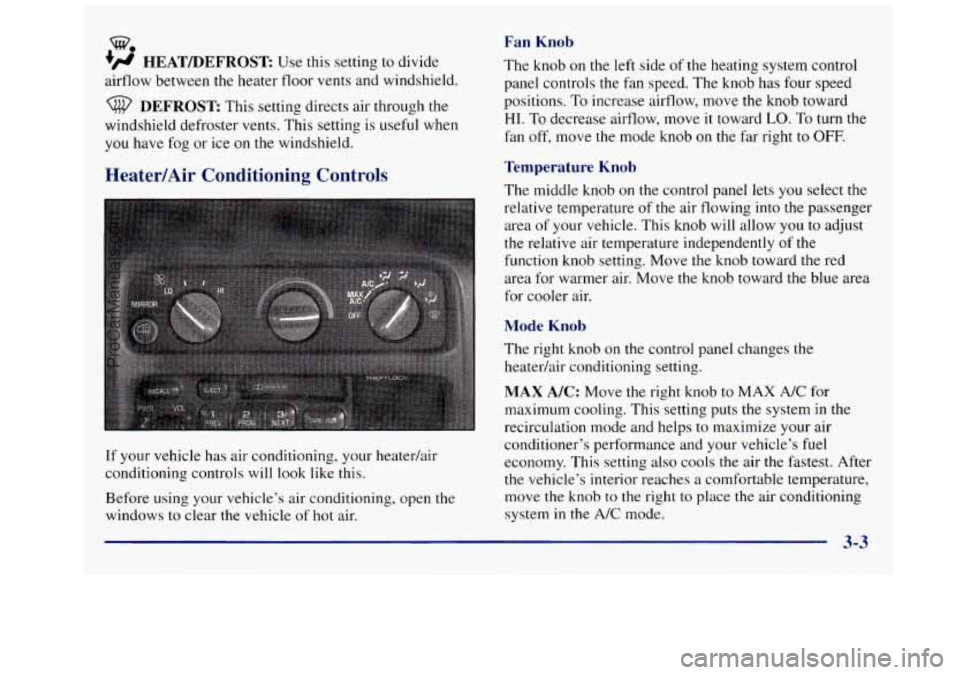
If your vehicle has air conditioning, your heatedair
conditioning controls will look like this.
Before using your vehicle’s air conditioning, open
the
windows to clear the vehicle of hot air.
Fan Knob
The knob on the left side of the heating system control
panel controls the fan speed. The knob has four speed
positions. To increase airflow, move the knob toward
HI. To decrease airflow, move it toward LO. To turn the
fan off, move the mode knob on
the far right to OFF.
Temperature Knob
The middle knob on the control panel lets you select the
relative temperature
of the air flowing into the passenger
area of your vehicle. This knob will allow
you to adjust
the relative air temperature independently of the
function knob setting. Move the knob toward the red
area for warmer air. Move the
knob toward the blue area
for cooler air.
Mode Knob
The right knob on the control panel changes the
heatedair conditioning setting.
MAX A/C: Move the right knob to MAX A/C for
maximum cooling. This setting puts the system in the
recirculation mode and helps to maximize your air
conditioner’s performance and your vehicle’s
fuel
economy. This setting also cools the air the fastest. After
the vehicle’s interior reaches a comfortable temperature,
move the knob to the right to place the air conditioning
system in the
A/C mode.
ProCarManuals.com
Page 143 of 388
You can move the vents from side to side or up and
down to direct the flow
of air, or close the vents
altogether. When you close
a vent, it will increase the
flow of air coming out
of any vents that are open.
Audio Systems
Your Delco Electronics audio system has been designed
to operate easily and give years of listening pleasure.
You will get the most enjoyment out of it if you acquaint
yourself with it first. Find out what your Delco
Electronics system can do and how to operate all its
controls, to be sure you’re getting the most out of the
advanced engineering that went into
it.
Setting the Clock for Systems without
Automatic Tone Control
Press SET. Within five seconds, press and hold the
SEEK right arrow until the correct minute appears on
the display. Press and hold the
SEEK left arrow until the
correct hour appears on the display.
Setting the Clock for Systems with
Automatic Tone Control
Press and hold HR until the correct hour appears on the
display. Press and hold
MN until the correct minute
appears on the display. To display the clock with the ignition
off, press RECALL or HR/MN and the time
will be displayed for a few seconds. There is an initial
two-second delay before the clock goes into the
time-set mode.
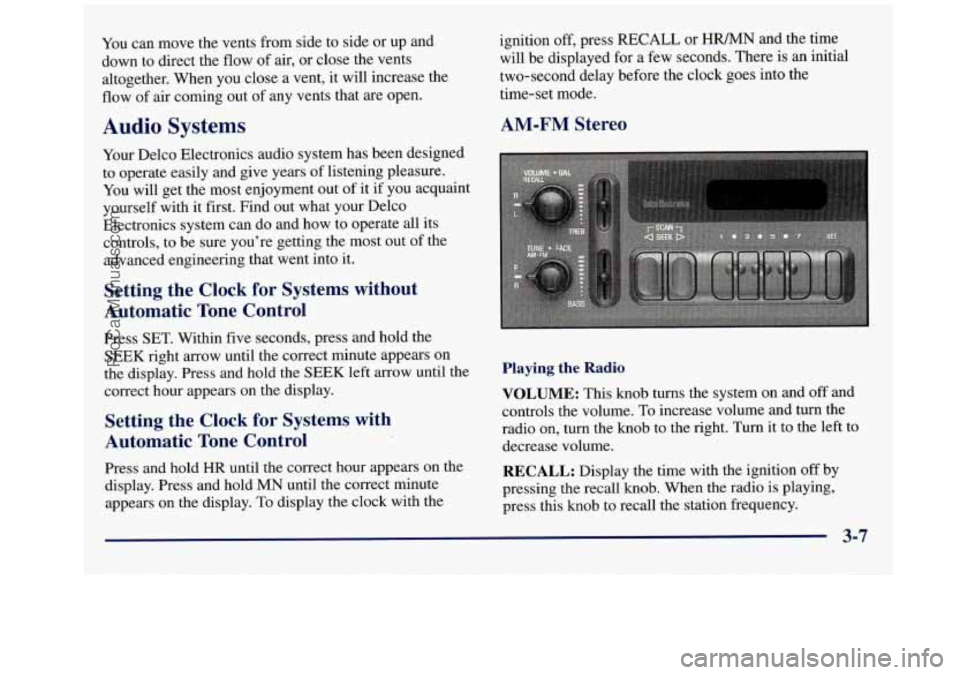
AM-FM Stereo
Playing the Radio
VOLUME: This knob turns the system on and off and
controls the volume.
To increase volume and turn the
radio
on, turn the knob to the right. Turn it to the left to
decrease volume.
RECALL: Display the time with the ignition off by
pressing the recall knob. When the radio
is playing,
press this knob to recall the station frequency.
3-7
ProCarManuals.com
Page 149 of 388
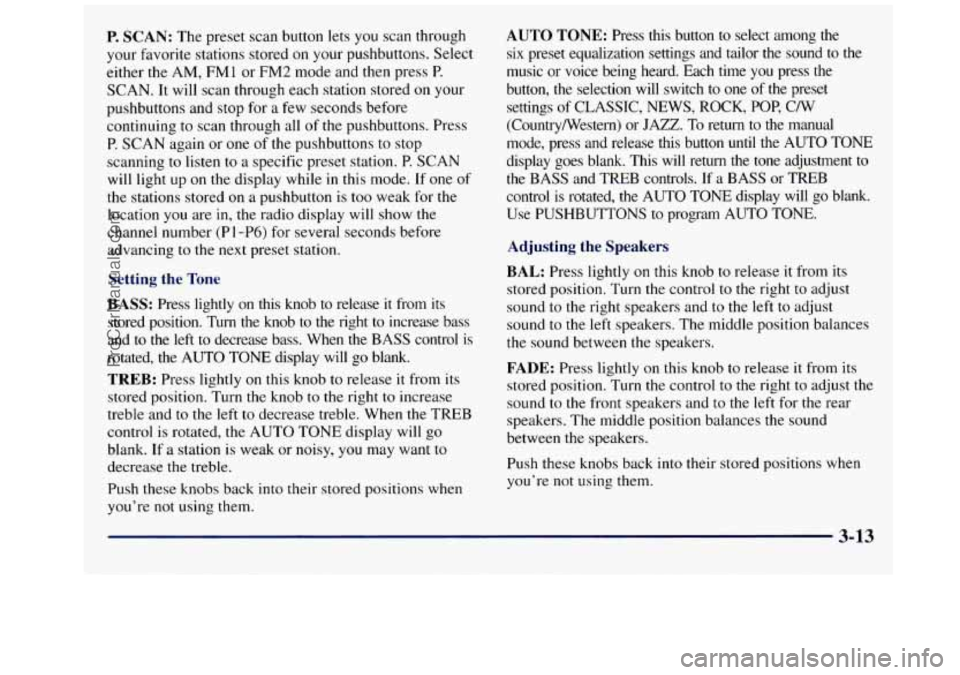
P. SCAN: The preset scan button lets you scan through
your favorite stations stored
on your pushbuttons. Select
either
the AM, FMl or FM2 mode and then press P.
SCAN. It will scan through each station stored on your
pushbuttons and stop for a few seconds before
continuing to scan through all
of the pushbuttons. Press
P. SCAN again or one of the pushbuttons to stop
scanning to listen to a specific preset station. P. SCAN
will light up on the display while in this mode. If one
of
the stations stored on a pushbutton is too weak for the
location you
are in, the radio display will show the
channel number
(P 1 -P6) for several seconds before
advancing
to the next preset station.
Setting the Tone
BASS:
Press lightly on this knob to release it from its
stored position. Turn the knob
to the right to increase bass
and to the
left to decrease bass. When the BASS control is
rotated, the AUTO TONE display will go blank.
TREB: Press lightly on this knob to release it from its
stored position. Turn the knob to the right to increase
treble and to the left
to decrease treble. When the TREB
control is rotated, the AUTO
TONE display will go
blank. If a station is weak or noisy, you may want to
decrease the treble.
Push these knobs back into their
stored positions when
you’re not using them.
AUTO TONE: Press this button to select among the
six preset equalization settings and tailor the sound
to the
music or voice being heard. Each time you press the
button, the selection will switch
to one of the preset
settings
of CLASSIC, NEWS, ROCK, POP, C/W
(CountryNestern) or
JAZZ. To return to the manual
mode, press and release this button until the AUTO TONE
display goes blank. This will return the
tone adjustment to
the BASS and TREB controls. If a BASS or TREB
control is rotated,
the AUTO TONE display will go blank.
Use PUSHBUTTONS
to program AUTO TONE.
Adjusting the Speakers
BAL:
Press lightly on this knob to release it from its
stored position. Turn the control to
the right to adjust
sound
to the right speakers and to the left to adjust
sound to the left speakers. The middle position balances
the sound between the speakers.
FADE: Press lightly on this knob to release it from its
stored position. Turn the control
to the right to adjust the
sound
to the front speakers and to the left for the rear
speakers. The middle position balances
the sound
between the speakers.
Push these knobs back into their stored positions when
you’re not using them.
3-13
ProCarManuals.com