Page 8 of 192

What you should do if the Service Engine Soon
light illuminates
Light turns on solid:
This means that the OBD II system has detected a
malfunction.
Temporary malfunctions may cause yourService
Engine Soonlight to illuminate. Examples are:
1. The vehicle has run out of fuel. (The engine may
misfire or run poorly.)
2. Poor fuel quality or water in the fuel.
3. The fuel cap may not have been properly installed
and securely tightened.
These temporary malfunctions can be corrected by
filling the fuel tank with good quality fuel and/or
properly installing and securely tightening the gas
cap. After three driving cycles without these or any
other temporary malfunctions present, theService
Engine Soonlight should turn off. (A driving cycle
consists of a cold engine startup followed by mixed
city/highway driving.) No additional vehicle service is
required.
If theService Engine Soonlight remains on, have
your vehicle serviced at the first available
opportunity.
Light is blinking:
Engine misfire is occurring which could damage your
catalytic converter. You should drive in a moderate
fashion (avoid heavy acceleration and deceleration)
and have your vehicle serviced at the first available
opportunity.
Under engine misfire conditions, excessive
exhaust temperatures could damage the
catalytic converter, the fuel system, interior floor
coverings or other vehicle components, possibly
causing a fire.
Instrumentation
8
Page 42 of 192
Cargo net (if equipped)
The cargo net secures
lightweight objects in
the cargo area. Attach
the net to the anchors
provided. Do not put
more than 22 kg (50
lbs.) in the net. This
net is not designed to
restrain objects during
a collision.
Cargo cover (if equipped)
Your vehicle may be equipped with a cargo area
shade that covers the luggage compartment of your
vehicle.
To install the shade:
1. Fasten the cover
into the mounting
brackets (make sure
the cover is right side
up).
2. Pull the end of the
shade toward you and
hook the sides into the notches in the rear trim
panels.
To prevent the possibility of injuries, the
fasteners for the cargo area cover must be
properly attached to the mounting clips on the
rear trim panels.
Do not place any objects on the cargo area
cover. They may obstruct your vision or
strike occupants of the vehicle in the case of a
sudden stop or collision.
Controls and features
42
Page 43 of 192

Rewinding the shade
With extended use, the cargo shade may lose its
spring tension. If this occurs, the shade must be
manually rewound. This is a two-person operation.
1. Remove the shade from the vehicle and extend it
with the smooth grain facing you.
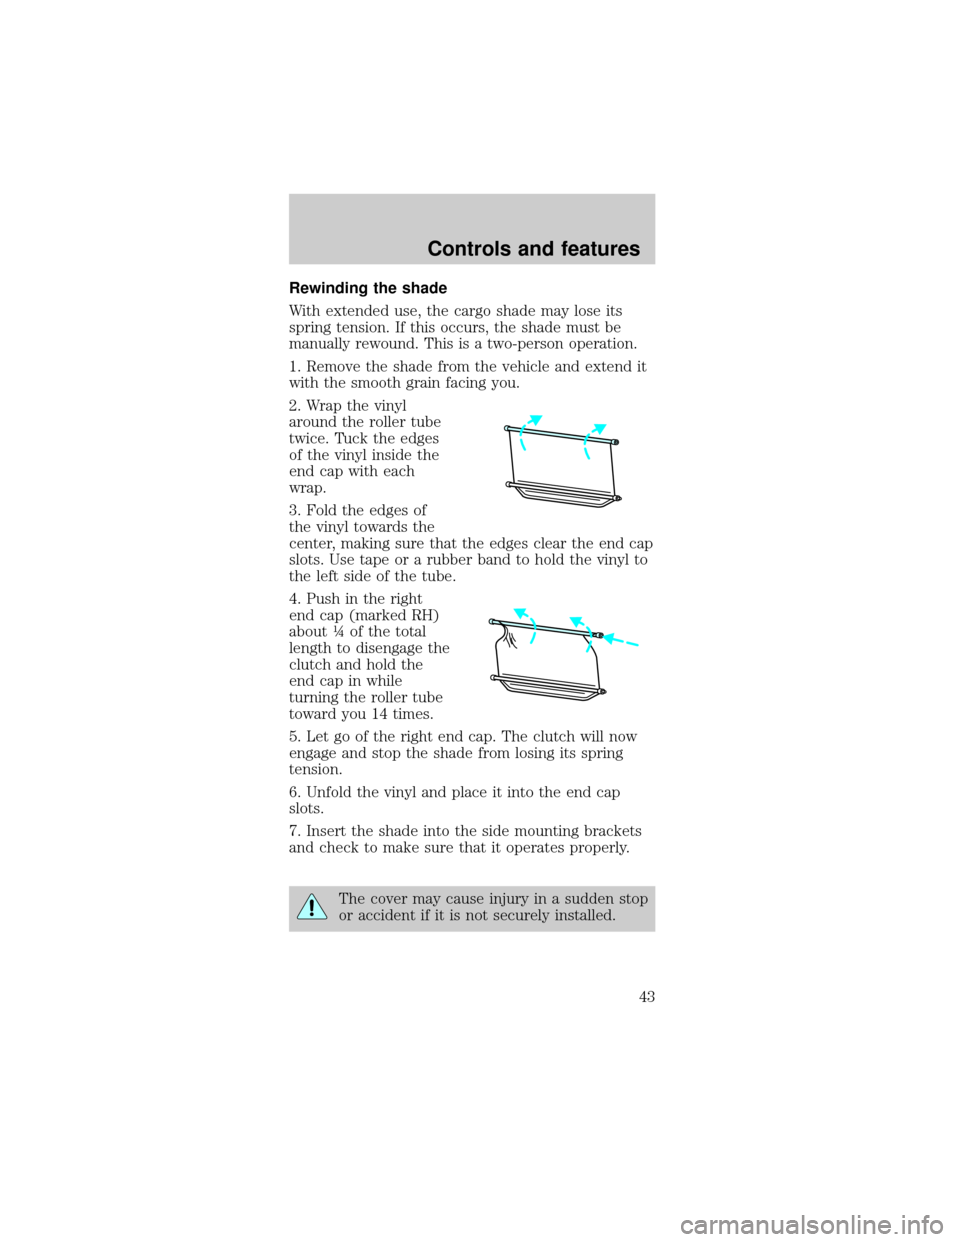
2. Wrap the vinyl
around the roller tube
twice. Tuck the edges
of the vinyl inside the
end cap with each
wrap.
3. Fold the edges of
the vinyl towards the
center, making sure that the edges clear the end cap
slots. Use tape or a rubber band to hold the vinyl to
the left side of the tube.
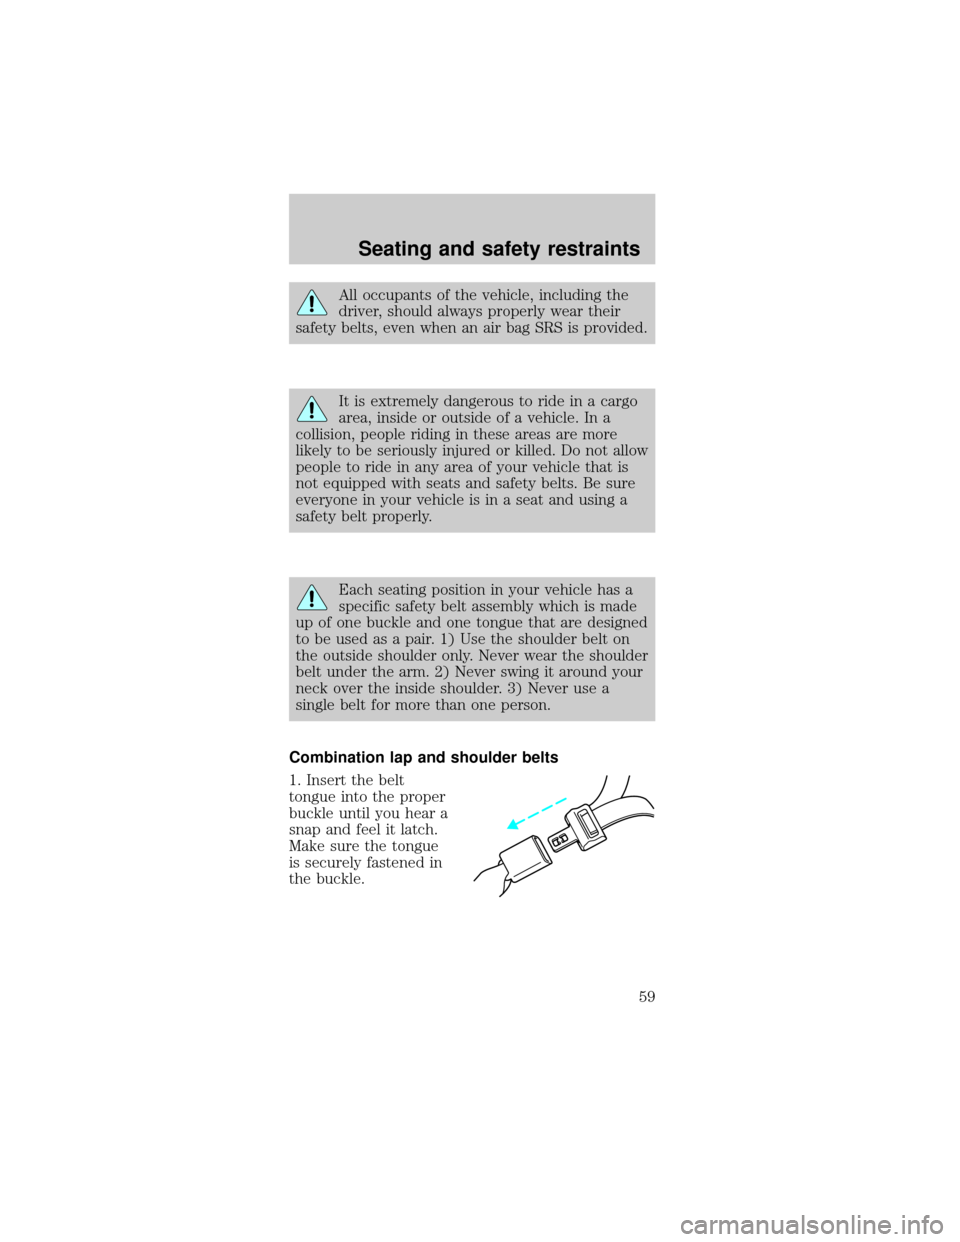
4. Push in the right
end cap (marked RH)
about ò of the total
length to disengage the
clutch and hold the
end cap in while
turning the roller tube
toward you 14 times.
5. Let go of the right end cap. The clutch will now
engage and stop the shade from losing its spring
tension.
6. Unfold the vinyl and place it into the end cap
slots.
7. Insert the shade into the side mounting brackets
and check to make sure that it operates properly.
The cover may cause injury in a sudden stop
or accident if it is not securely installed.
Controls and features
43
Page 53 of 192

You must complete steps 1 through 5 within 30
seconds or the procedure will have to be repeated. If
the procedure needs to be repeated, you must wait
30 seconds.
1. Turn the ignition key from OFF to RUN/ACC.
2. Press the power door UNLOCK control three
times.
3. Turn the ignition key from RUN/ACC to OFF.
4. Press the power door UNLOCK control three
times.
5. Turn the ignition key from OFF to RUN/ACC. A
horn chirp indicates the enable/disable feature is
entered.
6. Press the power door UNLOCK control one time.
7. Press the power door LOCK control to toggle the
Autolock/Relock state. You will receive a horn chirp
followed by either a long honk, autolock/relock is
enabled, or no honk, autolock/relock is disabled.
8. Turn ignition to OFF.
If autolock/relock has been changed, the horn will
chirp to confirm procedure is complete.
SECURILOCKYANTI-THEFT SYSTEM
The SecuriLockyanti-theft system provides an
advanced level of vehicle theft protection. Your
vehicle's engine can only be started with the two
special SecuriLockyelectronically coded keys
provided with your vehicle. Each time you start your
vehicle, the SecuriLockykey is read by the
SecuriLockyanti-theft system. If the SecuriLocky
key identification code matches the code stored in
the SecuriLockyanti-theft system, the vehicle's
engine is allowed to start. If the SecuriLockykey
identification code does not match the code stored
in the system or if a SecuriLockykey is not
detected (vehicle theft situation), the vehicle's
engine will not operate.
Controls and features
53
Page 54 of 192
Spare SecuriLockykeys can be purchased from
your dealership and programmed to your
SecuriLockyanti-theft system. Refer to
Programming spare SecuriLockykeysfor more
information.
If one or both of your SecuriLockykeys are lost or
stolen and you want to ensure the lost or stolen key
will not operate your vehicle, bring your vehicle and
all available SecuriLockykeys to your dealership for
reinitialization.
Controls and features
54
Page 59 of 192

All occupants of the vehicle, including the
driver, should always properly wear their
safety belts, even when an air bag SRS is provided.
It is extremely dangerous to ride in a cargo
area, inside or outside of a vehicle. In a
collision, people riding in these areas are more
likely to be seriously injured or killed. Do not allow
people to ride in any area of your vehicle that is
not equipped with seats and safety belts. Be sure
everyone in your vehicle is in a seat and using a
safety belt properly.
Each seating position in your vehicle has a
specific safety belt assembly which is made
up of one buckle and one tongue that are designed
to be used as a pair. 1) Use the shoulder belt on
the outside shoulder only. Never wear the shoulder
belt under the arm. 2) Never swing it around your
neck over the inside shoulder. 3) Never use a
single belt for more than one person.
Combination lap and shoulder belts
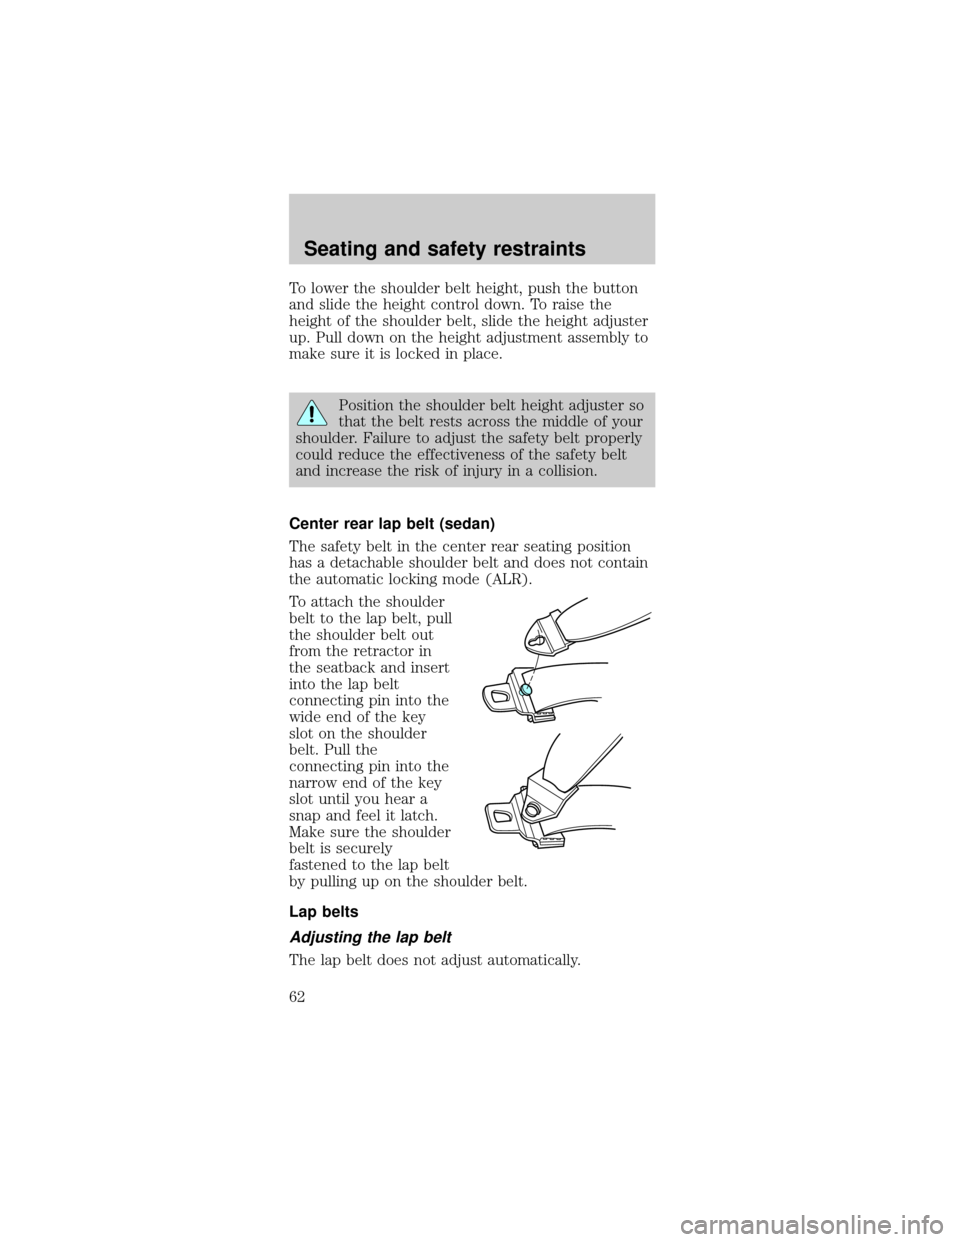
1. Insert the belt
tongue into the proper
buckle until you hear a
snap and feel it latch.
Make sure the tongue
is securely fastened in
the buckle.
Seating and safety restraints
59
Page 62 of 192

To lower the shoulder belt height, push the button
and slide the height control down. To raise the
height of the shoulder belt, slide the height adjuster
up. Pull down on the height adjustment assembly to
make sure it is locked in place.
Position the shoulder belt height adjuster so
that the belt rests across the middle of your
shoulder. Failure to adjust the safety belt properly
could reduce the effectiveness of the safety belt
and increase the risk of injury in a collision.
Center rear lap belt (sedan)
The safety belt in the center rear seating position
has a detachable shoulder belt and does not contain
the automatic locking mode (ALR).
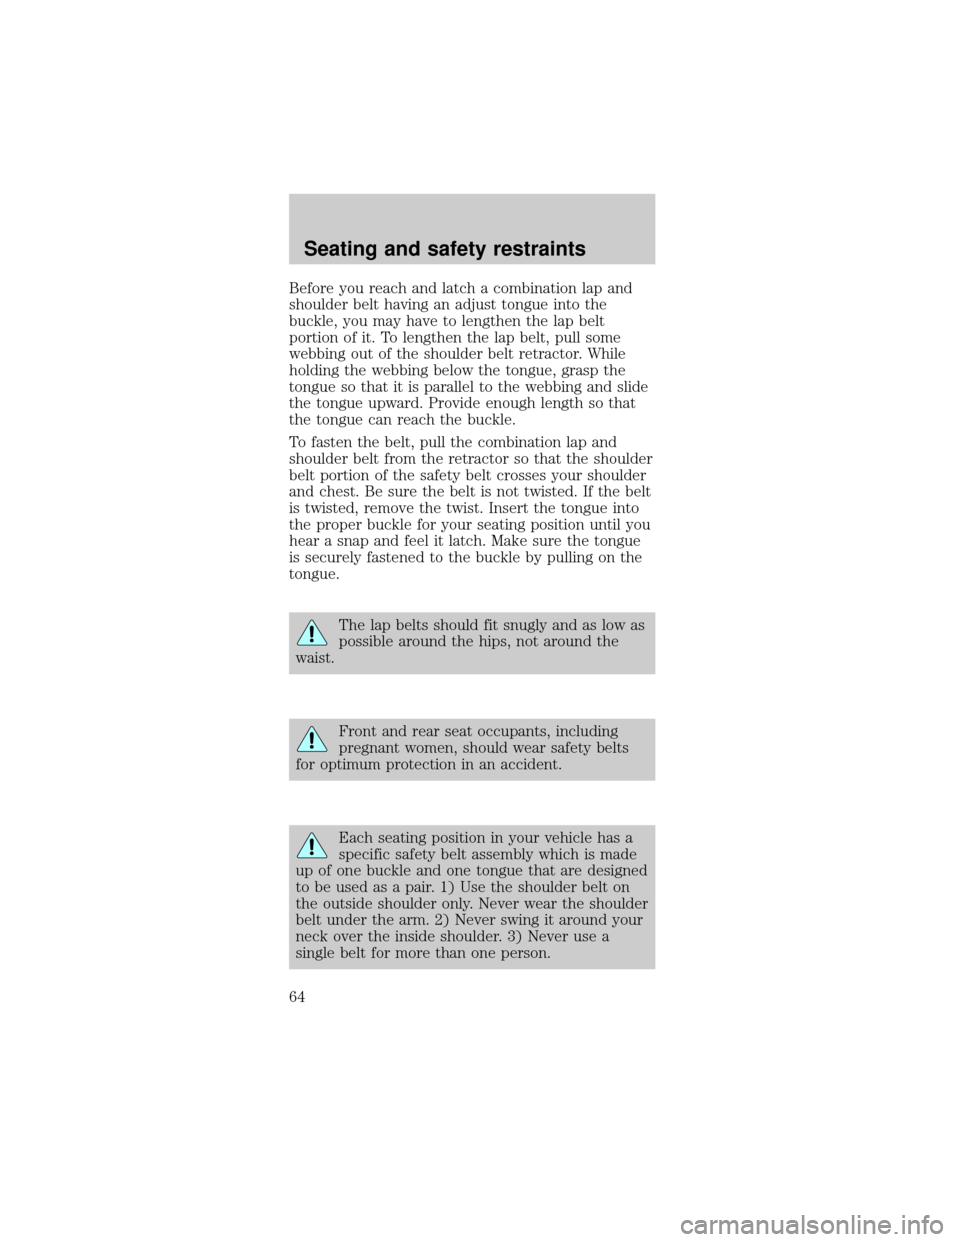
To attach the shoulder
belt to the lap belt, pull
the shoulder belt out
from the retractor in
the seatback and insert
into the lap belt
connecting pin into the
wide end of the key
slot on the shoulder
belt. Pull the
connecting pin into the
narrow end of the key
slot until you hear a
snap and feel it latch.
Make sure the shoulder
belt is securely
fastened to the lap belt
by pulling up on the shoulder belt.
Lap belts
Adjusting the lap belt
The lap belt does not adjust automatically.
Seating and safety restraints
62
Page 64 of 192

Before you reach and latch a combination lap and
shoulder belt having an adjust tongue into the
buckle, you may have to lengthen the lap belt
portion of it. To lengthen the lap belt, pull some
webbing out of the shoulder belt retractor. While
holding the webbing below the tongue, grasp the
tongue so that it is parallel to the webbing and slide
the tongue upward. Provide enough length so that
the tongue can reach the buckle.
To fasten the belt, pull the combination lap and
shoulder belt from the retractor so that the shoulder
belt portion of the safety belt crosses your shoulder
and chest. Be sure the belt is not twisted. If the belt
is twisted, remove the twist. Insert the tongue into
the proper buckle for your seating position until you
hear a snap and feel it latch. Make sure the tongue
is securely fastened to the buckle by pulling on the
tongue.
The lap belts should fit snugly and as low as
possible around the hips, not around the
waist.
Front and rear seat occupants, including
pregnant women, should wear safety belts
for optimum protection in an accident.
Each seating position in your vehicle has a
specific safety belt assembly which is made
up of one buckle and one tongue that are designed
to be used as a pair. 1) Use the shoulder belt on
the outside shoulder only. Never wear the shoulder
belt under the arm. 2) Never swing it around your
neck over the inside shoulder. 3) Never use a
single belt for more than one person.
Seating and safety restraints
64