Page 133 of 210

²Allow more distance for stopping with a trailer attached.
²The trailer tongue weight should be 10±15% of the loaded trailer
weight.
²After you have traveled 80 km (50 miles), thoroughly check your
hitch, electrical connections and trailer wheel lug nuts.
²When stopped in traffic for long periods of time in hot weather, place
the gearshift in P (Park) (automatic transmissions) or 1 (First)
(manual transmissions) and increase idle speed. This aids engine
cooling and air conditioner efficiency.
²Vehicles with trailers should not be parked on a grade. If you must
park on a grade, place wheel chocks under the trailer's wheels.
Launching or retrieving a boat
When backing down a ramp during boat launching or retrieval,
²Do not allow the static water level to rise above the bottom edge of
the rear bumper and
²Do not allow waves to break higher than 15 cm (six inches) above the
bottom edge of the rear bumper.
Exceeding these limits may allow water to enter critical vehicle
components, adversely affecting driveability, emissions and reliability.
If the rear axle is submerged in water, the rear axle lubricant should be
checked and changed, if necessary. The rear axle is filled with a
synthetic lubricant and does not normally require a lubricant change for
the life of the vehicle. Rear axle lubricant quantities should not need to
be checked unless a leak is suspected.
Recreational towing (all wheels on the ground)
(Neutral tow kit accessory)
On vehicles equipped with a 4.0L engine, an accessory is available that
allows you to tow your vehicle, behind another vehicle, with all the
wheels on the ground. Contact your dealer for more details. Do not tow
your vehicle with all wheels on the ground unless you install the neutral
tow kit as vehicle damage may occur.
LUGGAGE RACK
Maximum load is 45 kg (100 lbs), evenly distributed. If it is not possible
to distribute the load, position it as far rearward as possible. Adjustable
tie down loops must be used to secure the load.
Driving
133
Page 145 of 210

Stowing the spare
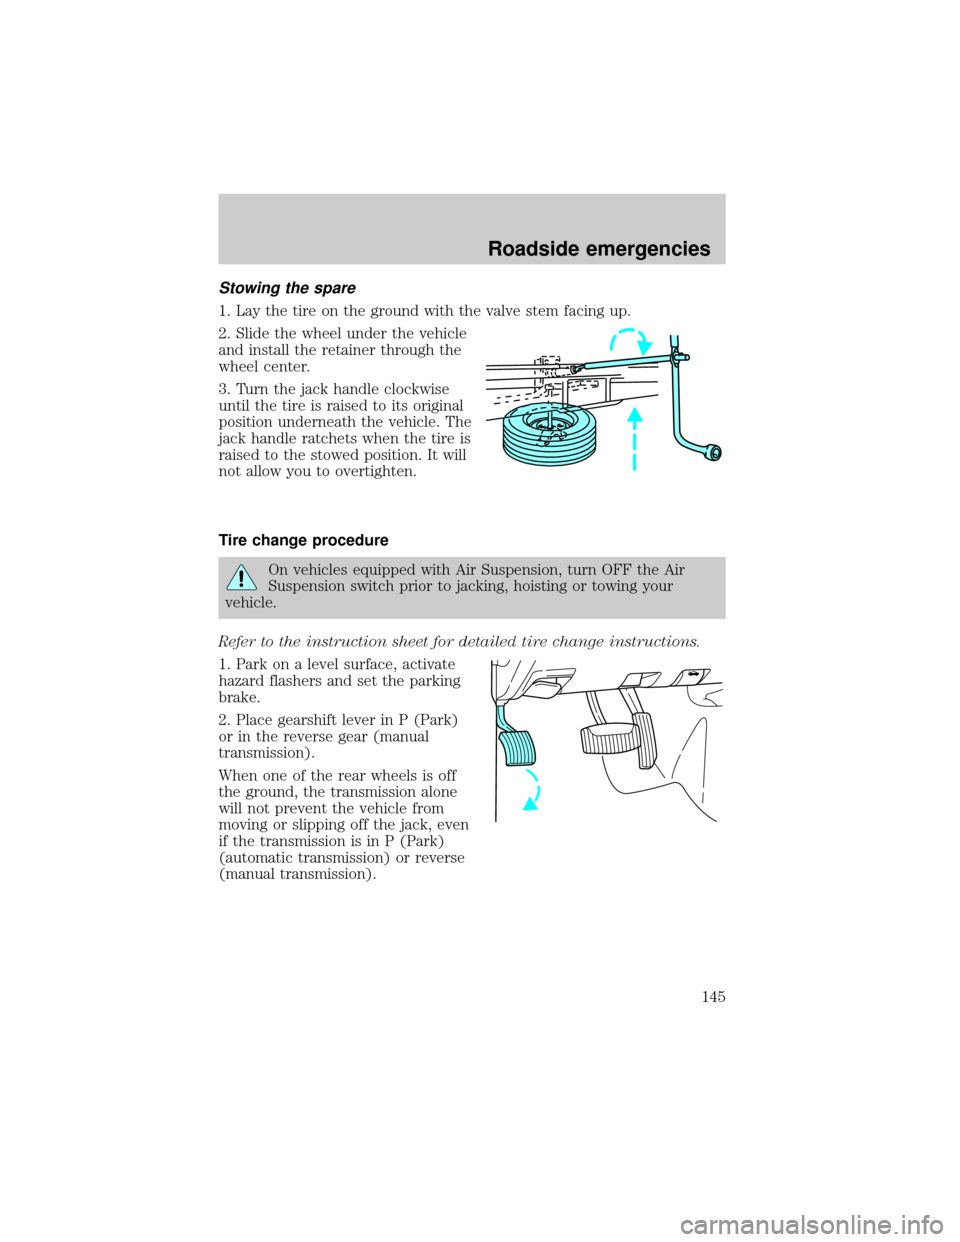
1. Lay the tire on the ground with the valve stem facing up.
2. Slide the wheel under the vehicle
and install the retainer through the
wheel center.
3. Turn the jack handle clockwise
until the tire is raised to its original
position underneath the vehicle. The
jack handle ratchets when the tire is
raised to the stowed position. It will
not allow you to overtighten.
Tire change procedure
On vehicles equipped with Air Suspension, turn OFF the Air
Suspension switch prior to jacking, hoisting or towing your
vehicle.
Refer to the instruction sheet for detailed tire change instructions.
1. Park on a level surface, activate
hazard flashers and set the parking
brake.
2. Place gearshift lever in P (Park)
or in the reverse gear (manual
transmission).
When one of the rear wheels is off
the ground, the transmission alone
will not prevent the vehicle from
moving or slipping off the jack, even
if the transmission is in P (Park)
(automatic transmission) or reverse
(manual transmission).
Roadside emergencies
145
Page 156 of 210

SERVICE RECOMMENDATIONS
To help you service your vehicle:
²We highlight do-it-yourself items in the engine compartment for easy
location.
²We provide a ``Service Guide'' which makes tracking routine service
easy.
If your vehicle requires professional service, your dealership can provide
necessary parts and service. Check your ``Warranty Guide'' to find out
which parts and services are covered.
Use only recommended fuels, lubricants, fluids and service parts
conforming to specifications. Motorcraft parts are designed and built to
provide the best performance in your vehicle.
PRECAUTIONS WHEN SERVICING YOUR VEHICLE
Be especially careful when inspecting or servicing your vehicle.
²Do not work on a hot engine.
²When the engine is running, make sure that loose clothing, jewelry or
long hair does not get caught up in moving parts.
²Do not work on a vehicle with the engine running in an enclosed
space, unless you are sure you have enough ventilation.
²Keep all lit cigarettes, open flames and other lit material away from
the battery and all fuel related parts.
If you disconnect the battery, the engine must ``relearn'' its idle
conditions before your vehicle will drive properly, as explained inBattery
in this chapter.
Working with the engine off
²Automatic transmission:
1. Set the parking brake and
ensure the gearshift is securely latched in P (Park).
2. Turn off the engine and remove the key.
3. Block the wheels to prevent the vehicle from moving unexpectedly.
²Manual transmission:
1. Set the parking brake.
2. Depress the clutch and place the gearshift in 1 (First).
Maintenance and care
156
Page 157 of 210

3. Turn off the engine and remove the key.
4. Block the wheels to prevent the vehicle from moving unexpectedly.
Working with the engine on
²Automatic transmission:
1. Set the parking brake and
ensure the gearshift is securely latched in P (Park).
2. Block the wheels to prevent the vehicle from moving unexpectedly.
Do not start your engine with the air cleaner removed and do
not remove it while the engine is running.
²Manual transmission:
1. Set the parking brake,
depress the clutch and place the gearshift in N (Neutral).
2. Block the wheels to prevent the vehicle from moving unexpectedly.
Do not start your engine with the air cleaner removed and do
not remove it while the engine is running.
OPENING THE HOOD
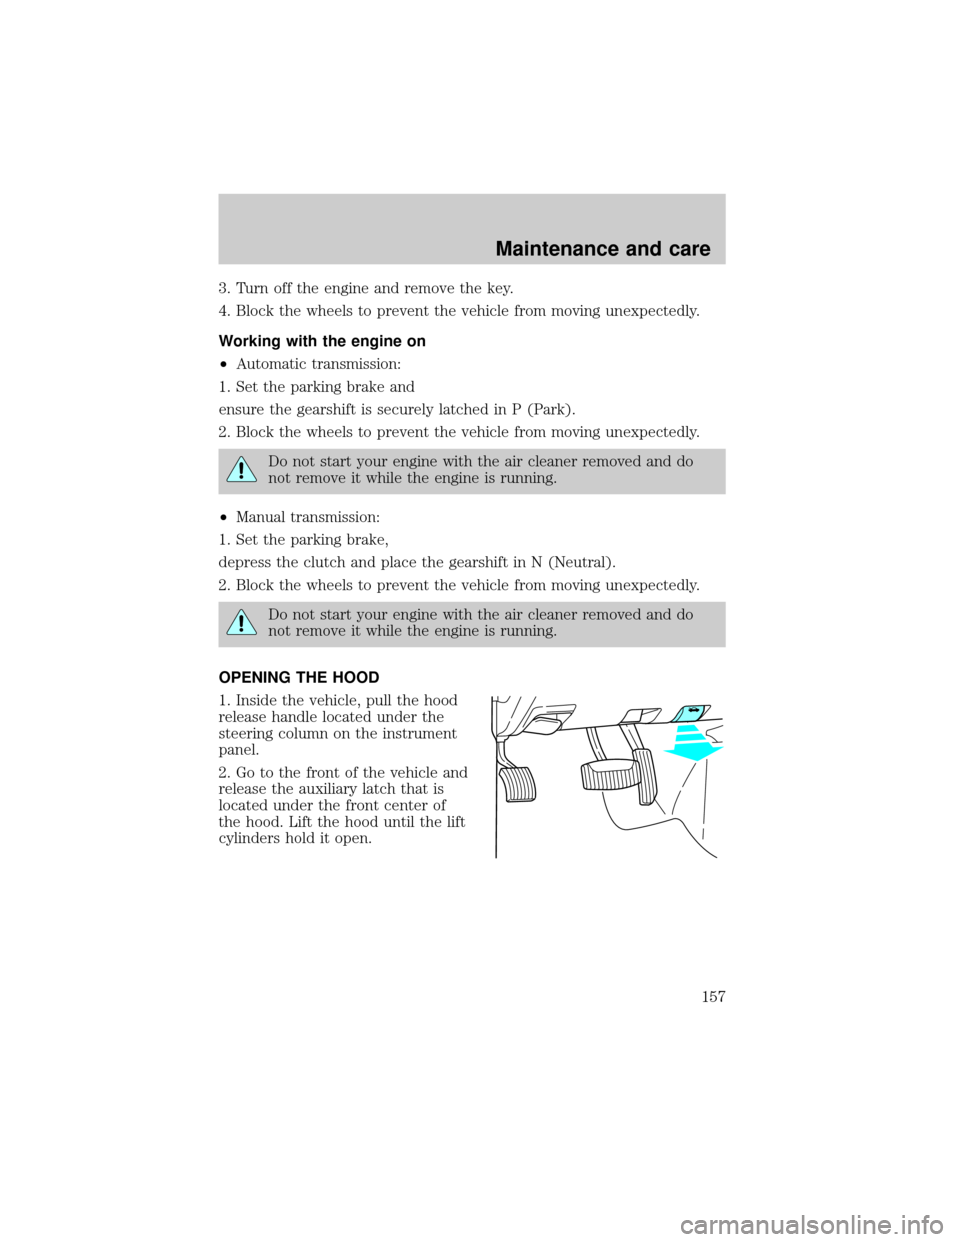
1. Inside the vehicle, pull the hood
release handle located under the
steering column on the instrument
panel.
2. Go to the front of the vehicle and
release the auxiliary latch that is
located under the front center of
the hood. Lift the hood until the lift
cylinders hold it open.
Maintenance and care
157
Page 158 of 210
IDENTIFYING COMPONENTS IN THE ENGINE COMPARTMENT
4.0L EFI engine
1. Windshield washer fluid reservoir
2. Engine oil fill cap
3. Transmission fluid dipstick (automatic transmission only)
4. Engine oil dipstick
5. Power steering fluid reservoir
6. Brake fluid reservoir
7. Clutch fluid reservoir (manual transmission only)
8. Battery
9. Air filter assembly
10. Engine coolant reservoir
10
1235674
89
Maintenance and care
158
Page 160 of 210
5.0L engine
1. Engine coolant reservoir
2. Windshield washer fluid reservoir
3. Engine oil fill cap
4. Automatic transmission fluid dipstick
5. Brake fluid reservoir
6. Battery
7. Power steering fluid reservoir
8. Engine oil dipstick
9. Air filter assembly
ENGINE OIL
Checking the engine oil
Check the engine oil each time you fuel your vehicle.
1. Make sure the vehicle is on level ground.
2. Turn the engine off and wait a few minutes for the oil to drain into the
oil pan.
1
23
6
54
879
Maintenance and care
160
Page 161 of 210
3. Set the parking brake and ensure the gearshift is securely latched in P
(Park) (automatic transmissions) or 1 (First) (manual transmissions).
4. Open the hood. Protect yourself from engine heat.
5. Locate and carefully remove the engine oil level indicator (dipstick).
²4.0L engines
²5.0L engine
6. Wipe the indicator clean. Insert the indicator fully, then remove it
again.
ADD 1 QTFULL
MAX MIN
Maintenance and care
161
Page 170 of 210

²5.0L engine
1. Start the engine and let it run until it reaches normal operating
temperature (the engine coolant temperature gauge will be near the
center of the NORMAL band).
2. While the engine idles, turn the steering wheel left and right several
times.
3. Turn the engine off.
4. Check the fluid level in the reservoir.
5.If your vehicle is equipped with a 4.0L EFI engine,the fluid level
should be in the FULL HOT range. Do not add fluid if the level is in this
range.
6.If your vehicle is equipped with a 4.0L SOHC engine or a 5.0L
engine,the fluid level should be between the MIN and MAX lines. Do
not add fluid if the level is in this range.
7. If the fluid is low, add fluid in small amounts, continuously checking
the level until it reaches the correct operating range. Be sure to put the
cap back on the reservoir.
TRANSMISSION FLUID
Checking and adding automatic transmission fluid
Follow the scheduled service intervals outlined in the ``Service Guide''.
Before adding any fluid, make sure the correct type is used. The type of
fluid used is normally indicated on the dipstick and/or dipstick handle
and also in theLubricant specificationssection in theCapacities and
specificationschapter.
Maintenance and care
170