1998 FORD EXPEDITION heater
[x] Cancel search: heaterPage 29 of 216
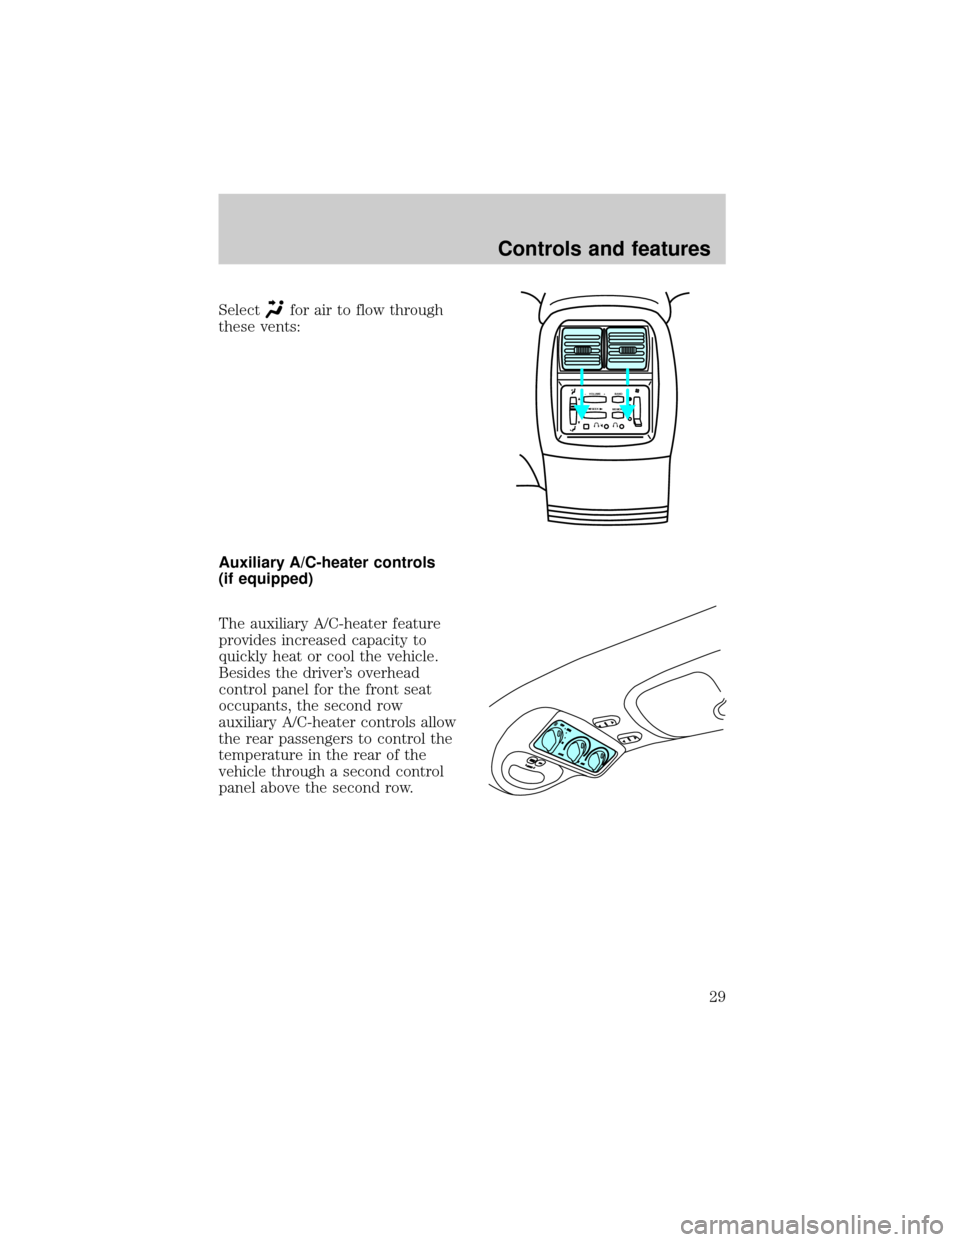
Selectfor air to flow through
these vents:
Auxiliary A/C-heater controls
(if equipped)
The auxiliary A/C-heater feature
provides increased capacity to
quickly heat or cool the vehicle.
Besides the driver's overhead
control panel for the front seat
occupants, the second row
auxiliary A/C-heater controls allow
the rear passengers to control the
temperature in the rear of the
vehicle through a second control
panel above the second row.
SEEK– VOLUME + BAND
MEMORY
Controls and features
29
Page 30 of 216
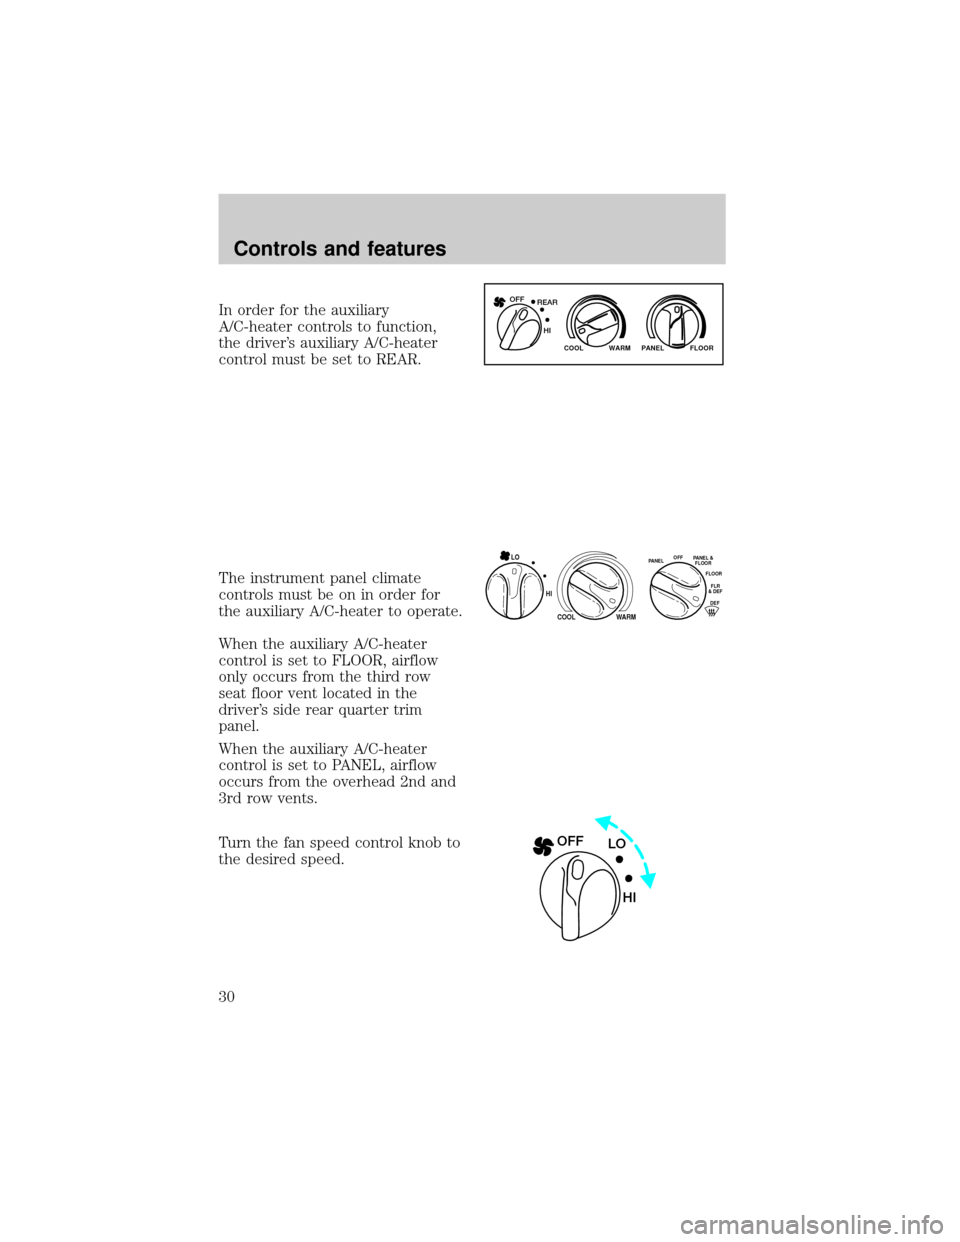
In order for the auxiliary
A/C-heater controls to function,
the driver's auxiliary A/C-heater
control must be set to REAR.
The instrument panel climate
controls must be on in order for
the auxiliary A/C-heater to operate.
When the auxiliary A/C-heater
control is set to FLOOR, airflow
only occurs from the third row
seat floor vent located in the
driver's side rear quarter trim
panel.
When the auxiliary A/C-heater
control is set to PANEL, airflow
occurs from the overhead 2nd and
3rd row vents.
Turn the fan speed control knob to
the desired speed.
WARM PANEL FLOOR COOL
REAR OFF
HI
HI
COOL WARM
OFFPANELFLOOR
DEFFLR
& DEF PANEL &
FLOOR
LO
LO OFF
HI
Controls and features
30
Page 44 of 216
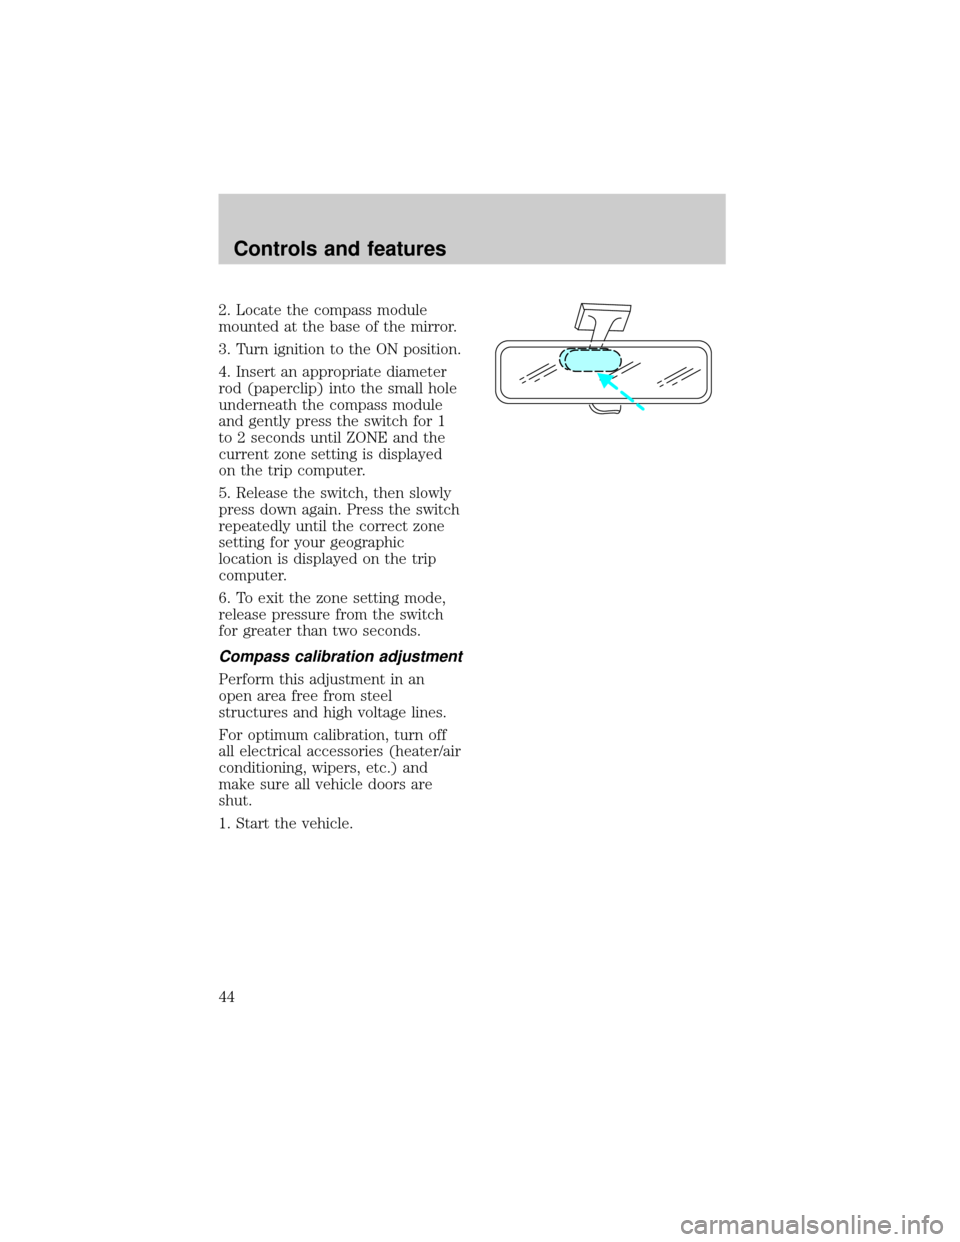
2. Locate the compass module
mounted at the base of the mirror.
3. Turn ignition to the ON position.
4. Insert an appropriate diameter
rod (paperclip) into the small hole
underneath the compass module
and gently press the switch for 1
to 2 seconds until ZONE and the
current zone setting is displayed
on the trip computer.
5. Release the switch, then slowly
press down again. Press the switch
repeatedly until the correct zone
setting for your geographic
location is displayed on the trip
computer.
6. To exit the zone setting mode,
release pressure from the switch
for greater than two seconds.
Compass calibration adjustment
Perform this adjustment in an
open area free from steel
structures and high voltage lines.
For optimum calibration, turn off
all electrical accessories (heater/air
conditioning, wipers, etc.) and
make sure all vehicle doors are
shut.
1. Start the vehicle.
Controls and features
44
Page 96 of 216
accelerator when the engine starts.
4. After idling for a few seconds,
apply the brake and release the
parking brake.
Using the engine block heater
(if equipped)
An engine block heater warms the
engine coolant, which improves
starting, warms up the engine
faster and allows the
heater-defroster system to respond
quickly. They are strongly
recommended if you live in a
region where temperatures reach
-23ÉC (-10ÉF) or below.
For best results, plug the heater in
at least three hours before starting
the vehicle. Using the heater for
longer than three hours will not
harm the engine, so the heater can
be plugged in the night before
starting the vehicle.
To prevent electrical
shock, do not use your
heater with ungrounded
electrical systems or
two-pronged (cheater) adapters.
Guarding against exhaust
fumes
Although odorless and colorless,
carbon monoxide is present in
exhaust fumes. Take precautions
to avoid its dangerous effects.
Starting
96
Page 131 of 216

Fuse/Relay
LocationFuse Amp
RatingDescription
5 15A Digital Transmission Range (DTR)
Sensor, Daytime Running Lamps
(DRL) Module, Speed Control
Servo/Amplifier Assembly,
Heater-A/C Control Assembly,
Blend Door Actuator, Electronic
Variable Orifice (EVO) Module
6 5A Shift Lock Actuator, Generic
Electronic Module (GEM), 4
Wheel Air Suspension (4WAS)
Module, Compass Sensor, Steering
Wheel Rotation Sensor, Heated
Grid Relay, Overhead Trip
Computer (OTC) Module
7 5A Auxiliary A/C Relay, Console
Blower Motor
8 5A Radio, Main Light Switch, Remote
Anti-Theft Personality (RAP)
Module
9 Ð Not Used
10 Ð Not Used
11 30A Washer Pump Relay, Wiper
Run/Park Relay, Wiper Hi/Lo
Relay, Windshield Wiper Motor,
Rear Wiper Pump Relay
12 5A Data Link Connector (DLC)
13 15A Brake On/Off (BOO) Switch,
Brake Pressure Switch
14 15A Battery Saver Relay, Interior
Lamp Relay
15 5A Generic Electronic Module
(GEM), Passive Anti-Theft System
(PATS) Module
Roadside emergencies
131
Page 146 of 216
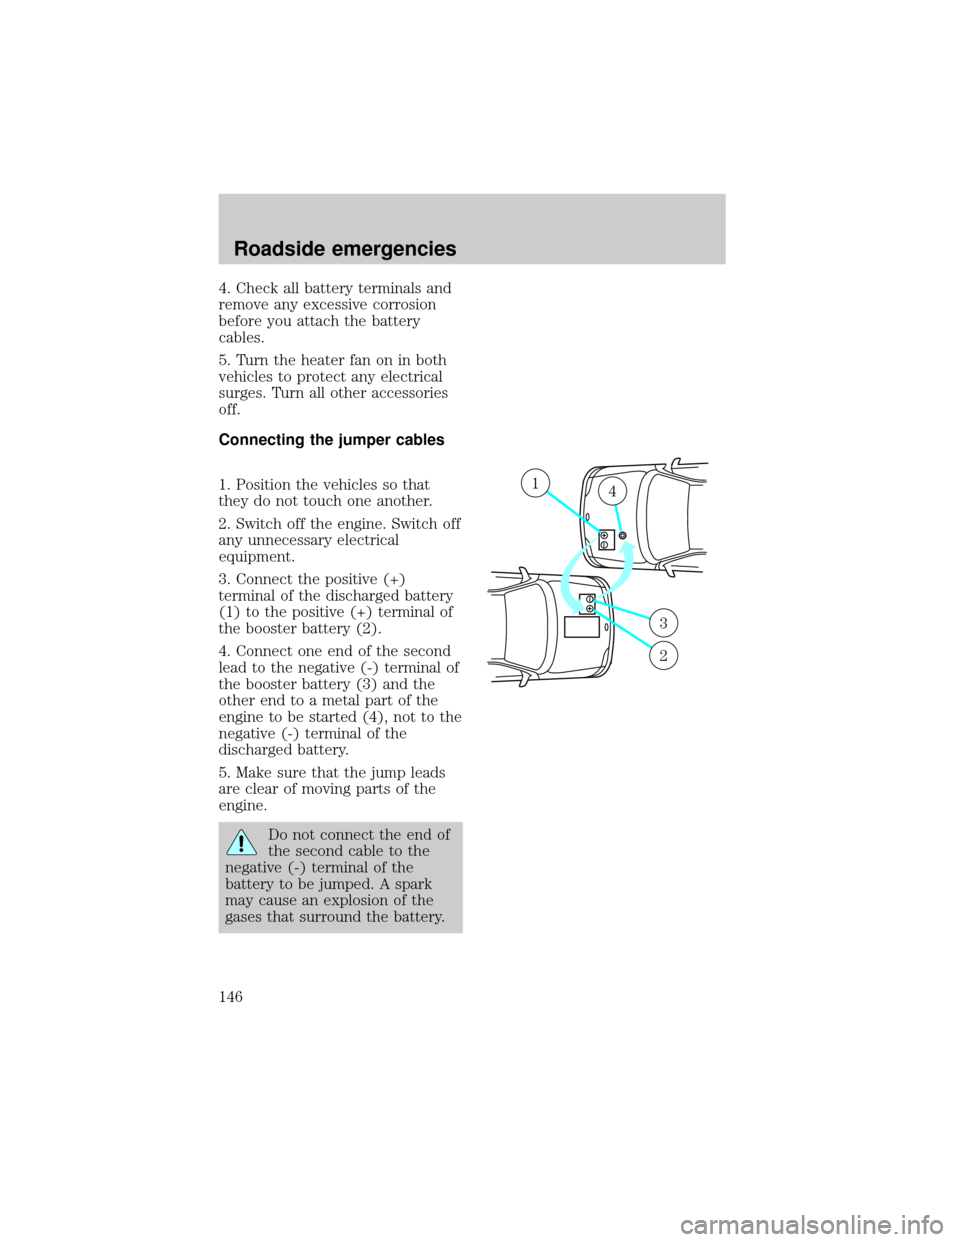
4. Check all battery terminals and
remove any excessive corrosion
before you attach the battery
cables.
5. Turn the heater fan on in both
vehicles to protect any electrical
surges. Turn all other accessories
off.
Connecting the jumper cables
1. Position the vehicles so that
they do not touch one another.
2. Switch off the engine. Switch off
any unnecessary electrical
equipment.
3. Connect the positive (+)
terminal of the discharged battery
(1) to the positive (+) terminal of
the booster battery (2).
4. Connect one end of the second
lead to the negative (-) terminal of
the booster battery (3) and the
other end to a metal part of the
engine to be started (4), not to the
negative (-) terminal of the
discharged battery.
5. Make sure that the jump leads
are clear of moving parts of the
engine.
Do not connect the end of
the second cable to the
negative (-) terminal of the
battery to be jumped. A spark
may cause an explosion of the
gases that surround the battery.
+–
+–
14
3
2
Roadside emergencies
146
Page 208 of 216

Aiming headlamps ....................193
Air bag supplemental restraint
system ..........................................78
and child safety seats ..............80
description ................................79
disposal ......................................83
indicator light ...........................82
passenger air bag .....................81
Air cleaner filter .......................170
Air conditioning
auxiliary heater and air
conditioner ................................29
manual heating and air
conditioning system ..23,24,26,28
Air suspension
description ..............................102
warning light .............................11
Ambulance packages ....................3
Anti-lock brake system (ABS)
description ................................99
Battery .......................................168
voltage gauge ............................16
Brake fluid
checking and adding ..............157
Brakes ..........................................98
anti-lock .....................................98
anti-lock brake system (ABS)
warning light .............................99
fluid, checking and adding ....157
Brake-shift interlock .................104
Break-in period .............................2
Bulbs, replacing ........................186
headlamps ...............................187
rear lamps ........................191,192
Changing a tire .........................138
Child safety seats ........................86
Childproof locks ..........................50
Chime
headlamps on ............................13
Cleaning your vehicle ...............194
engine compartment ..............195
fabric ........................................197instrument panel ....................197
plastic parts ............................196
safety belts ..............................197
tail lamps .................................196
washing ....................................194
waxing .....................................194
wheels ......................................195
Compass, electronic ....................42
calibration .................................44
set zone adjustment .................43
Control trac 4WD system .........108
Controls ..................................51,52
Daytime running light system ...20
Defrost
rear window ..............................22
Driving under special
conditions ..................................111
high water ...............................112
slippery roads ..................113,114
Electronic sound system ............52
Emission control system ..........183
Engine ........................................204
check engine temperature
warning, message center .......152
service points ..........................152
Engine block heater ...................96
Engine coolant
checking and adding .......158,159
disposal ....................................161
refill capacities ........................161
Engine oil ...........................153,155
changing oil and oil filter .......156
checking and adding .......153,155
Exhaust fumes ............................96
Fail safe cooling ........................162
Floor mats ...................................53
Foglamps ...................................190
Four-Wheel Drive vehicles
control trac ........................23,108
indicator light ...........................11
special driving
instructions ......................109,110
Index
208