1998 FORD CROWN VICTORIA light
[x] Cancel search: lightPage 40 of 160

When programming your HomeLinktUniversal Transmitter, you
will be operating the garage door or gate. Be sure that people
and objects are out to the way to prevent potential harm or damage.
Do not use the HomeLinktUniversal Transmitter with any garage door
opener that lacks safety stop and reverse features as required by U.S.
federal safety standards (this includes any garage door opener model
manufactured before April 1, 1982). A garage door which cannot detect
an object, signaling the door to stop and reverse, does not meet current
U.S. federal safety standards. For more information on this matter, call
toll-free: 1±800±355±3515.
Programming
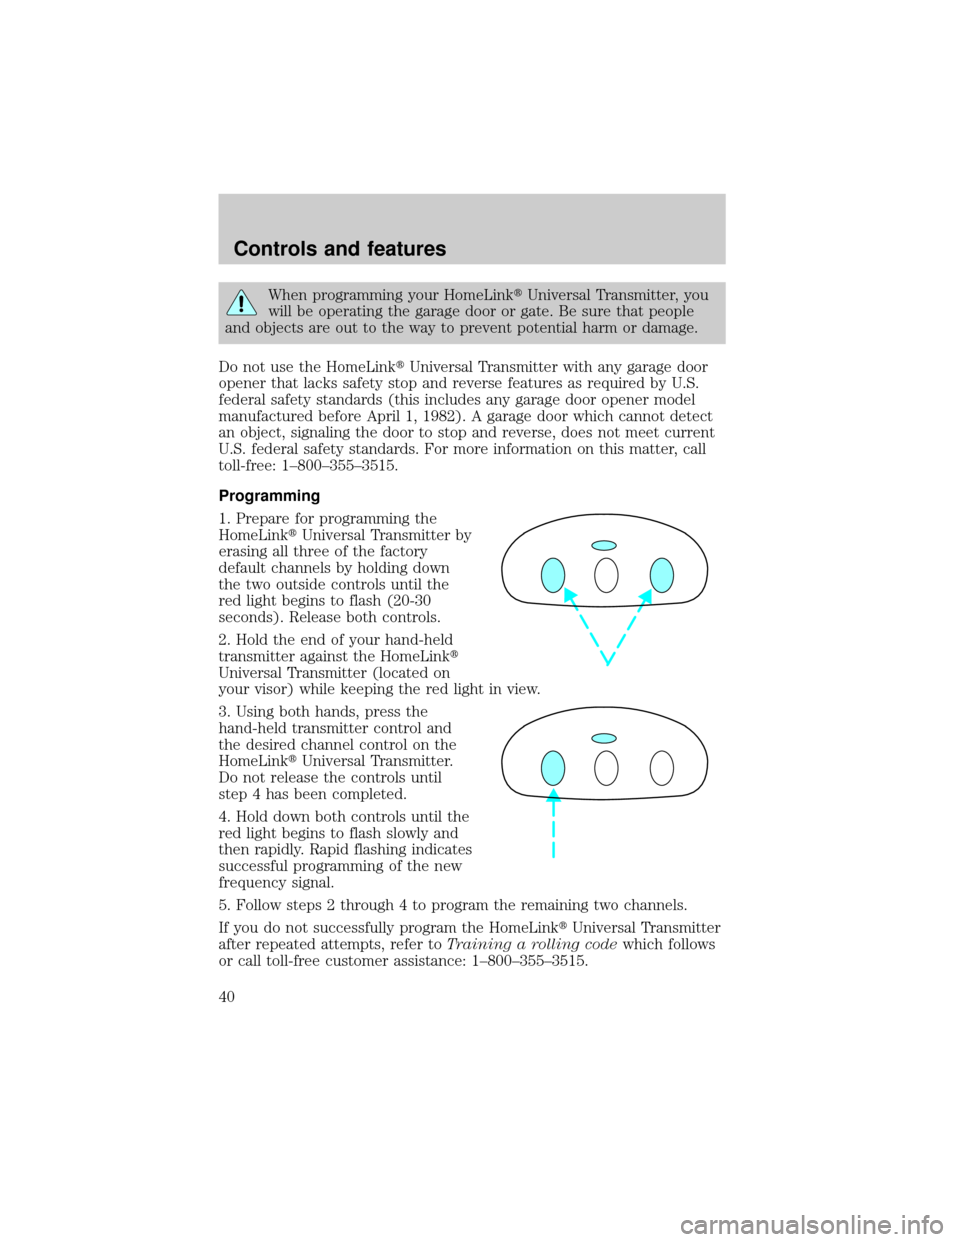
1. Prepare for programming the
HomeLinktUniversal Transmitter by
erasing all three of the factory
default channels by holding down
the two outside controls until the
red light begins to flash (20-30
seconds). Release both controls.
2. Hold the end of your hand-held
transmitter against the HomeLinkt
Universal Transmitter (located on
your visor) while keeping the red light in view.
3. Using both hands, press the
hand-held transmitter control and
the desired channel control on the
HomeLinktUniversal Transmitter.
Do not release the controls until
step 4 has been completed.
4. Hold down both controls until the
red light begins to flash slowly and
then rapidly. Rapid flashing indicates
successful programming of the new
frequency signal.
5. Follow steps 2 through 4 to program the remaining two channels.
If you do not successfully program the HomeLinktUniversal Transmitter
after repeated attempts, refer toTraining a rolling codewhich follows
or call toll-free customer assistance: 1±800±355±3515.
Controls and features
40
Page 41 of 160

Note to Canadian residents
During programming, your hand-held transmitter may automatically stop
transmitting after two seconds which may not be long enough to
program the HomeLinktUniversal Transmitter.
If you are programming from one of
these hand-held transmitters:
²continue to hold the control on
the HomeLinktUniversal
Transmitter
²re-press the hand-held
transmitter every two seconds
You may have to repeat this function
several times while programming.
Operating the HomeLinkTUniversal Transmitter
Once programmed, the HomeLinkt
Universal Transmitter can be used in
place of hand-held transmitters. To
operate, simply press the
appropriate channel control on the
transmitter (the red light will
illuminate, indicating the signal is
being transmitted).
Training a rolling code system
Rolling code systems (garage door openers which are ªcode protectedº)
may be determined by the following:
²The hand-held transmitter appears to program the HomeLinkt
Universal Transmitter but does not activate the garage door.
²The garage door opener was manufactured after 1995.
Follow these steps to train a garage door with the rolling code feature:
1. Locate the training control on the garage door opener receiver. Refer
to the garage door opener manual or call 1±800±355±3515 if there is
difficulty locating the training control.
Controls and features
41
Page 42 of 160

2. Press the training control on the garage door opener receiver until the
training light (next to the control) begins to flash (1-2 seconds).
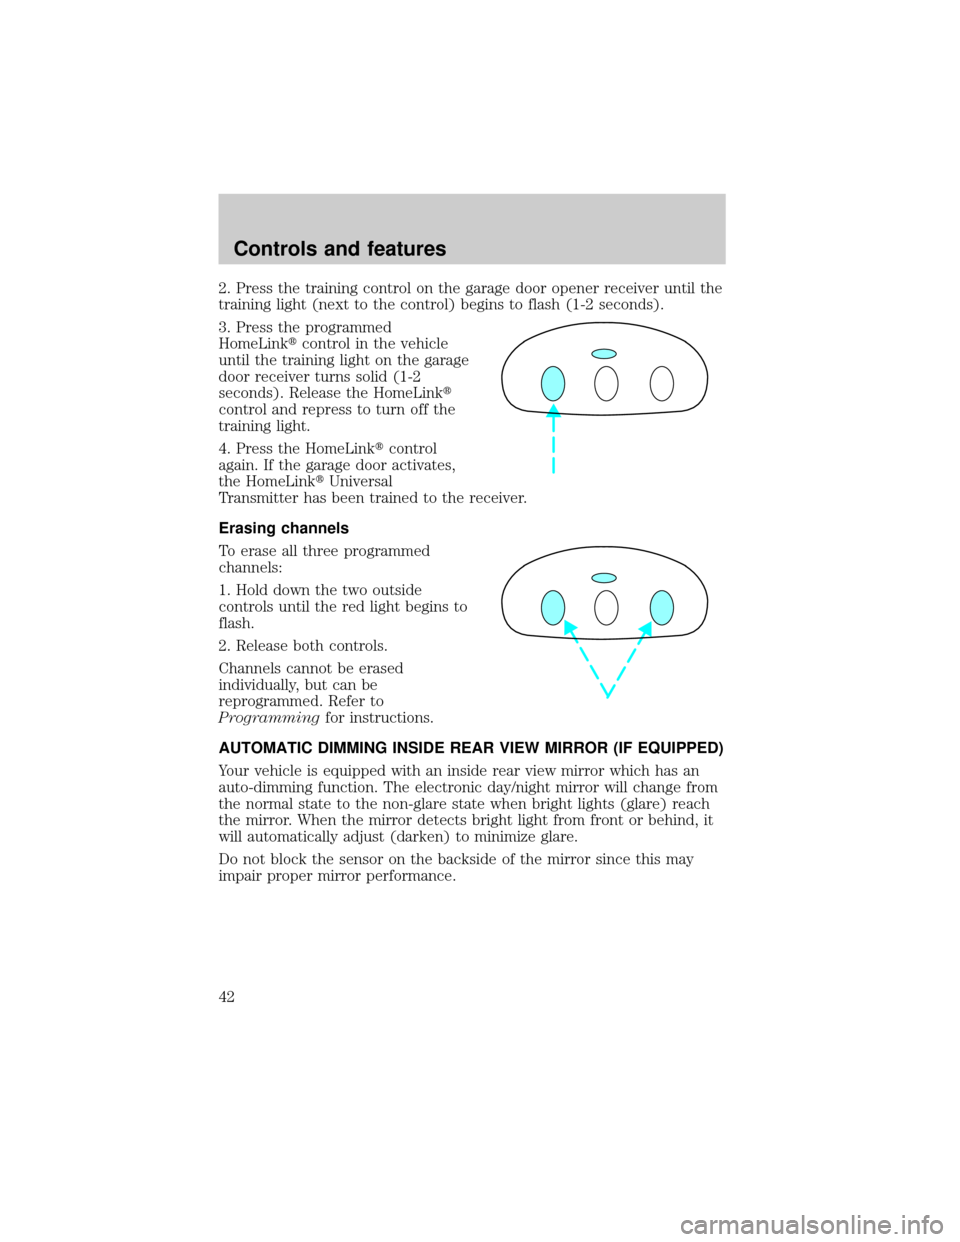
3. Press the programmed
HomeLinktcontrol in the vehicle
until the training light on the garage
door receiver turns solid (1-2
seconds). Release the HomeLinkt
control and repress to turn off the
training light.
4. Press the HomeLinktcontrol
again. If the garage door activates,
the HomeLinktUniversal
Transmitter has been trained to the receiver.
Erasing channels
To erase all three programmed
channels:
1. Hold down the two outside
controls until the red light begins to
flash.
2. Release both controls.
Channels cannot be erased
individually, but can be
reprogrammed. Refer to
Programmingfor instructions.
AUTOMATIC DIMMING INSIDE REAR VIEW MIRROR (IF EQUIPPED)
Your vehicle is equipped with an inside rear view mirror which has an
auto-dimming function. The electronic day/night mirror will change from
the normal state to the non-glare state when bright lights (glare) reach
the mirror. When the mirror detects bright light from front or behind, it
will automatically adjust (darken) to minimize glare.
Do not block the sensor on the backside of the mirror since this may
impair proper mirror performance.
Controls and features
42
Page 43 of 160

Press the control to turn the mirror
on or off.
The mirror will automatically return
to the normal state whenever the
vehicle is placed in R
(Reverse)(when the mirror is on) to
ensure a bright clear view when
backing up.
ELECTRONIC COMPASS (IF EQUIPPED)
The compass reading will remain accurate during most driving
conditions. Unknown to the driver, the compass is continuously
recalibrating due to magnetic fields and subtle, slow changes in vehicle
magnetics which can occur over the life of the vehicle.
The compass reading will remain fixed when significant levels are
experienced (such as steel bridges). The compass will return to normal
operation upon leaving the magnetized area.
If highly magnetized items (such as magnetic mount antennas) are
placed very near the compass the display will change to ªCº for 15
seconds, then display all segments until the magnetized item is removed.
Most geographic areas (zones) have a magnetic north compass point that
varies slightly from the northerly direction on maps. This variation is four
degrees between adjacent zones and will become noticeable as the
vehicle crosses multiple zones. A correct zone setting will eliminate this
error. Refer toCompass zone adjustment.
COMP MIRROR
Controls and features
43
Page 52 of 160

The inside lights will not turn off if:
²they have been turned on with the dimmer control or
²any door is open.
The battery saver will shut off the interior lamps 30 minutes after the
last door is closed or after 10 minutes if the door is left open.
Replacing the battery
The transmitter is powered by one coin type three-volt lithium battery
CR2032 or equivalent. Typical operating range will allow you to be up to
10 meters (33 feet) away from your vehicle. A decrease in operating
range can be caused by:
²battery weakness due to time and use
²weather conditions
²nearby radio towers
²structures around the vehicle
²other vehicles parked next to the vehicle
To replace the battery:
1. Twist a thin coin between the two
halves of the transmitter near the
key ring. DO NOT TAKE THE
FRONT PART OF THE
TRANSMITTER APART.
2. Place the positive (+) side of new
battery in the same orientation.
Refer to the diagram inside the
transmitter unit.
3. Snap the two halves back
together.
Replacement of the battery willnotcause the remote transmitter to
become deprogrammed from your vehicle. The remote transmitter should
operate normally after battery replacement.
Controls and features
52
Page 54 of 160

Theft indicator
The theft indicator on top of the instrument panel will operate as
follows:
²When the ignition is OFF, the theft indicator will flash briefly every 2
seconds to indicate the SecuriLockysystem is protecting your
vehicle.
²When the ignition is turned to RUN or START, the theft indicator will
light for 3 seconds and then go out. If the theft indicator stays on for
an extended period of time or flashes rapidly, have the system
serviced by your dealership or a qualified technician.
Programming spare SecuriLockYkeys
Spare SecuriLockykeys can be purchased from your dealership and
programmed to your SecuriLockyanti-theft system (up to a total of 8
keys). Your dealership can program your new SecuriLockykey(s) to
your vehicle or you can do it yourself using the following simple
procedure. To program a new SecuriLockykey yourself, you will need
two previously programmed SecuriLockykeys (keys that already
operate your vehicle's engine). If two previously programmed
SecuriLockykeys are not available (one or both of your original keys
were lost or stolen), you must bring your vehicle to your dealership to
have the spare SecuriLockykey(s) programmed.
Procedure to program spare SecuriLockYkeys to your vehicle
New SecuriLockykeys must have the correct mechanical key cut for
your vehicle.
Conventional (non-SecuriLocky) keyscannotbe programmed to your
vehicle.
You will need to have two previously programmed SecuriLockykeys and
the new unprogrammed SecuriLockykey readily accessible for timely
implementation of each step in the procedure. Please read and
understand the entire procedure before you begin.
1. Insert the first previously programmed SecuriLockykey into the
ignition and turn the ignition from OFF to RUN (maintain ignition in
RUN for at least one second).
2. Turn ignition to OFF and remove the first SecuriLockykey from the
ignition.
Controls and features
54
Page 55 of 160

3. Within five seconds of turning the ignition to OFF, insert the second
previously programmed SecuriLockykey into the ignition and turn the
ignition from OFF to RUN (maintain ignition in RUN for at least one
second but no more than 5 seconds).
4. Turn the ignition to OFF and remove the second SecuriLockykey
from the ignition.
5. Within 10 seconds of turning the ignition to OFF, insert the
unprogrammed SecuriLockykey (new key) into the ignition and turn
the ignition from OFF to RUN (maintain ignition in RUN for at least one
second). This step will program your new SecuriLockykey.
6. To program additional SecuriLockykey(s), repeat this procedure from
step 1.
If the programming procedure was successful, the new SecuriLocky
key(s) will start the vehicle's engine. The theft indicator (located on the
instrument panel) will light for three seconds and then go out.
If the programming procedure was not successful, the new SecuriLocky
key(s) will not operate the vehicle's engine. The theft indicator will flash
on and off. Wait at least one minute and then repeat the procedure from
step 1. If failure repeats, bring your vehicle to your dealership to have
the spare SecuriLockykey(s) programmed.
KEYLESS ENTRY SYSTEM
With the keyless entry keypad, you
can:
²lock or unlock the vehicle doors
without using the key
²open trunk
²disable/enable horn chirp
²disable/enable autolock
See alsoRemote entry systemin this chapter for more information.
Your vehicle has a factory-set 5±digit code that operates the keyless
entry system. You can also program your own 5±digit personal entry
code.
123
45678
90
Controls and features
55
Page 66 of 160

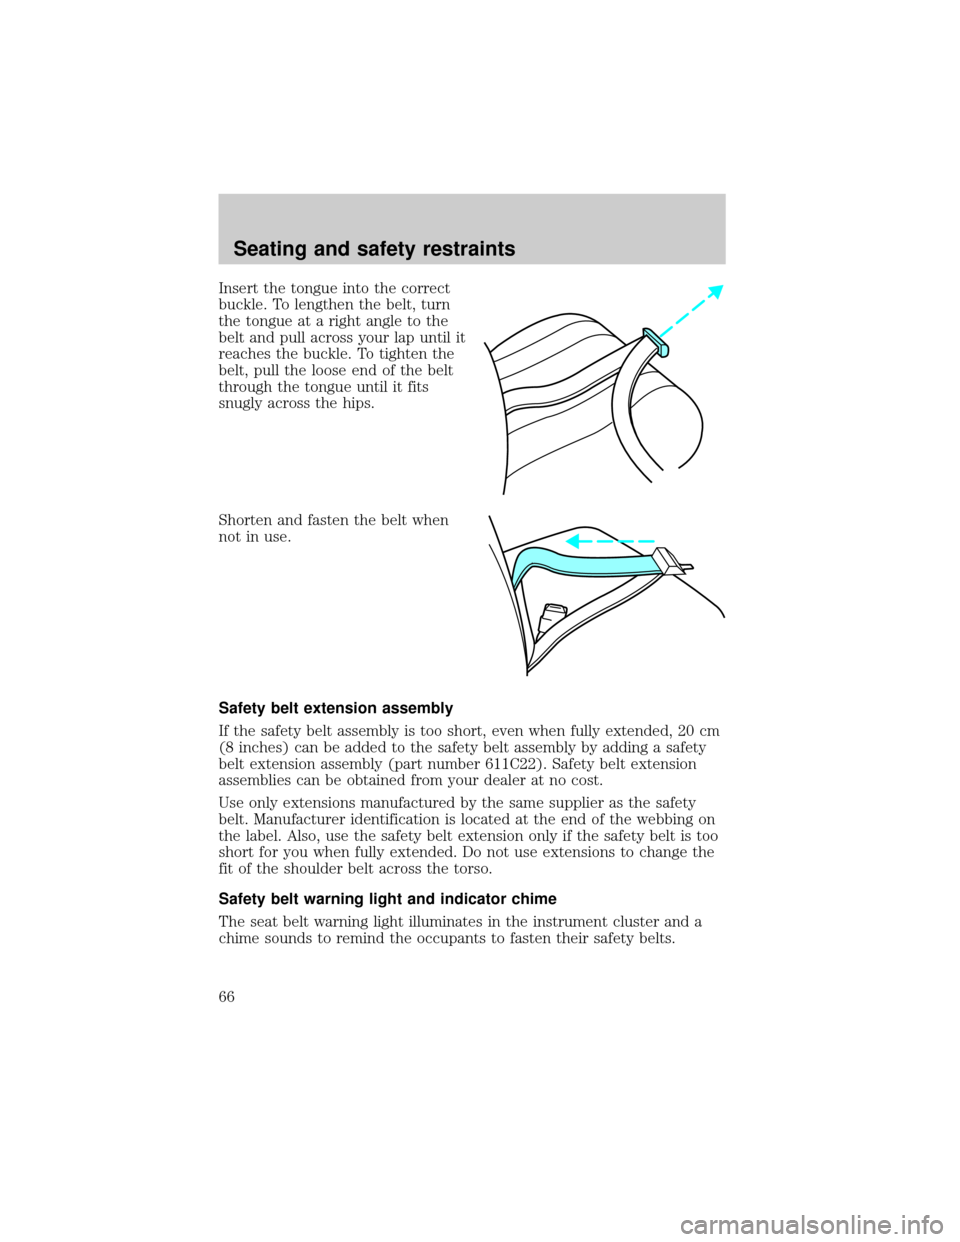
Insert the tongue into the correct
buckle. To lengthen the belt, turn
the tongue at a right angle to the
belt and pull across your lap until it
reaches the buckle. To tighten the
belt, pull the loose end of the belt
through the tongue until it fits
snugly across the hips.
Shorten and fasten the belt when
not in use.
Safety belt extension assembly
If the safety belt assembly is too short, even when fully extended, 20 cm
(8 inches) can be added to the safety belt assembly by adding a safety
belt extension assembly (part number 611C22). Safety belt extension
assemblies can be obtained from your dealer at no cost.
Use only extensions manufactured by the same supplier as the safety
belt. Manufacturer identification is located at the end of the webbing on
the label. Also, use the safety belt extension only if the safety belt is too
short for you when fully extended. Do not use extensions to change the
fit of the shoulder belt across the torso.
Safety belt warning light and indicator chime
The seat belt warning light illuminates in the instrument cluster and a
chime sounds to remind the occupants to fasten their safety belts.
Seating and safety restraints
66