Page 4 of 160
BAS
SEEK
TUNE
VOL - PUSH ON
HI
LO
F
S
OFF
E
CHECK
ENGINEAIR
SUSPOD
OFF
BRAKE
TEMP OIL VOLTS FUEL
MPH km/h10 203040506070
80
90
10 0
11 0
12 020 406080100
120
140
160
180
200H H
L C F H
L
< FUEL FILL DOOR
NORM A/CMAX A/COUTSIDE TEMP
12
CD AM
FM
R.DEF.
AUTO
LAMP0FFPANEL
DIM
PUSH INTERIORP R N D 2 1
OFF ON
RSM
SET
ACC
COAST
Driver side air
bag
(pg. 68) Instrument
cluster
(pg. 6)
Rear window
defroster control
(pg. 24)
Tilt steering
wheel lever
(pg. 35) Instrument panel
dimmer switch
(pg. 23)
Headlamp control
(pg. 23)
Speed control*
(pg. 36)Gearshift lever
(pg. 88)
Turn signal and
wiper/washer
control
(pg. 34)
*if equipped
Instrumentation
4
Page 9 of 160
Anti-lock brake system (ABS) (If equipped)
Momentarily illuminates when the
ignition is turned on and the engine
is off. If the light does not illuminate
momentarily at start up, remains on
or continues to flash, the ABS needs
to be serviced. With the ABS light on, the anti-lock brake system is
disabled and normal braking is still effective unless the brake warning
light also remains illuminated with parking brake released.
Turn signal
Illuminates when the left or right
turn signal or the hazard lights are
turned on. If one or both of the
indicators stay on continuously or
flash faster, check for a burned-out
turn signal bulb. Refer toExterior bulbsin theMaintenance and care
chapter.
High beams
Illuminates when the high beam
headlamps are turned on.
Charging system
Illuminates when the ignition is
turned to the ON position and the
engine is off. The light also
illuminates when the battery is not
charging properly, requiring
electrical system service.
ABS
Instrumentation
9
Page 12 of 160

Headlamps on warning chime
Sounds when the headlamps or parking lamps are on, the ignition is off
(and the key is not in the ignition) and either front door is opened.
Turn signal chime
Sounds when the turn signal lever has been activated to signal a turn.
GAUGES
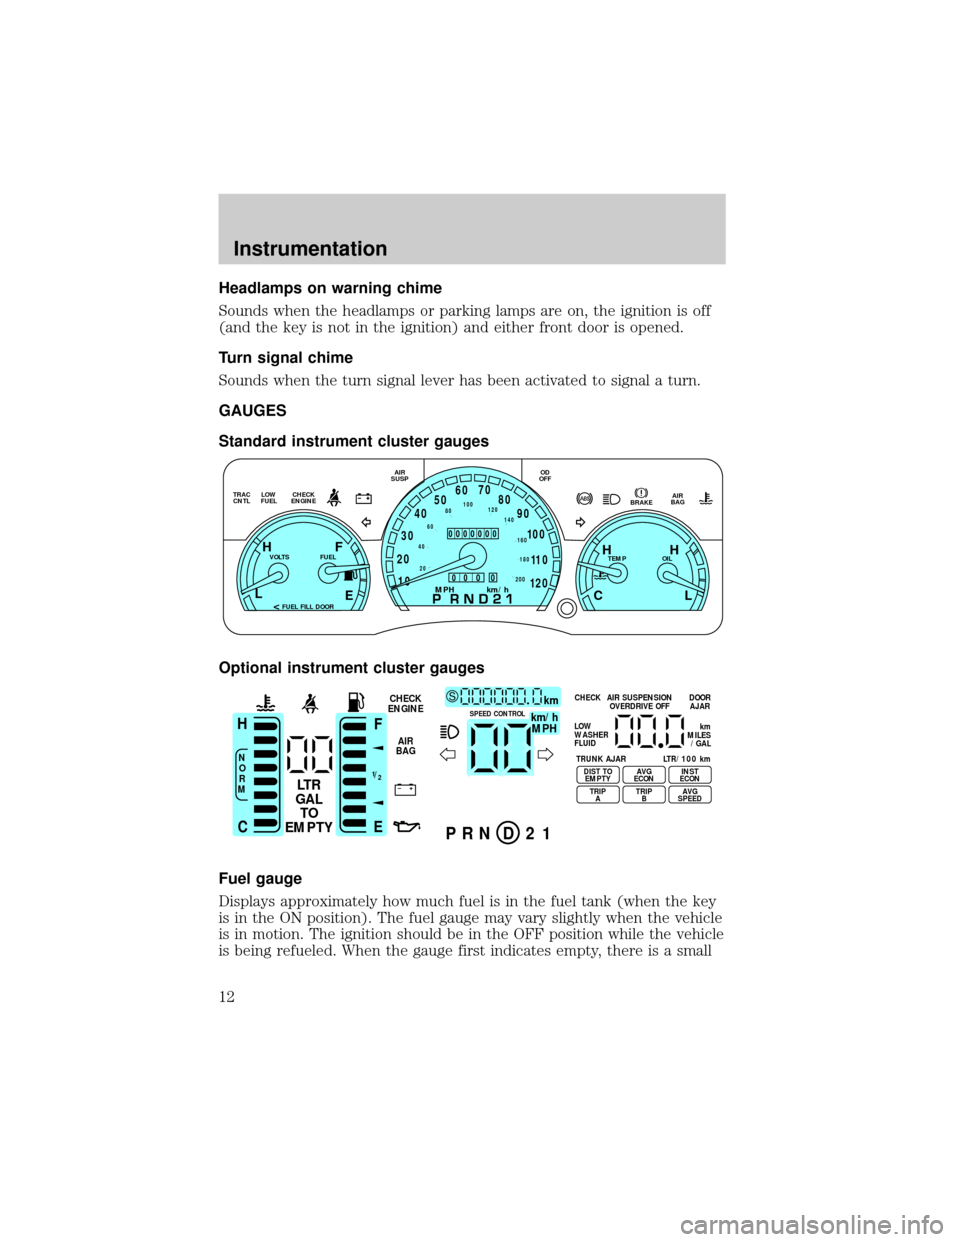
Standard instrument cluster gauges
Optional instrument cluster gauges
Fuel gauge
Displays approximately how much fuel is in the fuel tank (when the key
is in the ON position). The fuel gauge may vary slightly when the vehicle
is in motion. The ignition should be in the OFF position while the vehicle
is being refueled. When the gauge first indicates empty, there is a small
E
LOW
FUEL TRAC
CNTLCHECK
ENGINEAIR
SUSPOD
OFF
BRAKEAIR
BAG
TEMP OIL VOLTS FUEL
MPH km/h10 203040506070
80
90
10 0
11 0
12 020 406080100
120
140
160
180
200
H H
L C F H
L
< FUEL FILL DOOR
0000000
0
0 0 0
+ –
F
E
/2 1
N
O
R
M
H
C
LT R
GAL
TO
EMPTY
km/h
MPH
km SCHECK
ENGINE
AIR
BAGSPEED CONTROL
P R N D 2 1
CHECK
TRUNK AJAR LTR/100 kmAIR SUSPENSION
OVERDRIVE OFFDOOR
AJAR
LOW
WASHER
FLUID
DIST TO
EMPTY
TRIP
AAVG
ECON
TRIP
BINST
ECON
AVG
SPEED
km
MILES
/GAL
Instrumentation
12
Page 23 of 160
PANEL DIMMER CONTROL
Use to adjust the brightness of the
instrument panel during headlight
and parklamp operation.
²Push up to brighten.
²Push down to dim.
HEADLAMP CONTROL
Rotate the headlamp control to the
first position to turn on the parking
lamps only. Rotate to the second
position to also turn on the
headlamps.
High beams
Push forward to activate.
Flash to pass
Pull toward you to activate and
release to deactivate.
PANEL
DIM
OFF
P
HI
LO
F
S
OFF
HI
LO
F
S
OFF
Controls and features
23
Page 24 of 160

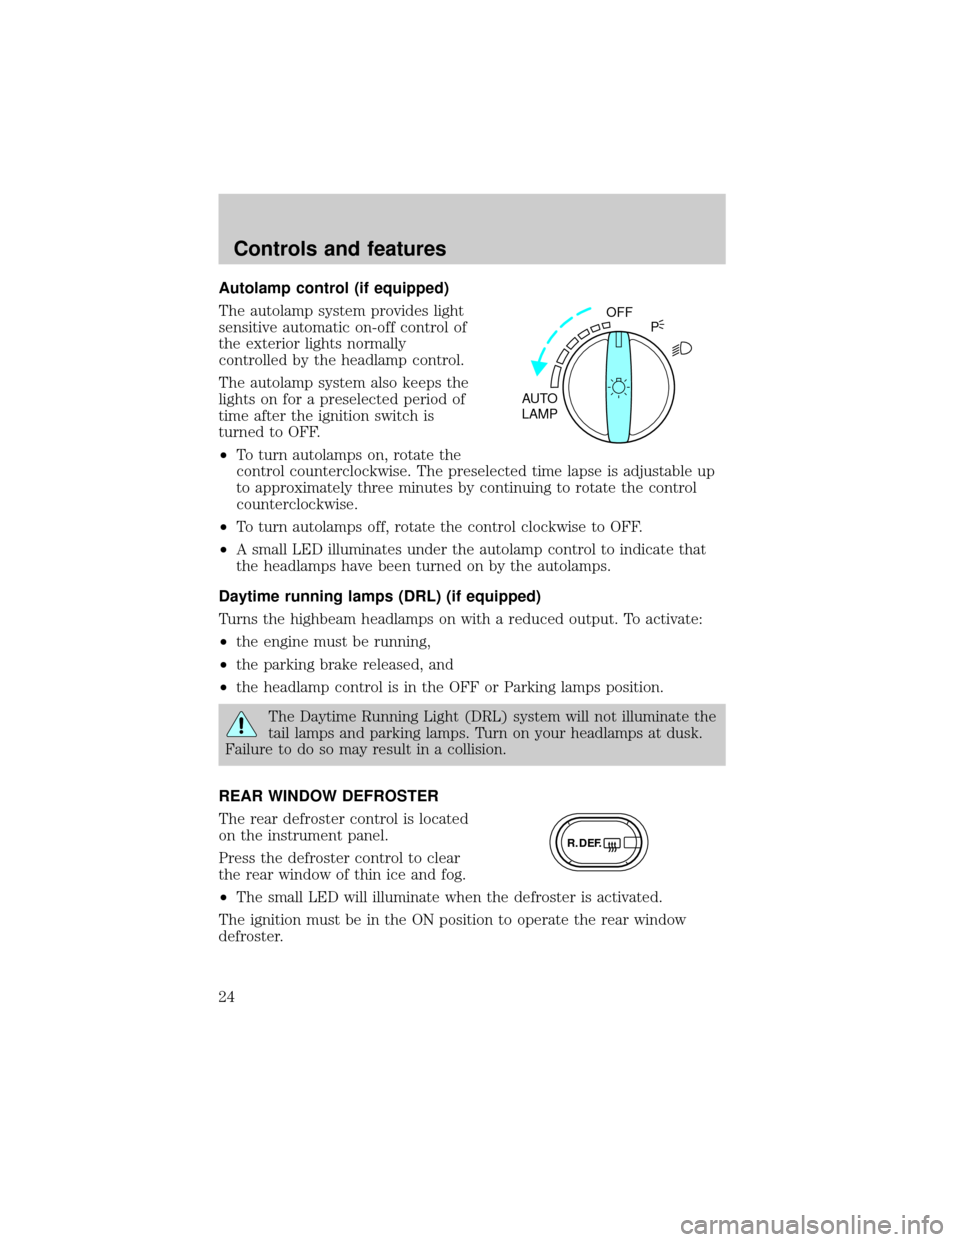
Autolamp control (if equipped)
The autolamp system provides light
sensitive automatic on-off control of
the exterior lights normally
controlled by the headlamp control.
The autolamp system also keeps the
lights on for a preselected period of
time after the ignition switch is
turned to OFF.
²To turn autolamps on, rotate the
control counterclockwise. The preselected time lapse is adjustable up
to approximately three minutes by continuing to rotate the control
counterclockwise.
²To turn autolamps off, rotate the control clockwise to OFF.
²A small LED illuminates under the autolamp control to indicate that
the headlamps have been turned on by the autolamps.
Daytime running lamps (DRL) (if equipped)
Turns the highbeam headlamps on with a reduced output. To activate:
²the engine must be running,
²the parking brake released, and
²the headlamp control is in the OFF or Parking lamps position.
The Daytime Running Light (DRL) system will not illuminate the
tail lamps and parking lamps. Turn on your headlamps at dusk.
Failure to do so may result in a collision.
REAR WINDOW DEFROSTER
The rear defroster control is located
on the instrument panel.
Press the defroster control to clear
the rear window of thin ice and fog.
²The small LED will illuminate when the defroster is activated.
The ignition must be in the ON position to operate the rear window
defroster.
OFF
AUTO
LAMPP
R.DEF.
Controls and features
24
Page 79 of 160
2. Make sure the headlamps and vehicle accessories are off.
3. Make sure the parking brake is
set.
4. Make sure the gearshift is in P
(Park).
5. Turn the key to 4 (ON) without
turning the key to 5 (START).
BRAKE
HOOD
1
2
34
5
Starting
79
Page 136 of 160

If the vehicle's powertrain system or its battery has just been serviced,
the OBD-II system is reset to a ªnot ready for I/M testº condition. To
ready the OBD-II system for I/M testing, a minimum of 30 minutes of city
and highway driving is necessary as described below:
²First, at least 10 minutes of driving on an expressway or highway.
²Next, at least 20 minutes driving in stop-and-go, city-type traffic with
at least four idle periods.
Allow the vehicle to sit for at least eight hours without starting the
engine. Then, start the engine and complete the above driving cycle. The
engine must warm up to its normal operating temperature. Once started,
do not turn off the engine until the above driving cycle is complete.
EXTERIOR BULBS
Replacing exterior bulbs
Check the operation of the following lamps frequently:
²Headlamps
²Tail lamps
²Brakelamps
²High-mount brakelamp
²Turn signals
²Backup lamps
²License plate lamp
Do not remove lamp bulbs unless they will be replaced immediately. If a
bulb is removed for an extended period of time, contaminants may enter
the lamp housings and affect performance.
Replacing headlamp bulbs
Handle a halogen headlamp bulb carefully and keep out of
children's reach. Grasp the bulb only by its plastic base and do
not touch the glass. The oil from your hand could cause the bulb to
break the next time the headlamps are operated.
To remove the headlamp bulb:
1. Make sure headlamp switch is in OFF position, then open the hood.
Maintenance and care
136
Page 137 of 160

2. Remove the protective cover by turning the three knobs to the unlock
position.
3. Disengage the safety snap on the connector by pulling upward slightly
on the clip.
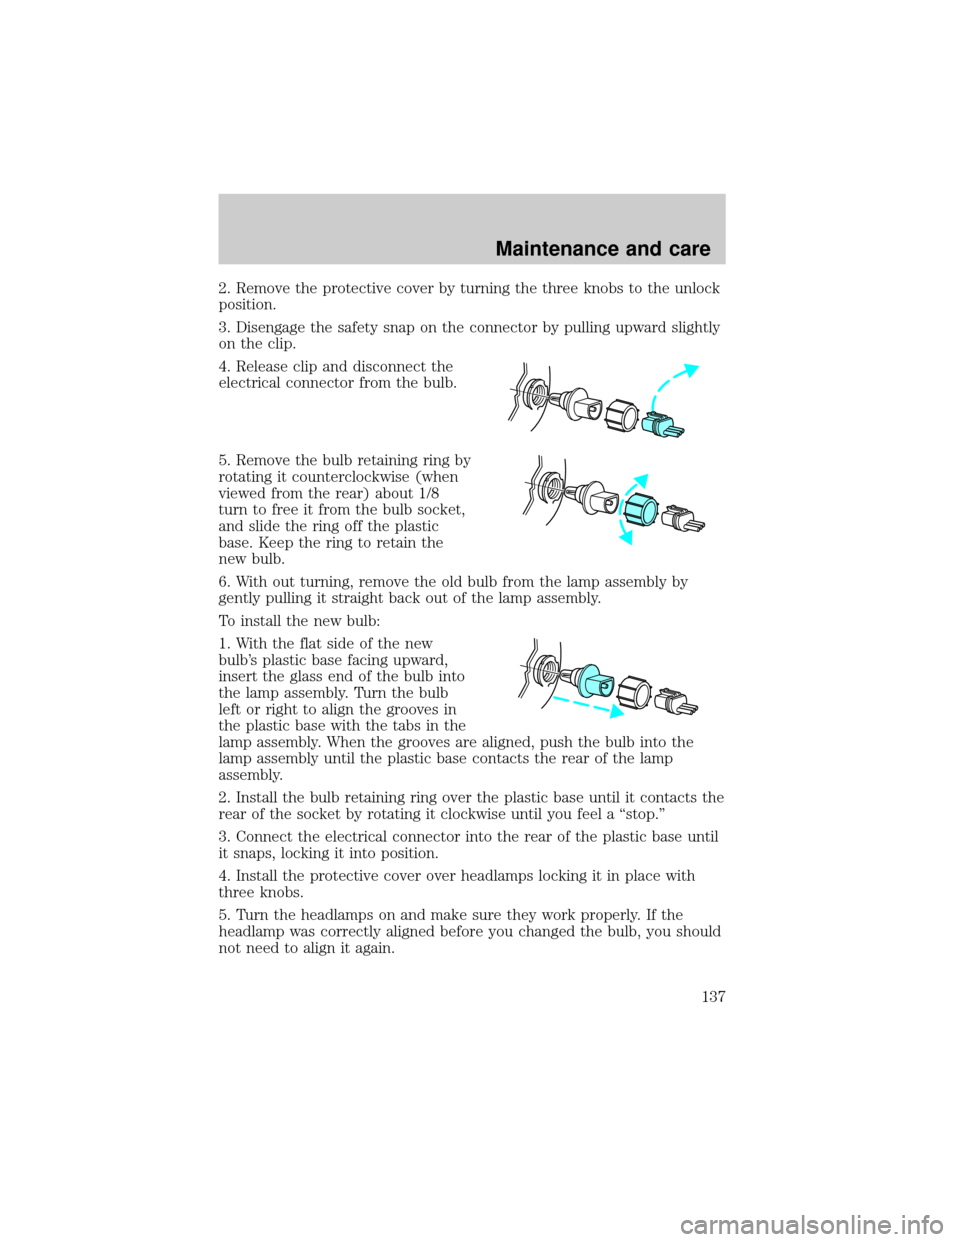
4. Release clip and disconnect the
electrical connector from the bulb.
5. Remove the bulb retaining ring by
rotating it counterclockwise (when
viewed from the rear) about 1/8
turn to free it from the bulb socket,
and slide the ring off the plastic
base. Keep the ring to retain the
new bulb.
6. With out turning, remove the old bulb from the lamp assembly by
gently pulling it straight back out of the lamp assembly.
To install the new bulb:
1. With the flat side of the new
bulb's plastic base facing upward,
insert the glass end of the bulb into
the lamp assembly. Turn the bulb
left or right to align the grooves in
the plastic base with the tabs in the
lamp assembly. When the grooves are aligned, push the bulb into the
lamp assembly until the plastic base contacts the rear of the lamp
assembly.
2. Install the bulb retaining ring over the plastic base until it contacts the
rear of the socket by rotating it clockwise until you feel a ªstop.º
3. Connect the electrical connector into the rear of the plastic base until
it snaps, locking it into position.
4. Install the protective cover over headlamps locking it in place with
three knobs.
5. Turn the headlamps on and make sure they work properly. If the
headlamp was correctly aligned before you changed the bulb, you should
not need to align it again.
Maintenance and care
137