1998 CHEVROLET PRIZM power steering
[x] Cancel search: power steeringPage 90 of 364

Downloaded from www.Manualslib.com manuals search engine ACC (ACCESSORY) (B): In this position, you can
operate some of your electrical power accessories (such
as the radio, but not the ventilation fan). It unlocks the
steering wheel and ignition.
To move the key from ACC
to LOCK, push in the key and then turn it to LOCK.
ON (C): The switch returns to this position after you
start your engine and release the switch. The switch
stays in the
ON position when the engine is running. But
even when the ignition is not running, you can use ON
to operate your electrical power accessories (including
the ventilation fan) and to display some warning and
indicator lights.
START (D): This position starts the engine. When the
engine starts, release the key. The ignition switch will
return to ON for normal driving.
When the engine is not running,
ACC and ON allow
you to operate some
of your electrical accessories.
A warning tone will sound if you open the driver’s
door when the ignition
is in ACC or LOCK and the
key is in the ignition. On manual transaxle
vehicles, turning the key to
LOCK and removing it will lock the steering
column and result in
a loss of ability to steer the
vehicle. This could cause
a collision. If you need
to turn the engine off while the vehicle is moving,
turn the key only to
ACC. Don’t push the key in
while the vehicle is moving.
NOTICE:
If your key seems stuck in LOCK and you can’t
turn it, be sure you are using the correct key; if
so, is it all the way in? If it is, then turn the
steering wheel left and right while you turn the
key hard. But turn the key only with your hand.
Using
a tool to force it could break the key or the
ignition switch. If none
of this works, then your
vehicle needs service.
2-12
Page 114 of 364

Downloaded from www.Manualslib.com manuals search engine Power Remote C
(If Equipped)
The remote power mirror
control is to the left of
your steering wheel.
To adjust either mirror,
move the switch to
L (left)
or R (right). Then use
the touch pad to adjust
the mirror.
Once you have adjusted both mirrors, move
the switch
back to the center. This prevents moving
the mirrors
accidentally once
you have adjusted them.
Convex Outside Mirror
Your passenger’s side mirror is convex. A convex
mirror’s surface
is curved so you can see more from
the driver’s seat.
A convex mirror can make things (like other
vehicles) look farther away than they really are.
If you cut too sharply into the right lane, you
could hit a vehicle
on your right. Check your
inside mirror or glance over your shoulder
before changing lanes.
2-36
Page 162 of 364

Downloaded from www.Manualslib.com manuals search engine Steering
Power Steering
If you lose power steering assist because the engine
stops or the system
is not functioning, you can steer
but it will take much more effort.
Steering Tips
Driving on Curves
It’s important to take curves at a reasonable speed.
A lot of the “driver lost control” accidents mentioned
on the news happen on curves. Here’s why:
Experienced driver
or beginner, each of us is subject to
the same laws of physics when driving on curves. The
traction
of the tires against the road surface makes it
possible for the vehicle to change its path when you turn
the front wheels. If there’s no traction, inertia will keep
the vehicle going in the same direction. If you’ve ever
tried
to steer a vehicle on wet ice, you’ll understand this.
The traction you can get in a curve depends on the
condition
of your tires and the road surface, the angle
at which the curve
is banked, and your speed.
While you’re in a curve, speed is the one factor you
can control. Suppose you’re steering through a sharp curve. Then
you suddenly apply the brakes.
Both control
systems
-- steering and braking -- have to do their
work where the tires meet the road. Unless you have
four-wheel anti-lock brakes, adding the hard braking can
demand too much of those places.
You can lose control.
The same thing can happen if you’re steering through
a sharp curve and you suddenly accelerate. Those two
control systems
-- steering and acceleration -- can
overwhelm those places where the tires meet the road
and make
you lose control.
What should you do
if this ever happens? Ease up on
the brake or accelerator pedal, steer the vehicle the
way you want it to go, and slow down.
Speed limit signs near curves warn that you should
adjust your speed.
Of course, the posted speeds are
based
on good weather and road conditions. Under
less favorable conditions you’ll want to go slower.
If you need to reduce your speed as you approach a
curve, do it before you enter the curve, while your
front wheels are straight ahead.
Try to adjust your speed
so you can “drive” through the
curve. Maintain a reasonable, steady speed. Wait to
accelerate until you are out of the curve, and then
accelerate gently into the straightaway.
Page 227 of 364

Downloaded from www.Manualslib.com manuals search engine 0 Section 6 Service and Appearance Care
Here you will find information about the care of your vehicle. This section begins with service and fuel information,
and then
it shows how to check important fluid and lubricant levels. There is also technical information about your
vehicle, and
a part devoted to its appearance care.
6-2
6-
3
6-5
6-6
6-
8
6-9
6-12
6-16
6-18
6-2
1
6-22 6-23
6-25
6-25
6-26
6-27
Service
Fuel
Fuels in Foreign Countries
Filling Your Tank
Filling a Portable
Fuel Container
Checking Things Under the Hood
Engine Oil
Air Cleaner
Automatic Transaxle Fluid
Manual Transaxle Fluid
Hydraulic Clutch
Engine Coolant
Radiator Pressure Cap
Thermostat Power Steering Fluid
Windshield Washer Fluid
6-28
6-32
6-33
6-37
6-44
6-45
6-47
6-47
6-48
6-53
6-53
6-5
8
6-59 6-60
Brakes
Battery
Bulb Replacement
Tires
Appearance Care
Cleaning the Inside
of Your Vehicle
Cleaning the Built-in Child Restraint
Care of Safety Belts and Built-in Child
Restraint Harness
Cleaning the Outside of Your Vehicle
Vehicle Identification Number
(VIN)
Electrical System
Replacement Bulbs
Capacities and Specifications
Air Conditioning Refrigerants
Page 237 of 364

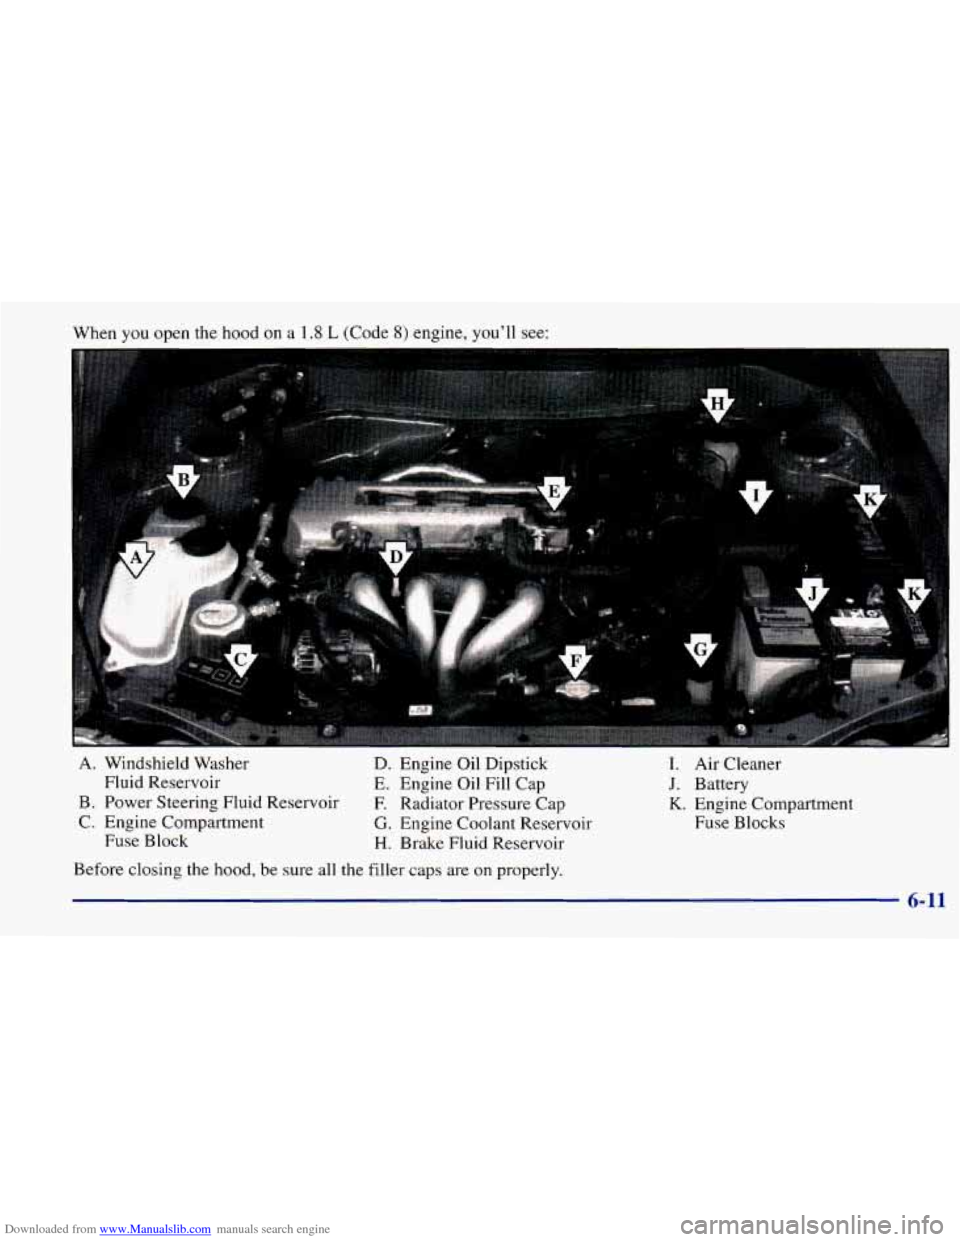
Downloaded from www.Manualslib.com manuals search engine When you open the hood on a 1.8 L (Code 8) engine, you'll see:
A. Windshield Washer
D. Engine Oil Dipstick I. Air Cleaner
Fluid Reservoir
E. Engine Oil Fill Cap
J. Battery
B. Power Steering Fluid Reservoir
F. Radiator Pressure Cap K. Engine Compartment
C. Engine Compartment
G. Engine Coolant Reservoir Fuse Blocks
Fuse Block
H. Brake Fluid Reservoir
Before closing the hood, be sure all the filler caps are on properly.
6-11
Page 252 of 364

Downloaded from www.Manualslib.com manuals search engine Power Steering Fluid
1
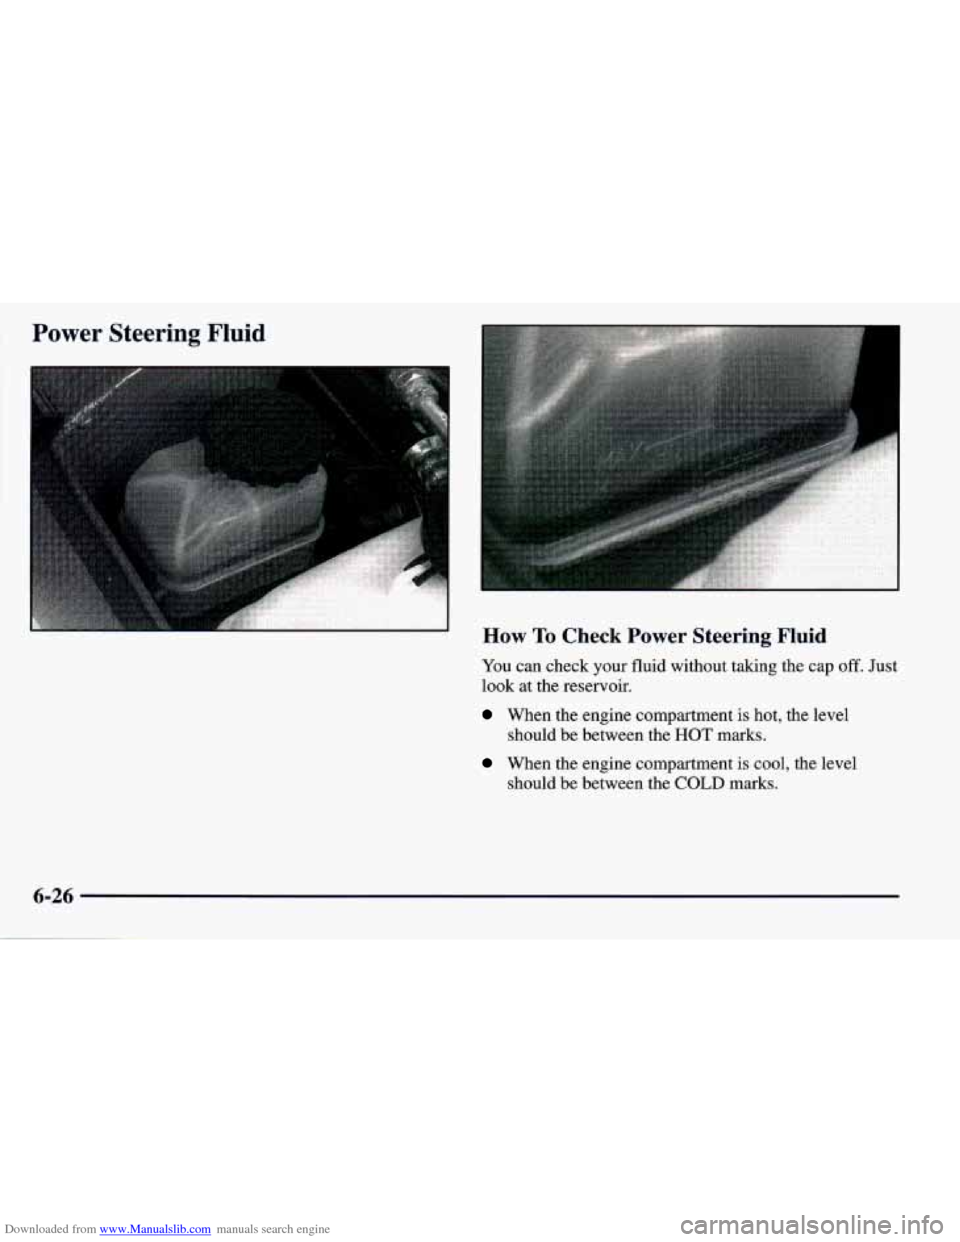
How To Check Power Steering Fluid
You can check your fluid without taking the cap off. Just
look at the reservoir.
When the engine compartment is hot, the level
should be between the
HOT marks.
When the engine compartment is cool, the level
should be between the
COLD marks.
6-26
Page 253 of 364

Downloaded from www.Manualslib.com manuals search engine What to Use
To determine what lund of fluid to use, see
“Recommended Fluids and Lubricants” in the Index.
I NOTICE:
When adding power steering fluid or making a
complete fluid change, always use the proper
fluid. Failure
to use the proper fluid can cause
leaks and damage hoses and seals.
Windshield Washer Fluid
What to Use
When you need windshield washer fluid, be sure to read
the manufacturer’s instructions before use.
If you will be
operating your vehicle in an area where the temperature
may fall below freezing, use a fluid that has sufficient
protection against freezing.
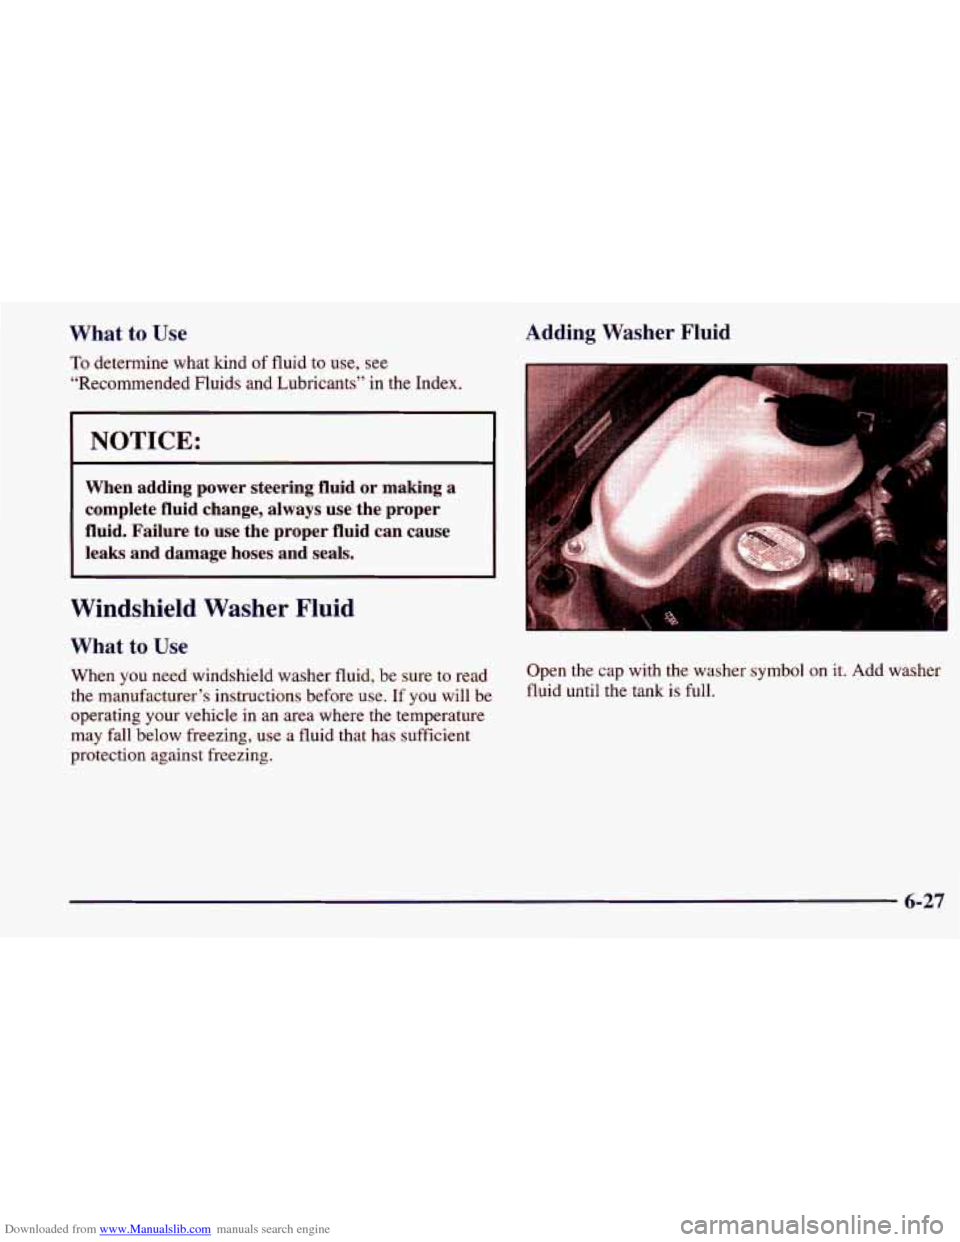
Adding Washer Fluid
Open the cap with the washer symbol on it. Add washer
fluid until the tank is full.
6-27
Page 324 of 364

Downloaded from www.Manualslib.com manuals search engine At Least Twice a Year Wiper Blade Check
Restraint System Check
Make sure the safety belt reminder light and all your
belts, buckles, latch plates, retractors and anchorages are
working properly.
If your vehicle has a built-in child
restraint, also periodically make sure the harness straps,
latch plates, buckle, clip, and anchorages are working
properly.
Look for any other loose or damaged safety
belt and built-in child restraint system parts. If you
see anything that might keep a safety belt or built-in
child restraint system from doing its
job, have it
repaired. Have any torn or frayed safety belts or
harness straps replaced.
Also look for any opened or broken air bag coverings,
and have them repaired or replaced. The air bag system
should be inspected by a qualified technician
10 years
from the manufacture date on the Certification label.
After
10 years from the manufacture date, have the
system inspected every
24 months. (The Certification
label is located on the rear edge
of the driver’s door.) Inspect
wiper blades for wear or cracking. Replace blade
inserts that appear worn or damaged
or that streak or
miss areas
of the windshield. Also see “Wiper Blades,
Cleaning” in the Index.
Fluid Level Check
Check the power steering pump, hydraulic clutch and
automatic or manual transaxle fluid levels and add as
needed. See “Power Steering,” “Hydraulic Clutch” and
“Automatic Transaxle” or “Manual Transaxle” in the
Index. Check for leaks. A fluid loss in these systems
could indicate a problem. Have the system inspected
and repaired at once.
7-38