1998 CHEVROLET CAVALIER warning
[x] Cancel search: warningPage 289 of 400
Downloaded from www.Manualslib.com manuals search engine Brakes
Brake Fluid
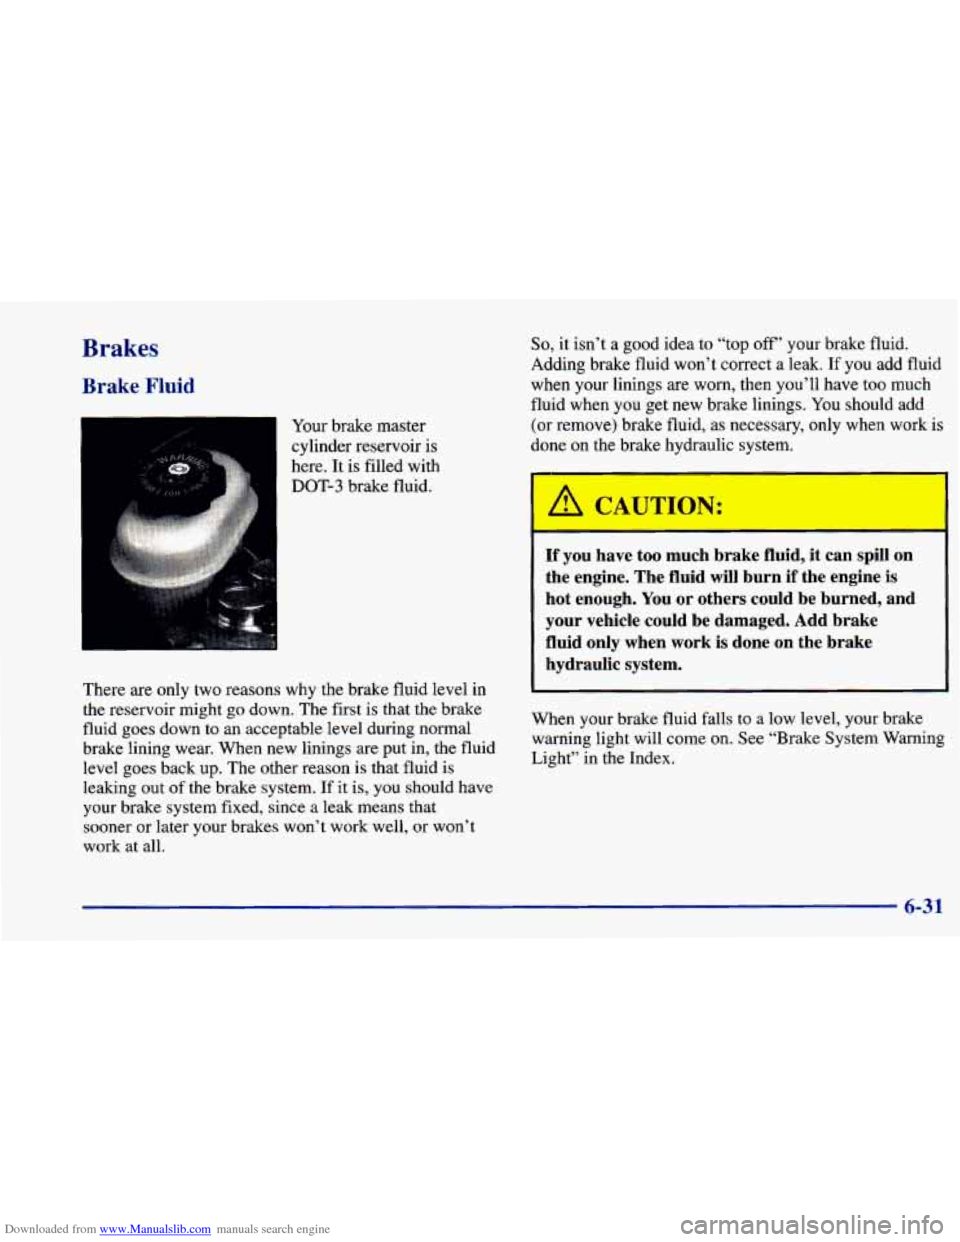
Your brake master
cylinder reservoir
is
here. It is filled with
DOT-3 brake fluid.
There are only two reasons why the brake fluid level in
the reservoir might
go down. The first is that the brake
fluid goes down to an acceptable level during normal
brake lining wear. When new linings are put in, the fluid
level goes back up. The other reason is that fluid is
leaking out of the brake system. If it is, you should have
your brake system fixed, since a leak means that
sooner or later your brakes won’t work well, or won’t
work at all.
So, it isn’t a good idea to “top off’ your brake fluid.
Adding brake fluid won’t correct a leak. If you add fluid
when your linings are worn, then you’ll have too much
fluid when you get new brake linings. You should add
(or remove) brake fluid, as necessary, only when work is
done on the brake hydraulic system.
If you have too much brake fluid, it can spill on
the engine. The fluid will burn if the engine is
hot enough. You or others could be burned, and
your vehicle could be damaged. Add brake
fluid only when work is done on the brake
hydraulic system.
V“-en your brake fluid falls to a low level, your brake
warning light will come
on. See “Brake System Warning
Light” in the Index.
6-31
Page 291 of 400
Downloaded from www.Manualslib.com manuals search engine Brake Wear
Your vehicle has front disc brakes and rear drum brakes.
Disc brake pads have built-in wear indicators that make a
high-pitched warning sound when the brake pads are worn and new pads are needed. The sound may come and go or be heard all the time your vehicle is moving (except
when you are pushing on the brake pedal
firmly).
The brake wear warning sound means that soon
your brakes won’t work well. That could lead to
an accident. When you hear the brake wear
warning sound, have your vehicle serviced.
I 1
NOTICE:
Continuing to drive with worn-out brake pads
could result in costly brake repair.
Some driving conditions or climates may cause a brake
squeal when the brakes are first applied or lightly
applied. This does not mean something
is wrong with
your brakes.
See “Caliper/Knuckle Maintenance Inspection”
in
Section 7 of this manual under Part C “Periodic
Maintenance Inspections.”
Properly torqued wheel nuts are necessary to help
prevent brake pulsation. When tires are rotated, inspect
brake pads for wear and evenly torque wheel nuts in the
proper sequence to
GM specifications.
Your rear drum brakes don’t have wear indicators, but if
you ever hear a rear brake rubbing noise, have the rear
brake linings inspected immediately. Also, the rear brake drums should be removed and inspected each time the tires are removed for rotation or changing. When
you have the front brake pads replaced, have the rear
brakes inspected, too.
Brake linings should always be replaced as complete axle sets.
See “Brake System Inspection” in Section
7 of
this manual under Part C “Periodic Maintenance
Inspections.’’
6-33
Page 303 of 400
Downloaded from www.Manualslib.com manuals search engine Uniform Tire Quality Grading
The following information relates to the system developed
by the United States National Highway Traffic Safety Administration, which grades tires by treadwear, traction
and temperature performance.
(This applies only to
vehicles sold in the United States.) The grades are molded
on the sidewalls of most passenger car tires. The Uniform
Tire Quality Grading system does not apply to deep tread, winter-type snow tires, space-saver or temporary use spare
tires, tires with nominal rim diameters of 10 to
12 inches
(25 to 30 cm), or to some limited-production tires.
While the tires available on General Motors passenger
cars and light trucks may vary with respect to these grades, they must also conform to Federal safety
requirements and additional General Motors Tire
Performance Criteria (TPC) standards.
Treadwear
The treadwear grade is a comparative rating based on
the wear rate of the tire when tested under controlled
conditions on a specified government test course. For
example, a tire graded 150 would wear one and
a half
(1
1/2) times as well on the government course as a tire
graded
100. The relative performance of tires depends
upon the actual conditions of their use, however, and
may depart significantly from the norm due to variations in driving habits, service practices and differences in
road characteristics and climate.
Traction -- A, B, C
The traction grades, from highest to lowest, are A, B, and
C,
and they represent the tire’s ability to stop on wet
pavement as measured under controlled conditions on specified government test surfaces
of asphalt and concrete.
A tire marked
C may have poor traction performance.
Warning: The traction grade assigned to this tire is based
on braking (straight ahead) traction tests and does not include cornering (turning) traction.
Temperature -- A, B, C
The temperature grades are A (the highest), B, and C,
representing the tire’s resistance to the generation of
heat and its ability to dissipate heat when tested under
controlled conditions on
a specified indoor laboratory
test wheel. Sustained high temperature can cause the
material of the tire to degenerate and reduce tire life, and
excessive temperature can lead to sudden tire failure.
The grade C corresponds to a level of performance
which all passenger car tires must meet under the
Federal Motor Vehicle Safety Standard
No. 109. Grades
B and A represent higher levels of performance on the
laboratory test wheel than the minimum required by law.
6-45
Page 304 of 400
Downloaded from www.Manualslib.com manuals search engine Warning: The temperature grade for this tire is
established for a tire that is properly inflated and not
overloaded. Excessive speed, underinflation, or
excessive loading, either separately or in combination,
can cause heat buildup and possible tire failure.
Wheel Alignment and Tire Balance
The wheels on your vehicle were aligned and balanced
carefully at the factory to give you the longest tire life
and best overall performance.
Scheduled wheel alignment and wheel balancing are not
needed. However, if you notice unusual tire wear or your vehicle pulling one way or the other, the alignment
may need to be reset. If you notice your vehicle
vibrating when driving on a smooth road, your wheels
may need to be rebalanced.
Wheel ?eDlacement
Replace any wheel that is bent, cracked, or badly rusted
or corroded.
If wheel nuts keep coming loose, the wheel,
wheel bolts and wheel
nuts should be replaced. If the
wheel leaks air, replace it (except some aluminum
wheels, which can sometimes be repaired). See your
dealer
if any of these conditions exist. Your
dealer will know the kind
of wheel you need.
Each new wheel should have the same load-carrying capacity, diameter, width, offset and be mounted the same way as the one it replaces.
If you need to replace any of your wheels, wheel bolts
or wheel nuts, replace them only with new
GM original
equipment parts. This way, you will be sure to have the
right wheel, wheel bolts and wheel nuts for your
Chevrolet model.
A CAI'"1ON:
Using the wrong replacement wheels, wheel bolts
or wheel nuts on your vehicle can be dangerous.
It could affect the braking and handling of your
vehicle, make your tires lose air and make you
lose control. You could have a collision in which
you or others could be injured. Always use
the correct wheel, wheel bolts and wheel nuts
for replacement.
6-46
Page 306 of 400
Downloaded from www.Manualslib.com manuals search engine NOTICE: (Continued)
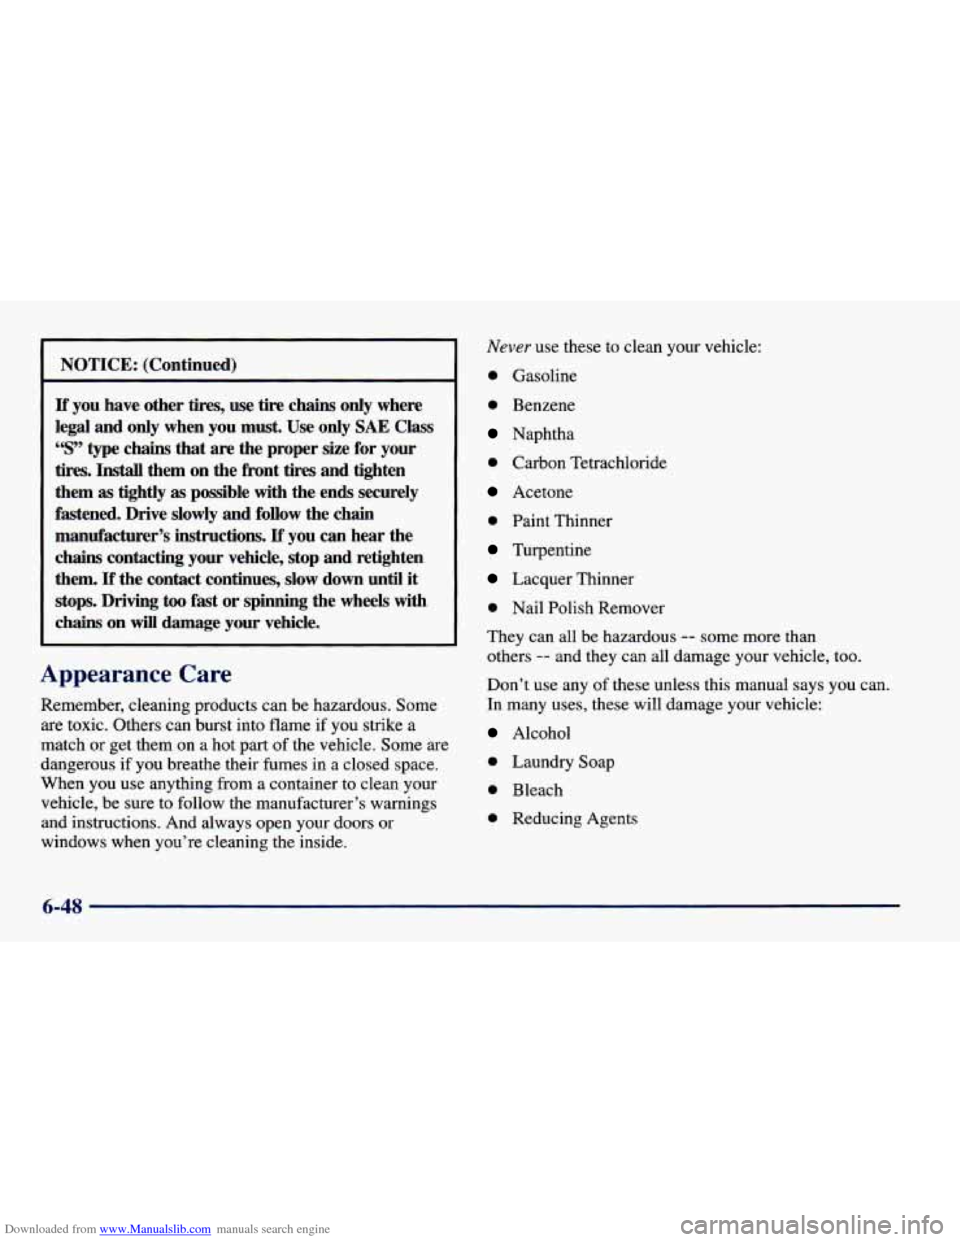
If you have other tires, use tire chains only where
legal
and only when you must. Use only SAE Class
“S” type chains that are the proper size for your
tires. Install them on the front tires and tighten
them
as tightly as possible with the ends securely
fastened. Drive slowly and follow the chain
manufacturer’s instructions.
If you can hear the
chains contacting your vehicle, stop and retighten
them.
If the contact continues, slow down until it
stops. Driving
too fast or spinning the wheels with
chains
on will damage your vehicle.
Appearance Care
Remember, cleaning products can be hazardous. Some
are toxic. Others can burst into flame if you strike a
match or get them on a hot
part of the vehicle. Some are
dangerous if you breathe their fumes in a closed space.
When you use anything from a container to clean your
vehicle, be sure
to follow the manufacturer’s warnings
and instructions. And always open your doors or
windows when you’re cleaning the inside.
Never use these to clean your vehicle:
0 Gasoline
0 Benzene
Naphtha
0 Carbon Tetrachloride
Acetone
0 Paint Thinner
Turpentine
Lacquer Thinner
0 Nail Polish Remover
They can all be hazardous
-- some more than
others
-- and they can all damage your vehicle, too.
Don’t use any
of these unless this manual says you can.
In many uses, these will damage your vehicle:
Alcohol
0 Laundry Soap
0 Bleach
0 Reducing Agents
6-48
Page 319 of 400
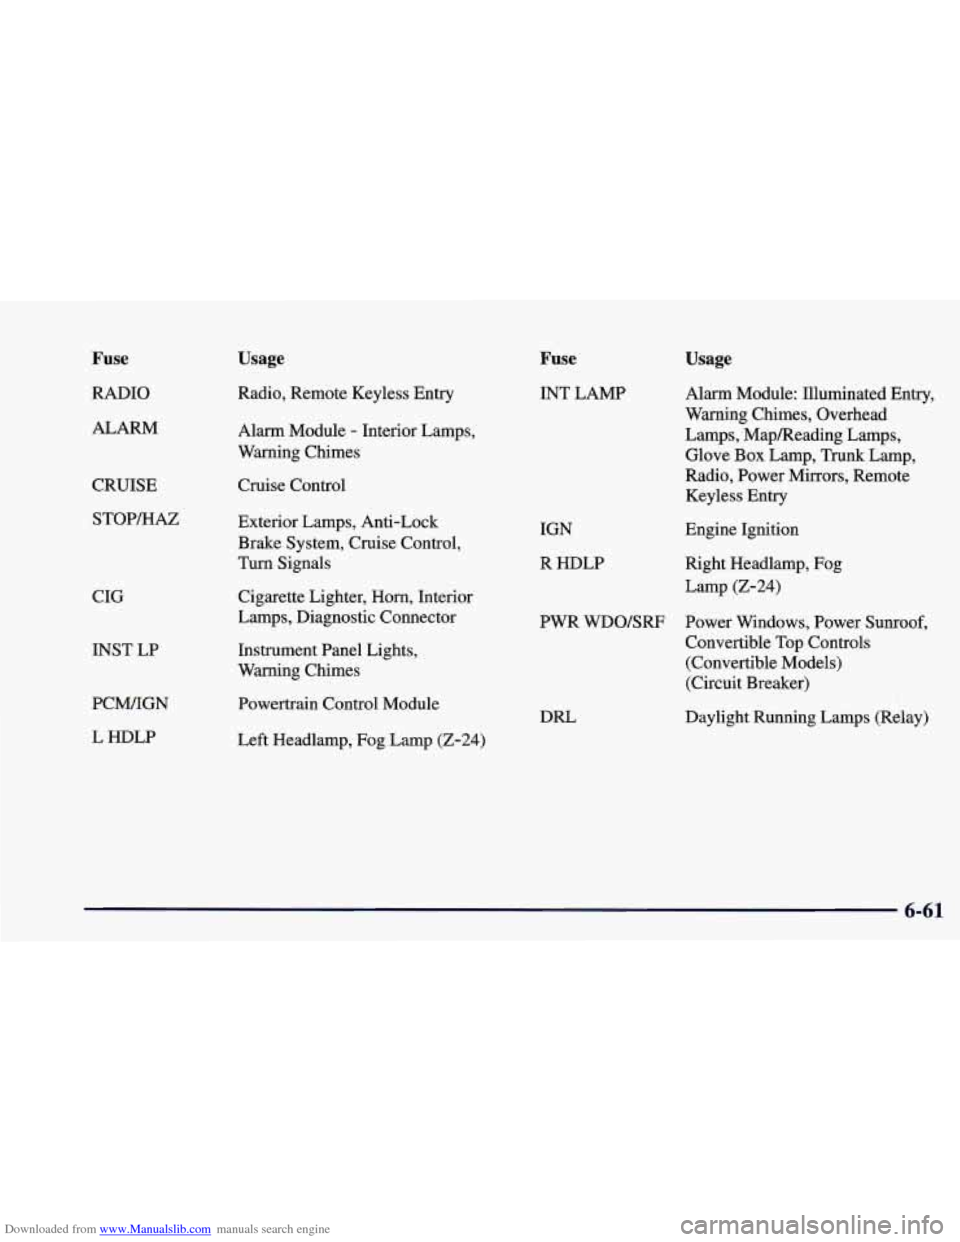
Downloaded from www.Manualslib.com manuals search engine Fuse
RADIO
ALARM CRUISE STOP/HAZ
CIG
INST LP
PCM/IGN
L HDLP
Usage
Radio, Remote Keyless Entry
Alarm Module
- Interior Lamps,
Warning Chimes
Cruise Control
Exterior Lamps, Anti-Lock
Brake System, Cruise Control,
Turn Signals Cigarette Lighter,
Horn, Interior
Lamps, Diagnostic Connector
Instrument Panel Lights,
Warning Chimes
Powertrain Control Module
Left Headlamp, Fog Lamp
(2-24)
Fuse
INT LAMP
IGN
R HDLP
Usage
Alarm Module: Illuminated Entry,
Warning Chimes, Overhead
Lamps, MapReading Lamps,
Glove Box Lamp, Trunk Lamp,
Radio, Power Mirrors, Remote Keyless
Entry
Engine Ignition
Right Headlamp, Fog
Lamp
(2-24)
PWR WDO/SRF Power Windows, Power Sunroof,
Convertible Top Controls
(Convertible Models)
(Circuit Breaker)
DRL Daylight Running Lamps (Relay)
6-61
Page 383 of 400
Downloaded from www.Manualslib.com manuals search engine 0 Section 9 Index
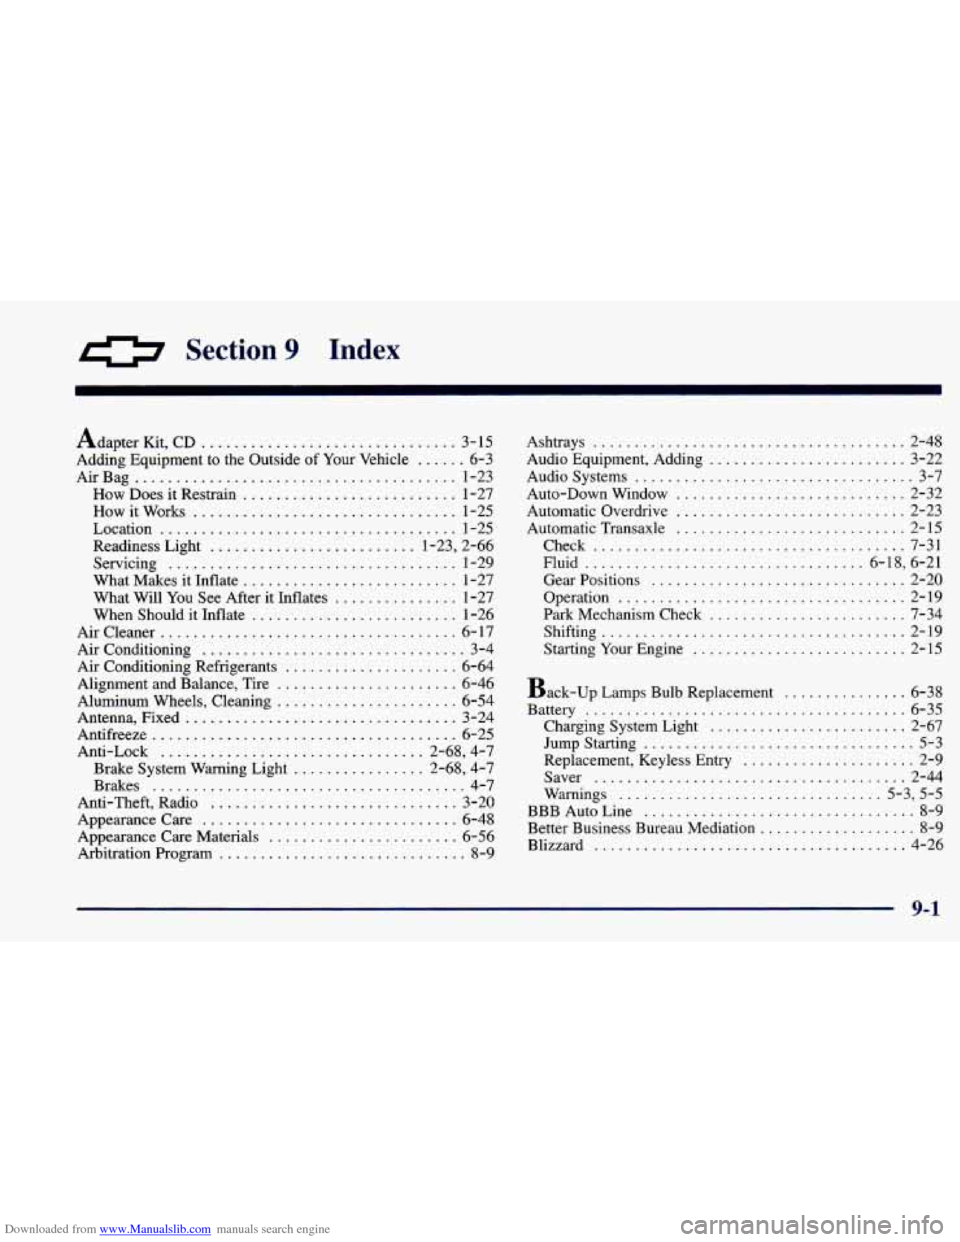
Adapter Kit. CD ............................... 3- 15
Adding Equipment to the Outside of Your Vehicle
...... 6-3
AirBag
....................................... 1-23
How Does it Restrain .......................... 1-27
How it Works ................................ 1-25
Location
.................................... 1-25
Readiness Light
......................... 1-23, 2-66
What Makes it Inflate
.......................... 1-27
What Will You See After it Inflates
............... 1-27
When Should it Inflate
......................... 1-26
Aircleaner
.................................... 6-17
Air Conditioning
................................ 3-4
Air Conditioning Refrigerants
..................... 6-64
Alignment and Balance, Tire
...................... 6-46
Aluminum Wheels, Cleaning
...................... 6-54
Antenna, Fixed
................................. 3-24
Antifreeze
..................................... 6-25
Anti-Lock
................................ 2-68, 4-7
Brake System Warning Light
................ 2-68, 4-7
Brakes
...................................... 4-7
Anti-Theft, Radio
.............................. 3-20
Appearancecare
............................... 6-48
Appearance Care Materials
....................... 6-56
Arbitration Program
.............................. 8-9
Servicing
................................... 1-29
Ashtrays
...................................... 2-48
Audio Systems
.................................. 3-7
Auto-Down Window
............................ 2-32
Automatic Overdrive
............................ 2-23
Automatic Transaxle
............................ 2-15
Check
...................................... 7-31
Fluid
.................................. 6-18, 6-21
Gear Positions
............................... 2-20
Operation
................................... 2-19
Park Mechanism Check
........................ 7-34
Shifting
..................................... 2-19
Starting Your Engine
.......................... 2-15
Audio Equipment. Adding
........................ 3-22
Back-up Lamps Bulb Replacement
............... 6-38
Battery
....................................... 6-35
Charging System Light
........................ 2-67
Jump Starting
................................. 5-3
Replacement. Keyless Entry
..................... 2-9
Saver
...................................... 2-44
Warnings
................................ 5-3, 5-5
BBB Auto Line ................................. 8-9
Better Business Bureau Mediation
................... 8-9
Blizzard
...................................... 4-26
9-1
Page 384 of 400
Downloaded from www.Manualslib.com manuals search engine Brake Adjustment
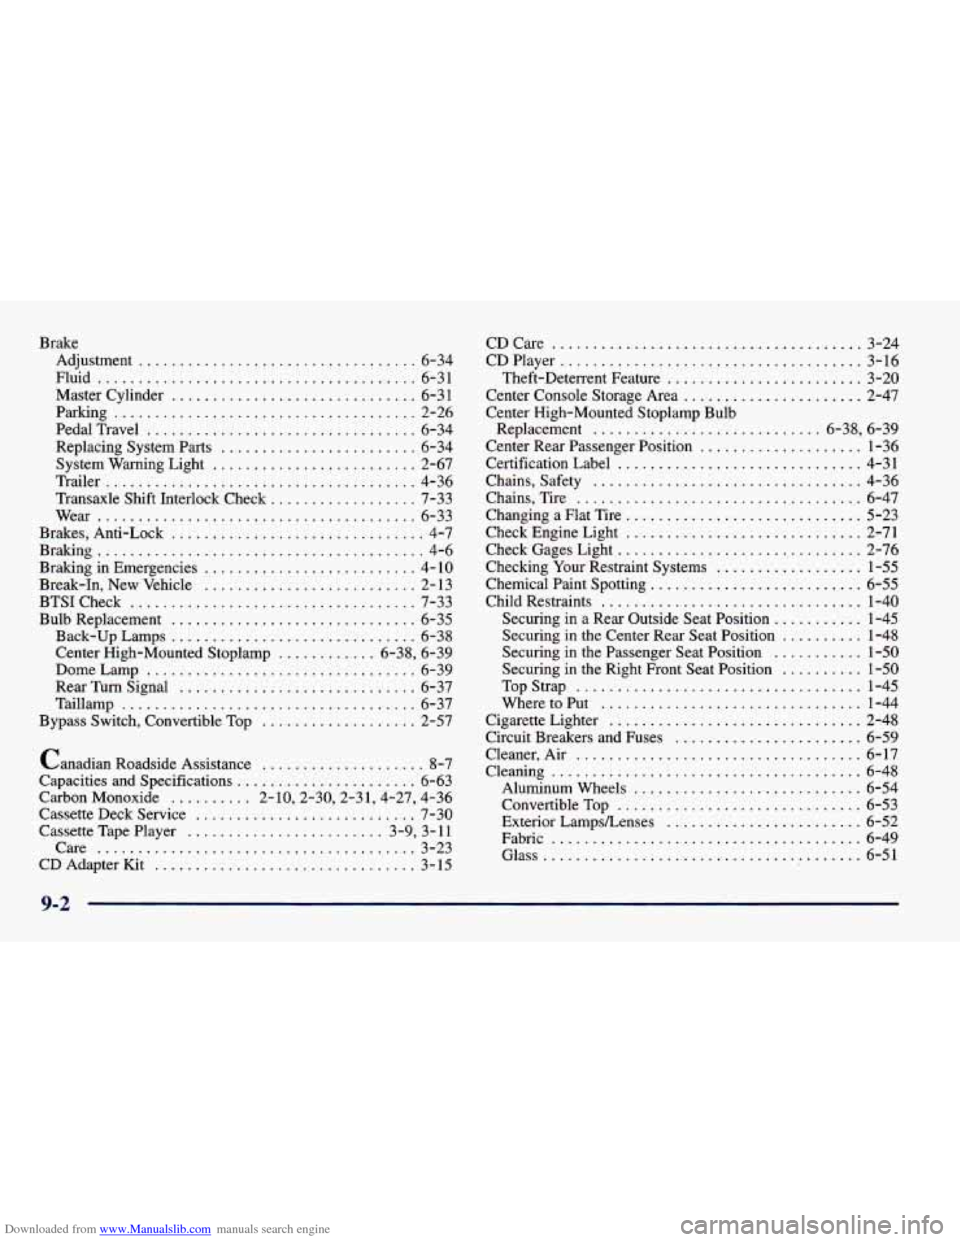
.................................. 6-34
Fluid
....................................... 6-31
Master Cylinder
.............................. 6-3 1
Parking ..................................... 2-26
PedalTravel
................................. 6-34
Replacing System Parts
........................ 6-34
System Warning Light
......................... 2-67
Trailer
...................................... 4-36
Transaxle Shift Interlock Check
.................. 7-33
Wear
....................................... 6-33
Brakes.Anti -Lock
............................... 4-7
Braking in Emergencies
.......................... 4- 10
Break-In. New Vehicle
.......................... 2- 13
BTSICheck ................................... 7-33
Bulb Replacement
.............................. 6-35
Back-up Lamps
.............................. 6-38
Center High-Mounted Stoplamp
............ 6-38. 6-39
Dome Lamp
................................. 6-39
RearTurnSignal
............................. 6-37
Taillamp
.................................... 6-37
Bypass Switch. Convertible Top
................... 2-57
Braking
........................................ 4-6
Canadian Roadside Assistance
.................... 8-7
Capacities and Specifications
...................... 6-63
Carbon Monoxide
.......... 2.10.2.30.2.31.4.27. 4.36
Cassette Deck Service
........................... 7-30
Cassette Tape Player
........................ 3.9. 3. 11
Care
....................................... 3-23
CD Adapter Kit
................................ 3- 15 CDCare
...................................... 3-24
CDPlayer
..................................... 3-16
Theft-Deterrent Feature
........................ 3-20
Center Console Storage Area
...................... 2-47
Center High-Mounted Stoplamp Bulb
Replacement
............................ 6.38. 6.39
Center Rear Passenger Position
.................... 1-36
Certification Label
.............................. 4-31
Chains. Safety
................................. 4-36
Chains. Tire
................................... 6-47
Changing a Flat Tire
............................. 5-23
Check Engine Light
............................. 2-71
Check Gages Light
.............................. 2-76
Checking Your Restraint Systems
.................. 1-55
Chemical Paint Spotting
.......................... 6-55
Child Restraints
................................ 1-40
Securing in a Rear Outside Seat Position ........... 1-45
Securing
in the Center Rear Seat Position .......... 1-48
Securing in the Passenger Seat Position
........... 1-50
Securing in the Right Front Seat Position
.......... 1-50
Top Strap ................................... 1-45
WheretoPut ................................ 1-44
Cigarette Lighter
............................... 2-48
Circuit Breakers and Fuses
....................... 6-59
Cleaner. Air
................................... 6-17
Cleaning
...................................... 6-48
Aluminum Wheels
............................ 6-54
ConvertibleTop
.............................. 6-53
Exterior LampsLenses
........................ 6-52
Fabric
...................................... 6-49
Glass ....................................... 6-51