Page 114 of 346

Downloaded from www.Manualslib.com manuals search engine Fog Lamps Cornering Lamps
Use
the fog lamps for better
vision in foggy or misty
conditions.
Press this button
to turn the fog lamps on and
press the button again to
I turn the lamps off. (The fog
lamps only work when the
parking lamps or the
low-beam headlamps
are on.)
I
This light on the instrument
panel will come on
when the fog lamp button
is pressed. 50
I
If you turn on the high-beam headlamps, the fog lamps
will turn
off. They'll turn back on again when you
switch to low-beam headlamps. The
cornering lamps come
on when the headlamps or
parking lamps are on and you signal a turn. They
provide more light for cornering.
Twilight Sentinel
This feature is below the
lamp control dial on the left
side
of the instrument panel.
It automatically switches
the parking lamps and
low-beam headlamps on
and off by sensing how dark
it is outside.
To operate the twilight sentinel, the ignition must be in
ON or START and the twilight sentinel must be turned
on by pressing the
OFF button (an indicator light in the
button will be
off when the twilight sentinel is
activated). If the system senses it is dark outside, the
lamps will turn on. The lamps turn off when the system
detects that it is bright outside.
Page 115 of 346

Downloaded from www.Manualslib.com manuals search engine If you rotate the control dial all the way up, the lamps Light Sensor
will remain on for about three minutes after the ignition
has been turned to
OFF or LOCK. If you rotate the
control dial all the way down, the lamps will go
off
quickly. You can adjust the delay time from a few
seconds up to three minutes.
I
1
1 To turn the twilight sentinel off, press the OFF button
again. The indicator light in the button will be on.
This
lets the driver know that the system has been turned off.
The twilight sentinel also turns off if the ignition is
turned to
OFF or to LOCK.
-. ~ ~ -- - This light in the instrument
panel will come on if the ignition is on and: The
light sensor for the twilight sentinel is located in the
center of the front defogger grille. If you cover the
sensor, it will read “dark” and the parking lamps and
low-beam headlamps will come on.
1 0 The headlamps have not been manually turned on,
1 0 The twilight sentinel senses it is dark outside,
l 0 The twilight sentinel is OFF and
~ 0 The transmission is not in PARK (P).
Page 116 of 346
Downloaded from www.Manualslib.com manuals search engine Interior Lamps
Instrument Panel Brightness Control
This control dial is located to the right of the fog lamp
button. As you rotate the control dial up, the instrument
panel lights will brighten.
Illuminated Entry
This system turns on the courtesy lamps (dome lamps
and door entry lamps) for about
20 seconds when any of
the following occur:
0 If you manually unlock your vehicle with the key,
0 If any door is opened,
0 If you press the unlock button on the remote keyless
entry transmitter, or
0 After the last door on your vehicle is closed.
Illuminated entry immediately ends when your vehicle’s
ignition
is turned to ON or START.
Rear Reading Lamps
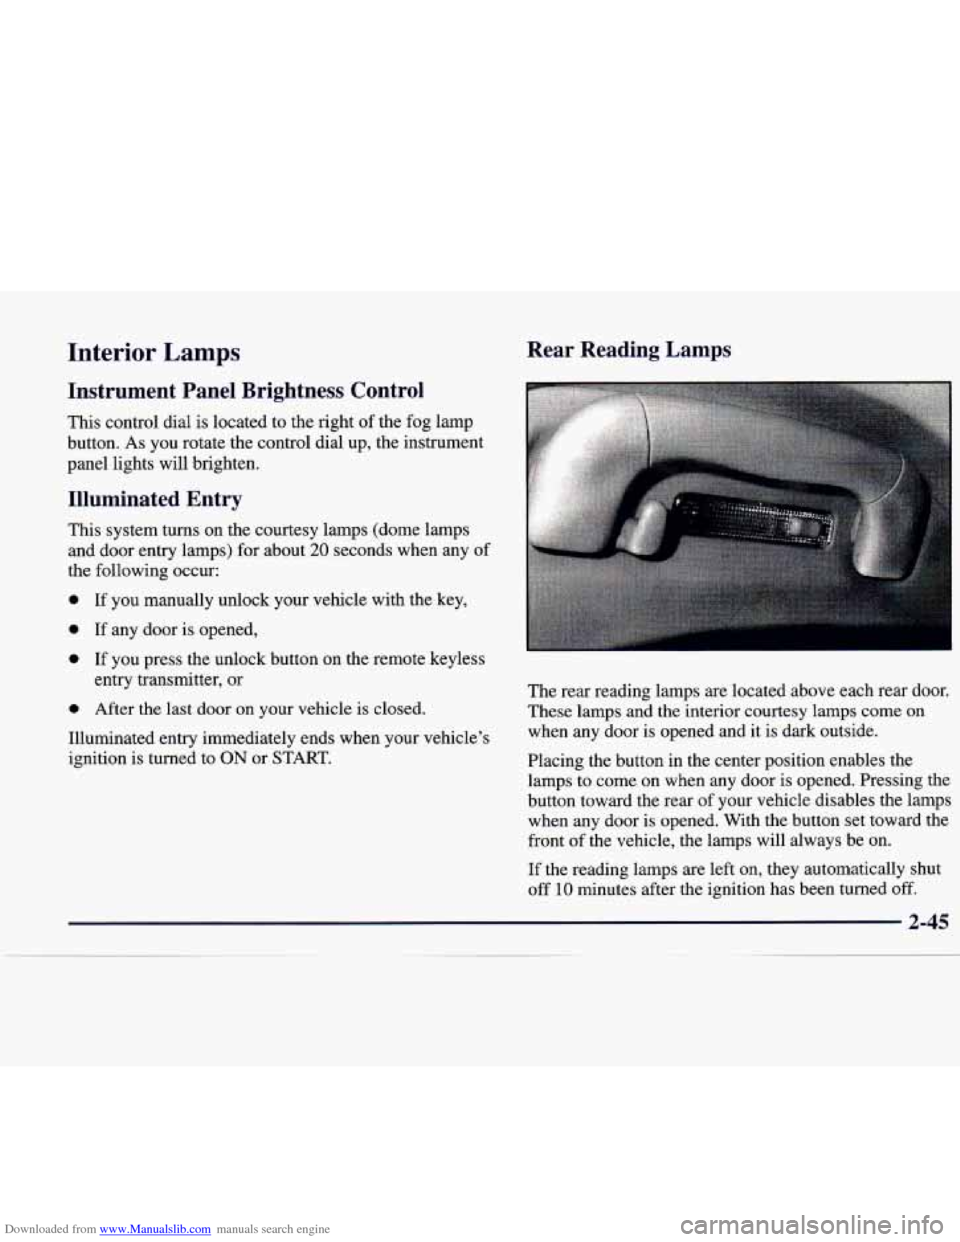
The rear reading lamps are located above each rear door.
These lamps
and the interior courtesy lamps come on
when any door is opened and it is dark outside.
Placing the button in the center position enables the
lamps to come on when any door is opened. Pressing the
button toward the rear of your vehicle disables the lamps
when any door is opened. With the button set toward the
front
of the vehicle, the lamps will always be on.
If the reading lamps are left on, they automatically shut
off
10 minutes after the ignition has been turned off.
2-45
Page 131 of 346
Downloaded from www.Manualslib.com manuals search engine Instrument Panel
Page 132 of 346
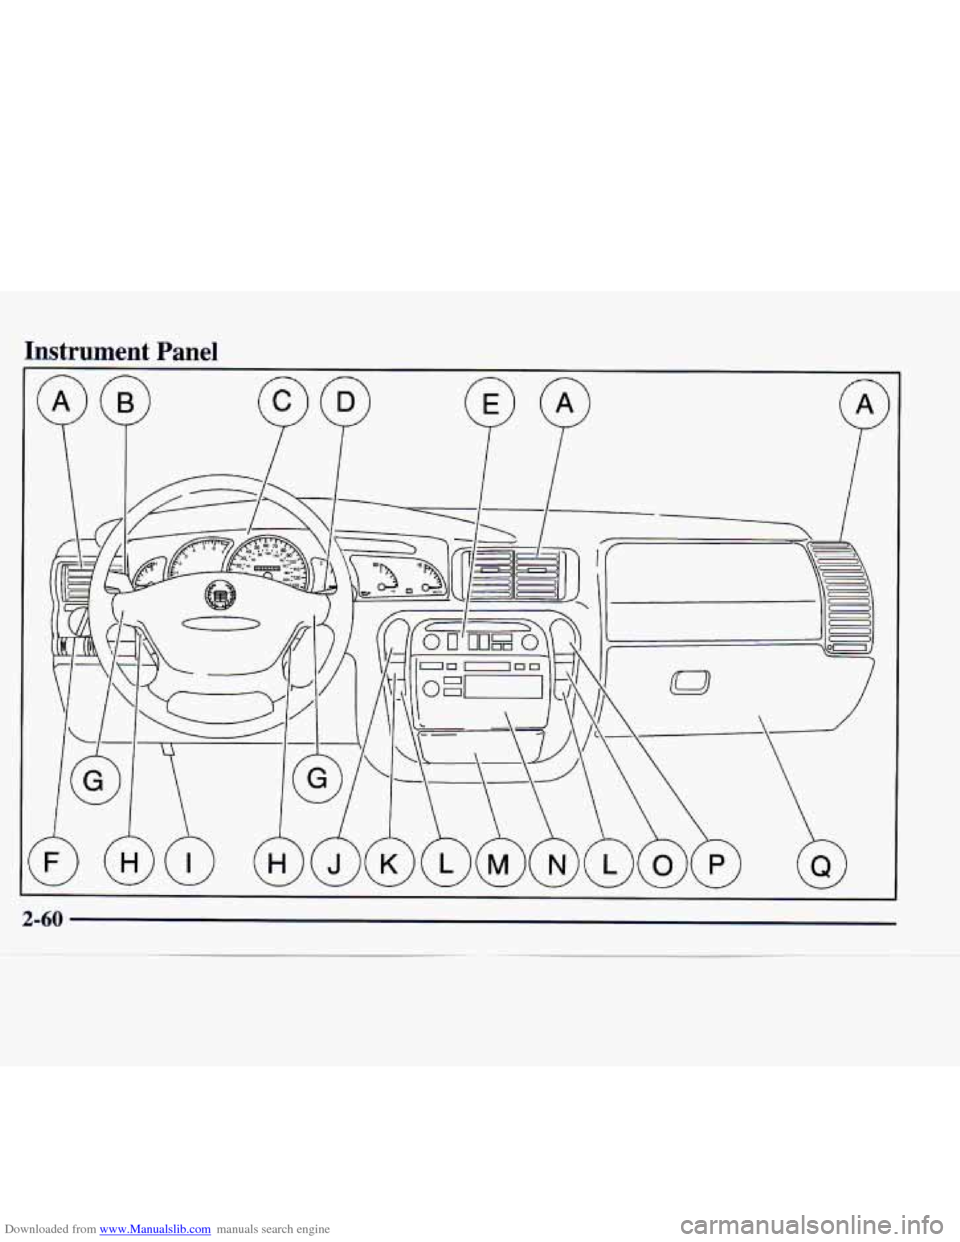
Downloaded from www.Manualslib.com manuals search engine The instrument panel is designed to let you know at a
glance how your vehicle is running. You’ll know how
fast you’re going, how much fuel you’re using and
many of the other things you’ll need to know to drive
safely and economically. The main components of the
instrument panel are:
A. Air Outlets
B. Turn SignalMultifunction Lever
C. Instrument Cluster
D. Windshield Washer Lever
E. Comfort Controls
E Lamp Controls
G. Horn H. Steering Wheel Touch Controls
for Audio System
I. Hood Release
J. Hazard Warning Flasher Button
K. Fuel Door Release Button
L. Heated Front Seat
Ordoff Button (Option)
M. Ashtray
N. Radio
0. Trunk Release Button
P. Traction Control OdOff Button
Q. Glove Box
Page 133 of 346
Downloaded from www.Manualslib.com manuals search engine Instrument Panel Cluster
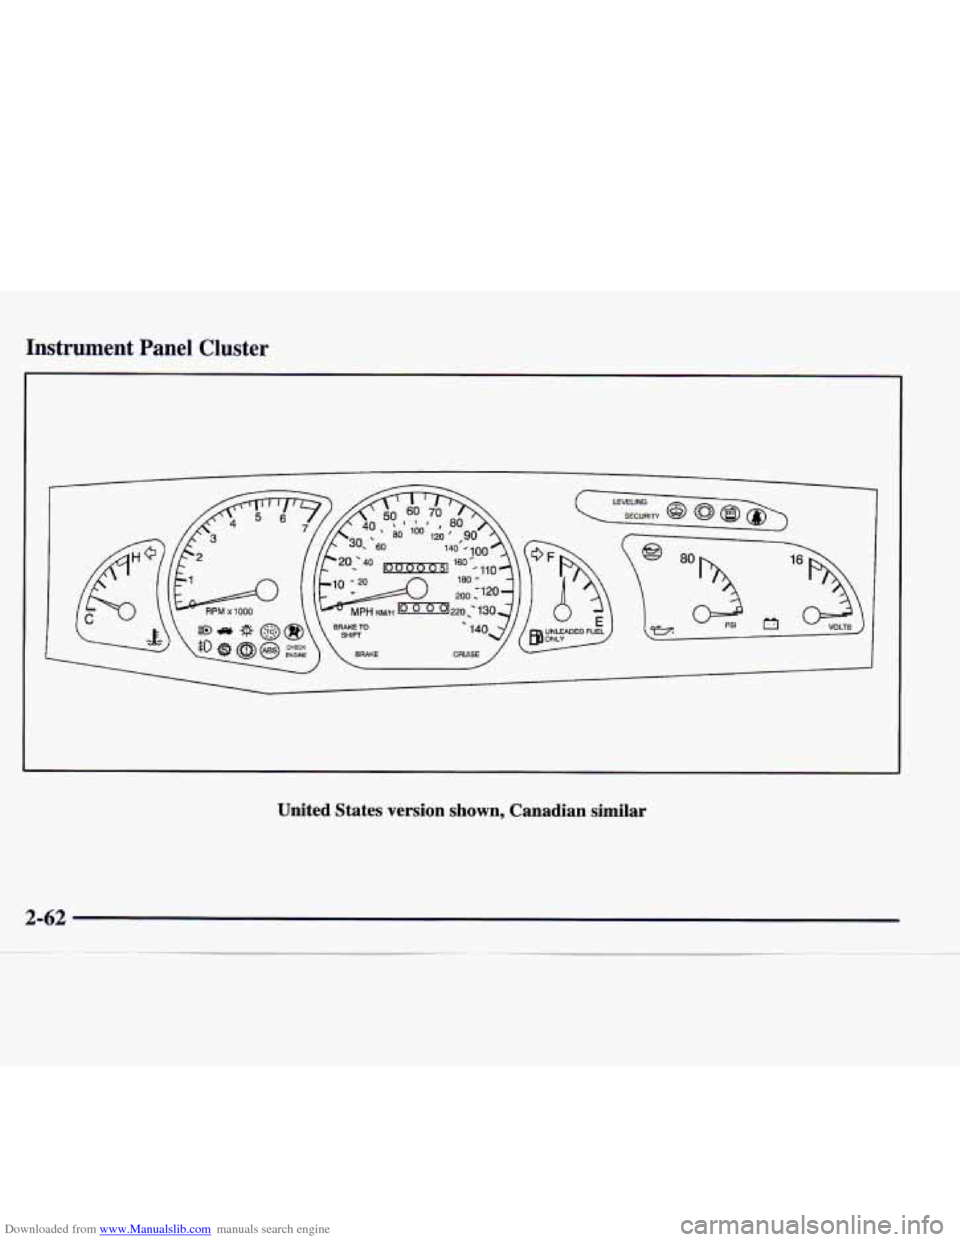
United States version shown, Canadian similar
Page 136 of 346

Downloaded from www.Manualslib.com manuals search engine Air Bag Readiness Light
There is an air bag readiness light on the instrument
panel, which shows the air bag symbol. The system
checks the air bag’s electrical system for malfunctions.
The light tells you if there is an electrical problem. The
system check includes the air bag sensors, the air bag
modules, the wiring and the diagnostic module. For
more information on the air bag system, see “Air Bag”
in the Index.
This light will come on
when you start your engine,
and
it will flash for a few
seconds. Then the light
should go out. This means
the system is ready.
If the air bag readiness light stays on after you start the
engine or comes on when you are driving, your air bag
system may not work properly. Have your vehicle
serviced right away.
The air bag readiness light should flash for
a few
seconds when you turn the ignition key to
ON. If the
light doesn’t come on then, have
it fixed so it will be
ready to warn you if there is a problem.
Charging System Indicator Light
El
When you turn the key
to START, this light will
come on briefly to show
that the generator and
battery charging systems are working.
If this light stays on, you need service and you should
take your vehicle to the dealer at once. To save the
battery until you get there, turn
off all accessories.
Brake System Warning Light
Your vehicle’s hydraulic brake system is divided into
two parts. If one part isn’t working, the other part can
still work and stop you. For good braking, though, you
need both parts working well.
If the warning light comes on, there is a brake problem.
Have your brake system inspected right away.
Page 150 of 346

Downloaded from www.Manualslib.com manuals search engine Outside Temperature Display
The outside temperature is always displayed when your
vehicle's ignition is on. If the outside temperature
display begins to flash, this means that icy road
conditions
are possible. Adjust your driving if needed.
The display will flash for about
30 seconds and then
remain on steady.
Mode Button
Press this button to deliver air through the floor, middle
or windshield outlets. The climate control system will
stay in the selected ECC mode until the MODE button is
pressed again or until the TEMP/AUTO knob is pressed.
Press the up or down arrow to see the available modes.
EnglisWetric Display
You can change the temperature display from English
(degrees Fahrenheit) to metric (degrees Celsius) by
pressing and holding the driver's side TEMP/AUTO
knob for approximately three seconds. Repeat the
process to change back to English from metric.
Automatic Operation
Pressing the driver's side TEMP/AUTO knob sets the
system for automatic operation. Once the system is set,
sensors will control the air delivery mode. Air will come
from the floor, middle, side
or windshield outlets. The
fan speed will
vary as the system maintains the selected
temperature setting. (All previous manually set mode
settings will change back to a fully automatic mode
when the climate control system is turned on this way.)
Be careful not to put anything over the solar sensor
located in the middle of the instrument panel near the
windshield. This sensor is used by the automatic system
to regulate temperature.
To find your comfort zone, start with the
75 "F (24°C)
setting and allow about 20 minutes for the system to
regulate air temperature. Adjust the temperature if
necessary. If you choose
60 OF (1 6 " C), the system will
remain at that maximum cooling setting and will not
regulate fan speed. If you choose the temperature of
90" F (32"C), the system will remain at that maximum
heating setting and will not regulate fan speed. Choosing
either maximum setting will not cause the system to heat
or cool any faster.