1998 BMW CONVERTIBLE steering
[x] Cancel search: steeringPage 115 of 179

11 4
We recommend winter tires (M+S radial
tires) for operation under inclement win-
ter driving conditions. Although all-sea-
son M+S tires provide better winter
traction than standard summer tires
with H, V, W and ZR speed ratings, they
generally fail to provide the same levels
of performance as standard snow tires
in winter driving.
If you fit winter tires, install radial tires
of the same tread configuration and
from a single manufacturer on all four
wheels (better still: on all five wheels).
This ensures safe tracking and steering
response.
Fit BMW-approved winter tires only.
Any BMW Retailer will be glad to pro-
vide you with information on the best
winter tires for your particular driving
conditions.Winter tires display a perceptible loss in
their ability to cope with winter driving
conditions once the tread wears to
below 0.16 in (4 mm), and should thus
be replaced.
Observe the specified tire inflation
pressures - and be sure to have the
wheel and tire assemblies balanced
every time you change the tires!
a
Never exceed the maximum speed
for which the tires are rated.
Unprofessional attempts by laymen to
service tires can lead to damage and ac-
cidents.
Have this work performed by skilled pro-
fessionals only. Your BMW Retailer will
be glad to assist you.c
Store tires in a cool, dry place, away
from light whenever possible. Protect
the tires from contact with oil, grease
and fuel.
Winter tires
Page 124 of 179

12 3
At a glanceControlsCar careRepairsTechnicalDataIndex
1 Fuse box
2 Engine oil dipstick
3 Brake ßuid reservoir
4 Power steering oil reservoir
5 Coolant expansion tank
6 Engine oil Þller neck
7 Supply tank for headlamp washer
*
and windshield washer system
8 Auxiliary terminal for jump starting
Engine compartment BMW 323i, 323is, 328i, 328is
Page 126 of 179

12 5
At a glanceControlsCar careRepairsTechnicalDataIndex
Measure the oil level:
1 Pull out dipstick and wipe off with a
lint-free cloth, paper tissue, etc.
2 Push the dipstick all the way into the
guide tube and pull it out again.
3 The oil level should be between the
two marks on the dipstick.
Add oil Wait until the level has dropped to just
above the lower graduation before add-
ing oil. Never wait until the oil drops
below the lower mark.
The space between the two marks on
the dipstick corresponds to approxi-
mately 1.1 US quarts (1 liter). Do not fill
to beyond the upper mark on the dip-
stick. Excess oil harms the engine.
Because it would be consumed within a
short period, it would also result in an
abnormally high rate of oil consump-
tion.a
BMW engines are designed to op-
erate without oil additives; the use of ad-
ditives could lead to damage in some
cases. This also applies to the manual
and automatic transmissions, the differ-
ential and the power steering system.c
Engine oil specificationsAlways refer to the API specifications
when selecting oil.
Required quality:
API SH
API-SH/CD
API-SH/CEViscosity ratingsViscosity = Oil flow rating according to
SAE class.
Select the SAE viscosity rating accord-
ing to the average seasonal air temper-
ature.
Consult the table on the following page
to determine the correct SAE viscosity.
You can continue to operate the vehicle
for short periods of time at tempera-
tures beyond the range for the SAE rat-
ing of the oil being used.A
Always observe all environmental
protection guidelines and regulations
when disposing of used oil.c
Recommendation: have the oil changed
by your BMW Retailer.
360de096
Engine oil
Page 129 of 179

12 8
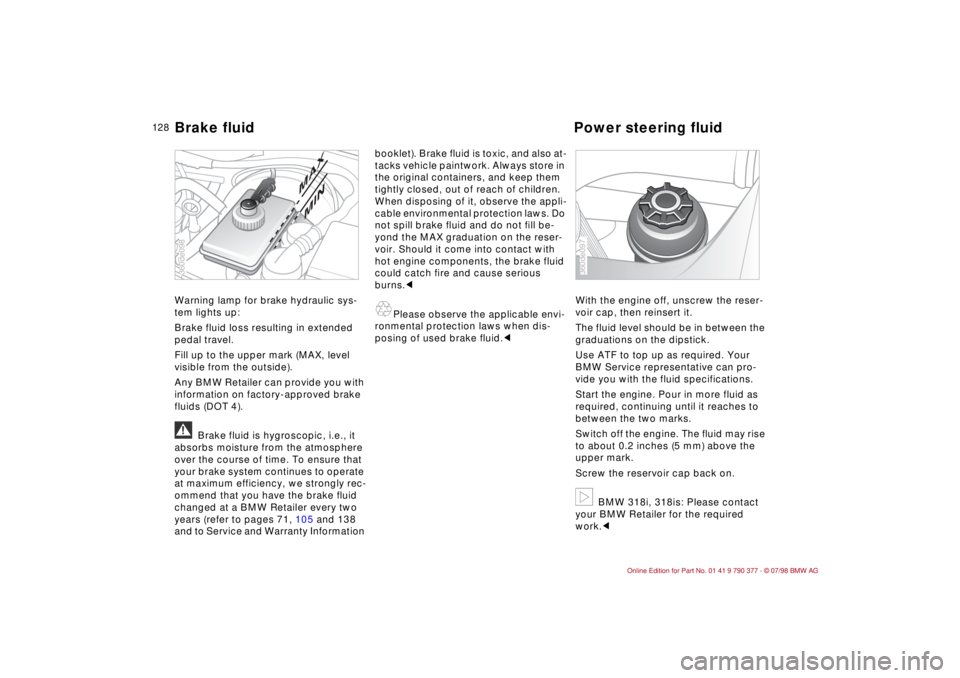
Warning lamp for brake hydraulic sys-
tem lights up:
Brake fluid loss resulting in extended
pedal travel.
Fill up to the upper mark (MAX, level
visible from the outside).
Any BMW Retailer can provide you with
information on factory-approved brake
fluids (DOT 4).
a
Brake fluid is hygroscopic, i.e., it
absorbs moisture from the atmosphere
over the course of time. To ensure that
your brake system continues to operate
at maximum efficiency, we strongly rec-
ommend that you have the brake fluid
changed at a BMW Retailer every two
years (refer to pages 71, 105 and 138
and to Service and Warranty Information booklet). Brake fluid is toxic, and also at-
tacks vehicle paintwork. Always store in
the original containers, and keep them
tightly closed, out of reach of children.
When disposing of it, observe the appli-
cable environmental protection laws. Do
not spill brake fluid and do not fill be-
yond the MAX graduation on the reser-
voir. Should it come into contact with
hot engine components, the brake fluid
could catch fire and cause serious
burns.c
A
Please observe the applicable envi-
ronmental protection laws when dis-
posing of used brake fluid.cWith the engine off, unscrew the reser-
voir cap, then reinsert it.
The fluid level should be in between the
graduations on the dipstick.
Use ATF to top up as required. Your
BMW Service representative can pro-
vide you with the fluid specifications.
Start the engine. Pour in more fluid as
required, continuing until it reaches to
between the two marks.
Switch off the engine. The fluid may rise
to about 0.2 inches (5 mm) above the
upper mark.
Screw the reservoir cap back on.
b
BMW 318i, 318is: Please contact
your BMW Retailer for the required
work.c
MAXMIN
360de098
360de097
Brake fluid Power steering fluid
Page 130 of 179

12 9
At a glanceControlsCar careRepairsTechnicalDataIndex
High steering effort:
Check oil level, refer to previous page.
High steering effort during sudden tran-
sitions:
Please contact your BMW Retailer for
an immediate inspection.a
If the power steering fails, in-
creased effort will be required to steer
the vehicle.c
In the engine compartment on the right-
hand side of the heater partition panel
(arrow).
The information on the type plate and
the Vehicle Identification Number must
match those contained in the vehicle
papers.
These data are essential for processing
inquiries, expediting service procedures
and when ordering replacement parts.
360de310
Power steering fluid Vehicle Identification Number
Page 147 of 179

14 6
a
Change tires only on a flat, hard
surface affording good traction. Avoid
jacking the car on a soft or slippery sup-
port surface (snow, ice, loose gravel,
etc.), as it could slide sideways.
Take extra care to ensure that the base
of the jack is positioned on a solid sup-
port surface.
Never use wooden blocks or similar
objects to support the base of the jack,
as the weight of the car could exceed
their support capacity.
Never lie beneath the vehicle or start
the engine while the car is supported by
the jack - risk of fatal injury.
Additional precautions to observe when
changing flat tires:
When pulling over on the roadside to
change a tire, always try to park the car
as far as possible from passing traffic.
Switch on the hazard flashers.
All passengers should be outside the
car and well away from your immediate
working area (e.g., behind the guard-
rail).Turn the steering wheel to the straight-
ahead position, remove the key and
engage the steering lock. Shift into 1st
or reverse (selector lever in Park with
automatic) and engage the parking
brake.
If a warning triangle or portable hazard
warning lamp is available, set it up on
the roadside at an appropriate distance
from the rear of the vehicle. Observe all
safety guidelines and regulations.c
b
To avoid rattling noises, note the
positions of the tools and return them to
their original positions.c
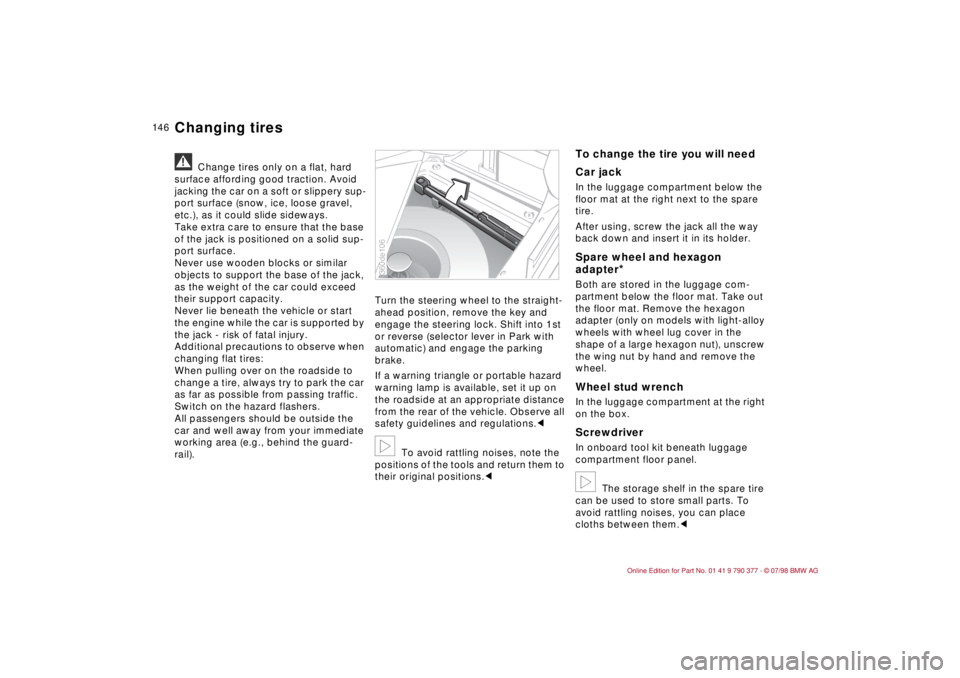
To change the tire you will need
Car jackIn the luggage compartment below the
floor mat at the right next to the spare
tire.
After using, screw the jack all the way
back down and insert it in its holder.Spare wheel and hexagon
adapter
*
Both are stored in the luggage com-
partment below the floor mat. Take out
the floor mat. Remove the hexagon
adapter (only on models with light-alloy
wheels with wheel lug cover in the
shape of a large hexagon nut), unscrew
the wing nut by hand and remove the
wheel.Wheel stud wrench In the luggage compartment at the right
on the box. ScrewdriverIn onboard tool kit beneath luggage
compartment floor panel.b
The storage shelf in the spare tire
can be used to store small parts. To
avoid rattling noises, you can place
cloths between them.c
360de106
Changing tires
Page 155 of 179

15 4
Tow fittingsThe screw-in tow fitting is stored in the
onboard tool kit; ensure that it remains
with the vehicle at all times. It can be
screwed in to either the front or the rear
of the vehicle and is intended for towing
only on a roadway. Access to tow socketsFront:
Pry out the cover with a screwdriver.Rear:
Pry out the cover with a screwdriver.
a
Ensure that the tow fitting is
screwed in tightly.c
Vehicles with automatic transmission:
dSelector lever on N.
Towing speed:
maximum 30 mph (50 km/h).
Towing distance:
maximum 30 miles (50 km).
a
The steering and brakes are with-
out power assist when the engine is off.
This means that increased effort is re-
quired for steering and braking.c
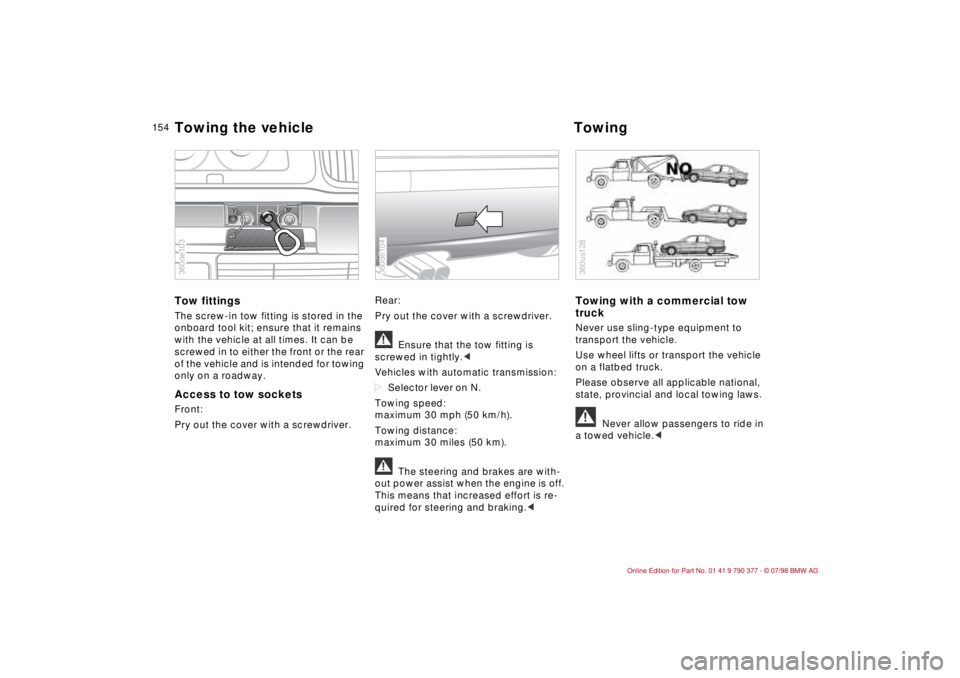
Towing with a commercial tow
truckNever use sling-type equipment to
transport the vehicle.
Use wheel lifts or transport the vehicle
on a flatbed truck.
Please observe all applicable national,
state, provincial and local towing laws.a
Never allow passengers to ride in
a towed vehicle.c
360de103
360de104
360us128
Towing the vehicle Towing
Page 157 of 179

15 6
Deceleration sensors continuously
monitor the physical forces acting upon
the vehicle. If a frontal impact results in
deceleration, for which the protection
afforded by safety belts no longer suf-
fices, the gas generators of the driver's
and the passenger's airbags ignite
simultaneously. The passenger's air-
bag is activated only when a special
sensor indicates that the front passen-
ger's seat is occupied.
In the event of a severe side impact the
side airbag
* is activated on the side on
which the impact occurred.
The airbags, which are under the cover
of the steering wheel, in the instrument
panel or the side trim panels of the front
doors, are deployed and inflated by the
gas within a few milliseconds. In the
process they tear or push apart the pro-grammed separation points in their
upholstered covers.
Because the inflation process must be
virtually instantaneous, it is necessarily
accompanied by a certain amount of
ignition and inflation noise. The gas
which the system employs to inflate the
airbag is not dangerous, and the asso-
ciated smoke is quickly dissipated.
The entire process is completed within
one twentieth of a second.Automatic Stability Control plus Trac-
tion helps maintain stable and con-
trolled vehicle response by inhibiting
slip at the drive wheels.
The system employs special sensors to
monitor wheelspeed and relay the data
to the system's electronic control unit,
which uses this information to calculate
slip rates at the individual wheels.
Depending on the driving situation, two
forms of remedial action can then be
taken by the system: it reacts to slip-
page caused by large amounts of
excess torque by instructing the engine
management system to reduce power
output. As a supplementary measure,
the system will also respond to an
especially pronounced tendency to-
ward traction loss at either of the drive
wheels with automatic individual appli-
cation of the affected wheel's brakes.
This achieves a locking action compa-
rable with a controlled limited-slip dif-
ferential. This brake action is active up
to 25 mph (40 km/h). From 25 mph
(40 km/h) upward, a diminished brake
action improves the traction up to
60 mph (100 km/h).
390de012Airbags ASC+T*