1998 BMW CONVERTIBLE clock
[x] Cancel search: clockPage 11 of 179
Contents
At a glance
Controls and features
Cockpit16
Instrument cluster18
Indicator and warning
lamps20
Hazard warning system22
Hazard warning triangle22
First-aid kit22
Refueling23
Fuel specification23
CARB OBD II interface24
Tire inflation pressures25
Locks and security systems:
Keys30
Electronic immobilizing device35
Doors31
Trunk lid33
Luggage compartment34
Power windows35
Sliding/tilt sunroof36
Convertible top operation37
Adjustments:
Seats43
Steering wheel45
Mirrors46
Passenger safety systems:
Safety belts47
Child restraint system48
Installing child seats49
Airbags50
Child-safety locks52
Rollover protection system Ð
convertible52
Driving:
Steering/ignition lock54
Starting the engine54
Switching off the engine55
Parking brake56
Manual transmission57
Automatic transmission58
Turn signals/high beam60
Wiper/washer system61
Cruise control62
Everything under control:
Odometer63
Tachometer63
Energy control63
Fuel gauge64
Coolant temperature gauge64
Service Interval Display64
Multi-Information Display (MID)66
Outside temperature display
and digital clock68
Check Control71
Check Control with outside
temperature display and
digital clock74
Onboard computer77
Technology for driving comfort
and safety:
Automatic stability control
plus traction (ASC+T)84
Page 29 of 179
28
Locks and security systems:
Keys30
Electronic vehicle immobilizer 30
Doors31
Luggage compartment lid33
Luggage compartment34
Power windows35
Sliding/tilt sunroof36
Convertible top operation37
Adjustments:
Seats43
Steering wheel45
Mirrors46
Passenger safety systems:
Safety belts47
Child restraint system48
Installing child seats49
Airbags50
Child-safety locks52
Rollover protection system Ð
convertible52Driving:
Steering/ignition lock54
Starting the engine54
Switching off the engine55
Parking brake56
Manual transmission57
Automatic transmission58
Turn signals/high beam60
Wiper/washer system61
Cruise control62
Everything under control:
Odometer63
Tachometer63
Energy control63
Fuel gauge64
Coolant temperature gauge64
Service Interval Display64
Multi-Information Display (MID)66
Outside temperature display
and digital clock68
Check Control71
Check Control with outside
temperature display and
digital clock74
Onboard computer77
Page 52 of 179

51
At a glanceControls Car careRepairsTechnicalDataIndex
The airbags are triggered by impacts
coming from the directions shown in
the illustration. Note that the supple-
mentary protection against lateral
impact is available only on vehicles
equipped with optional door-mounted
airbags.Indicator lamp in instrument
clusterSystem operational:
dThe indicator lamp comes on briefly.
System malfunction:
dThe indicator lamp fails to come on.dIndicator lamp lights up for approx.
4 seconds, goes out brießy and then
lights up again.
A system malfunction could prevent the
system from responding to an impact
occurring within its normal response
range.
Please have your authorized BMW
Retailer inspect and repair the system
as soon as possible.
a
For your own safety, please ob-
serve the following precautions con-
cerning airbags, as otherwise their
protective function may be impaired. We
also request that you make this informa-
tion available to your passengers, and
that you urge them to observe the in-
structions for safety belt use: the air-
bags are a supplemental restraint
device designed to provide extra pro-
tection; they are not a substitute for
safety belts. Wear your safety belt at all
times. The system does not respond to
minor collisions, if the vehicle rolls over,
or if the impact is at the rear of the vehi-
cle. In this situation, only the safety belt
protects you.
When adjusting your seat, select a posi-
tion that provides maximum distance
between you and the steering wheel, the instrument panel and the door while still
allowing comfortable and safe access to
all vehicle controls.
Always grip the steering wheel on its
rim with your hands at the 9 and 3 oÕclock
positions, otherwise hand and arm inju-
ries could occur when the airbag
inflates.
Never allow any objects to obstruct the
area between the airbag and the driver/
passenger.
Do not use the cover panel above the
passenger-side airbag as a storage
area.
Do not glue, cover or in any way alter
the padded covers on the steering
wheel, the instrument panel or the side
trim panels of the front doors.
Do not install a rear-facing child re-
straint device on the front passenger
seat. Children under 12 years of age
should only sit in the back.c
Even when all these guidelines are
observed, there is still a residual risk of
mild facial injuries occurring in isolated
instances of airbag actuation. The igni-
tion and inßation noise may induce a
mild temporary hearing loss in sensitive
individuals.
Airbag information is also located on
the sun visors.
p
The indicator lamp comes on from
ignition key position 1 to indicate
that the system is operational.
390de142Airbags
Page 67 of 179
66
With the different versions you can dis-
play not only the time and the date, but
also information e.g., on economical
driving and warnings on defective sys-
tems.
The following applies to all versions:
The unit will reject implausible entries.
When entering numerical values with
the number entry keys, the numerical
value is increased by one each time the
key is pressed and after each additional
half second with the key held down.
Numbers can be entered in any order.
The entries are saved in the memory by
pressing the SET/RES or SET key.
Any interruption in the power supply,
e.g., when changing the battery, will
result in the loss of all data saved in the
memory. After the power supply is
restored, you will need to re-enter the
time, date and any switch-on times, the
distance or speed warning threshold.
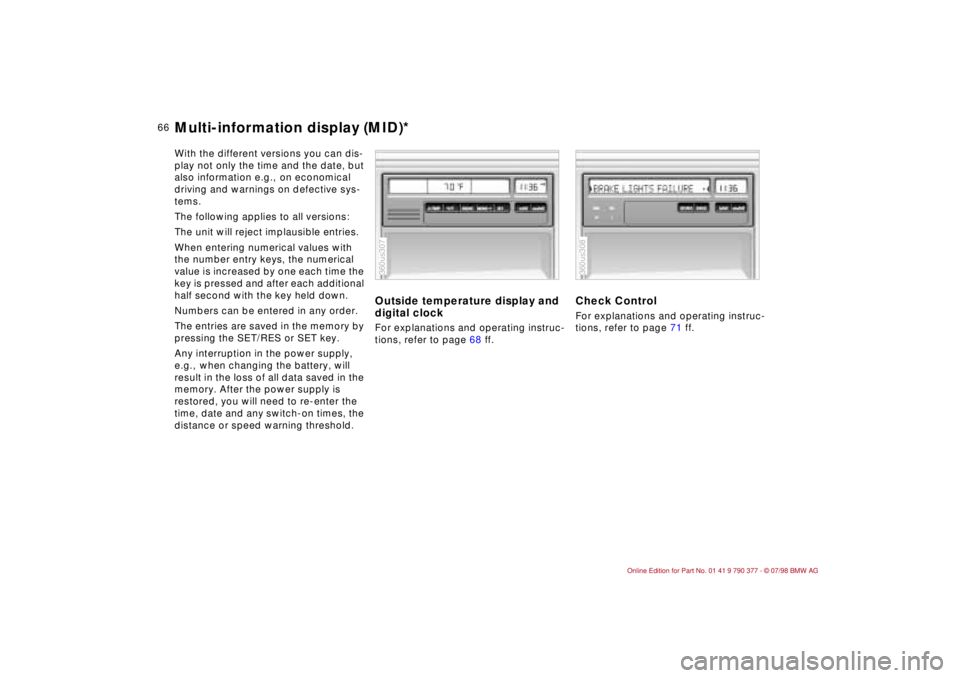
Outside temperature display and
digital clockFor explanations and operating instruc-
tions, refer to page 68 ff.
Check ControlFor explanations and operating instruc-
tions, refer to page 71 ff.
360us307
360us308
Multi-information display (MID)*
Page 68 of 179

67
At a glanceControls Car careRepairsTechnicalDataIndex
Check Control with outside
temperature display and digital
clockFor explanations and operating instruc-
tions, refer to page 74 ff.
Onboard computerFor explanations and operating instruc-
tions, refer to page 77 ff.
360us309
360us310
Multi-information display (MID)*
Page 69 of 179
68
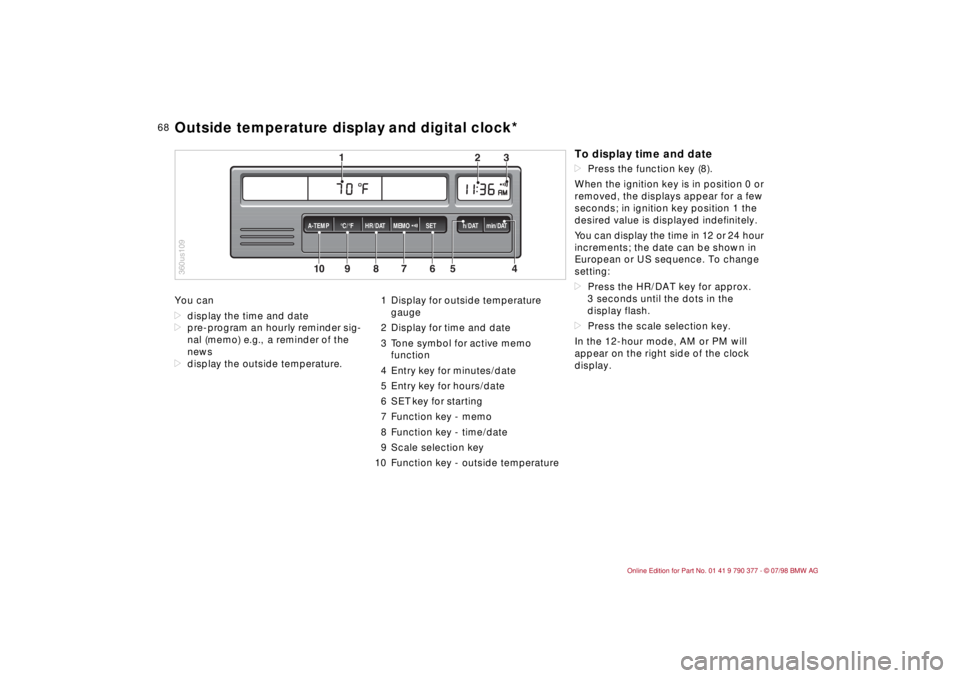
You can
ddisplay the time and date
dpre-program an hourly reminder sig-
nal (memo) e.g., a reminder of the
news
ddisplay the outside temperature.1 Display for outside temperature
gauge
2 Display for time and date
3 Tone symbol for active memo
function
4 Entry key for minutes/date
5 Entry key for hours/date
6 SET key for starting
7 Function key - memo
8 Function key - time/date
9 Scale selection key
10 Function key - outside temperature
10
MEMO
9
8
7
6
5
43
2
1
HR/DAT A-TEMP°C/°F SET h/DAT min/DAT
360us109Outside temperature display and digital clock*
To display time and datedPress the function key (8).
When the ignition key is in position 0 or
removed, the displays appear for a few
seconds; in ignition key position 1 the
desired value is displayed indefinitely.
You can display the time in 12 or 24 hour
increments; the date can be shown in
European or US sequence. To change
setting:
dPress the HR/DAT key for approx.
3 seconds until the dots in the
display flash.
dPress the scale selection key.
In the 12-hour mode, AM or PM will
appear on the right side of the clock
display.
Page 70 of 179

69
At a glanceControls Car careRepairsTechnicalDataIndex
Memo modePress the MEMO key to activate or
deactivate the signal. When MEMO is
active, a tone symbol appears in the
right display. The signal sounds every
hour at the pre-programmed time or
without programming 15 seconds
before each full hour.Outside temperatureData request: Press TEMP key.
If the outside temperature drops below
37.5 5F (+36), a warning signal sounds,
the temperature display automatically
appears and the unit of measure flashes
for 8 seconds.
The warning is repeated whenever the
temperature has increased to 43 5F
(+66) at least once before falling to
37.5 5F (+36) again.a
The temperature warning device
does nothing to alter the fact that sur-
face ice can still form at temperatures
above 37.5 5F (+36), e.g., on bridges
and on shade-covered road surfaces.c
EntriesAll numbers for the time and date are
entered with the entry keys according
to the following principle: The numbers
can be entered in any order. Each time
the key is pressed, or for each half sec-
ond the key is held down, the numerical
value increases by one.
Pressing the key longer starts the rapid-
advance function.
After a power failureThe dots in the display flash.
dPress the scale selection key as
required.
dEnter the time with the h/DAT and
min/DAT entry keys.
dPress SET. The clock starts.
dPress the HR/DAT key.
dEnter the date with the entry keys.
dPress SET.
dConfirm the year by pressing the SET
key or correct with the entry key and
complete the number entry by press-
ing the SET key.
360us321
Outside temperature display and digital clock*
Page 71 of 179
70
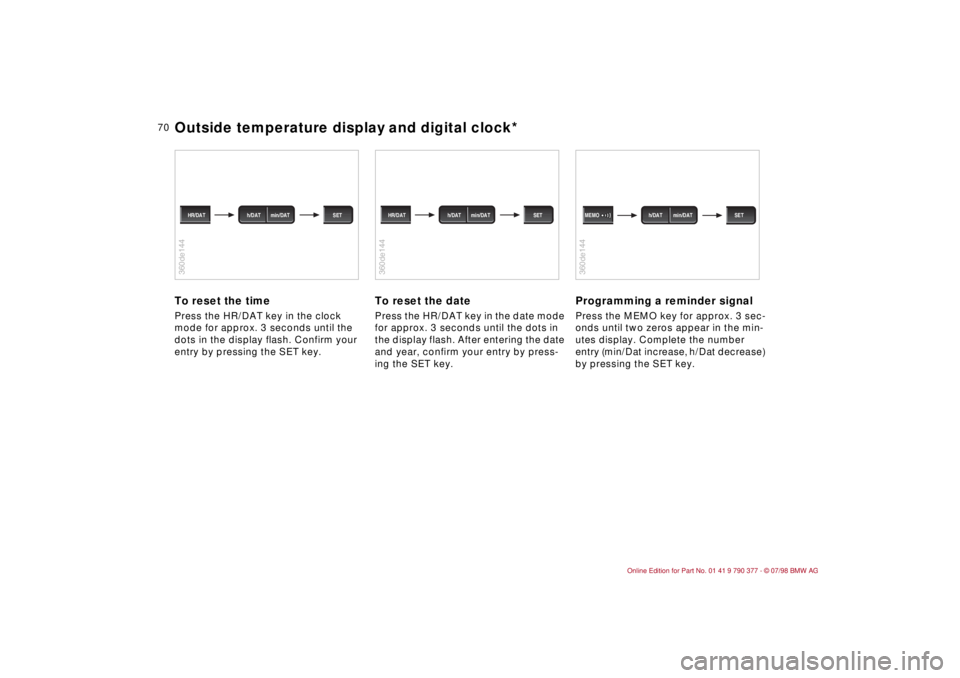
To reset the timePress the HR/DAT key in the clock
mode for approx. 3 seconds until the
dots in the display flash. Confirm your
entry by pressing the SET key.
To reset the datePress the HR/DAT key in the date mode
for approx. 3 seconds until the dots in
the display flash. After entering the date
and year, confirm your entry by press-
ing the SET key.
Programming a reminder signalPress the MEMO key for approx. 3 sec-
onds until two zeros appear in the min-
utes display. Complete the number
entry (min/Dat increase, h/Dat decrease)
by pressing the SET key.
360de144
h/DAT min/DAT HR/DAT SET
360de144
h/DAT min/DAT HR/DAT SET
360de144
h/DAT min/DAT MEMO SET
Outside temperature display and digital clock*