1998 BMW 750IL SEDAN seat adjustment
[x] Cancel search: seat adjustmentPage 11 of 211

Contents
Overview
Controls and features
Cockpit16
Instrument cluster18
Indicator and warning lamps20
Multifunction steering wheel
(MFL)23
Hazard warning flashers24
Warning triangle24
First-aid kit24
Refueling25
Fuel specifications25
Tire inflation pressure26
Locks and security systems:
Keys30
Electronic vehicle
immobilizer31
Central locking system32
Door locks – outside32
Radio remote control33
Door locks – inside36
Luggage compartment lid37
Luggage compartment39
Alarm system40
Electric power windows42
Security glass43
Sliding/Tilt sunroof44
Adjustments:
Seats46
Steering wheel49
Mirrors50
Seat, mirror and steering wheel
memory51
Car Memory, Key Memory53
Passenger safety systems:
Safety belts54
Airbags55
Child restraints57
Child restraint installation58
Child-safety locks58
Driving:
Steering/Ignition lock59
Starting engine59
Switching off engine60Parking brake61
Automatic transmission62
Automatic transmission with
Steptronic65
Turn signal/Headlamp flasher68
Washer/Wiper system/Rain
sensor68
Rear window defroster70
Cruise control70
Everything under control:
Odometer, outside temperature
display72
Tachometer72
Energy control73
Fuel gauge73
Temperature gauge74
Service Interval Display74
Check Control 75
Multi-Information Display
(MID)78
Digital clock79
Onboard computer84
Technology for safety and
convenience:
Park Distance Control PDC90
Automatic Stability Control plus
Traction (ASC+T)/Dynamic Sta-
bility Control (DSC)92
Electronic Damper Control
(EDC)93
Tire Pressure Control (RDC)94
Page 29 of 211
28n
Locks and security systems:
Keys30
Electronic vehicle
immobilizer31
Central locking system32
Door locks – outside32
Radio remote control33
Door locks – inside36
Luggage compartment lid37
Luggage compartment39
Alarm system40
Electric power windows42
Security glass43
Sliding/Tilt sunroof44
Adjustments:
Seats46
Steering wheel49
Mirrors50
Seat, mirror and steering wheel
memory51
Car Memory, Key Memory53
Passenger safety systems:
Safety belts54
Airbags55
Child restraints57
Child restraint installation58
Child-safety locks58
Driving:
Steering/Ignition lock59
Starting engine59
Switching off engine60
Page 47 of 211
46n
Seat adjustment Electric power seatsFor maximum safety when adjusting the
seat position, please observe the fol-
lowing:
Never try to adjust your seat while
operating the vehicle. The seat
could respond with unexpected move-
ment, and the ensuing loss of vehicle
control could lead to an accident.
Wear the safety belt firmly against your
body at all times. In the event of a fron-
tal impact, a loose lap belt could slide
over your hips, leading to abdominal in-
jury. In addition, the safety belt's re-
straint effectiveness is reduced if the
belt is worn loosely.
Never ride with the backrest reclined to
an extreme horizontal angle (especially
important for front passengers to re-
member). Keep the backrest relatively
upright to minimize the risk of "sliding
under" the safety belt and sustaining in-
jury in an accident.
Do not slide the seats to the rear when
the vehicle is at an extreme angle (on
garage ramps or steep slopes, for in-
stance), to prevent the shoulder strap's
automatic height adjustment mecha-
nism from disengaging.<
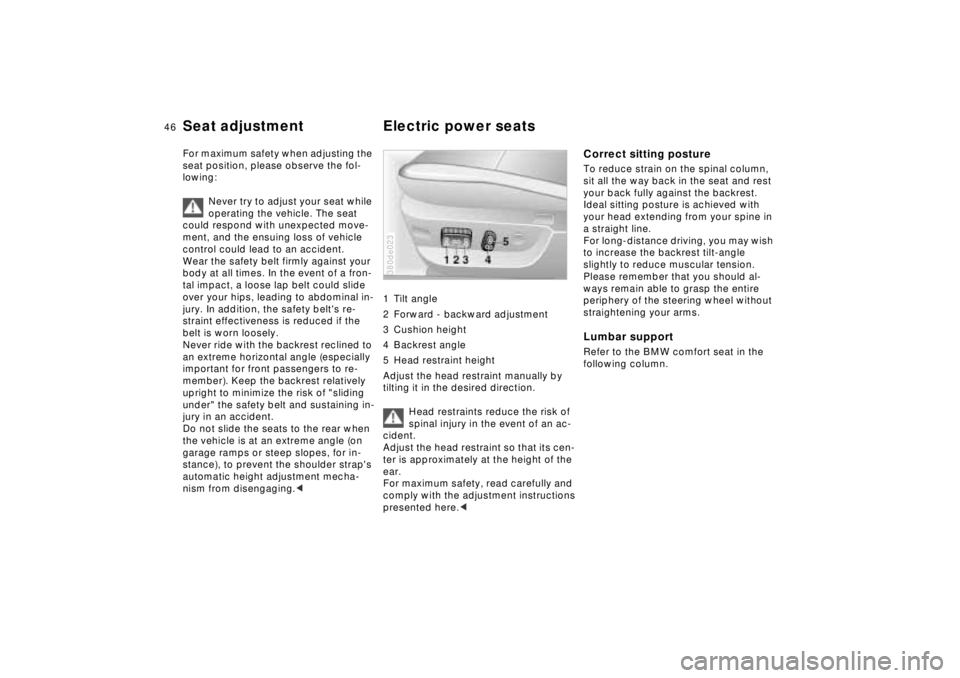
1 Tilt angle
2 Forward - backward adjustment
3 Cushion height
4 Backrest angle
5 Head restraint height
Adjust the head restraint manually by
tilting it in the desired direction.
Head restraints reduce the risk of
spinal injury in the event of an ac-
cident.
Adjust the head restraint so that its cen-
ter is approximately at the height of the
ear.
For maximum safety, read carefully and
comply with the adjustment instructions
presented here.< 380de023
Correct sitting postureTo reduce strain on the spinal column,
sit all the way back in the seat and rest
your back fully against the backrest.
Ideal sitting posture is achieved with
your head extending from your spine in
a straight line.
For long-distance driving, you may wish
to increase the backrest tilt-angle
slightly to reduce muscular tension.
Please remember that you should al-
ways remain able to grasp the entire
periphery of the steering wheel without
straightening your arms.Lumbar supportRefer to the BMW comfort seat in the
following column.
Page 48 of 211
47n
RepairsIndexOverview Controls Car care Technology Data
BMW comfort seat
*
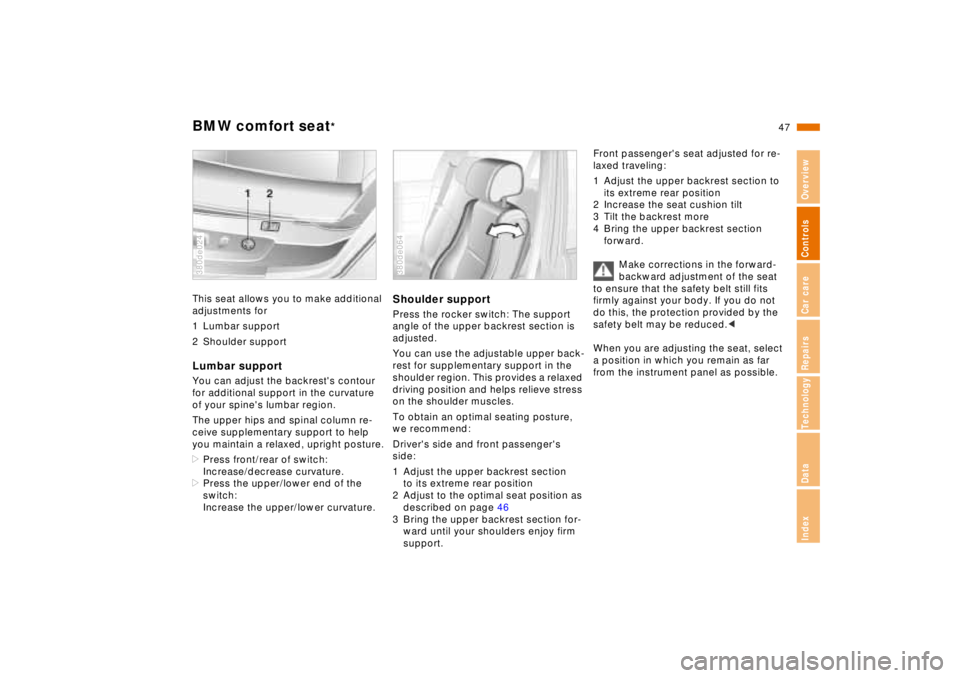
This seat allows you to make additional
adjustments for
1 Lumbar support
2 Shoulder supportLumbar supportYou can adjust the backrest's contour
for additional support in the curvature
of your spine's lumbar region.
The upper hips and spinal column re-
ceive supplementary support to help
you maintain a relaxed, upright posture.
>Press front/rear of switch:
Increase/decrease curvature.
>Press the upper/lower end of the
switch:
Increase the upper/lower curvature.380de024
Shoulder supportPress the rocker switch: The support
angle of the upper backrest section is
adjusted.
You can use the adjustable upper back-
rest for supplementary support in the
shoulder region. This provides a relaxed
driving position and helps relieve stress
on the shoulder muscles.
To obtain an optimal seating posture,
we recommend:
Driver's side and front passenger's
side:
1 Adjust the upper backrest section
to its extreme rear position
2 Adjust to the optimal seat position as
described on page 46
3 Bring the upper backrest section for-
ward until your shoulders enjoy firm
support.380de064
Front passenger's seat adjusted for re-
laxed traveling:
1 Adjust the upper backrest section to
its extreme rear position
2 Increase the seat cushion tilt
3 Tilt the backrest more
4 Bring the upper backrest section
forward.
Make corrections in the forward-
backward adjustment of the seat
to ensure that the safety belt still fits
firmly against your body. If you do not
do this, the protection provided by the
safety belt may be reduced.<
When you are adjusting the seat, select
a position in which you remain as far
from the instrument panel as possible.
Page 49 of 211
48n
BMW contour seat
* BMW active seat
* Rear power seat
*
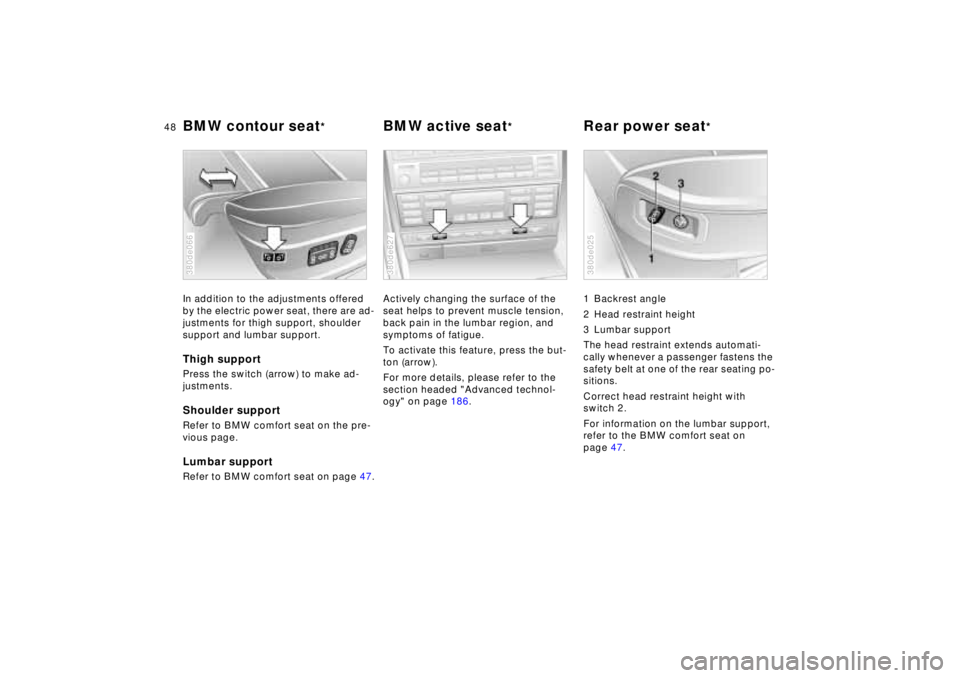
In addition to the adjustments offered
by the electric power seat, there are ad-
justments for thigh support, shoulder
support and lumbar support.Thigh supportPress the switch (arrow) to make ad-
justments.Shoulder supportRefer to BMW comfort seat on the pre-
vious page.Lumbar supportRefer to BMW comfort seat on page 47.380de066
Actively changing the surface of the
seat helps to prevent muscle tension,
back pain in the lumbar region, and
symptoms of fatigue.
To activate this feature, press the but-
ton (arrow).
For more details, please refer to the
section headed "Advanced technol-
ogy" on page 186.380de627
1 Backrest angle
2 Head restraint height
3 Lumbar support
The head restraint extends automati-
cally whenever a passenger fastens the
safety belt at one of the rear seating po-
sitions.
Correct head restraint height with
switch 2.
For information on the lumbar support,
refer to the BMW comfort seat on
page 47.380de025
Page 50 of 211
49n
RepairsIndexOverview Controls Car care Technology Data
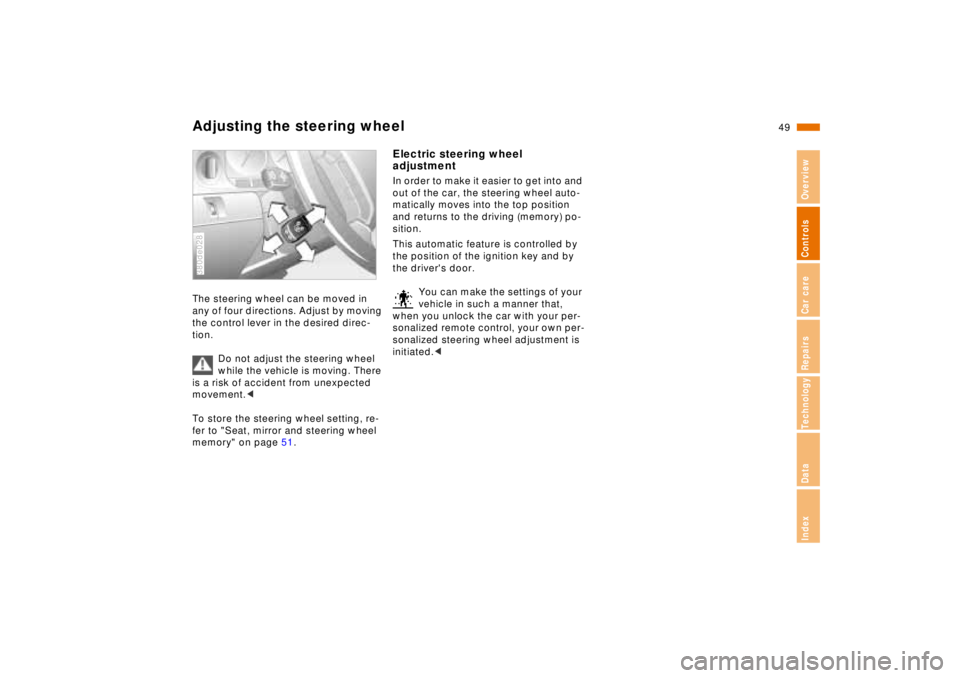
Adjusting the steering wheelThe steering wheel can be moved in
any of four directions. Adjust by moving
the control lever in the desired direc-
tion.
Do not adjust the steering wheel
while the vehicle is moving. There
is a risk of accident from unexpected
movement.<
To store the steering wheel setting, re-
fer to "Seat, mirror and steering wheel
memory" on page 51.380de028
Electric steering wheel
adjustmentIn order to make it easier to get into and
out of the car, the steering wheel auto-
matically moves into the top position
and returns to the driving (memory) po-
sition.
This automatic feature is controlled by
the position of the ignition key and by
the driver's door.
You can make the settings of your
vehicle in such a manner that,
when you unlock the car with your per-
sonalized remote control, your own per-
sonalized steering wheel adjustment is
initiated.<
Page 51 of 211
50n
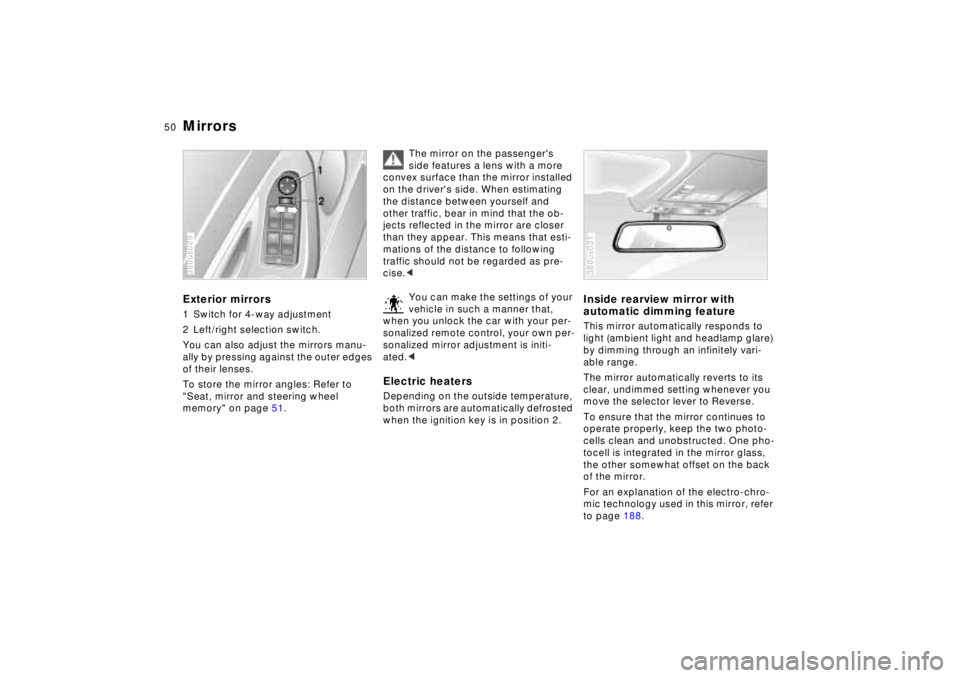
MirrorsExterior mirrors1 Switch for 4-way adjustment
2 Left/right selection switch.
You can also adjust the mirrors manu-
ally by pressing against the outer edges
of their lenses.
To store the mirror angles: Refer to
"Seat, mirror and steering wheel
memory" on page 51.380us029
The mirror on the passenger's
side features a lens with a more
convex surface than the mirror installed
on the driver's side. When estimating
the distance between yourself and
other traffic, bear in mind that the ob-
jects reflected in the mirror are closer
than they appear. This means that esti-
mations of the distance to following
traffic should not be regarded as pre-
cise.<
You can make the settings of your
vehicle in such a manner that,
when you unlock the car with your per-
sonalized remote control, your own per-
sonalized mirror adjustment is initi-
ated.<
Electric heatersDepending on the outside temperature,
both mirrors are automatically defrosted
when the ignition key is in position 2.
Inside rearview mirror with
automatic dimming featureThis mirror automatically responds to
light (ambient light and headlamp glare)
by dimming through an infinitely vari-
able range.
The mirror automatically reverts to its
clear, undimmed setting whenever you
move the selector lever to Reverse.
To ensure that the mirror continues to
operate properly, keep the two photo-
cells clean and unobstructed. One pho-
tocell is integrated in the mirror glass,
the other somewhat offset on the back
of the mirror.
For an explanation of the electro-chro-
mic technology used in this mirror, refer
to page 188.380us031
Page 52 of 211
51n
RepairsIndexOverview Controls Car care Technology Data
Mirrors Seat, mirror and steering wheel memoryLighted vanity mirrorFold down the sun visor and slide the
cover panel to the side as required.
The mirror lamps operate in ignition key
positions 1 and 2.Sun visorsThese can be folded down toward the
windshield or swiveled out against the
side windows.380de670
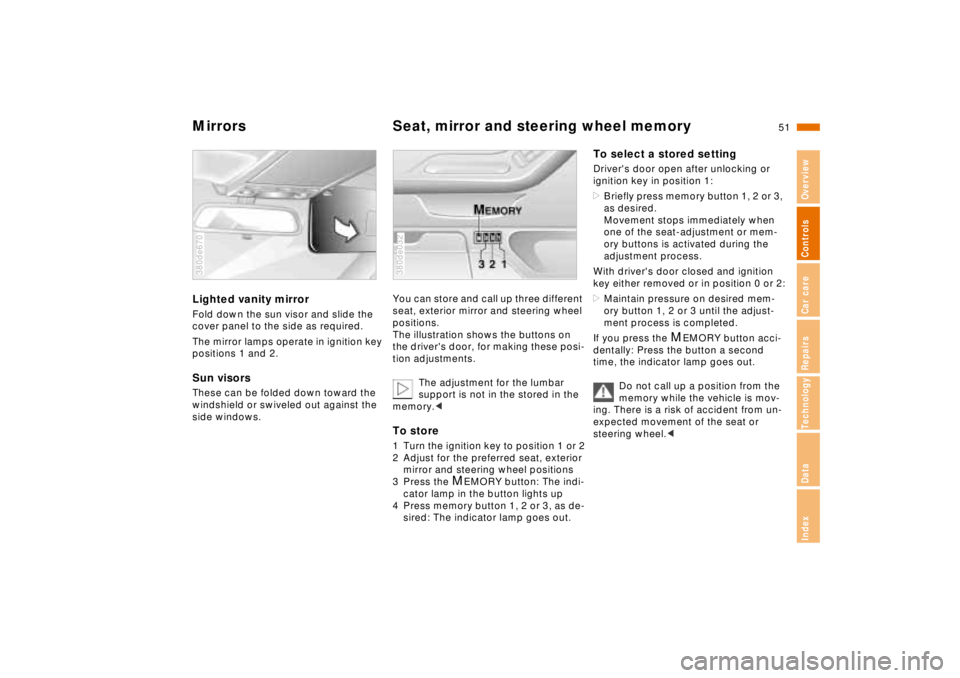
You can store and call up three different
seat, exterior mirror and steering wheel
positions.
The illustration shows the buttons on
the driver's door, for making these posi-
tion adjustments.
The adjustment for the lumbar
support is not in the stored in the
memory.< To store1 Turn the ignition key to position 1 or 2
2 Adjust for the preferred seat, exterior
mirror and steering wheel positions
3 Press the
M
EMORY button: The indi-
cator lamp in the button lights up
4 Press memory button 1, 2 or 3, as de-
sired: The indicator lamp goes out.
380de032
To select a stored settingDriver's door open after unlocking or
ignition key in position 1:
>Briefly press memory button 1, 2 or 3,
as desired.
Movement stops immediately when
one of the seat-adjustment or mem-
ory buttons is activated during the
adjustment process.
With driver's door closed and ignition
key either removed or in position 0 or 2:
>Maintain pressure on desired mem-
ory button 1, 2 or 3 until the adjust-
ment process is completed.
If you press the
M
EMORY button acci-
dentally: Press the button a second
time, the indicator lamp goes out.
Do not call up a position from the
memory while the vehicle is mov-
ing. There is a risk of accident from un-
expected movement of the seat or
steering wheel.<