1998 BMW 750IL SEDAN instrument panel
[x] Cancel search: instrument panelPage 12 of 211
11n
Controls and features
Operation, care and maintenance
Lamps:
Parking lamps/Low beams96
Instrument panel lighting96
High beams/Parking lamps97
Fog lamps97
Interior lamps97
Reading lamps98
Controlling the climate
for pleasant driving:
Automatic climate control100
Rear passenger-area air
conditioning105
Seat heating106
Steering wheel heating106
Roller sun blind107
Independent ventilation
system107
Cabin convenience:
Integrated Universal
Remote Control108
Glove compartment110
Center armrests111
Additional storage areas113
Cup holder113
Cellular phone113
Ashtray114
Cigarette lighter115
Rear footrests115
Loading and transporting cargo:
Ski bag116
Cargo loading118
Roof-mounted luggage rack118
Special operating instructions:
Break-in procedure122
Driving notes123
Catalytic converter124
Antilock Brake System
(ABS)125
Disc brakes126
Brake system128
Winter operation128
Power steering130
Level control system130
Cellular phone131
Radio reception131
Wheels and tires:
Tire inflation pressure132
Tire condition132
Tire replacement133
Tire rotation133
Wheel and tire
combinations134
Winter tires135
Snow chains135
Approved wheel and tire
specifications136
Under the hood:
Hood137
Engine compartment138
Washer fluids142
Washer nozzles142
Engine oil143
Coolant146
Brake fluid147
Oil for power steering/
Level control system148
Vehicle Identification
Number148
Care and maintenance:
The BMW Maintenance
System149
Caring for your car150
Airbags156
Vehicle storage156
Laws and regulations:
Technical modifications to the
vehicle157
OBD connector158
Page 30 of 211
Overview
Controls and features
Operation, care
and maintenance
Owner service procedures
Technical data
Index Advanced technology
29n
RepairsIndexOverview Controls Car care Technology Data
Parking brake61
Automatic transmission62
Automatic transmission with
Steptronic65
Indicator/Headlamp flasher68
Washer/Wiper system/Rain
sensor68
Rear window defroster70
Cruise control70
Everything under control:
Odometer, outside temperature
display72
Tachometer72
Energy control73
Fuel gauge73
Temperature gauge74
Service Interval Display74
Check Control75
Multi-Information Display
(MID)78
Digital clock79
Onboard computer84
Technology for safety and
convenience:
Park Distance Control (PDC)90
Automatic Stability Control plus
Traction (ASC+T)/Dynamic Sta-
bility Control (DSC)92
Electronic Damper Control
(EDC)93
Tire Pressure Control (RDC)94Lamps:
Parking lamps/Low beams96
Instrument panel rheostat96
High beams/Parking lamps97
Fog lamps97
Interior lamps97
Reading lamps98
Controlling the climate
for pleasant driving:
Automatic climate control100
Rear passenger-area air
conditioning105
Seat heating106
Steering wheel heating106
Rear window blind107
Independent ventilation
system107
Cabin convenience:
Integrated Universal
Remote control108
Glove compartment110
Center armrests111
Additional storage areas113
Cup holder113
Cellular phone113
Ashtray114
Cigarette lighter115
Rear footrests115
Loading and transporting cargo:
Ski bag116
Cargo loading118
Roof-mounted luggage rack118
Page 37 of 211
36n
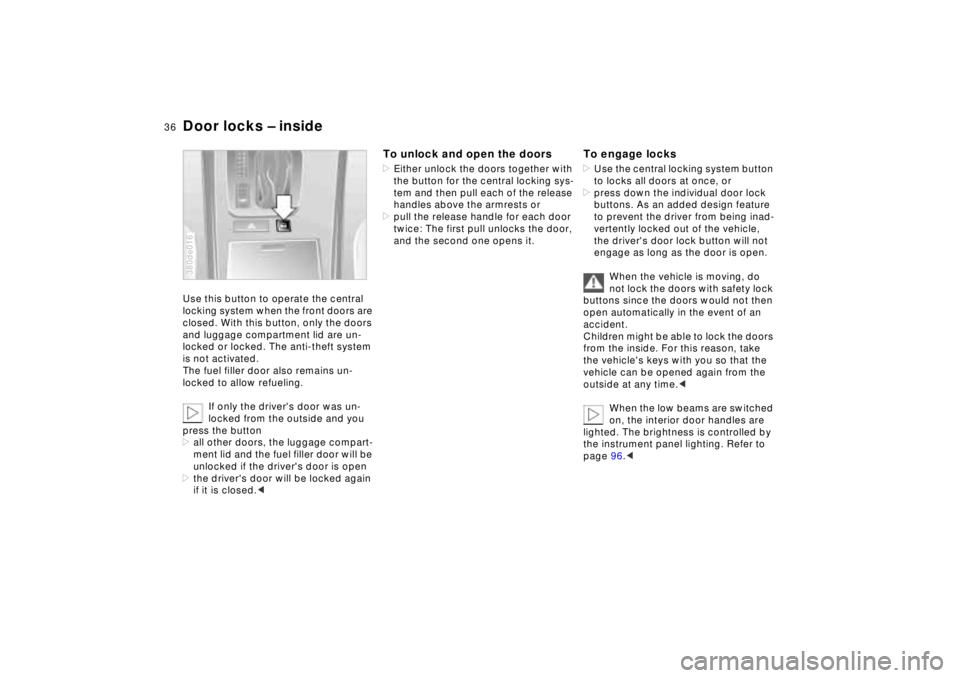
Door locks – insideUse this button to operate the central
locking system when the front doors are
closed. With this button, only the doors
and luggage compartment lid are un-
locked or locked. The anti-theft system
is not activated.
The fuel filler door also remains un-
locked to allow refueling.
If only the driver's door was un-
locked from the outside and you
press the button
>all other doors, the luggage compart-
ment lid and the fuel filler door will be
unlocked if the driver's door is open
>the driver's door will be locked again
if it is closed.< 380de016
To unlock and open the doors>Either unlock the doors together with
the button for the central locking sys-
tem and then pull each of the release
handles above the armrests or
>pull the release handle for each door
twice: The first pull unlocks the door,
and the second one opens it.
To engage locks>Use the central locking system button
to locks all doors at once, or
>press down the individual door lock
buttons. As an added design feature
to prevent the driver from being inad-
vertently locked out of the vehicle,
the driver's door lock button will not
engage as long as the door is open.
When the vehicle is moving, do
not lock the doors with safety lock
buttons since the doors would not then
open automatically in the event of an
accident.
Children might be able to lock the doors
from the inside. For this reason, take
the vehicle's keys with you so that the
vehicle can be opened again from the
outside at any time.<
When the low beams are switched
on, the interior door handles are
lighted. The brightness is controlled by
the instrument panel lighting. Refer to
page 96.<
Page 41 of 211
40n
Alarm systemThe vehicle alarm system responds:
>When a door, the hood or the lug-
gage compartment lid is opened
>To movement inside the vehicle (inte-
rior motion sensor)
>To variations in the vehicle tilt sensor
such as occur during attempts to
steal the wheels or tow the vehicle
>To interruption of battery voltage.
The system responds to unauthorized
vehicle entry and attempted theft by si-
multaneously activating the following:
>Sounding an acoustical alarm for
30 seconds
>The hazard warning flashers are acti-
vated for approx. five minutes
>The high beams flash on and off in
the same rhythm.
To arm and disarm the alarm
systemWhen the vehicle is locked or unlocked
by using a key or with the remote con-
trol, the alarm system is also simulta-
neously armed or disarmed.
The interior motion sensor is activated
approx. 30 seconds after you have fin-
ished locking the car.
The system indicates that it has been
correctly armed by switching on the
hazard flashers for a single cycle and by
emitting an acoustical signal.
When the system is active, you can still
gain access to the luggage compart-
ment by pressing button 3 on the re-
mote control transmitter. When the lid is
closed, it is armed once again.
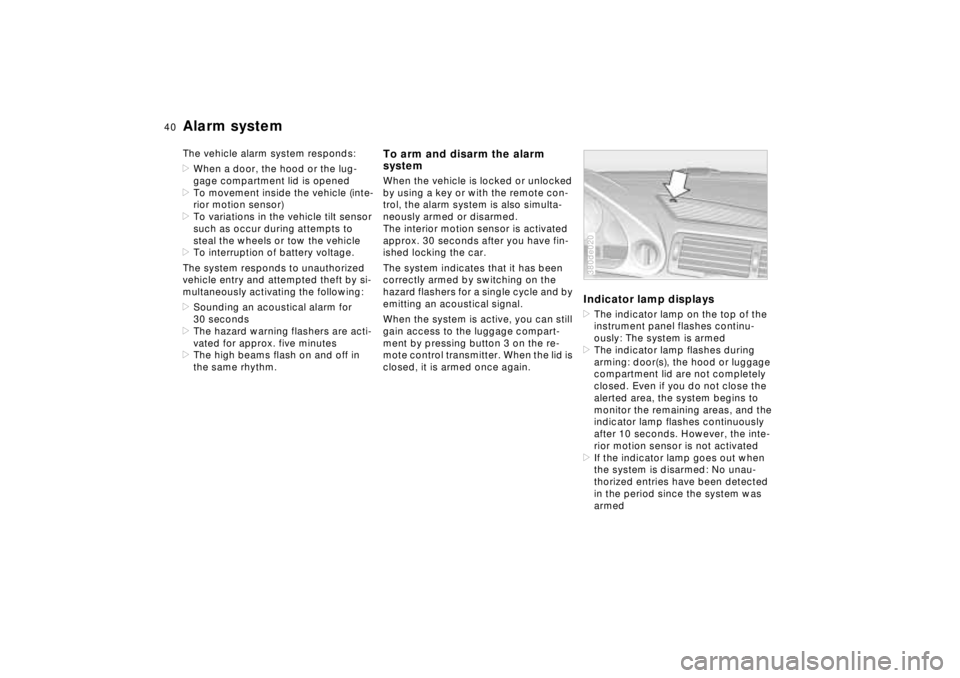
Indicator lamp displays>The indicator lamp on the top of the
instrument panel flashes continu-
ously: The system is armed
>The indicator lamp flashes during
arming: door(s), the hood or luggage
compartment lid are not completely
closed. Even if you do not close the
alerted area, the system begins to
monitor the remaining areas, and the
indicator lamp flashes continuously
after 10 seconds. However, the inte-
rior motion sensor is not activated
>If the indicator lamp goes out when
the system is disarmed: No unau-
thorized entries have been detected
in the period since the system was
armed380de020
Page 48 of 211
47n
RepairsIndexOverview Controls Car care Technology Data
BMW comfort seat
*
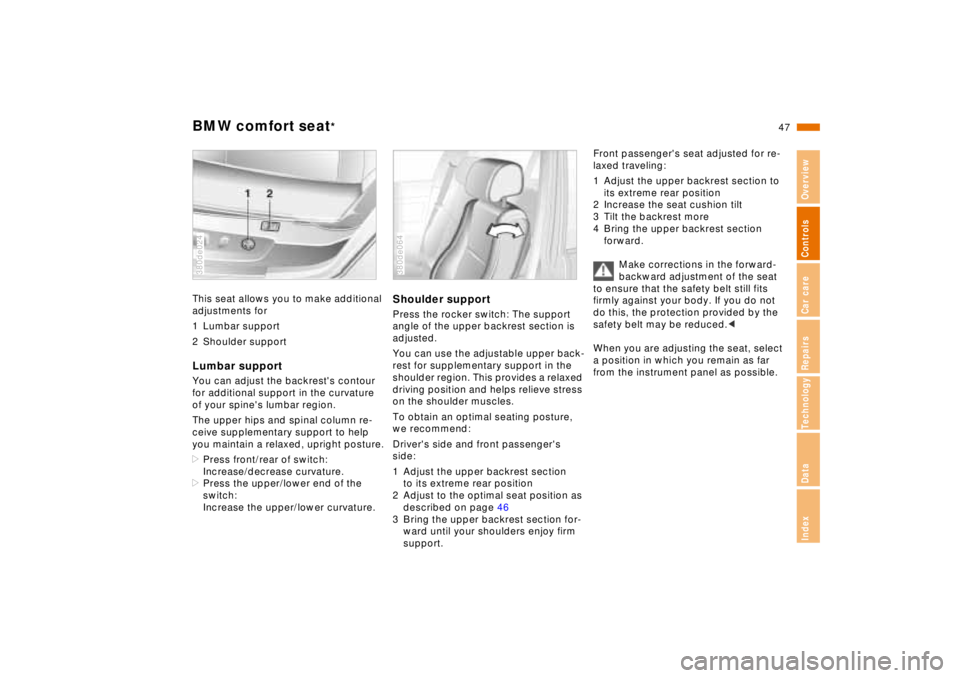
This seat allows you to make additional
adjustments for
1 Lumbar support
2 Shoulder supportLumbar supportYou can adjust the backrest's contour
for additional support in the curvature
of your spine's lumbar region.
The upper hips and spinal column re-
ceive supplementary support to help
you maintain a relaxed, upright posture.
>Press front/rear of switch:
Increase/decrease curvature.
>Press the upper/lower end of the
switch:
Increase the upper/lower curvature.380de024
Shoulder supportPress the rocker switch: The support
angle of the upper backrest section is
adjusted.
You can use the adjustable upper back-
rest for supplementary support in the
shoulder region. This provides a relaxed
driving position and helps relieve stress
on the shoulder muscles.
To obtain an optimal seating posture,
we recommend:
Driver's side and front passenger's
side:
1 Adjust the upper backrest section
to its extreme rear position
2 Adjust to the optimal seat position as
described on page 46
3 Bring the upper backrest section for-
ward until your shoulders enjoy firm
support.380de064
Front passenger's seat adjusted for re-
laxed traveling:
1 Adjust the upper backrest section to
its extreme rear position
2 Increase the seat cushion tilt
3 Tilt the backrest more
4 Bring the upper backrest section
forward.
Make corrections in the forward-
backward adjustment of the seat
to ensure that the safety belt still fits
firmly against your body. If you do not
do this, the protection provided by the
safety belt may be reduced.<
When you are adjusting the seat, select
a position in which you remain as far
from the instrument panel as possible.
Page 57 of 211
56n
Airbags
For your safety, comply with the
following instructions for the air-
bags. If you do not, the airbags may not
be able to provide their maximum pro-
tection. All passengers in the vehicle
should be aware of and comply with
this information:
The airbags are supplemental restraint
devices designed to provide extra pro-
tection; they are not a substitute for
safety belts. Wear your safety belt at all
times. The airbags will not be triggered
in the event of a minor accident, a vehi-
cle roll-over, or collisions from the rear.
In these situations, the safety belts pro-
vide optimal protection.
Adjust your seat to a position that pro-
vides maximum distance between you
and the steering wheel, the instrument
panel and the door while still allowing
comfortable and safe access to all vehi-
cle controls.
Hold the steering wheel at the rim
(hands at the "9 o'clock and 3 o'clock"
positions) in order to avoid injuries to
the hands or arms if the airbag is trig-
gered.
Never allow any objects to obstruct the
area between the airbag and the driver/
passenger.
Do not use the cover panel above the
passenger-side airbag as a storage
area.
Do not apply tape or stickers or other
material over the padded steering
wheel hub, the instrument panel, the
side trim panels of the front or rear
doors and the roof pillars or the sides of
the headliner, or modify them in any
other way.
Do not install a rear-facing child-re-
straint device on the front passenger
seat.
If your vehicle is equipped with side air-
bags in the rear, be sure that child seats
are installed correctly and with the
greatest possible distance from the
door. Do not allow children to lean out
of the child's seat in the direction of the
door. Otherwise, serious injuries could
occur if the airbag is triggered.<
Even when all these guidelines are fol-
lowed, there is still a small residual risk
of injuries to the face, hands and arms
occurring in isolated instances. The ig-
nition and inflation noise may provoke a
mild temporary hearing loss in extremely
sensitive individuals.
Airbag warning information is also pro-
vided on the sun visors.
For additional information concerning the
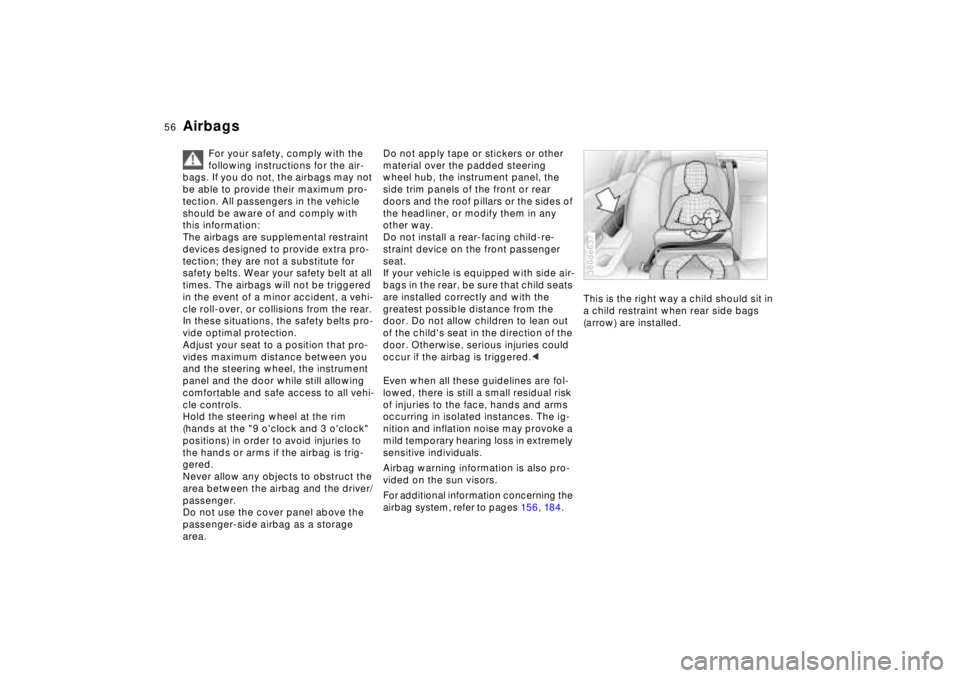
airbag system, refer to pages 15 6, 18 4.This is the right way a child should sit in
a child restraint when rear side bags
(arrow) are installed.
380de637
Page 73 of 211
72n
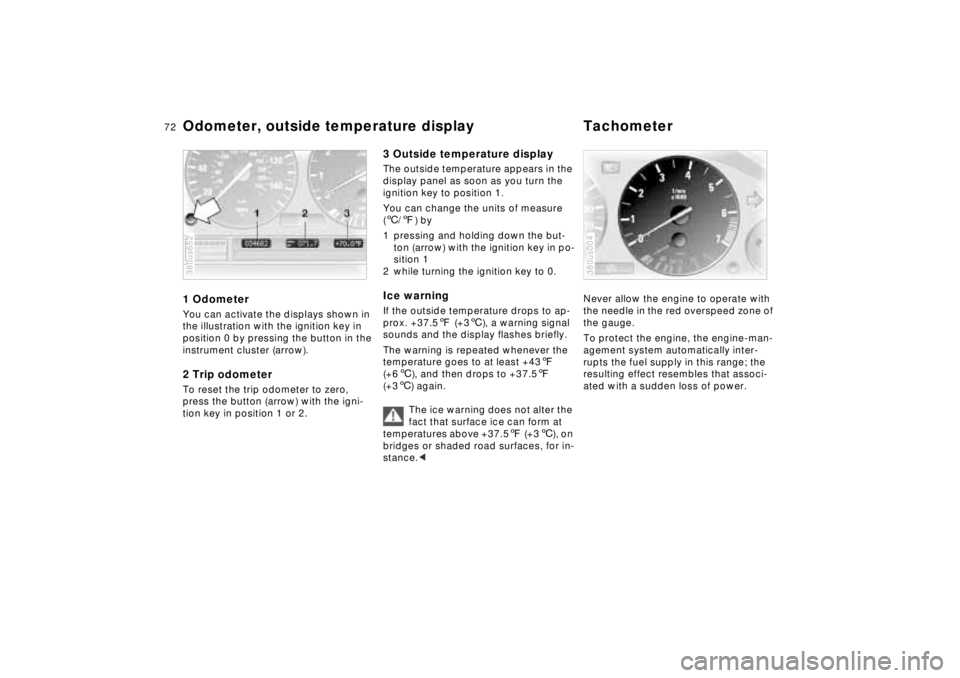
Odometer, outside temperature display Tachometer1 OdometerYou can activate the displays shown in
the illustration with the ignition key in
position 0 by pressing the button in the
instrument cluster (arrow).2 Trip odometerTo reset the trip odometer to zero,
press the button (arrow) with the igni-
tion key in position 1 or 2.380us652
3 Outside temperature displayThe outside temperature appears in the
display panel as soon as you turn the
ignition key to position 1.
You can change the units of measure
(6/7) by
1 pressing and holding down the but-
ton (arrow) with the ignition key in po-
sition 1
2 while turning the ignition key to 0.Ice warningIf the outside temperature drops to ap-
prox. +37.57 (+36), a warning signal
sounds and the display flashes briefly.
The warning is repeated whenever the
temperature goes to at least +437
(+66), and then drops to +37.57
(+36) again.
The ice warning does not alter the
fact that surface ice can form at
temperatures above +37.57 (+36), on
bridges or shaded road surfaces, for in-
stance.<
Never allow the engine to operate with
the needle in the red overspeed zone of
the gauge.
To protect the engine, the engine-man-
agement system automatically inter-
rupts the fuel supply in this range; the
resulting effect resembles that associ-
ated with a sudden loss of power.380us004
Page 88 of 211
87n
RepairsIndexOverview Controls Car care Technology Data
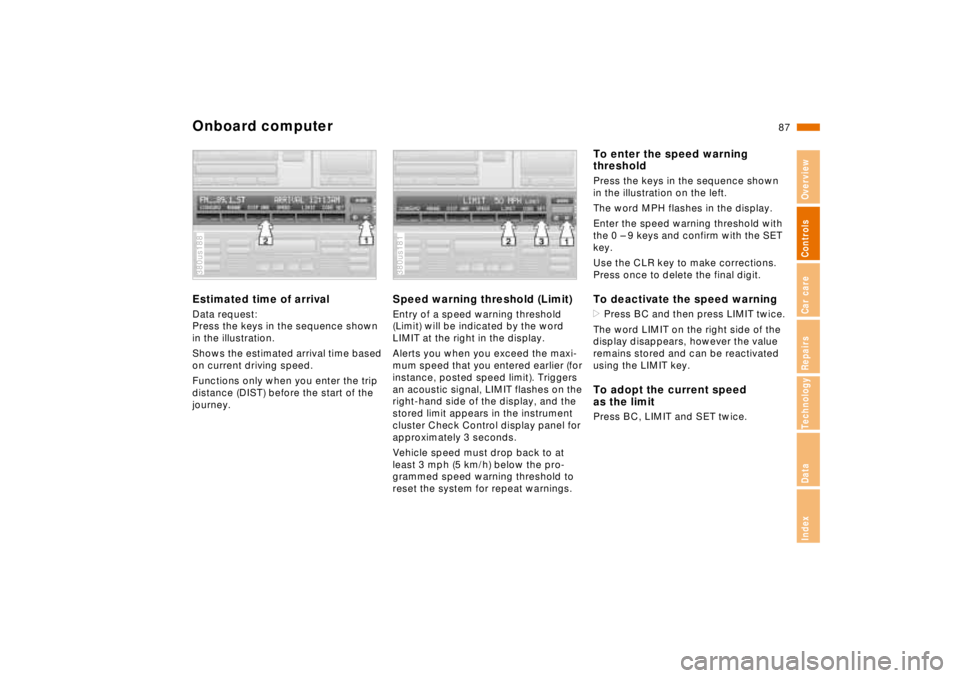
Onboard computerEstimated time of arrivalData request:
Press the keys in the sequence shown
in the illustration.
Shows the estimated arrival time based
on current driving speed.
Functions only when you enter the trip
distance (DIST) before the start of the
journey.380us188
Speed warning threshold (Limit)Entry of a speed warning threshold
(Limit) will be indicated by the word
LIMIT at the right in the display.
Alerts you when you exceed the maxi-
mum speed that you entered earlier (for
instance, posted speed limit). Triggers
an acoustic signal, LIMIT flashes on the
right-hand side of the display, and the
stored limit appears in the instrument
cluster Check Control display panel for
approximately 3 seconds.
Vehicle speed must drop back to at
least 3 mph (5 km/h) below the pro-
grammed speed warning threshold to
reset the system for repeat warnings.380us181
To enter the speed warning
thresholdPress the keys in the sequence shown
in the illustration on the left.
The word MPH flashes in the display.
Enter the speed warning threshold with
the 0 – 9 keys and confirm with the SET
key.
Use the CLR key to make corrections.
Press once to delete the final digit.To deactivate the speed warning>Press BC and then press LIMIT twice.
The word LIMIT on the right side of the
display disappears, however the value
remains stored and can be reactivated
using the LIMIT key.To adopt the current speed
as the limitPress BC, LIMIT and SET twice.