1998 BMW 740I sensor
[x] Cancel search: sensorPage 11 of 211

Contents
Overview
Controls and features
Cockpit16
Instrument cluster18
Indicator and warning lamps20
Multifunction steering wheel
(MFL)23
Hazard warning flashers24
Warning triangle24
First-aid kit24
Refueling25
Fuel specifications25
Tire inflation pressure26
Locks and security systems:
Keys30
Electronic vehicle
immobilizer31
Central locking system32
Door locks – outside32
Radio remote control33
Door locks – inside36
Luggage compartment lid37
Luggage compartment39
Alarm system40
Electric power windows42
Security glass43
Sliding/Tilt sunroof44
Adjustments:
Seats46
Steering wheel49
Mirrors50
Seat, mirror and steering wheel
memory51
Car Memory, Key Memory53
Passenger safety systems:
Safety belts54
Airbags55
Child restraints57
Child restraint installation58
Child-safety locks58
Driving:
Steering/Ignition lock59
Starting engine59
Switching off engine60Parking brake61
Automatic transmission62
Automatic transmission with
Steptronic65
Turn signal/Headlamp flasher68
Washer/Wiper system/Rain
sensor68
Rear window defroster70
Cruise control70
Everything under control:
Odometer, outside temperature
display72
Tachometer72
Energy control73
Fuel gauge73
Temperature gauge74
Service Interval Display74
Check Control 75
Multi-Information Display
(MID)78
Digital clock79
Onboard computer84
Technology for safety and
convenience:
Park Distance Control PDC90
Automatic Stability Control plus
Traction (ASC+T)/Dynamic Sta-
bility Control (DSC)92
Electronic Damper Control
(EDC)93
Tire Pressure Control (RDC)94
Page 26 of 211
25n
RepairsIndexOverview Controls Car care Technology Data
Refueling Fuel specifications
Before filling the tank, shut off the
engine. If you do not, fuel cannot
flow into the tank and the "Check En-
gine" warning lamp may come on.<
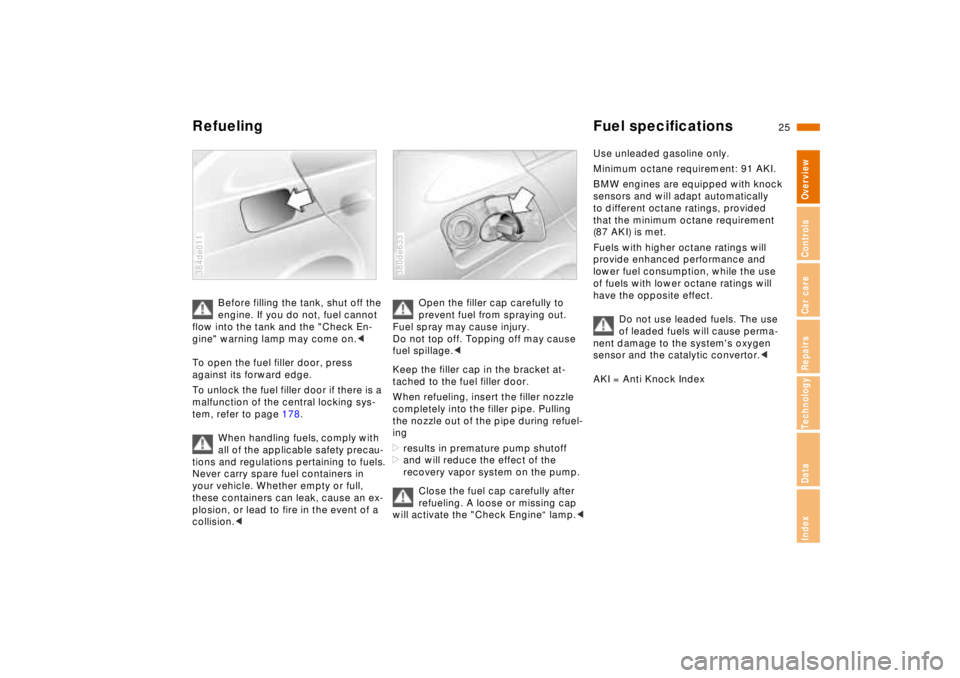
To open the fuel filler door, press
against its forward edge.
To unlock the fuel filler door if there is a
malfunction of the central locking sys-
tem, refer to page 178.
When handling fuels, comply with
all of the applicable safety precau-
tions and regulations pertaining to fuels.
Never carry spare fuel containers in
your vehicle. Whether empty or full,
these containers can leak, cause an ex-
plosion, or lead to fire in the event of a
collision.<
384de011
Open the filler cap carefully to
prevent fuel from spraying out.
Fuel spray may cause injury.
Do not top off. Topping off may cause
fuel spillage.<
Keep the filler cap in the bracket at-
tached to the fuel filler door.
When refueling, insert the filler nozzle
completely into the filler pipe. Pulling
the nozzle out of the pipe during refuel-
ing
>results in premature pump shutoff
>and will reduce the effect of the
recovery vapor system on the pump.
Close the fuel cap carefully after
refueling. A loose or missing cap
will activate the "Check Engine“ lamp.<
380de633
Use unleaded gasoline only.
Minimum octane requirement: 91 AKI.
BMW engines are equipped with knock
sensors and will adapt automatically
to different octane ratings, provided
that the minimum octane requirement
(87 AKI) is met.
Fuels with higher octane ratings will
provide enhanced performance and
lower fuel consumption, while the use
of fuels with lower octane ratings will
have the opposite effect.
Do not use leaded fuels. The use
of leaded fuels will cause perma-
nent damage to the system's oxygen
sensor and the catalytic convertor.<
AKI = Anti Knock Index
Page 30 of 211
Overview
Controls and features
Operation, care
and maintenance
Owner service procedures
Technical data
Index Advanced technology
29n
RepairsIndexOverview Controls Car care Technology Data
Parking brake61
Automatic transmission62
Automatic transmission with
Steptronic65
Indicator/Headlamp flasher68
Washer/Wiper system/Rain
sensor68
Rear window defroster70
Cruise control70
Everything under control:
Odometer, outside temperature
display72
Tachometer72
Energy control73
Fuel gauge73
Temperature gauge74
Service Interval Display74
Check Control75
Multi-Information Display
(MID)78
Digital clock79
Onboard computer84
Technology for safety and
convenience:
Park Distance Control (PDC)90
Automatic Stability Control plus
Traction (ASC+T)/Dynamic Sta-
bility Control (DSC)92
Electronic Damper Control
(EDC)93
Tire Pressure Control (RDC)94Lamps:
Parking lamps/Low beams96
Instrument panel rheostat96
High beams/Parking lamps97
Fog lamps97
Interior lamps97
Reading lamps98
Controlling the climate
for pleasant driving:
Automatic climate control100
Rear passenger-area air
conditioning105
Seat heating106
Steering wheel heating106
Rear window blind107
Independent ventilation
system107
Cabin convenience:
Integrated Universal
Remote control108
Glove compartment110
Center armrests111
Additional storage areas113
Cup holder113
Cellular phone113
Ashtray114
Cigarette lighter115
Rear footrests115
Loading and transporting cargo:
Ski bag116
Cargo loading118
Roof-mounted luggage rack118
Page 35 of 211
34n
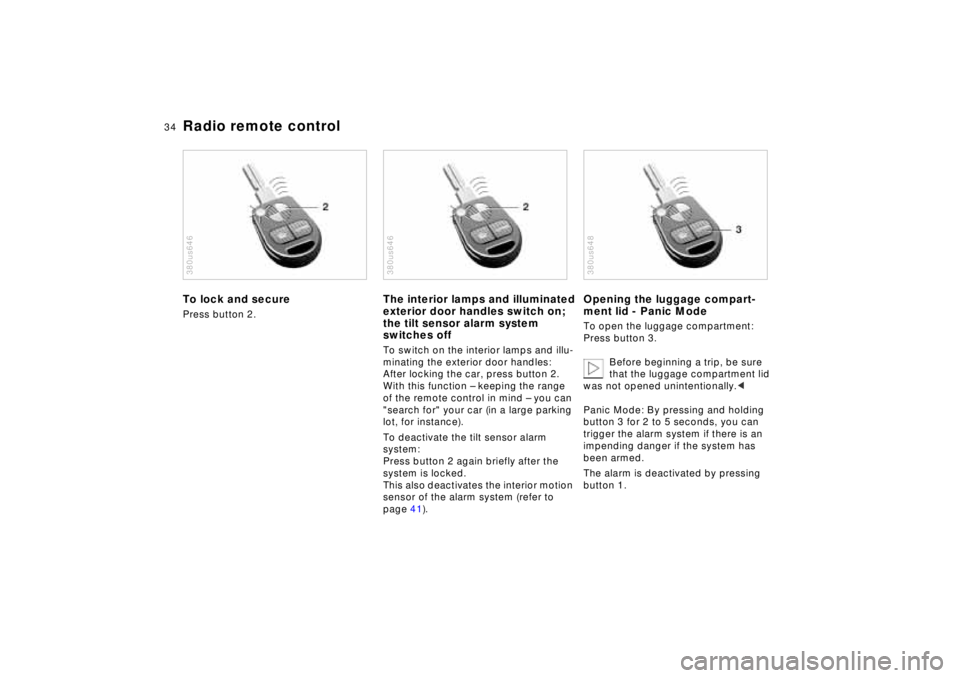
Radio remote controlTo lock and securePress button 2.380us646
The interior lamps and illuminated
exterior door handles switch on;
the tilt sensor alarm system
switches offTo switch on the interior lamps and illu-
minating the exterior door handles:
After locking the car, press button 2.
With this function – keeping the range
of the remote control in mind – you can
"search for" your car (in a large parking
lot, for instance).
To deactivate the tilt sensor alarm
system:
Press button 2 again briefly after the
system is locked.
This also deactivates the interior motion
sensor of the alarm system (refer to
page 41).380us646
Opening the luggage compart-
ment lid - Panic ModeTo open the luggage compartment:
Press button 3.
Before beginning a trip, be sure
that the luggage compartment lid
was not opened unintentionally.<
Panic Mode: By pressing and holding
button 3 for 2 to 5 seconds, you can
trigger the alarm system if there is an
impending danger if the system has
been armed.
The alarm is deactivated by pressing
button 1.380us648
Page 41 of 211
40n
Alarm systemThe vehicle alarm system responds:
>When a door, the hood or the lug-
gage compartment lid is opened
>To movement inside the vehicle (inte-
rior motion sensor)
>To variations in the vehicle tilt sensor
such as occur during attempts to
steal the wheels or tow the vehicle
>To interruption of battery voltage.
The system responds to unauthorized
vehicle entry and attempted theft by si-
multaneously activating the following:
>Sounding an acoustical alarm for
30 seconds
>The hazard warning flashers are acti-
vated for approx. five minutes
>The high beams flash on and off in
the same rhythm.
To arm and disarm the alarm
systemWhen the vehicle is locked or unlocked
by using a key or with the remote con-
trol, the alarm system is also simulta-
neously armed or disarmed.
The interior motion sensor is activated
approx. 30 seconds after you have fin-
ished locking the car.
The system indicates that it has been
correctly armed by switching on the
hazard flashers for a single cycle and by
emitting an acoustical signal.
When the system is active, you can still
gain access to the luggage compart-
ment by pressing button 3 on the re-
mote control transmitter. When the lid is
closed, it is armed once again.
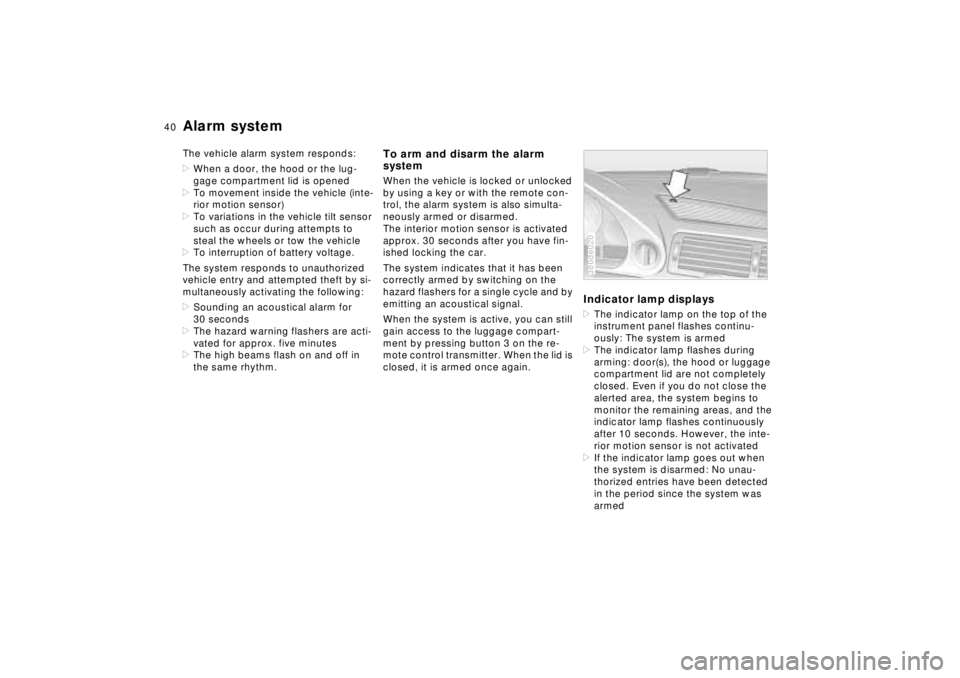
Indicator lamp displays>The indicator lamp on the top of the
instrument panel flashes continu-
ously: The system is armed
>The indicator lamp flashes during
arming: door(s), the hood or luggage
compartment lid are not completely
closed. Even if you do not close the
alerted area, the system begins to
monitor the remaining areas, and the
indicator lamp flashes continuously
after 10 seconds. However, the inte-
rior motion sensor is not activated
>If the indicator lamp goes out when
the system is disarmed: No unau-
thorized entries have been detected
in the period since the system was
armed380de020
Page 42 of 211
41n
RepairsIndexOverview Controls Car care Technology Data
Alarm system>If the indicator lamp flashes for
10 seconds when the system is
disarmed: An attempted entry has
been detected in the period since the
system was armed.
Following triggering of an alarm, the in-
dicator lamp will flash continuously.Tilt alarm sensorThe tilt alarm sensor and interior motion
sensor may be switched off at the same
time. By doing this, you can prevent
false alarms on garage ramps or when
the vehicle is transported by trailer or
train, for instance.
Lock the vehicle twice (= arm the sys-
tem). In other words, press button 2 of
the remote control twice in succession
or lock the vehicle twice with the key.
The indicator lamp lights up briefly and
then flashes continuously. The tilt alarm
sensor and the interior motion sensor
are deactivated for as long as the sys-
tem remains armed.
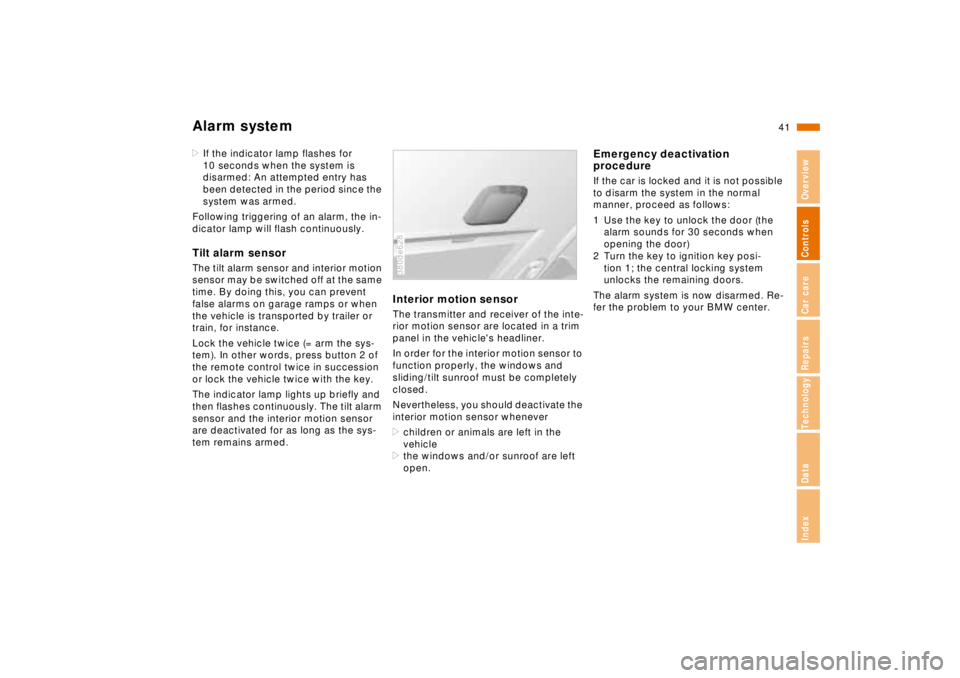
Interior motion sensorThe transmitter and receiver of the inte-
rior motion sensor are located in a trim
panel in the vehicle's headliner.
In order for the interior motion sensor to
function properly, the windows and
sliding/tilt sunroof must be completely
closed.
Nevertheless, you should deactivate the
interior motion sensor whenever
>children or animals are left in the
vehicle
>the windows and/or sunroof are left
open.380de628
Emergency deactivation
procedureIf the car is locked and it is not possible
to disarm the system in the normal
manner, proceed as follows:
1 Use the key to unlock the door (the
alarm sounds for 30 seconds when
opening the door)
2 Turn the key to ignition key posi-
tion 1; the central locking system
unlocks the remaining doors.
The alarm system is now disarmed. Re-
fer the problem to your BMW center.
Page 69 of 211
68n
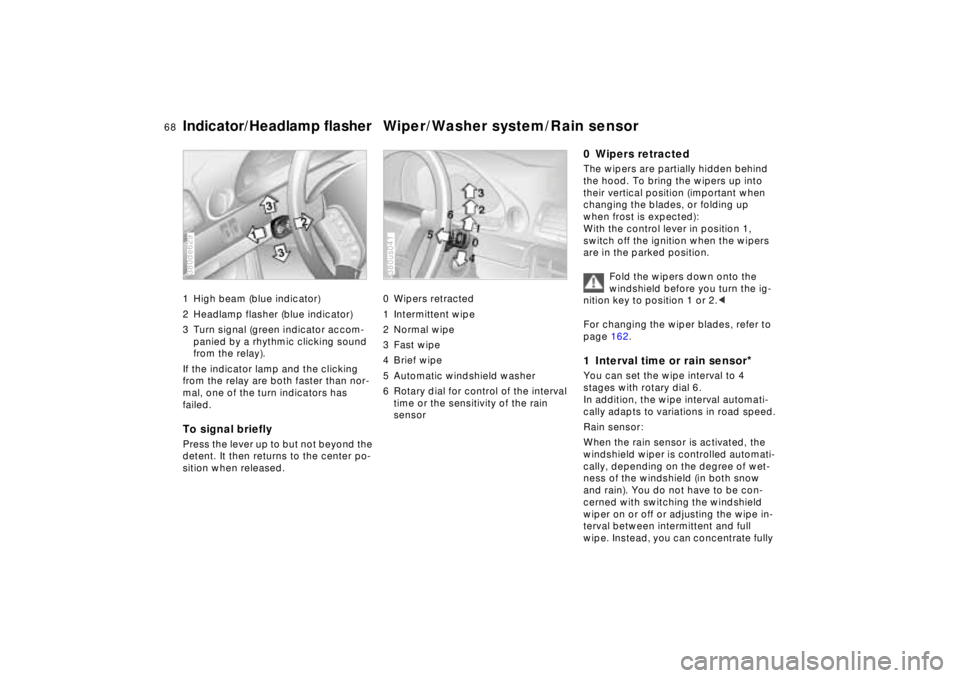
Indicator/Headlamp flasher Wiper/Washer system/Rain sensor1 High beam (blue indicator)
2 Headlamp flasher (blue indicator)
3 Turn signal (green indicator accom-
panied by a rhythmic clicking sound
from the relay).
If the indicator lamp and the clicking
from the relay are both faster than nor-
mal, one of the turn indicators has
failed.To signal brieflyPress the lever up to but not beyond the
detent. It then returns to the center po-
sition when released.380de629
0 Wipers retracted
1 Intermittent wipe
2 Normal wipe
3 Fast wipe
4 Brief wipe
5 Automatic windshield washer
6 Rotary dial for control of the interval
time or the sensitivity of the rain
sensor380us041
0 Wipers retractedThe wipers are partially hidden behind
the hood. To bring the wipers up into
their vertical position (important when
changing the blades, or folding up
when frost is expected):
With the control lever in position 1,
switch off the ignition when the wipers
are in the parked position.
Fold the wipers down onto the
windshield before you turn the ig-
nition key to position 1 or 2.<
For changing the wiper blades, refer to
page 162.1 Interval time or rain sensor
*
You can set the wipe interval to 4
stages with rotary dial 6.
In addition, the wipe interval automati-
cally adapts to variations in road speed.
Rain sensor:
When the rain sensor is activated, the
windshield wiper is controlled automati-
cally, depending on the degree of wet-
ness of the windshield (in both snow
and rain). You do not have to be con-
cerned with switching the windshield
wiper on or off or adjusting the wipe in-
terval between intermittent and full
wipe. Instead, you can concentrate fully
Page 70 of 211
69n
RepairsIndexOverview Controls Car care Technology Data
Wiper/Washer systemon the traffic conditions. This is espe-
cially important under adverse weather
conditions.
To activate the rain sensor:
From ignition key position 1 and up,
move the lever to position 1. The wipers
travel once across the windshield, re-
gardless of the weather.
You can leave the lever permanently in
position 1. It is then only necessary to
activate the rain sensor from ignition
key position 1 and up. To do this
>turn rotary dial 7 briefly or
>use either the automatic windshield
washer 5 or the automatic intensive
washer 6.
To modify the sensitivity of the rain
sensor:
Turn rotary dial 7.
Turn the rain sensor off in auto-
matic car washes.
If you do not, damage may occur if the
wipers switch on unintentionally.<
2 Normal wiper speedWhen the vehicle is stationary, the wip-
ers switch automatically to intermittent
wipe (not on vehicles with rain sensor).3 Fast wiper speedWhen the vehicle is stationary, the wip-
ers operate at normal speed (not on ve-
hicles with rain sensor).5 Automatic windshield washerThe system sprays washer fluid against
the windshield and activates the wipers
for a brief period.
If you only pull the lever briefly, the sys-
tem sprays washer fluid onto the wind-
shield without activating the wipers.Headlamp washers
*
If they are on, the headlamps will also
be cleaned every fifth time you activate
the automatic windshield washer.Do not use the washers if there is
any danger that the fluid will
freeze on the windshield, otherwise vi-
sion could be obscured. For this rea-
son, use an antifreeze agent. Refer to
page 142.
Do not use the washers when the reser-
voir is empty, since this could cause
damage to the washer pump.<
Windshield washer jetsThe windshield washer jets and the
windshield in the wiper sweep area are
defrosted automatically when the igni-
tion key is in position 2.