Page 99 of 211
98n
Interior lamps Reading lampsFootwell lampsThe footwell lamps operate in the same
way as the interior lamps.
The reading lamps are located in the
front near the interior lamp and in the
rear. They can be switched on and off
with the switch adjacent to each lamp.
In order to conserve the battery,
all of the lamps in the vehicle
are switched off automatically approx.
15 minutes after the ignition key is
turned to position 0.<
380us641
Page 105 of 211
104n
Automatic climate controlResidual heat mode
The heat which is stored in
the engine is utilized for
heating of the interior when the engine
has been switched off (while waiting at
a railroad crossing, for instance).
In ignition key position 1, you can alter
the settings of the automatic climate
control. In ignition key position 0, the
system automatically directs heated air
to the windshield, side windows and
footwells.
This function may be activated
when the outside temperature is
below approx. 597 (156), the engine
is at operating temperature, and the
battery is adequately charged.<
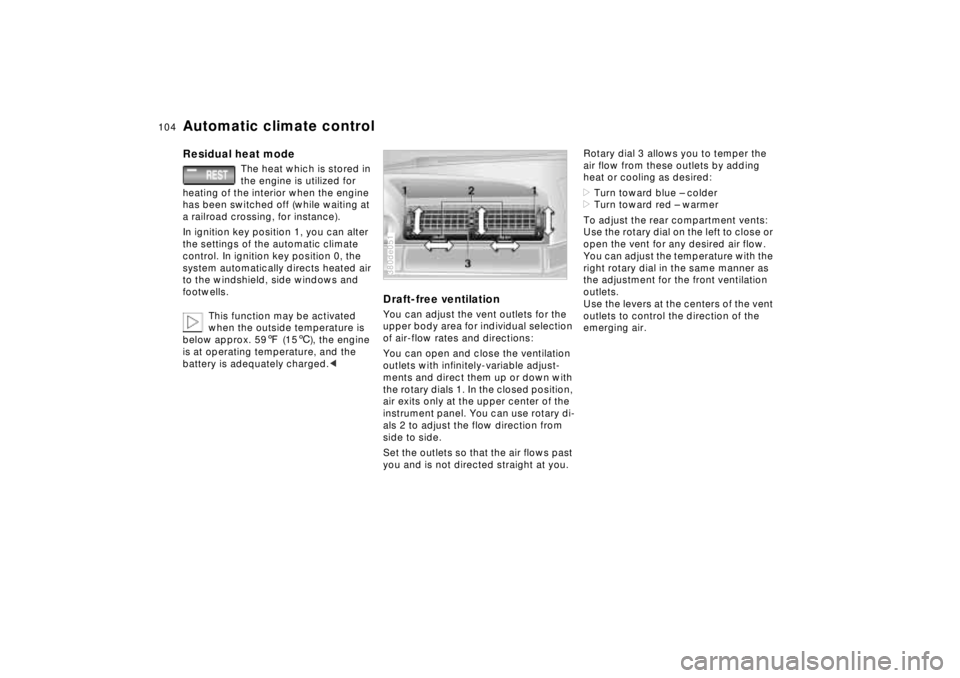
Draft-free ventilationYou can adjust the vent outlets for the
upper body area for individual selection
of air-flow rates and directions:
You can open and close the ventilation
outlets with infinitely-variable adjust-
ments and direct them up or down with
the rotary dials 1. In the closed position,
air exits only at the upper center of the
instrument panel. You can use rotary di-
als 2 to adjust the flow direction from
side to side.
Set the outlets so that the air flows past
you and is not directed straight at you.380de051
Rotary dial 3 allows you to temper the
air flow from these outlets by adding
heat or cooling as desired:
>Turn toward blue – colder
>Turn toward red – warmer
To adjust the rear compartment vents:
Use the rotary dial on the left to close or
open the vent for any desired air flow.
You can adjust the temperature with the
right rotary dial in the same manner as
the adjustment for the front ventilation
outlets.
Use the levers at the centers of the vent
outlets to control the direction of the
emerging air.
Page 108 of 211
107n
RepairsIndexOverview Controls Car care Technology Data
Roller sun blind
*
Independent ventilation system
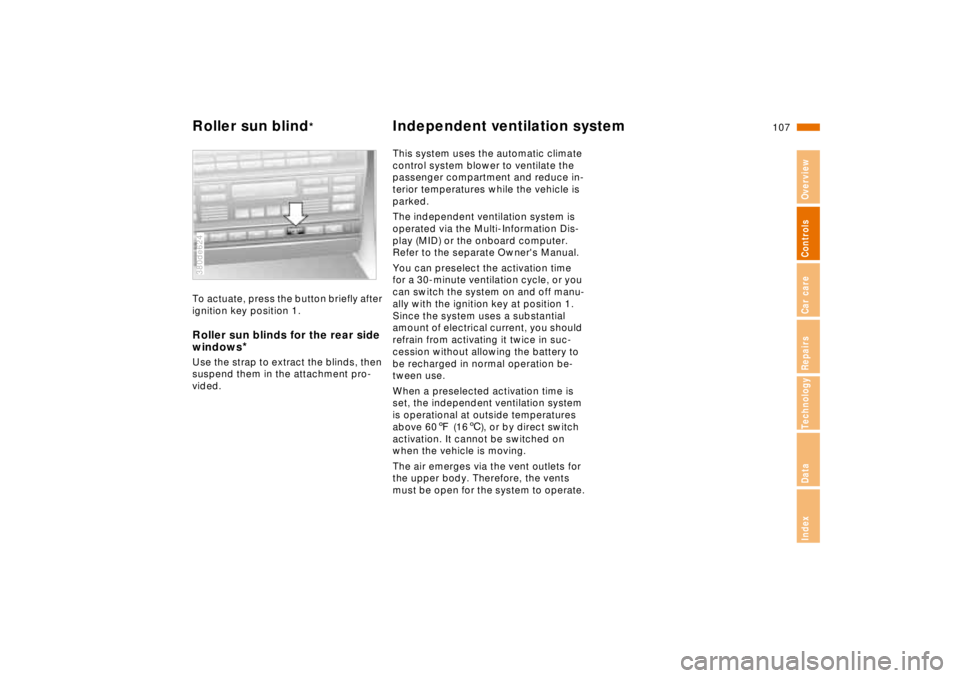
To actuate, press the button briefly after
ignition key position 1.Roller sun blinds for the rear side
windows
*
Use the strap to extract the blinds, then
suspend them in the attachment pro-
vided.380de624
This system uses the automatic climate
control system blower to ventilate the
passenger compartment and reduce in-
terior temperatures while the vehicle is
parked.
The independent ventilation system is
operated via the Multi-Information Dis-
play (MID) or the onboard computer.
Refer to the separate Owner's Manual.
You can preselect the activation time
for a 30-minute ventilation cycle, or you
can switch the system on and off manu-
ally with the ignition key at position 1.
Since the system uses a substantial
amount of electrical current, you should
refrain from activating it twice in suc-
cession without allowing the battery to
be recharged in normal operation be-
tween use.
When a preselected activation time is
set, the independent ventilation system
is operational at outside temperatures
above 607 (166), or by direct switch
activation. It cannot be switched on
when the vehicle is moving.
The air emerges via the vent outlets for
the upper body. Therefore, the vents
must be open for the system to operate.
Page 138 of 211
137n
RepairsIndexOverview Controls Car care Technology Data
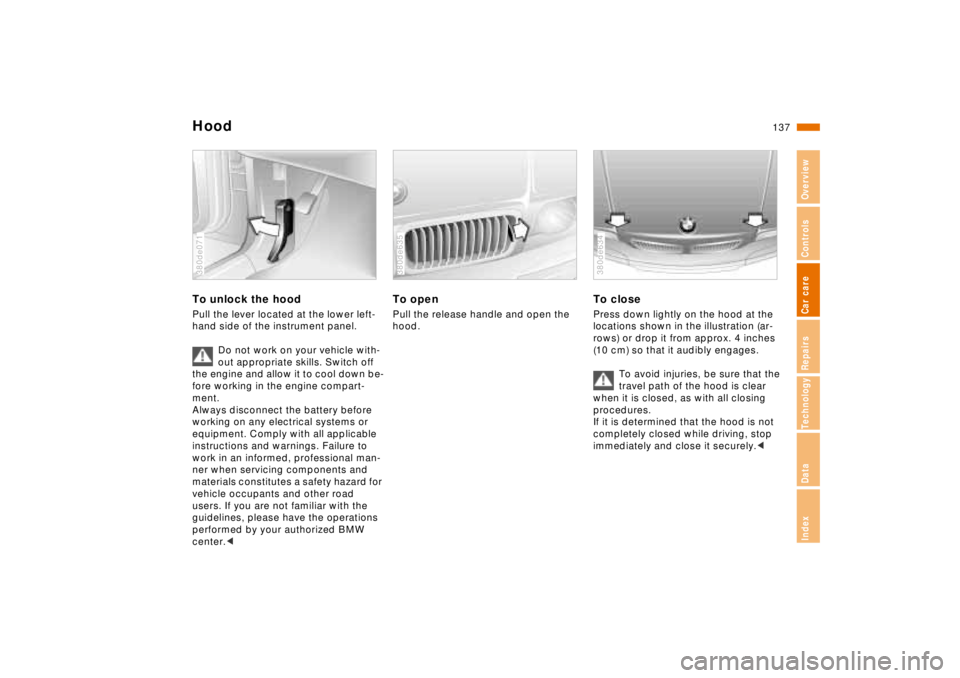
HoodTo unlock the hoodPull the lever located at the lower left-
hand side of the instrument panel.
Do not work on your vehicle with-
out appropriate skills. Switch off
the engine and allow it to cool down be-
fore working in the engine compart-
ment.
Always disconnect the battery before
working on any electrical systems or
equipment. Comply with all applicable
instructions and warnings. Failure to
work in an informed, professional man-
ner when servicing components and
materials constitutes a safety hazard for
vehicle occupants and other road
users. If you are not familiar with the
guidelines, please have the operations
performed by your authorized BMW
center.< 380de071
To openPull the release handle and open the
hood.380de635
To closePress down lightly on the hood at the
locations shown in the illustration (ar-
rows) or drop it from approx. 4 inches
(10 cm) so that it audibly engages.
To avoid injuries, be sure that the
travel path of the hood is clear
when it is closed, as with all closing
procedures.
If it is determined that the hood is not
completely closed while driving, stop
immediately and close it securely.< 380de634
Page 162 of 211
Overview
Controls and features
Operation, care
and maintenance
Owner service procedures
Technical data
Index Advanced technology
161n
RepairsIndexOverview Controls Car care Technology Data
Replacement procedures:
Onboard tool kit162
Windshield wiper blades162
Lamps and bulbs163
Remote control168
Changing tires170
Battery173
Fuses176
In case of electrical
malfunction:
Fuel filler door178
Sliding/Tilt sunroof178
Assistance, giving and
receiving:
Jump-starting179
Towing the vehicle180
Page 164 of 211
163n
RepairsIndexOverview Controls Car care Technology Data
Lamps and bulbsThe lamps and bulbs make essential
contributions to the safety of your vehi-
cle. Observe the following instructions
during bulb replacement carefully. If
you are not familiar with any of the pro-
cedures, consult your authorized BMW
center.
Do not touch the glass portion of a
new bulb with your bare hands
since even small amounts of impurities
burn in to the surface, thus reducing the
service life of the bulb. Use a clean
cloth, paper napkin, or a similar mate-
rial, or hold the bulb by its metallic
base.<
A replacement bulb set is available from
your BMW center.
Whenever working on the electri-
cal system, switch off the electri-
cal accessory you are working on or
disconnect the cable from the negative
terminal of the battery. Failure to do this
could result in short circuits.
To prevent injuries and damage, comply
with any instructions provided by the
bulb manufacturer.<
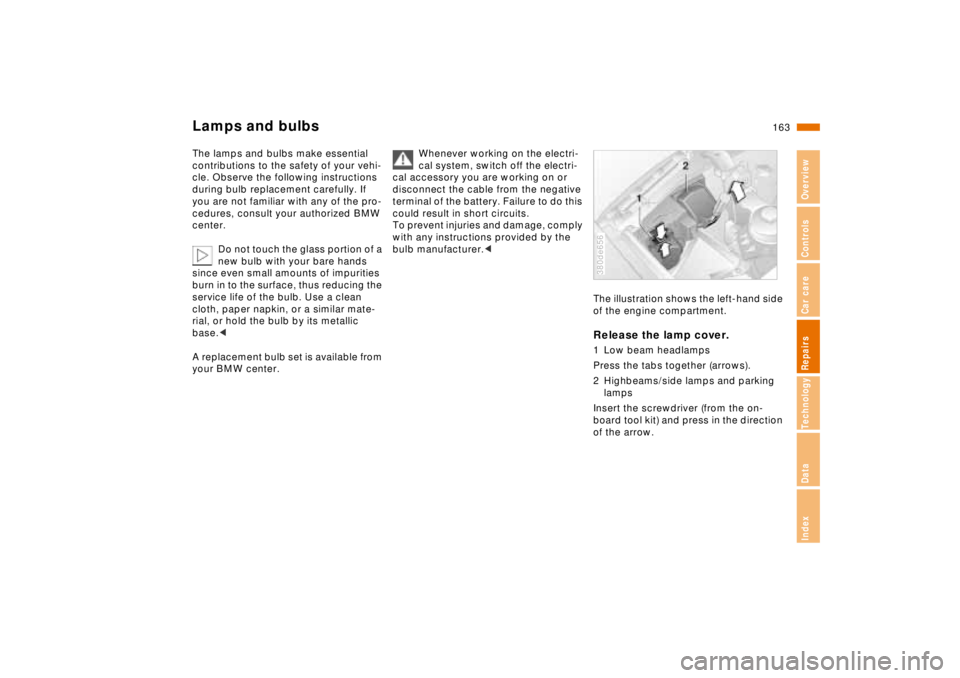
The illustration shows the left-hand side
of the engine compartment.Release the lamp cover.1 Low beam headlamps
Press the tabs together (arrows).
2 Highbeams/side lamps and parking
lamps
Insert the screwdriver (from the on-
board tool kit) and press in the direction
of the arrow.380de656
Page 169 of 211
168n
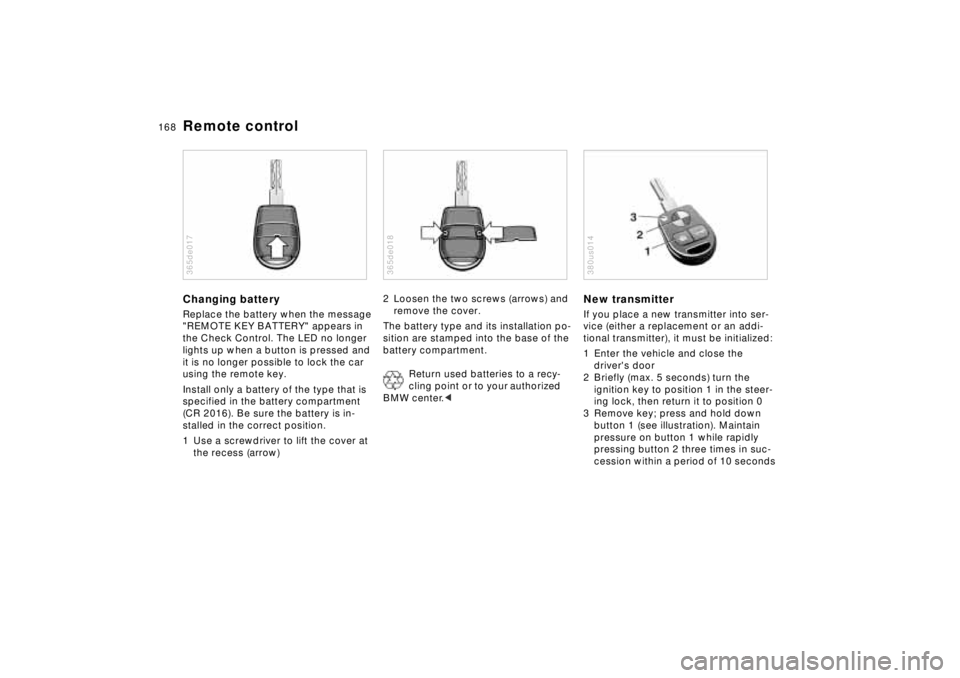
Remote controlChanging batteryReplace the battery when the message
"REMOTE KEY BATTERY" appears in
the Check Control. The LED no longer
lights up when a button is pressed and
it is no longer possible to lock the car
using the remote key.
Install only a battery of the type that is
specified in the battery compartment
(CR 2016). Be sure the battery is in-
stalled in the correct position.
1 Use a screwdriver to lift the cover at
the recess (arrow)365de017
2 Loosen the two screws (arrows) and
remove the cover.
The battery type and its installation po-
sition are stamped into the base of the
battery compartment.
Return used batteries to a recy-
cling point or to your authorized
BMW center.< 365de018
New transmitterIf you place a new transmitter into ser-
vice (either a replacement or an addi-
tional transmitter), it must be initialized:
1 Enter the vehicle and close the
driver's door
2 Briefly (max. 5 seconds) turn the
ignition key to position 1 in the steer-
ing lock, then return it to position 0
3 Remove key; press and hold down
button 1 (see illustration). Maintain
pressure on button 1 while rapidly
pressing button 2 three times in suc-
cession within a period of 10 seconds380us014
Page 171 of 211
170n
Changing tires
Safety measures in the event of a
flat tire or wheel change:
Stop the vehicle as far as possible from
passing traffic. Park on a firm, flat, sur-
face.
Switch on the hazard flashers.
Turn the steering wheel to the straight-
ahead position, remove the key and en-
gage the steering lock. Make sure that
the selector lever is in Park, and engage
the parking brake.
All passengers should be outside the
car and well away from your immediate
working area (for instance, behind a
guardrail).
If a warning triangle or portable hazard
warning lamp is available, set it up on
the roadside at an appropriate distance
from the rear of the vehicle.
Comply with all safety guidelines and
regulations.
Change the wheel only on a level, firm
surface which is not slippery. Avoid
jacking the car on a soft or slippery sup-
port surface (snow, ice, loose gravel,
etc.), since it could slide sideways.
Position the jack on a firm support sur-
face.
Do not place wooden blocks or similar
objects under the jack. If this is done,
the jack might not be able to reach its
full support capacity because of the
limited height. Do not lie under the vehi-
cle or start the engine when the vehicle
is supported by the jack - risk of fatal
injury.<
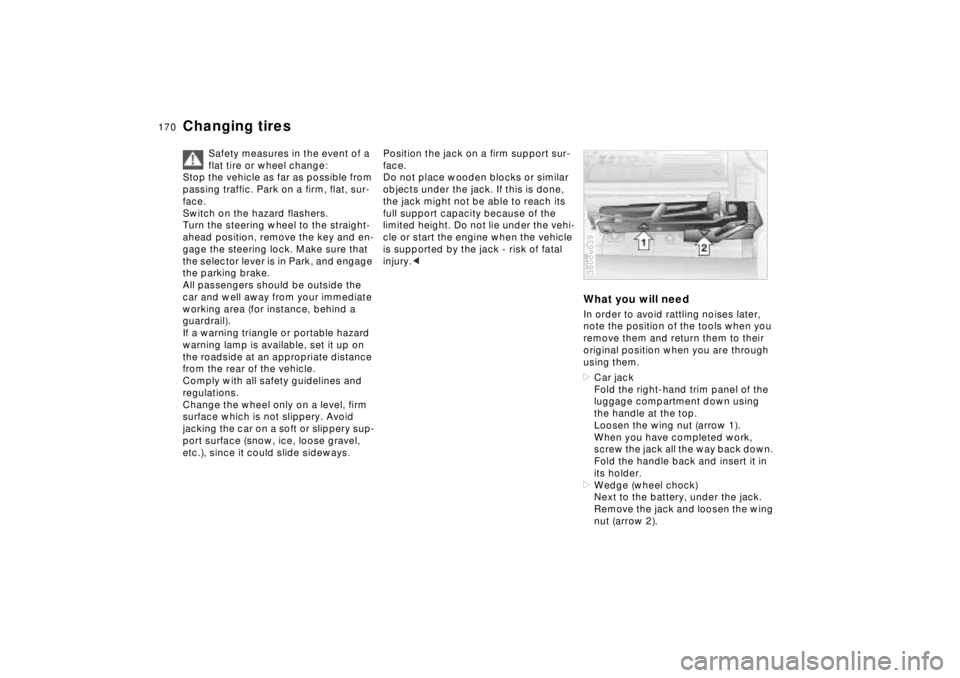
What you will needIn order to avoid rattling noises later,
note the position of the tools when you
remove them and return them to their
original position when you are through
using them.
>Car jack
Fold the right-hand trim panel of the
luggage compartment down using
the handle at the top.
Loosen the wing nut (arrow 1).
When you have completed work,
screw the jack all the way back down.
Fold the handle back and insert it in
its holder.
>Wedge (wheel chock)
Next to the battery, under the jack.
Remove the jack and loosen the wing
nut (arrow 2).380de639