Page 61 of 198

59
On the luggage compartment floor
a. Using the illustration as a guide, run your fingers across the luggage compart-
ment floor itself to locate the position of the bolts underneath. b. Remove the bolt.
c. Insert a 10 mm (0.4 in.) spacer and tighten down the anchor bracket for your
child restraint system with a bolt. Torque
the bolt to 16.5-24.7 N
Vm (1.68-2.52 kgr-
V m, 12.2-18.2 ft Vlbf).
To comply with Canada Motor Vehicle
Safety Standards, vehicles sold in Cana-
da are provided with a bracket set in the
glovebox, designed for use with any of the
2 anchor locations shown in the illustra- tion.
If your child restraint system does not pro-
vide any of the necessary parts, ask your
Toyota dealer. (See -Child restraint sys- temº.)
If you remove the anchor brackets when
the child restraint system is necessary no
longer, replace the bolts in the holes to
prevent entry of exhaust emissions, water
or dirt.
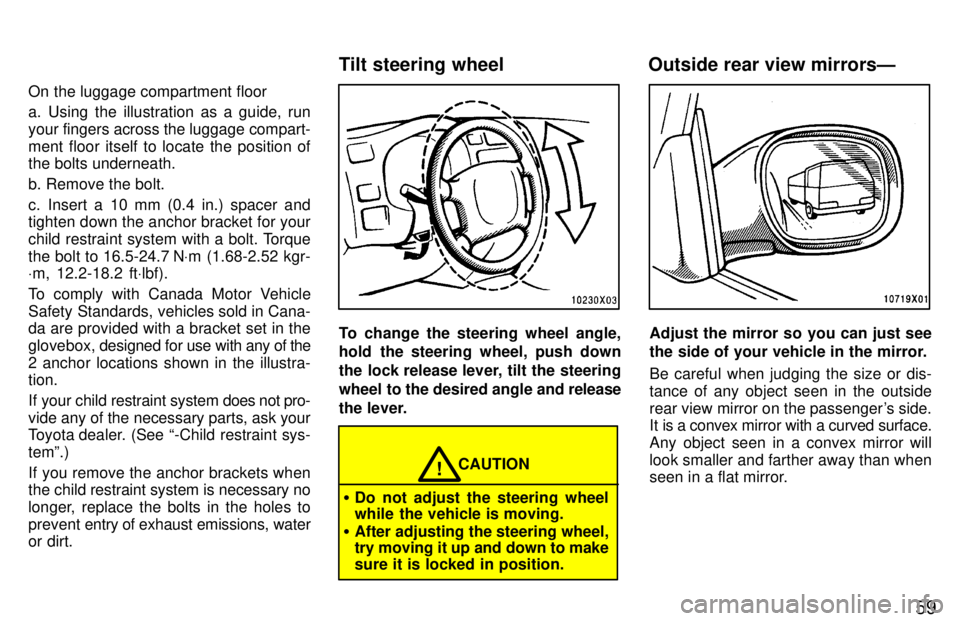
To change the steering wheel angle,
hold the steering wheel, push down
the lock release lever, tilt the steering
wheel to the desired angle and release
the lever.
CAUTION!
� Do not adjust the steering wheel
while the vehicle is moving.
� After adjusting the steering wheel,try moving it up and down to make sure it is locked in position.
Adjust the mirror so you can just see
the side of your vehicle in the mirror. Be careful when judging the size or dis- tance of any object seen in the outside
rear view mirror on the passenger's side.
It is a convex mirror with a curved surface.
Any object seen in a convex mirror will
look smaller and farther away than when
seen in a flat mirror.
Tilt steering wheel Outside rear view mirrorsÐ
Page 62 of 198

59
On the luggage compartment floor
a. Using the illustration as a guide, run your fingers across the luggage compart-
ment floor itself to locate the position of the bolts underneath. b. Remove the bolt.
c. Insert a 10 mm (0.4 in.) spacer and tighten down the anchor bracket for your
child restraint system with a bolt. Torque
the bolt to 16.5-24.7 N
Vm (1.68-2.52 kgr-
V m, 12.2-18.2 ft Vlbf).
To comply with Canada Motor Vehicle
Safety Standards, vehicles sold in Cana-
da are provided with a bracket set in the
glovebox, designed for use with any of the
2 anchor locations shown in the illustra- tion.
If your child restraint system does not pro-
vide any of the necessary parts, ask your
Toyota dealer. (See -Child restraint sys- temº.)
If you remove the anchor brackets when
the child restraint system is necessary no
longer, replace the bolts in the holes to
prevent entry of exhaust emissions, water
or dirt.
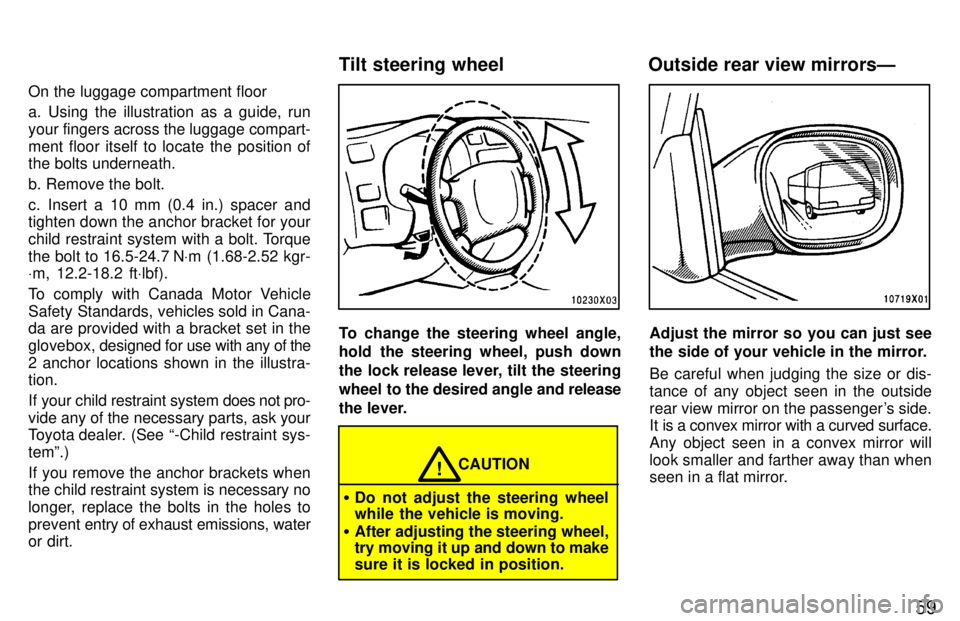
To change the steering wheel angle,
hold the steering wheel, push down
the lock release lever, tilt the steering
wheel to the desired angle and release
the lever.
CAUTION!
� Do not adjust the steering wheel
while the vehicle is moving.
� After adjusting the steering wheel,try moving it up and down to make sure it is locked in position.
Adjust the mirror so you can just see
the side of your vehicle in the mirror. Be careful when judging the size or dis- tance of any object seen in the outside
rear view mirror on the passenger's side.
It is a convex mirror with a curved surface.
Any object seen in a convex mirror will
look smaller and farther away than when
seen in a flat mirror.
Tilt steering wheel Outside rear view mirrorsÐ
Page 142 of 198

142
When lowering the vehicle, make sure all portions of your body and
all other persons around will not be
injured as the vehicle is lowered tothe ground.CAUTION
!
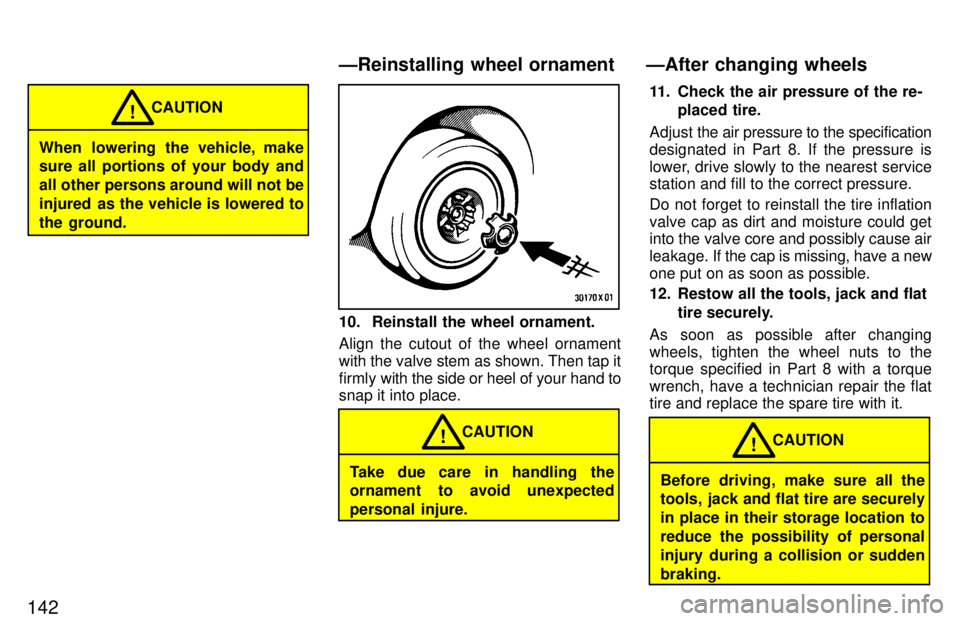
10. Reinstall the wheel ornament.
Align the cutout of the wheel ornament with the valve stem as shown. Then tap it
firmly
with the side or heel of your hand to
snap it into place.
Take due care in handling the
ornament to avoid unexpected
personal injure. CAUTION
! 11. Check the air pressure of the re-
placed tire.
Adjust the air pressure to the specification
designated in Part 8. If the pressure is
lower, drive slowly to the nearest service station and fill to the correct pressure.
Do not forget to reinstall the tire inflation valve cap as dirt and moisture could get into the valve core and possibly cause air
leakage. If the cap is missing, have a new
one put on as soon as possible.
12. Restow all the tools, jack and flat
tire securely.
As soon as possible after changing
wheels, tighten the wheel nuts to the torque specified in Part 8 with a torque wrench, have a technician repair the flat tire and replace the spare tire with it.
Before driving, make sure all the
tools, jack and flat tire are securely in place in their storage location to
reduce the possibility of personal
injury during a collision or suddenbraking. CAUTION
!
ÐReinstalling wheel ornament ÐAfter changing wheels
Page 194 of 198
198
Tire size and pressure:
Tire pressure 2
MdlTi i
Tire ressure
kpa (kgf/cm 2
or bar, psi)
Wh l iModelTire sizeFrontRearWheel size
2-door models215/70R 16 99S180 (1.8, 26)180 (1.8, 26)16 X 6JJ 16 X 6.5JJ*
235/60R 16 100H170 (1.7, 25)170 (1.7, 25)16 X 6.5 JJ
4-door models215/70R 16 99S190 (1.9, 28)180 (1.8, 26)16 x 6JJ 16 X 6.5JJ *
235/60R 16 100H170 (1.7, 25)170 (1.7, 25)16 X 6.5JJ
Wheel nut torque, N w m (kgf w m, f w Ibf):
103 (10.5, 76)
*: Vehicles with aluminum wheel
Tires