1997 TOYOTA RAV4 run flat
[x] Cancel search: run flatPage 61 of 198

59
On the luggage compartment floor
a. Using the illustration as a guide, run your fingers across the luggage compart-
ment floor itself to locate the position of the bolts underneath. b. Remove the bolt.
c. Insert a 10 mm (0.4 in.) spacer and tighten down the anchor bracket for your
child restraint system with a bolt. Torque
the bolt to 16.5-24.7 N
Vm (1.68-2.52 kgr-
V m, 12.2-18.2 ft Vlbf).
To comply with Canada Motor Vehicle
Safety Standards, vehicles sold in Cana-
da are provided with a bracket set in the
glovebox, designed for use with any of the
2 anchor locations shown in the illustra- tion.
If your child restraint system does not pro-
vide any of the necessary parts, ask your
Toyota dealer. (See -Child restraint sys- temº.)
If you remove the anchor brackets when
the child restraint system is necessary no
longer, replace the bolts in the holes to
prevent entry of exhaust emissions, water
or dirt.
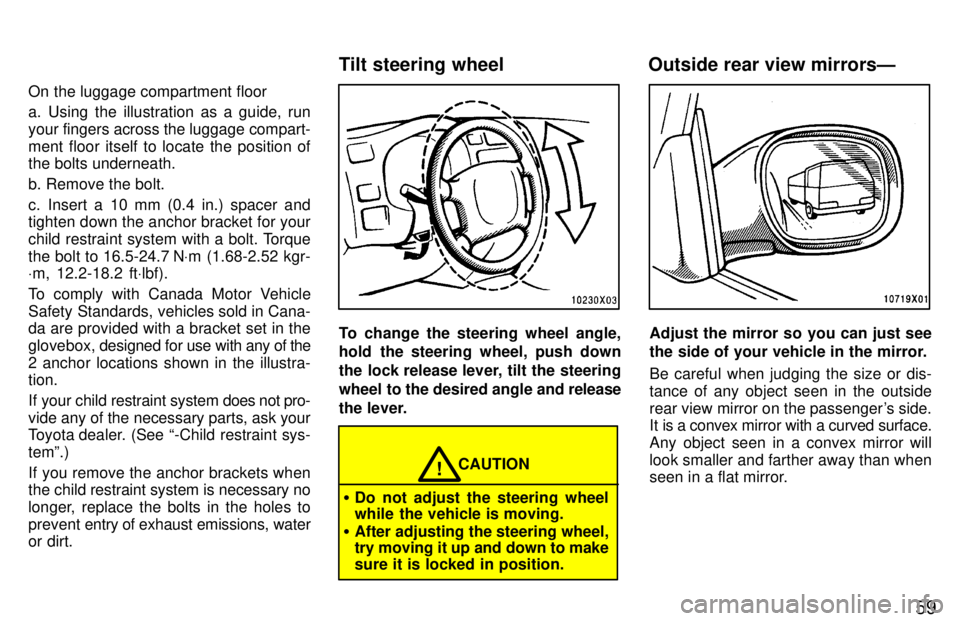
To change the steering wheel angle,
hold the steering wheel, push down
the lock release lever, tilt the steering
wheel to the desired angle and release
the lever.
CAUTION!
� Do not adjust the steering wheel
while the vehicle is moving.
� After adjusting the steering wheel,try moving it up and down to make sure it is locked in position.
Adjust the mirror so you can just see
the side of your vehicle in the mirror. Be careful when judging the size or dis- tance of any object seen in the outside
rear view mirror on the passenger's side.
It is a convex mirror with a curved surface.
Any object seen in a convex mirror will
look smaller and farther away than when
seen in a flat mirror.
Tilt steering wheel Outside rear view mirrorsÐ
Page 62 of 198

59
On the luggage compartment floor
a. Using the illustration as a guide, run your fingers across the luggage compart-
ment floor itself to locate the position of the bolts underneath. b. Remove the bolt.
c. Insert a 10 mm (0.4 in.) spacer and tighten down the anchor bracket for your
child restraint system with a bolt. Torque
the bolt to 16.5-24.7 N
Vm (1.68-2.52 kgr-
V m, 12.2-18.2 ft Vlbf).
To comply with Canada Motor Vehicle
Safety Standards, vehicles sold in Cana-
da are provided with a bracket set in the
glovebox, designed for use with any of the
2 anchor locations shown in the illustra- tion.
If your child restraint system does not pro-
vide any of the necessary parts, ask your
Toyota dealer. (See -Child restraint sys- temº.)
If you remove the anchor brackets when
the child restraint system is necessary no
longer, replace the bolts in the holes to
prevent entry of exhaust emissions, water
or dirt.
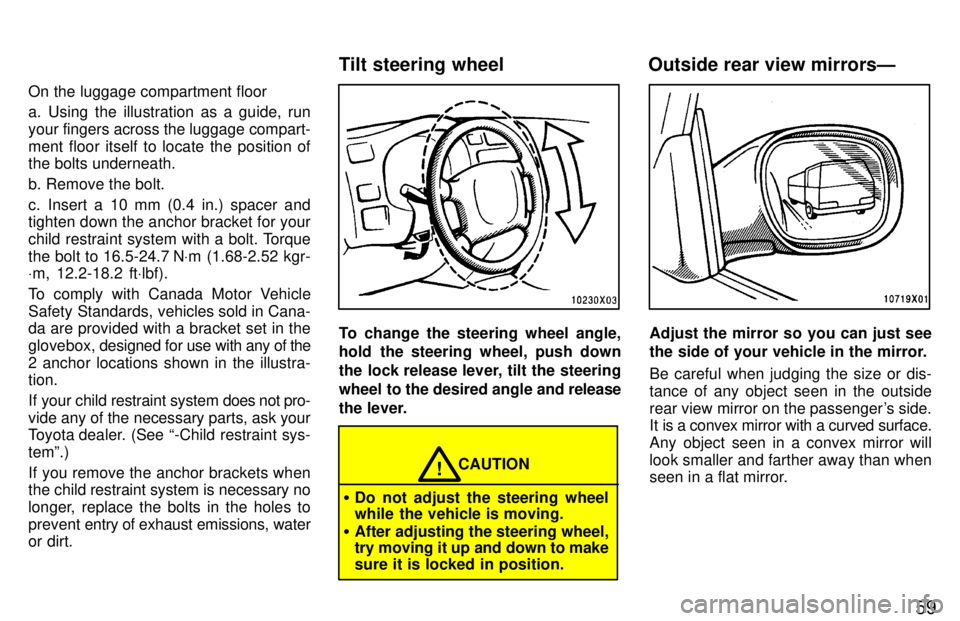
To change the steering wheel angle,
hold the steering wheel, push down
the lock release lever, tilt the steering
wheel to the desired angle and release
the lever.
CAUTION!
� Do not adjust the steering wheel
while the vehicle is moving.
� After adjusting the steering wheel,try moving it up and down to make sure it is locked in position.
Adjust the mirror so you can just see
the side of your vehicle in the mirror. Be careful when judging the size or dis- tance of any object seen in the outside
rear view mirror on the passenger's side.
It is a convex mirror with a curved surface.
Any object seen in a convex mirror will
look smaller and farther away than when
seen in a flat mirror.
Tilt steering wheel Outside rear view mirrorsÐ
Page 116 of 198

11 5
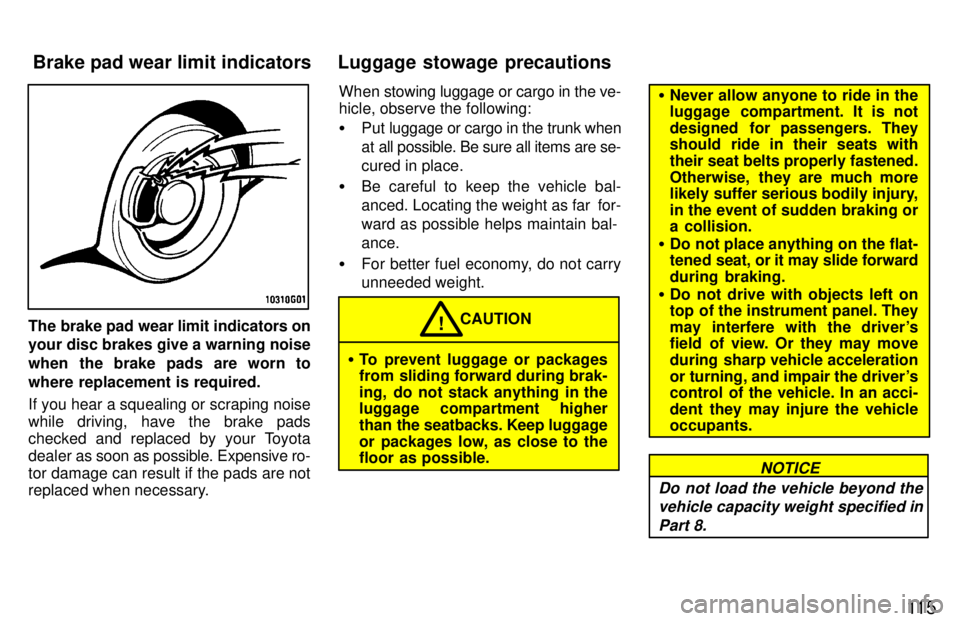
The brake pad wear limit indicators on your disc brakes give a warning noise
when the brake pads are worn to
where replacement is required.
If you hear a squealing or scraping noise
while driving, have the brake pads
checked and replaced by your Toyota
dealer as soon as possible. Expensive ro-
tor damage can result if the pads are not
replaced when necessary. When stowing luggage or cargo in the ve-
hicle, observe the following: �
Put luggage or cargo in the trunk when
at all possible. Be sure all items are se-cured in place.
� Be careful to keep the vehicle bal-
anced. Locating the weight as far for-
ward as possible helps maintain bal-ance.
� For better fuel economy, do not carry unneeded weight.CAUTION!
� To prevent luggage or packages
from sliding forward during brak-
ing, do not stack anything in the
luggage compartment higher
than the seatbacks. Keep luggage
or packages low, as close to the
floor as possible.
� Never allow anyone to ride in the
luggage compartment. It is not
designed for passengers. They
should ride in their seats with
their seat belts properly fastened.
Otherwise, they are much more
likely suffer serious bodily injury, in the event of sudden braking or a collision.
� Do not place anything on the flat-
tened seat, or it may slide forward
during braking.
� Do not drive with objects left on
top of the instrument panel. They
may interfere with the driver's
field of view. Or they may move
during sharp vehicle acceleration
or turning, and impair the driver's
control of the vehicle. In an acci-
dent they may injure the vehicle occupants.
Do not load the vehicle beyond the
vehicle capacity weight specified in
Part 8.
NOTICE
Brake pad wear limit indicators Luggage stowage precautions
Page 129 of 198

128
When restarting out after parking on a slope:
1. With the transmission in Pº position
(automatic) or the clutch pedal de-
pressed (manual), start the engine.
(With an automatic transmission, be
sure to keep the brake pedal de- pressed.)
2. Shift into gear.
3. Release the parking brake (also foot brake on automatic transmission ve- hicles) and slowly pull or back away
from the wheels blocks. Stop and ap- ply your brakes.
4. Have someone retrieve the blocks.
CAUTION!
� Do not exceed 72 km/h (45 mph) or
the posted towing speed limit,
whichever is lower. Because insta- bility (swaying) of a towing vehicle
trailer combination usually in-
creases as the speed increases, ex-
ceeding 72 km/h (45 mph) maycause loss of control.
� Slow down and downshift before
descending steep or long down- hill grades. Do not make sudden downshifts.
� Avoid holding the pedal down
too long or too frequently. This
could cause the brakes to over-
heat and result in reduced brak-
ing efficiency. Getting
more kilometers/mileage from a li-
ter/gallon of fuel is easy-just take it easy.
It will help make your vehicle last longer,
too. Here are some specific tips on how to
save money on both fuel and repairs: � Keep your tires inflated at the cor- rect pressure. Underinflation causes
tire wear and wastes fuel. See Chapter
7-2 for instructions.
� Do not carry unneeded weight in
your vehicle. Excess weight puts a
heavier load on the engine, causing greater fuel consumption.
� Avoid lenghty warm-up idling.
Once the engine is running smoothly,
begin drivingÐbut gently. Remember,
however, that on cold winter days this
may take a little longer.
� Accelerate slowly and smoothly.
Avoid jackrabbit starts. Get into high
gear as quickly as possible.
� Avoid long engine idling. If you have
a long wait and you are not in traffic, it
is better to turn off the engine and start
again later.
� Avoid engine lug or overrevving.
Use a gear position suitable for the
road on which you are travelling.
How to save fuel and make
your vehicle last longer, too
Page 136 of 198

1361. Reduce
your speed gradually, keeping
a straight line. Move cautiously off the
road to a safe place well away from the
traf fic. Avoid stopping on the center di-
vider of a highway. Park on a level spotwith firm ground.
2. Stop the engine and turn on your emergency flashers.
3. Firmly set the parking brake and put the transmission in Pº (automatic) or reverse (manual).
4. Have everyone get out of the vehicle on the side away from traffic.
5. Read the following instructions thor- oughly.
When jacking, be sure to observe
the following to reduce the possibil-
ity of personal injury: �Follow jacking instructions.
� Do not start or run the engine
while your vehicle is supported by
the jack. CAUTION
!
�
Stop the vehicle on a level firm
ground, firmly set the parking
brake and put the transmission in Pº (automatic) or reverse (manu-
al). Block the wheel diagonally op-
posite to the one being changed if
necessary.
� Make sure to set the jack properly
in the jack point. Raising the ve-
hicle with jack improperly posi-
tioned will damage the vehicle or
may allow the vehicle to fall off thejack and cause injury to the per- son.
� Never get under the vehicle when
the vehicle is supported by the jack alone.
� Use the jack only for lifting your
vehicle during wheel changing.
� Do not raise the vehicle with some-
one in the vehicle.
� When raising the vehicle, do not
put an object on or under the jack.
� Raise the vehicle only high
enough to remove and change the tire.NOTICE
Do not continue driving with a deflated tire. Driving even a short
distance can damage a tire beyondrepair.
If you have a flat tireÐ