1997 TOYOTA PASEO lock
[x] Cancel search: lockPage 134 of 182

132
(a) Towing with wheel lift type truck
From front
ÐRelease the parking brake.
NOTICE
When lifting wheels, take care to ensure adequate ground clearance
for towing at the opposite end of theraised vehicle. Otherwise, the bumper and/or underbody of thetowed vehicle will be damaged during towing.
From rearÐ � Manual transmission:
We recommend using a towing dolly
under the front wheels. If you do not
use a towing dolly, place the ignitionkey in the ACCº position and put thetransmission in neutral.
NOTICE
Do not tow with the key removed or in the LOCKº position when
towing from the rear without atowing dolly. The steering lock mechanism is not strong enough tohold the front wheels straight.
� Automatic transmission: Use a towing dolly under the front wheels.
NOTICE
Never tow a vehicle with an automatic transmission from the
rear with the front wheels on theground, as this may cause serious damage to the transmission.
(b) Using a flat bed truck
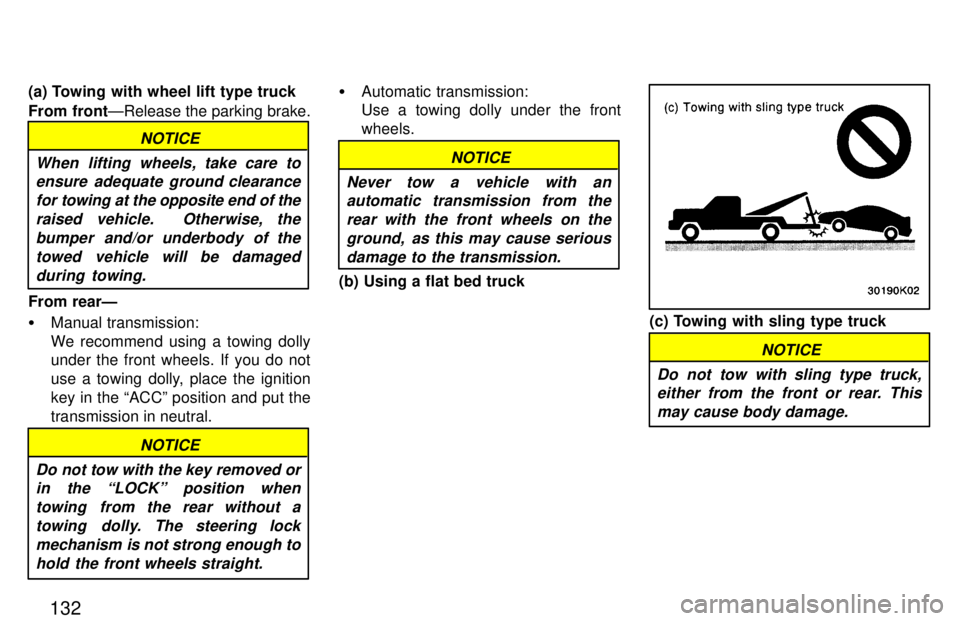
(c) Towing with sling type truck
NOTICE
Do not tow with sling type truck, either from the front or rear. This
may cause body damage.
Page 136 of 182

134
If you cannot shift the selector lever
out of Pº position to other positions
even though the brake pedal is de-pressed, use the shift lock override
button as follows:
1. Turn the ignition key to LOCKºposition. Make sure the parking brake is on.
2. Pry up the cover with a flat-bladed screwdriver or equivalent.3. Insert the screwdriver or equivalent
into the hole to push down the shift
lock override button. You can shift
out of Pº position only while push-
ing the button.
4. Shift into Nº position.
5. Insert the cover.
6. Start the engine. For your safety, keep the brake pedal depressed.
Be sure to have the system checked by
your Toyota dealer as soon as possible. Many Toyota dealers can make a new
key if you can give them the key num-
ber. See the suggestion given in Keysº in Chapter 1-2.
If your keys are locked in the vehicle and
you cannot get a duplicate, many Toyota
dealers
can still open the door for you, us-
ing their special tools. If you must break a
window to get in, we suggest breaking the
smallest side window because it is the least expensive to replace. Be extremely cautious to avoid cuts from the glass.
If you cannot shift automatic transmission selector lever
If you lose your keys
Page 145 of 182

143
Tire surface and wheel nuts Check the tires carefully
for cuts, damage
or excessive wear. See Chapter 7-2 for
additional information. When checking the tires, make sure no nuts are missing,
and check the nuts for looseness. T ighten
them if necessary.
Tire rotation
Rotate the tires every 12000 km (7500
miles). See Chapter 7-2 for additional in- formation.
Fluid leaks Check underneath for leaking fuel, oil, wa-
ter or other fluid after the vehicle has been
parked for a while. If you smell fuel fumes
or notice any leak, have the cause found
and corrected immediately. Doors and engine hood Check that all doors including trunk lid op-
erate smoothly and all latches lock se-
curely. M ake sure the engine hood secon-
dary latch secures the hood from opening
when the primary latch is released. INSIDE THE VEHICLE Items listed below should be checked
regularly, e.g. while performing peri-
odic services, cleaning the vehicle,etc. Lights Make sure the headlights, stop lights, tail lights, turn signal lights, and other lights are all working. Check headlight aim. Service reminder indicators and
warn-
ing buzzers Check that all service reminder indicators
and warning buzzers function properly. Steering wheel
Check that it has the specified freeplay.
Be alert for changes in steering condition, such as hard steering or strange noise. Seats Check that all front seat controls such as
seat adjusters, seatback recliner, etc. op- erate smoothly and that all latches lock
securely in any position. For folding-down
rear seat backs, check that the latches
lock securely. Seat belts
Check that the seat belt system such as
buckles, retractors and anchors operate
properly and smoothly. Make sure the belt
webbing is not cut, frayed, worn or dam- aged. Accelerator pedal Check
the pedal for smooth operation and
uneven pedal effort or catching. Clutch pedal Check the pedal for smooth operation. Brake pedal Check the pedal for smooth operation and
that the pedal has the proper clearance. Check the brake booster function. Brakes
At a safe place, check that the brakes do not pull to one side when applied. Parking brake Check that the lever has the proper travel and that, on a safe incline, your vehicle is
held securely with only the parking brake applied.
Automatic transmission Parkº mech-
anism
Check the lock release button of the se-
lector lever for proper and smooth opera-
tion. On a safe incline, check that your ve-
hicle is held securely with the selector lever in Pº position and all brakes re- leased.
Page 150 of 182

1481. Power steering fluid reservoir
2. Engine oil filler cap
3. Engine oil level dipstick
4. Brake fluid reservoir
5. Fuse blocks
6. Windshield washer fluid tank
7. Battery
8. Engine coolant reservoir
9. Electric cooling fans
Engine compartment overview
Page 158 of 182

156To check the fluid level, simply look at
the see-through reservoir. The level
should be between the MAXº and
MINº lines on the reservoir. It is normal for the brake fluid level to go
down slightly as the
brake pads wear. So
be sure to keep the reservoir filled. If the reservoir needs frequent refilling, it may indicate a serious mechanical prob- lem.
If the level is low, add SAE J1703 or
FMVSS No. 116 DOT 3 brake fluid to the
brake reservoir. Remove and replace the reservoir cover by hand. Fill the brake fluid to the dotted
line. This brings the fluid to the correct
level when you put the cover back on.
Use only newly opened brake fluid. Once
opened, brake fluid absorbs moisture
from the air, and excess moisture can cause a dangerous loss of braking.
CAUTION
Take care when filling the reservoir
because brake fluid can harm your
eyes and damage painted surfaces. If
fluid gets in your eyes, flush your
eyes with clean water.!
If you spill the fluid, be sure to wash
it off with water to prevent it from
damaging the parts or paint.
NOTICE
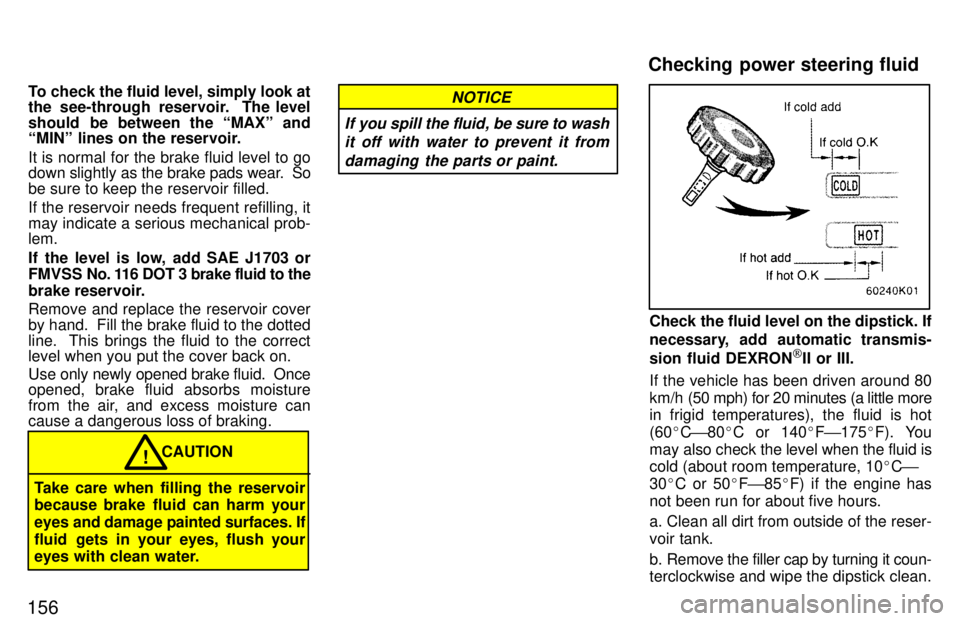
Check the fluid level on the dipstick. If
necessary, add automatic transmis-
sion fluid DEXRON [
II or III.
If the vehicle has been driven around 80
km/h (50 mph) for 20 minutes (a little more
in frigid temperatures), the fluid is hot (60 �C ' 80 �C or 140 �F ' 175 �F). You
may also check the level when the fluid is
cold (about room temperature, 10 �C '
30 �C or 50 �F ' 85 �F) if the engine has
not been run for about five hours.
a. Clean all dirt from outside of the reser- voir tank.
b. Remove the filler cap by turning it coun- terclockwise and wipe the dipstick clean.
Checking power steering fluid
Page 162 of 182

160WHEN TO USE SNOW TIRES OR CHAINS
Snow tires or chains are recom-
mended when driving on snow or ice.
On wet or dry roads, conventional tires
provide better traction than snow tires. SNOW TIRE SELECTION
If you need snow tires, select the same
size, construction and load capacity
as the original tires on your Toyota.
Do not use tires other than those men-
tioned above. Do not install studded tires
without first checking local regulations for
possbile restrictions.
SNOW TIRE INSTALLATION
Snow tires should be installed on all wheels. Installing snow tires on the front wheels
only can lead to an excessive difference
in road grip capability between the front
and rear tires which could cause loss of
vehicle control.
When storing removed tires, you should
store them in a cool dry place.
Mark the direction of rotation and be sure to install them in the same direction when replacing.
CAUTION
� Do not drive with the snow tires in- correctly inflated.
� Never drive over 120 km/h (75 mph)
with any type of snow tires.!
TIRE CHAIN SELECTION
Use tire chains of the correct size and type. Use SAE Class Sº type radial tire chains
except radial cable chains or V-bar typechains.
Regulations regarding the use of tire
chains vary according to location or
type of r oad, so always check them be-
fore installing chains.
CHAIN INSTALLATION Install the chains on the front tires as
tightly as possible. Do not use tire
chains on the rear tires. Retighten
chains after driving 0.5 '1.0 km
(1/4 '1/2 mile).
When installing chains on your tires, care-fully follow the instructions of the chain
manufacturer. If wheel covers are used, they will be
scratched by the chain band, so remove the covers before putting on the chains.
�
Do not exceed 50 km/h (30 mph) or
the chain manufacturer's recom-
mended speed limit, whichever is
lower.
� Drive carefully avoiding bumps,
holes, and sharp turns, which may cause the vehicle to bounce.
� Avoid sharp turns or locked-wheel
braking, as use of chains may ad- versely affect vehicle handling.
CAUTION!
Do not attempt to use a tire chain on
the compact spare tire, as it may
result in damage to the vehicle as well as the tire.
NOTICE
Installing snow tires and chains
Page 177 of 182

175
BATTERY
Open voltage* at 20 5C (68 5F):
12.7 V Fully charged
12.3 V Half charged
11.9 V Discharged
*: Voltage that is checked 20 minutes af-
ter the key is removed with all the lights
turned off
Charging rates: 5 A max
CLUTCH
Pedal freeplay, mm (in.): 5' 15 (0.2 '0.6)
Fluid type:
SAE J1703 or FMVSS No. 116 DOT 3
MANUAL TRANSAXLE
Oil capacity, L (qt., Imp. qt.): 1.9 (2.0, 1.6)
Oil type:
Multipurpose gear oil API GL- 4
or GL- 5
Recommended oil viscosity: SAE 75W-90
AUTOMATIC TRANSAXLE Fluid capacity (drain and refill), L (qt., Imp. qt.): Up to 3.1 (3.3, 2.7) Fluid type:
Automatic transmission fluid D-II or DEXRON [
III (DEXRON [
II)
BRAKESMinimum pedal clearance when de- pressed with the pressure of 490 N (50
kgf, 110 lbf) with the engine running, mm (in.):
With anti-lock brake system55 (2.2)
Without anti-lock brake system 60 (2.4)
Pedal freeplay, mm (in.): 1Ð6 (0.04Ð0.24)
Pad wear limit, in. (mm): 1.0 (0.04)
Lining wear limit, in. (mm): 1.0 (0.04)
Parking brake adjustment when pulledwith the force of 196 N (20 kgf, 44 lbf): 5Ð8 clicks
Fluid type:
SAE J1703 or FMVSS No. 116 DOT 3
STEERINGWheel freeplay: Less than 30 mm (1.2 in.)
Power steering fluid type:
Automatic transmission fluid DEXRON [
II or III Tire size:
Spare tire
T115/70D14
Except spare tire
P185/60R14 82H
Tire pressure, kPa (kgf/cm 2
or bar,
psi): Spare tire
420 (4.2, 60)
Except spare tire
183 (1.83, 26)
Wheel size:
Spare tire 14 x 4T Except spare tire
Aluminum wheels 14 x 5.5JJ
Except aluminum wheels 14 x 5.5J
Wheel nut torque, N Vm (kg Vm, ft Vlbf):
103 (10.5, 76)
Tires
Page 178 of 182

176
Engine compartment (U.S.A.) Fuses (type A)
1. HEAD (LH) 10 A: Left-hand head-
light
2. HEAD (RH) 10 A: Right-hand head-
light
3. AM2 15 A: Ignition system, charging
system, multiport fuel injection system/
sequential multiport fuel injection system,
SRS airbag system, starter system
4. HAZ-HORN 15 A: Horns, turn signal
lights, em ergency flashers, theft deterrent
system
5. EFI 15 A: Multiport fuel injection sys-
tem/sequential multiport fuel injection
system, air conditioning systemEngine compartment (Canada)
6. DOME 10 A: Interior lights, open
door warning light, clock, car audio sys-
tem, anti-lock brake system, theft deter- rent system
7. OBD-II 7.5 A: On-board diagnosis
system
8. ALT-S 5 A: Charging system
9. DRL 5 A: Daytime running light sys-
tem
10. HEAD (RH-LWR) 10 A: Right-hand
headlight (low beam)
11. HEAD (LH-LWR) 10 A: Left-hand
headlight (low beam)
12. HEAD (RH-UPR) 10 A: Right-hand
headlight (high beam)Engine compartment (Canada only)
13. HEAD (LH-UPR) 10 A: Left-hand
headlight (high beam)
14. STOP 10 A: Stop lights, high
mounted stoplight, anti-lock brake sys-
tem, shift lock control system
15. A/C 10 A: Air conditioning system
16. TAIL 15 A: Tail lights, parking lights,
license plate lights, instrument panel
lights, emergency flashers, air condition-
ing system, rear window defogger, car au-
dio system, cigarette lighter, clock
Fuses