1997 TOYOTA 4RUNNER ESP
[x] Cancel search: ESPPage 11 of 223

10
CAUTION!
Before driving, be sure that the
doors are closed and locked, espe-
cially when small children are in the
vehicle. A long with the proper use of
seat belts, locking the doors helps
prevent the driver and passengers
from being thrown out from the ve-
hicle during an accident. It also
helps prevent the doors from being
opened unintentionally.
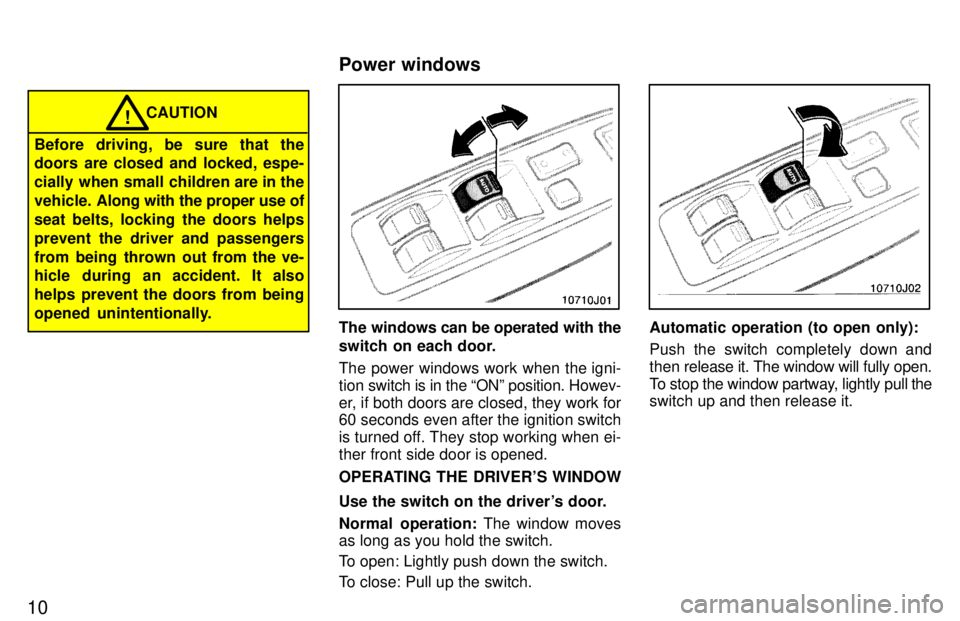
The windows can be operated with the
switch on each door.
The power windows work when the igni- tion switch is in the ONº position. Howev-
er, if both doors are closed, they work for 60 seconds even after the ignition switch
is turned off. They stop working when ei-ther front side door is opened.
OPERATING THE DRIVER'S WINDOW
Use the switch on the driver's door.
Normal operation: The window moves
as long as you hold the switch.
To open: Lightly push down the switch.
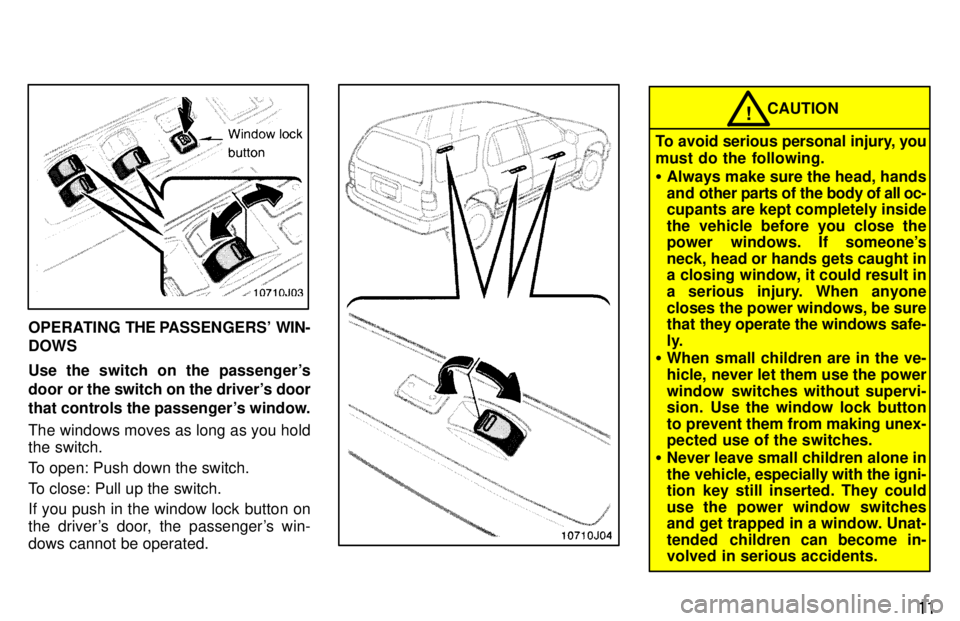
To close: Pull up the switch.Automatic operation (to open only):
Push the switch completely down and
then rel ease it. The window will fully open.
To stop the window partway, lightly pull the
switch up and then release it.
Power windows
Page 12 of 223

11
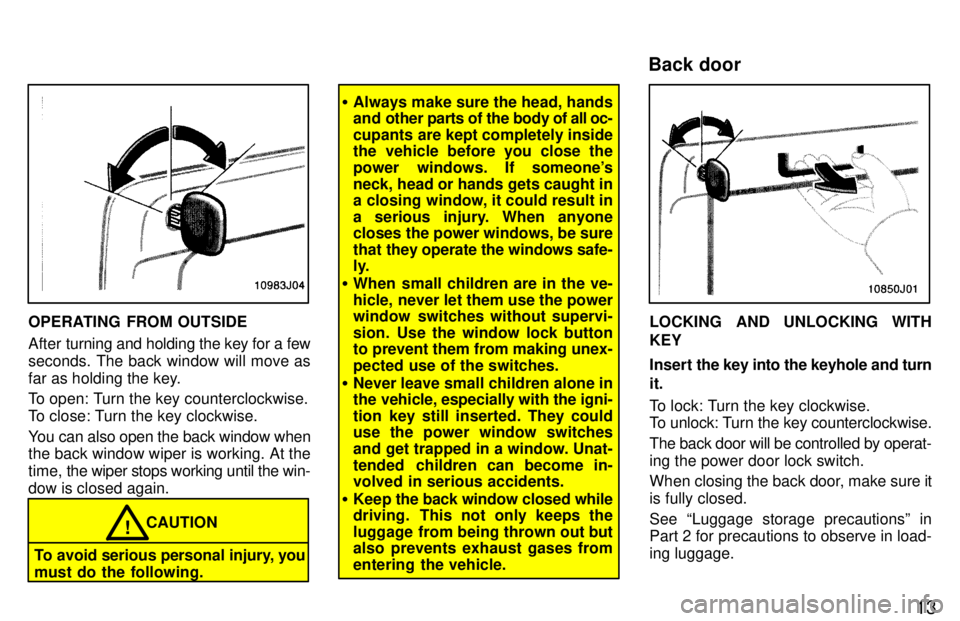
OPERATING THE PASSENGERS' WIN-
DOWS
Use the switch on the passenger's
door or the switch on the driver's door
that controls the passenger's window.
The windows moves as long as you hold the switch.
To open: Push down the switch.
To close: Pull up the switch.
If you push in the window lock button on
the driver's door, the passenger's win-
dows cannot be operated.
CAUTION!
To avoid serious personal injury, you
must do the following. � Always make sure the head, hands
and other parts of the body of all oc-
cupants are kept completely inside
the vehicle before you close the
power windows. If someone's
neck, head or hands gets caught in
a closing window, it could result in
a serious injury. When anyone
closes the power windows, be sure
that they operate the windows safe-
ly.
� When small children are in the ve-
hicle, never let them use the power
window switches without supervi-
sion. Use the window lock button
to prevent them from making unex-
pected use of the switches.
� Never leave small children alone in
the vehicle, especially with the igni-
tion key still inserted. They could
use the power window switches
and get trapped in a window. Unat-
tended children can become in-
volved in serious accidents.
Page 14 of 223

13
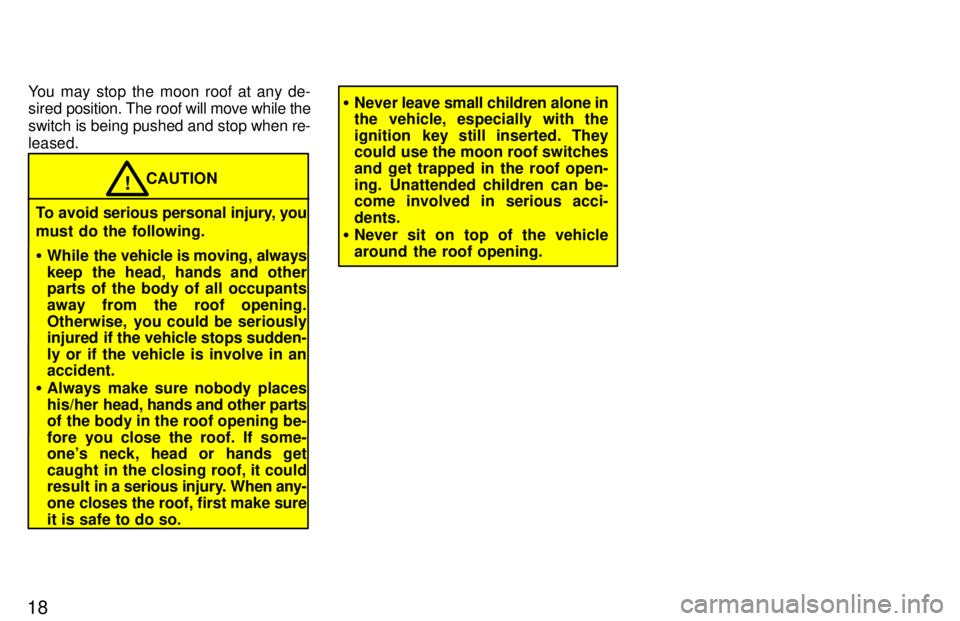
OPERATING FROM OUTSIDE
After turning and holding the key for a few
seconds. The back window will move as
far as holding the key.
To open: Turn the key counterclockwise.
To close: Turn the key clockwise.
You can also open the back window when the back window wiper is working. At the
time, the wiper st ops working until the win-
dow is closed again.
CAUTION!
To avoid serious personal injury, you
must do the following.
� Always make sure the head, hands
and other parts of the body of all oc-
cupants are kept completely inside
the vehicle before you close the
power windows. If someone's
neck, head or hands gets caught in
a closing window, it could result in
a serious injury. When anyone
closes the power windows, be sure
that they operate the windows safe-
ly.
� When small children are in the ve-
hicle, never let them use the power
window switches without supervi-
sion. Use the window lock button
to prevent them from making unex-
pected use of the switches.
� Never leave small children alone in
the vehicle, especially with the igni-
tion key still inserted. They could
use the power window switches
and get trapped in a window. Unat-
tended children can become in-
volved in serious accidents.
� Keep the back window closed while
driving. This not only keeps the
luggage from being thrown out but
also prevents exhaust gases from
entering the vehicle.
LOCKING AND UNLOCKING WITH KEY
Insert the key into the keyhole and turn
it.
To lock: Turn the key clockwise.
To unlock: Turn the key counterclockwise. The back door will be controlled by operat-
ing the power door lock switch.
When closing the back door, make sure it is fully closed. See Luggage storage precautionsº in
Part 2 for precautions to observe in load- ing luggage.
Back door
Page 19 of 223

18You may stop the moon roof at any de-
sired
position. The roof will move while the
switch is being pushed and stop when re- leased.
CAUTION!
To avoid serious personal injury, you
must do the following. � While the vehicle is moving, always
keep the head, hands and other
parts of the body of all occupants away from the roof opening.
Otherwise, you could be seriously
injured if the vehicle stops sudden-
ly or if the vehicle is involve in an accident.
� Always make sure nobody places
his/her head, hands and other parts
of the body in the roof opening be-
fore you close the roof. If some-
one's neck, head or hands get
caught in the closing roof, it could
result in a seri ous injury. When any-
one closes the roof, first make sure
it is safe to do so.
� Never leave small children alone in
the vehicle, especially with the
ignition key still inserted. They
could use the moon roof switches
and get trapped in the roof open-
ing. Unattended children can be- come involved in serious acci- dents.
� Never sit on top of the vehicle
around the roof opening.
Page 27 of 223

31
The SRS (Supplemental Restraint Sys-
tem) airbags are designed to provide
further protection to the driver and
front passenger when added to the pri-
mary protection provided by the seatbelts.
In response to a severe frontal impact, the
SRS airbags work together with the seat
belt to help preventing or reduce injury by inflating, in order to decrease the likeli-
hood of the driver's or front passenger's
head or chest directly hitting the steering
wheel or dashboard. The passenger air-
bag is activated even with no passenger
in the front seat.This indicator comes on when the
ignition key is turned to the ACCº or
ONº position. It goes off after about 6
seconds. This means the SRS airbag
is operating properly.
The SRS airbag warning light system
monitors the airbag sensor assembly, in-
flators, warning light, interconnecting wir-
ing and power sources.The SRS airbag system is designed to
activate in response to a severe frontal
impact within the shaded area be-
tween the arrows in the illustration.
The SRS airbags will deploy if the severity
of the impact is above the designed
threshold level, comparable to an approxi-
mate 20 km/h (14 mph) collision when im-
pacting straight into a fixed barrier that
does not move or deform.
If the severity of the impact is below the
above threshold level, the SRS airbags
may not deploy.
SRS airbag
Page 58 of 223

61
To defog or defrost the back window,
push the switch. The key must be in the ONº position.
The thin heater wires on the inside of the back window will quickly clear the surface.
An indicator light will illuminate to indicate the defogger is operating. Push the switch once again to turn the de-
fogger off.
Make sure you turn the defogger off when
the window is clear. Leaving the defogger on for a long time could cause the battery
to discharge, especially during stop-and-
go driving. The defogger is not designed
for drying rain water or for melting snow.
NOTICE
Avoid driving with the tailgate open.
�To prevent the battery from being
discharged, turn the switch onwhen the engine is running.
�When cleaning the inside of theback window, be careful not to
scratch or damage the heaterwires.
Back window defogger
Page 100 of 223

103
REW/FF (Rewind/Fast forward) Push
the FFº side of the button to fast for-
ward a cassette tape. FFº will appear on
the display. Push the REWº side to re-
wind a tape. REWº will appear on the dis-
play.
To stop the tape while it is fast forwarding,
push FFº or TAPEº; to stop the tape
while it is rewinding, push REWº or
TAPEº. The tape will immediately begin
to play.
If a tape side rewinds completely, the cas-
sette player will stop and then play that
same side. If a tape fast forwards com-
pletely, the cassette player will play the
other side of the tape, using the auto-re- verse feature. R.M. (Radio monitor)
Type 2-2 only
The radio monitor feature allows you to
listen to the radio while a cassette is being
rewound or fast forwarded.
Push R VMº. R VMº will appear on the dis-
play. Any time you are rewinding or fast
forwarding a cassette tape, the radio will
play the station that was set most recent-
ly. (You can not change the radio station
unless you switch out of the cassette play-
er function.) Push R
VM.º again to turn off the RM fea-
ture. RPT (Repeat)
Type 2-2 only
The repeat feature automatically replays the current cassette. Push RPTº while the track is playing.
RPTº will appear on the display. When
the track ends, it will automatically be re-
wound and replayed. This process will be continued until you push the button again
to turn off the repeat feature.
There must be at least 3 seconds of blank
space between tracks in order for the re-
peat feature to work correctly. SCAN
You can either scan all the frequencies on a band or scan only the preset stations for
that band.
To scan the preset stations: Quickly push
and release SCANº. If you hear a beep,
you held the button too long, and the radio will scan all the frequencies. The radio will tune in the next preset station up the
band, stay there for a few seconds, and
then move to the next preset station. To
select a station, push SCANº a second time. To scan all the frequencies: Push SCANº
until you hear a beep. The radio will find
the next station up the station band, stay there for a few seconds, and then scan
again. To select a station, push SCANº a
second time. SKIP
Type 2-2 only
The skip feature allows you to fast forward
past long stretches of blank tape. This is
especially useful at the end of cassettes.
Push SKIPº. SKIPº will appear on the
display. The cassette player will keep
track of how much blank space it plays.
Any time it has played about 1- seconds of blank tape, it will automatically fast for-
ward to the next track and begin to play.
Push the button a second time to turn off the skip feature.
Page 107 of 223

11 0RM (Radio Monitor)
The radio monitor feature allows you to
listen to
the radio while a cassette is being
rewound or fast forwarded. Push RMº. RMº will appear on the dis-
play. Any time you are rewinding or fast
forwarding a cassette tape, the radio will
play the station that was set most recent-
ly. (You can not change the radio station
unless you switch out of the cassette play-
er function.)
Push RMº again to turn off the RM fea- ture.
RPT (Repeat)
The repeat feature automatically replays the current cassette or compact disctrack. Push RPTº while the track is playing.
RPTº will appear on the display. When
the track ends, it will automatically be re-
wound (cassette) and replayed. This pro-
cess will be continued until you push the button again to turn off the repeat feature.
CassettesÐThere must be at least 3 sec- onds of blank space between tracks in or-
der for the repeat feature to work correct-
ly. Scan Radio
You can either scan all the frequencies on a band or scan only the preset stations for
that band.
To scan the preset stations: Quickly push
and release SCANº. If you hear a beep,
you held the button too long, and the radio will scan all the frequencies. The radio willtune in the next preset station up the
band, stay there for a few second, and
then move to the next preset station. To
select a station, push SCANº a second time.
To scan all the frequencies: Push SCANº
until you hear a beep. The radio will find
the next station up the station band, Stay there for a few seconds, and then scan
again. To select a station, push SCANº a
second time. Cassette player
The cassette player scan feature is similar
to the radio scan feature and uses the same button.
Push SCANº. SCANº will appear on the
display. The player will fast forward to the
next cassette track,
play it for 12 seconds,
and then scan again. To select a track,
push SCANº a second time. If the player reaches the end of one side of a cassette
tape, it will continue scanning on the other
side.
Compact disc player
The compact disc player scan feature is
similar to the radio scan feature.
Push SCANº. SCANº will appear on the
display. The compact disc player will play the next track for 10 seconds, then scan
again. To select a track, push SCANº a
second time. If the pl ayer reaches the end
of the disc, it will continue scanning at
track 1. SKIP
The skip feature allows you to fast forward
past long stretches off blank tape. This is
especially useful at the end of cassettes.