1997 OLDSMOBILE BRAVADA warning
[x] Cancel search: warningPage 233 of 358
What to Do with Used Oil
Did you know that used engine oil contains certain
elements that may be unhealthy for your skin and could
even cause cancer? Don‘t let used oil stay on your skin
for very long. Clean your skin and nails with soap
and
water, or a good hand cleaner. Wash or properly throw
away clothing or rags containing used engine oil. (See
the manufacturer’s warnings about the use and disposal
of oil products.)
Used
oil can be a real threat to the environment. If you
change your own oil, be sure to drain all free-flowing oil
from the filter before disposal. Don’t ever dispose of oil
by putting
it in the trash, pouring it on the ground, into
sewers, or into streams or bodies of water. Instead,
recycle
it by taking it to a place that collects used oil. If
you have a problem properly disposing of your used oil,
ask your retailer, a service station or a local recycling
center for help.
Air Cleaner
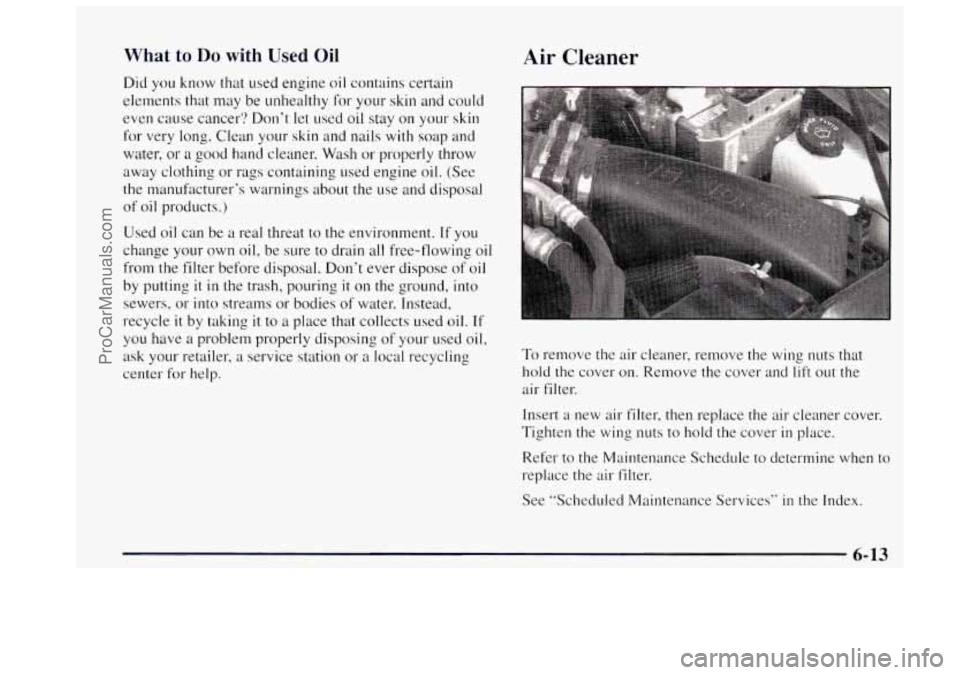
To remove the air cleaner, remove the wing nuts that
hold the cover on. Remove the cover and
lift out the
air filter.
Insert
a new air filter, then replace the air cleaner cover.
Tighten the wing nuts to hold the cover
in place.
Refer to the Maintenance Schedule to determine when to
replace the air filter.
See “Scheduled Maintenance Services” in the Index.
6-13
ProCarManuals.com
Page 240 of 358
1
; What to Use
I Refer to the Maintenance Schedule to determine what
’ kind of lubricant to use. See “Recommended Fluids and
i Lubricants” in the Index.
1 , I Engine Coolant
; The cooling system in your vehicle is filled with new
1 DEX-COOL” engine coolant. This coolant is designed
I to remain in your vehicle for 5 years or 150,000 miles
I (240 000 km), whichever occurs first, if you add only
~ DEX-COOL” extended life coolant.
I i The following explains your cooling system and how to
i
~
i
add coolant when it is low. If you have a problem with
engine overheating, see “Engine Overheating” in
the Index.
I
A 50/50 mixture of water and the proper coolant for
1 your Oldsmobile will:
’ 0 Give freezing protection down to -34°F (-37°C).
~ 0 Give boiling protection up to 265 “F (129°C). I
~ 0 Protect against rust and corrosion.
0 Help keep the proper engine temperature.
0 Let the warning lights and gages work as
they should.
NOTICE:
When adding coolant, it is important that you use
only
DEX-COOL TM (silicate-free) coolant.
If silicated coolant is added to the system,
premature engine, heater core or radiator
corrosion may result. In addition, the engine
coolant will require change sooner
-- at
30,000 miles (50 000 km) or 24 months,
whichever occurs first.
What to Use
Use a mixture of one-half clean water (preferably
distilled) and one-half DEX-COOL
TM coolant which
won’t damage aluminum parts. Use GM Engine Coolant
Supplement (sealer) (GM Part
No. 3634621) with any
complete coolant change.
If you use this mixture, you
don’t need to add anything else.
ProCarManuals.com
Page 241 of 358

1 NOTICE:
Adding only plain water to your cooling system
can be dangerous. Plain water, or some other
liquid like alcohol, can boil before the proper
coolant mix
will. Your vehicle’s coolant warning
system is set for the proper coolant mix. With
plain water or the wrong mix, your engine could
get too hot but you wouldn’t get the overheat
warning. Your engine could catch fire and you or
others could be burned. Use a
50150 mix of clean
water and
DEX-COOL TM coolant.
If you use an improper coolant mix, your engine
could overheat and be badly damaged. The
repair cost wouldn’t be covered by your
warranty.
Too much water in the mix can freeze
and crack the engine, radiator, heater core and
other parts.
If you have to add coolant more than four times a year,
have your retailer check your
cooling system.
NOTICE:
If you use the proper coolant, you don’t have to
add extra inhibitors or additives which claim to
improve the system. These can be harmful.
6-21
ProCarManuals.com
Page 248 of 358

Brake Wear
Your Oldsmobile has four-wheel disc brakes.
Disc brake pads have built-in wear indicators that make
a
high-pitched warning sound when the brake pads are worn
and new pads are needed. The sound may come and
go or
be heard all the time your vehicle is moving (except when
you are pushing on
the brake pedal firmly).
The brake wear warning sound means that soon
your brakes won’t work well. That could lead to
an accident. When you hear the brake wear
warning sound, have your vehicle serviced.
NOTICE:
Continuing to drive with worn-out brake pads
could result in costly brake repair.
Some driving conditions or climates may cause a brake
squeal when the brakes are first applied or lightly
applied. This does
not mean something is wrong with
your brakes.
Properly torqued wheel nuts are necessary to help
prevent brake pulsation. When tires are rotated, inspect
brake pads for wear and
evenly torque wheel nuts in the
proper sequence to
GM specifications.
Brake linings should always be replaced as complete
axle sets.
See “Brake System Inspection”
in Section 7 of this manual
under
Part C “Periodic Maintenance Inspections.”
Brake Pedal Travel
See your retailer if the brake pedal does not return to
normal height, or
if there is a rapid increase in pedal
travel. This could be a sign of brake trouble.
Brake Adjustment
Every time you make a brake stop, your disc brakes
adjust for wear.
6-28
ProCarManuals.com
Page 261 of 358
Treadwear Temperature -- A, B, C
The treadwear
grade is a comparative rating based on
the wear rate of the tire when tested under controlled
conditions
on a specified government test course. For
example, a tire graded
150 would wear one and a half
(1 1/2) times as well on the government course as a tire
graded
100. The relative performance of tires depends
upon the actual conditions
of their use, however, and
may depart significantly from the norm due to variations
in driving habits, service practices and differences in
road characteristics and climate.
Traction -- A, B, C
The traction grades, from highest to lowest, are A, B, and
C, and they represent the tire's ability to stop on wet
pavement as measured under controlled conditions on
specified government test surfaces of asphalt and concrete.
A tire marked C may have poor traction performance.
Warning: The traction grade assigned
to this tire is based
on braking (straight ahead) traction tests and does not
include cornering (turning) traction. The
temperature grades are
A (the highest), B, and C,
representing the tire's resistance to the generation of
heat and its ability
to dissipate heat when tested under
controlled conditions on a specified indoor laboratory
test wheel. Sustained high temperature can cause the
material of the tire
to degenerate and reduce tire life,
and excessive temperature
can lead to sudden tire
failure. The grade
C corresponds to a level of
performance which all passenger car tires must meet
under the Federal Motor Vehicle Safety Standard
No. 109. Grades B and A represent higher levels of
performance on the laboratory test wheel than the
minimum required by law.
Warning: The temperature grade for this tire is
established for
a tire that is properly inflated and not
overloaded. Excessive speed, underinflation, or
excessive
loading, either separately or in combination,
can cause heat buildup and possible tire failure.
6-41
ProCarManuals.com
Page 264 of 358
Appearance Care
Remember, cleaning products can be hazardous. Some
are toxic. Others can burst into flame
if you strike a
match or get them on
a hot part of the vehicle. Some are
dangerous
if you breathe their fumes in a closed space.
When you use anything from a container to clean your
Oldsmobile, be sure to follow the manufacturer’s
warnings and instructions. And always open your doors
or windows when you’re cleaning the inside.
Never use these to clean your vehicle:
0
0
0
0
0
0
0
0
0
Gasoline
Benzene Naphtha
Carbon Tetrachloride
Acetone
Paint Thinner
Turpentine
Lacquer Thinner
Nail Polish Remover
They can all be hazardous
-- some more than
others
-- and they can all damage your vehicle, too.
Don’t use any of these unless this manual says you can.
In many uses, these will damage your vehicle:
0 Alcohol
Laundry Soap
0 Bleach
0 Reducing Agents
Cleaning the Inside of Your Oldsmobile
Use a vacuum cleaner often to get rid of dust and loose
dirt. Wipe vinyl or leather
with a clean, damp cloth.
Your Oldsmobile retailer
has two cleaners, a
solvent-type spot lifter and a foam-type powdered
cleaner. They
will clean normal spots and stains very
well.
Do not use them on vinyl or leather.
Here are some cleaning tips:
1. Always read the instructions on the cleaner label.
2. Clean up stains as soon as you can -- before they set.
3. Use a clean cloth or sponge, and change to a clean area
4. Use solvent-type cleaners in a well-ventilated area
often.
A soft brush may be used if stains are stubborn.
only.
If you use them, don‘t saturate the stained area.
5. If a ring forms after spot cleaning, clean the entire
area immediately or
it will set.
6-44
ProCarManuals.com
Page 343 of 358

a Section 9 Index
Accessory power Outlets ........................ 2-43
Adding Equipment
to the Outside of Your Oldsmohile ... 6-3
Adding Sound Equipment
........................ 3- 15
Add-on Equipment
............................. 4-44
AirBag
....................................... 1-18
Adding Equipment ............................ 1-23
How Does it Restrain .......................... 1-2 1
How it Works ................................ 1-20
Location .................................... 1-20
Readiness Light ......................... 1-19. 2-53
What Makes
it Inflate .......................... 1-2 1
What You See After it Inflates ................... 1-22
When Should
it Inflate ......................... 1-2 1
Aircleaner ....................................... 13
Air Conditioning ................................ 3-3
Refrigerants
................................. 6-6 I
Alignment and Balance . Tire ...................... 6-42
All-Wheel Drive
.......................... 2-18.6-18
Antenna, Fixed ................................. 3-16
Anti-Lock Brake System Warning Light
......... 2-56? 4-7
Servicing ................................... 1-23
Aluminum Wheels
. Cleaning ...................... 6-50 Appearance Care
............................... 6-44
Materials
.................................... 6-52
Arbitration Program
.............................. 8-7
Armrest
. Storage ............................... 2-39
Audio Systems
.................................. 3-6
Automatic Overdrive
............................ 2-17
Automatic Transmission Check
...................................... 7-40
Fluid ....................................... 6-14
Operation
................................... 2-15
Park Mechanism Check
........................ 7-42
Ashtrays
...................................... 2-42
Axle Front
.......................................... 18
Rear ....................................... 6-19
Battery ...................................... 6-29
Charge Light
................................ 2-53
Jllmp Starting ................................. 5-3
Warnings ................................ 5-3. 5-5
BBB Auto Line ............................... 8-7
Replacement. Keyless Entry ..................... 2-7
9-1
. . .
ProCarManuals.com
Page 344 of 358
Better Business Bureau Mediation ................... 8-7
Blizzard. Driving In ............................. 4-40
BrakeFluid
.................................... 6-25
Brake. Parking
................................. 2-18
Brake System Warning Light
...................... 2-55
Brakes Adjustment
.................................. 6-28
Master Cylinder .............................. 6-25
PedalTravel ................................. 6-28
Replacing System Parts
........................ 6-29
Trailer
...................................... 4-48
Wear ....................................... 6-28
Brake-Transmission
Shift Interlock Check ........... 7-41
Braking
........................................ 4-6
In Emergencies ................................ 4-9
Brightness Control .............................. 2-31
BTSICheck ................................... 7-41
Bulb Replacement
.............................. 6-30
Capacities and Specifications
............... 6-60.6-6 1
Carbon Monoxide ................ 2.8. 2-22.4-41,4-49
Cargo Security Shade
............................ 2-40
Cargo Tie
Downs ............................... 2-41
Certificatian/Tire Label
.......................... 4-42
Chains Safety
........................ ......... 4-48
Tire ........................................ 6-43
Changing a Flat Tire ............................. 5-21
Charging System Light
.......................... 2-53
Checking Your Restraint Systems
.................. 1-44
Chcrnical
Paint Spotting .......................... 6-51
Child Restraints
................................ 1-34
Center Seat Positions
.......................... 1-38
Securing in a Rear Outside Seat Position ........... 1-36
Securing
in the Right Front Seat Position .......... 1-38
Where to Put
................................ 1-34
Cigarette Lighter
............................... 2-42
Circuit Breakers and Fuses
....................... 6-55
Cleaner. Air
................................... 6-13
Cleaning
Aluminum Wheels ............................ 6-50
Fabric ...................................... 6-45
Glass ....................................... 6-47
Inside
of Your Oldsmobile ...................... 6-44
Instrument Panel
............................. 6-47
Leather
..................................... 6-47
Outside
of Your Oldsmobile .................... 6-48
Stains
...................................... 6-46
Tires
....................................... 6-50
Vinyl ....................................... 6-46
Weatherstrips
................................ 6-48
Wheels ..................................... 6-50
Windshield . Backglass and Wiper Blades .......... 6-48
Check
Gages Light
.............................. 2-57
Topstrap
................................... 1-35
9-2
.. ~ . _._- -
ProCarManuals.com