1997 NISSAN SENTRA warning light
[x] Cancel search: warning lightPage 97 of 194
b) Tap the brake pedal; the CRUISE light
goes out.
c) Turn the main switch off. Both the ON
indicator and CRUISE lights go out.
The cruise control is automatically can-
celled and the CRUISE light goes out if:
cYou depress the brake pedal while push-
ing the ACCEL set switch.
cThe vehicle slows down more than 8
MPH (13 km/h) below the set speed.
cYou depress the clutch pedal (manual
transmission), or move the shift lever to
N (automatic transmission).
To reset at a faster cruising speed,use
one of the following three methods:
a) Depress the accelerator pedal. When the
vehicle attains the desired speed, push
and release the COAST/SET switch.
b) Push and hold the ACCEL set switch.
When the vehicle attains the speed you
desire, release the switch.
c) Push and quickly release the ACCEL set
switch. Each time you do this, the set
speed increases by about 1 MPH (1.6
km/h).To reset at a slower cruising speed,use
one of the following three methods:
a) Lightly tap the brake pedal. When the
vehicle attains the desired speed, push
the COAST/SET switch and release it.
b) Push and hold the COAST/SET switch.
Release the switch when the vehicle
slows down to the desired speed.
c) Push and quickly release the
COAST/SET switch. Each time you do
this, the set speed decreases by about 1
MPH (1.6 km/h).
To resume the preset speed,push and
release the RESUME switch. The vehicle
returns to the last set cruising speed when
the vehicle speed is over 30 MPH (48 km/h).
Precautions
cIf the cruise control system malfunctions,
it cancels automatically. The cruise indi-
cator light in the instrument panel then
blinks to warn the driver.
cIf the cruise indicator light blinks, turn the
cruise control main switch off and have
the system checked by your NISSAN
dealer.cThe cruise indicator light may blink when
the cruise control main switch is turned
ON while pushing the RES/ACCEL,
COAST/SET, or CANCEL switch (lo-
cated on the steering wheel). To properly
set the cruise control system, perform the
steps above in the order indicated.
WARNING
Do not use the cruise control when
driving under the following conditions:
cit is not possible to keep the vehicle
at a set speed.
cin heavy traffic or in traffic that var-
ies in speed.
con winding or hilly roads.
con slippery roads (rain, snow, ice,
etc.).
cin very windy areas.
Doing so could cause a loss of vehicle
control and result in an accident.
4-13
ZX
Page 101 of 194
The brake system has two separate hy-
draulic circuits. If one circuit develops a
problem, you will still have braking at
two wheels.
Vacuum assisted brakes
The brake booster aids braking by using
engine vacuum. If the engine stops, you can
stop the vehicle by depressing the brake
pedal. However, greater foot pressure on
the brake pedal will be required to stop the
vehicle and the stopping distance will be
longer.
Wet brakes
When the vehicle is washed or driven
through water, the brakes may get wet. As a
result, your braking distance will be longer
and the vehicle may pull to one side during
braking.
To dry brakes, drive the vehicle at a safe
speed while lightly pressing the brake pedal
to heat-up the brakes. Do this until the
brakes return to normal. Avoid driving the
vehicle at high speeds until the brakes
function correctly.
Using the brakes
Avoid resting your foot on the brake pedalwhile driving. This overheats the brakes,
increases wear on the brake linings and
pads, and reduces gas mileage.
To help save the brakes and to prevent the
brakes from overheating, reduce speed and
downshift to a lower gear before going down
a slope or long grade. Overheated brakes
may reduce braking performance and could
result in loss of vehicle control.
WARNING
While driving on a slippery surface, be
careful when braking, accelerating or
downshifting. Abrupt braking or accel-
erating could cause the wheels to skid
and result in an accident.The anti-lock brake system controls the
brakes at each wheel so the wheels do not
lock when braking abruptly or when braking
on slippery surfaces. The system detects
the rotation speed at each wheel and varies
the brake fluid pressure to prevent each
wheel from locking and sliding. By prevent-
ing wheel lockup, the system helps the
driver maintain steering control and helps to
minimize swerving and spinning on slippery
surfaces.
Using the System
Depress the brake pedal and hold it down.
WARNING
Do not pump the brake pedal. Doing so
may result in increased stopping dis-
tances.
Normal operation
The anti-lock brake system does not oper-
ate at speeds below 3 to 6 MPH (5 to 10
km/h) to completely stop the vehicle. (The
speeds vary according to road conditions.)
When the anti-lock system senses that one
or more wheels are close to locking up, the
actuator (under the hood) rapidly applies
BRAKE SYSTEM ANTI-LOCK BRAKE SYSTEM
(ABS) (if so equipped)
4-17
ZX
Page 102 of 194
and releases hydraulic pressure (like pump-
ing the brakes very quickly). While the ac-
tuator is working, you may feel a pulsation in
the brake pedal and hear a noise or vibra-
tion from the actuator under the hood. This
is normal and indicates that the anti-lock
system is working properly. However, the
pulsation may indicate that road conditions
are hazardous and extra care is required
while driving.
Self-test feature
The anti-lock brake system is sophisticated,
with electronic sensors, electric pumps, and
hydraulic solenoids controlled by a com-
puter. The computer has a built-in diagnos-
tic feature that tests the system each time
you start the engine and move the vehicle at
a low speed in forward or reverse. When the
self-test occurs, you may hear a ``clunk''
noise and/or feel a pulsation in the brake
pedal. This is normal and is not an indica-
tion of any malfunction. If the computer
senses any malfunction, it switches the anti-
lock brake system OFF and turns on the
ABS brake warning light in the dashboard.
The brake system then operates normally,
but without anti-lock assistance.
If the light comes on during the self check orwhile driving, take your vehicle to your NIS-
SAN dealer for repair at your earliest con-
venience.
WARNING
cThe anti-lock brake system is a so-
phisticated device, but it cannot pre-
vent accidents resulting from care-
less or dangerous driving tech-
niques. It can help maintain vehicle
control during braking on slippery
surfaces, but remember that the
stopping distance on slippery sur-
faces will be longer than on normal
surfaces, even with the anti-lock
system. Stopping distances may
also be longer on rough, gravel or
snow covered roads, or if you are
using tire chains. Always maintain a
safe distance from the vehicle in
front of you. Ultimately, the respon-
sibility for safety of self and others
rests in the hands of the driver.
cTire type and condition may also
affect braking effectiveness.
cWhen replacing tires, install the
specified size of tires on all 4 wheels.c
When installing a spare tire, make
sure it is the proper size and type as
specified on the tire placard. For tire
placard location information, refer to
``Tire placard'' in the Owner's Manual
index.
cRefer to ``Wheels and tires'' in the
``Do-it-yourself operations'' section
of this manual.
4-18
ZX
Page 133 of 194
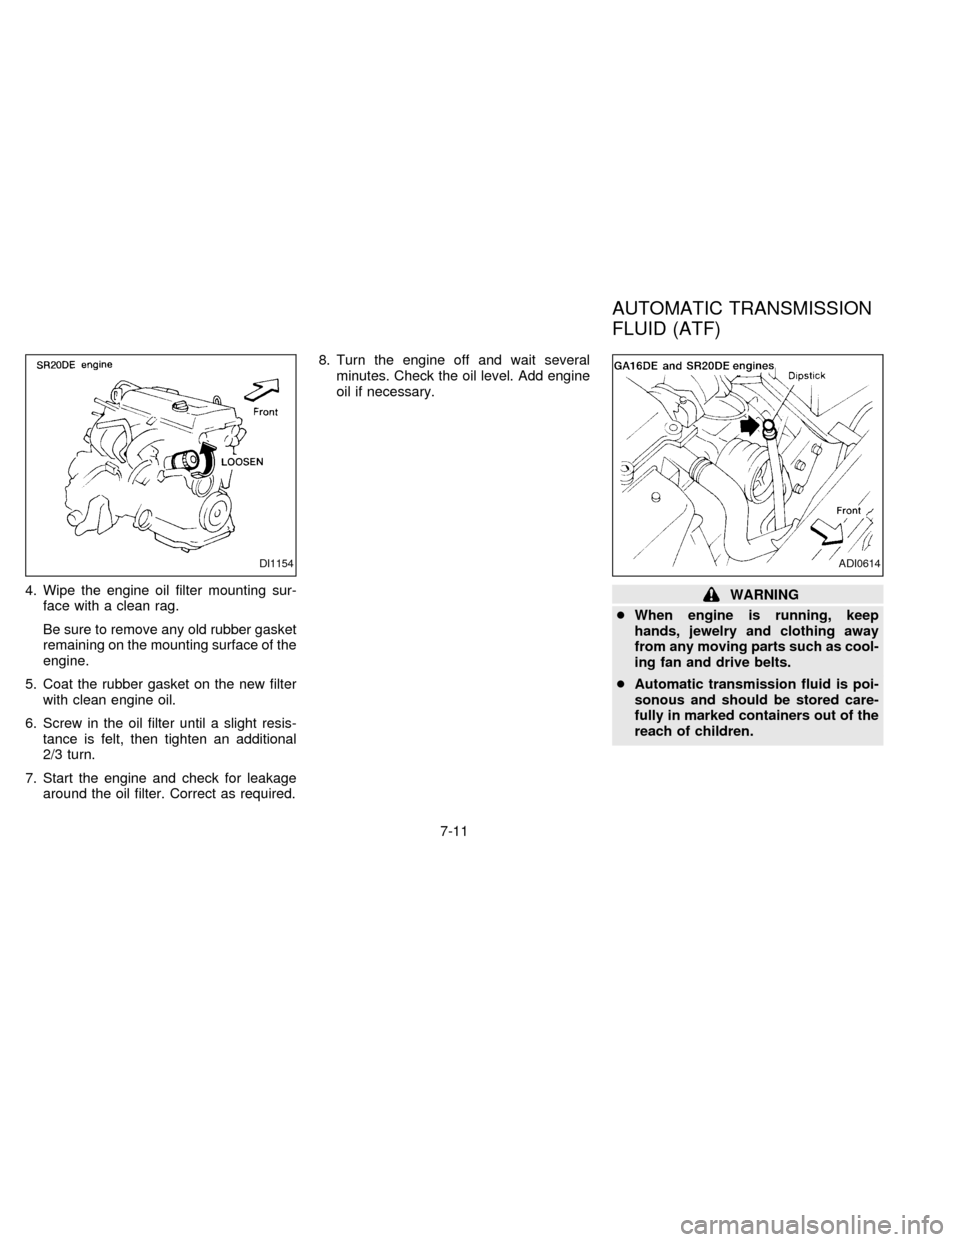
4. Wipe the engine oil filter mounting sur-
face with a clean rag.
Be sure to remove any old rubber gasket
remaining on the mounting surface of the
engine.
5. Coat the rubber gasket on the new filter
with clean engine oil.
6. Screw in the oil filter until a slight resis-
tance is felt, then tighten an additional
2/3 turn.
7. Start the engine and check for leakage
around the oil filter. Correct as required.8. Turn the engine off and wait several
minutes. Check the oil level. Add engine
oil if necessary.WARNING
cWhen engine is running, keep
hands, jewelry and clothing away
from any moving parts such as cool-
ing fan and drive belts.
cAutomatic transmission fluid is poi-
sonous and should be stored care-
fully in marked containers out of the
reach of children.
DI1154ADI0614
AUTOMATIC TRANSMISSION
FLUID (ATF)
7-11
ZX
Page 136 of 194
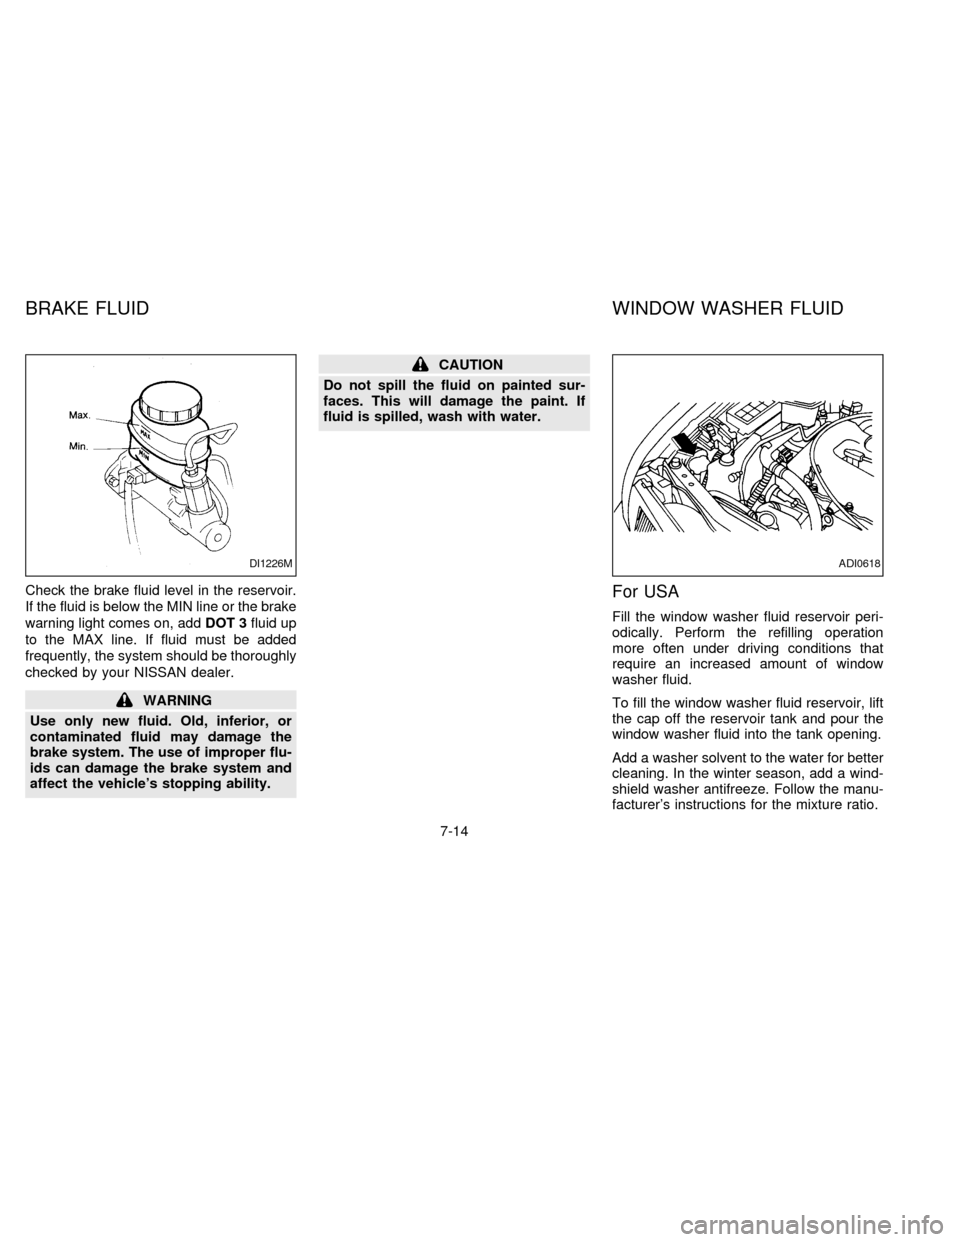
Check the brake fluid level in the reservoir.
If the fluid is below the MIN line or the brake
warning light comes on, addDOT 3fluid up
to the MAX line. If fluid must be added
frequently, the system should be thoroughly
checked by your NISSAN dealer.
WARNING
Use only new fluid. Old, inferior, or
contaminated fluid may damage the
brake system. The use of improper flu-
ids can damage the brake system and
affect the vehicle's stopping ability.
CAUTION
Do not spill the fluid on painted sur-
faces. This will damage the paint. If
fluid is spilled, wash with water.
For USA
Fill the window washer fluid reservoir peri-
odically. Perform the refilling operation
more often under driving conditions that
require an increased amount of window
washer fluid.
To fill the window washer fluid reservoir, lift
the cap off the reservoir tank and pour the
window washer fluid into the tank opening.
Add a washer solvent to the water for better
cleaning. In the winter season, add a wind-
shield washer antifreeze. Follow the manu-
facturer's instructions for the mixture ratio.
DI1226MADI0618
BRAKE FLUID WINDOW WASHER FLUID
7-14
ZX
Page 137 of 194
Canada Only
Add fluid when the low washer fluid warning
light comes on. Add a washer solvent to the
water for better cleaning. In the winter sea-
son, add a windshield washer antifreeze.
Follow the manufacturer's instructions for
the mixture ratio.
CAUTION
Do not substitute engine antifreeze
coolant for windshield washer solution.
This may result in damage to the paint.cKeep the battery surface clean and dry.
Any corrosion should be washed off with
a solution of baking soda and water.
cMake certain the terminal connections
are clean and securely tightened.
cIf the vehicle is not to be used for 30 days
or longer, disconnect the negative (þ)
battery terminal cable to prevent dis-
charge.
WARNING
cDo not expose the battery to flames
or electrical sparks. Hydrogen gas
generated by battery action is explo-
sive. Do not allow battery fluid to
contact your skin, eyes, fabrics, or
painted surfaces. After touching a
battery or battery cap, do not touch
or rub your eyes. Thoroughly wash
your hands. If the acid contacts your
eyes, skin or clothing, immediately
flush with water for at least 15 min-
utes and seek medical attention.
cWhen working on or near a battery,
always wear suitable eye protection
and remove all jewelry.
cKeep the battery out of the reach of
children.
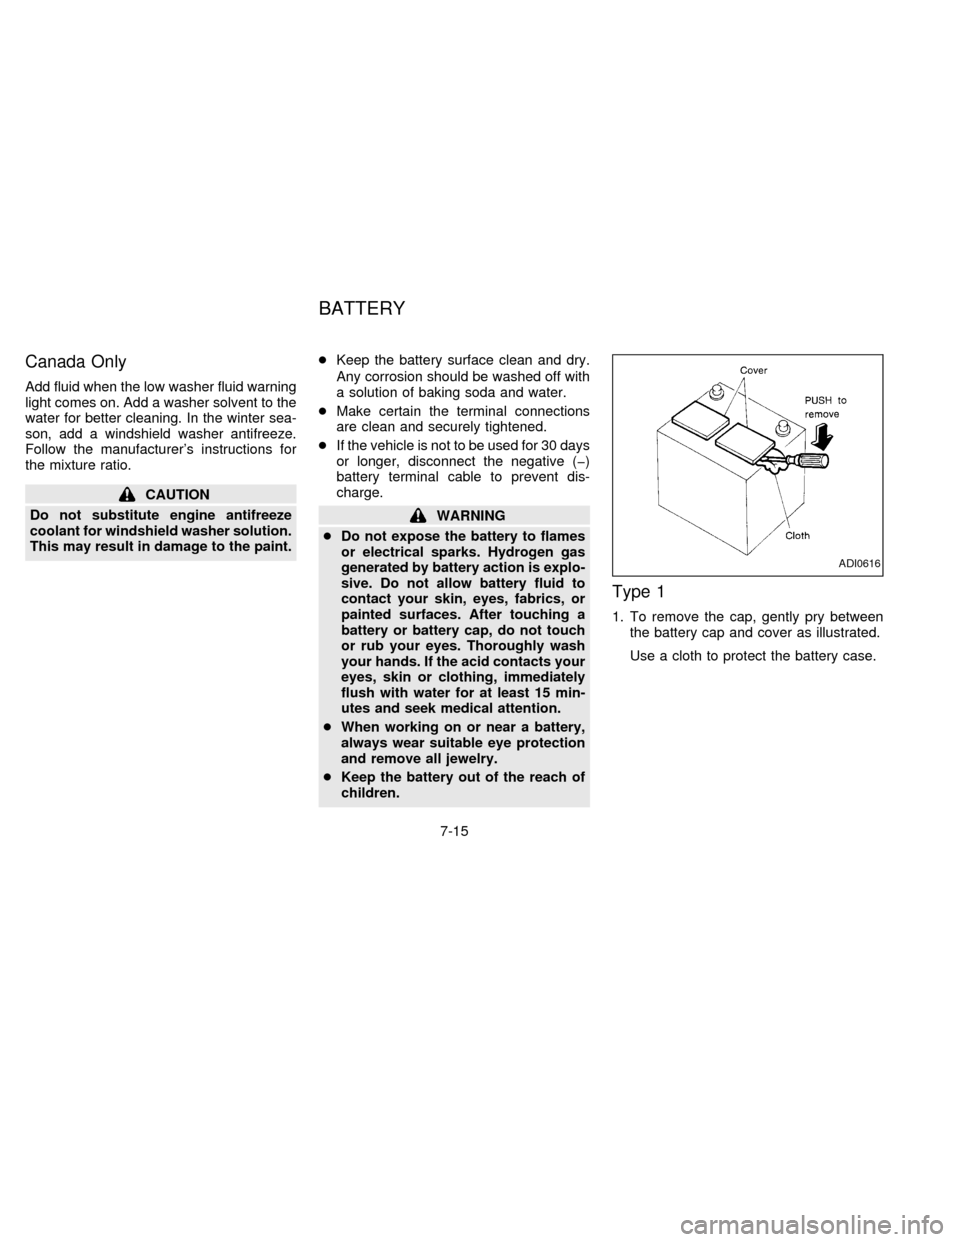
Type 1
1. To remove the cap, gently pry between
the battery cap and cover as illustrated.
Use a cloth to protect the battery case.
ADI0616
BATTERY
7-15
ZX
Page 144 of 194
normal, it may be due to a lack of adjust-
ment of the rear drum brakes. Apply the
parking brake several times.
WARNING
See your NISSAN dealer and have it
checked if the brake pedal height does
not return to normal.
Brake pad wear indicators
The disc brake pads on your vehicle have
audible wear indicators. When a brake pad
requires replacement, it makes a high
pitched scraping or screeching sound when
the vehicle is in motion whether or not the
brake pedal is depressed. Have the brakes
checked as soon as possible if the wear
indicator sound is heard.
Under some driving or climate conditions,
occasional brake squeak, squeal or other
noise may be heard. Occasional brake
noise during light to moderate stops is nor-
mal and does not affect the function or
performance of the brake system.
The rear drum brakes (if so equipped) do
not have audible wear indicators. Should
you ever hear an unusually loud noise fromthe rear drum brakes, have them inspected
as soon as possible by your NISSAN
dealer.
Proper brake inspection intervals should
be followed.For more information regard-
ing brake inspections, see the appropriate
maintenance schedule information in the
``Maintenance Schedule'' section of this
manual.Check the brake booster function as fol-
lows:
1. With the engine off, press and release
the brake pedal several times. When
brake pedal movement (distance of
travel) remains the same from one pedal
application to the next, continue on to the
next step.
2. While depressing the brake pedal, start
the engine. The pedal height should drop
a little.
3. With the brake pedal depressed, stop the
engine. Keeping the pedal depressed for
about 30 seconds, the pedal height
should not change.
4. Run the engine for one minute without
depressing the brake pedal, then turn it
off. Depress the brake pedal several
times. The pedal travel distance will de-
crease gradually with each depression
as the vacuum is released from the
booster.
If the brakes do not operate properly, see
your NISSAN dealer.
BRAKE BOOSTER
7-22
ZX
Page 156 of 194
WARNING
cAfter rotating the tires, adjust the tire
pressure.
cRetighten the wheel nuts after the
wheels have been run for the first
600 miles (1,000 km) (also in cases of
a flat tire, etc.).
cDo not include the T-type spare tire
in the tire rotation.
Tire wear and damage
WARNING
c
Tires should be periodically inspected
for wear, cracking, bulging, or objects
caught in the tread. If excessive wear,
cracks, bulging, or deep cuts are
found, the tire should be replaced.
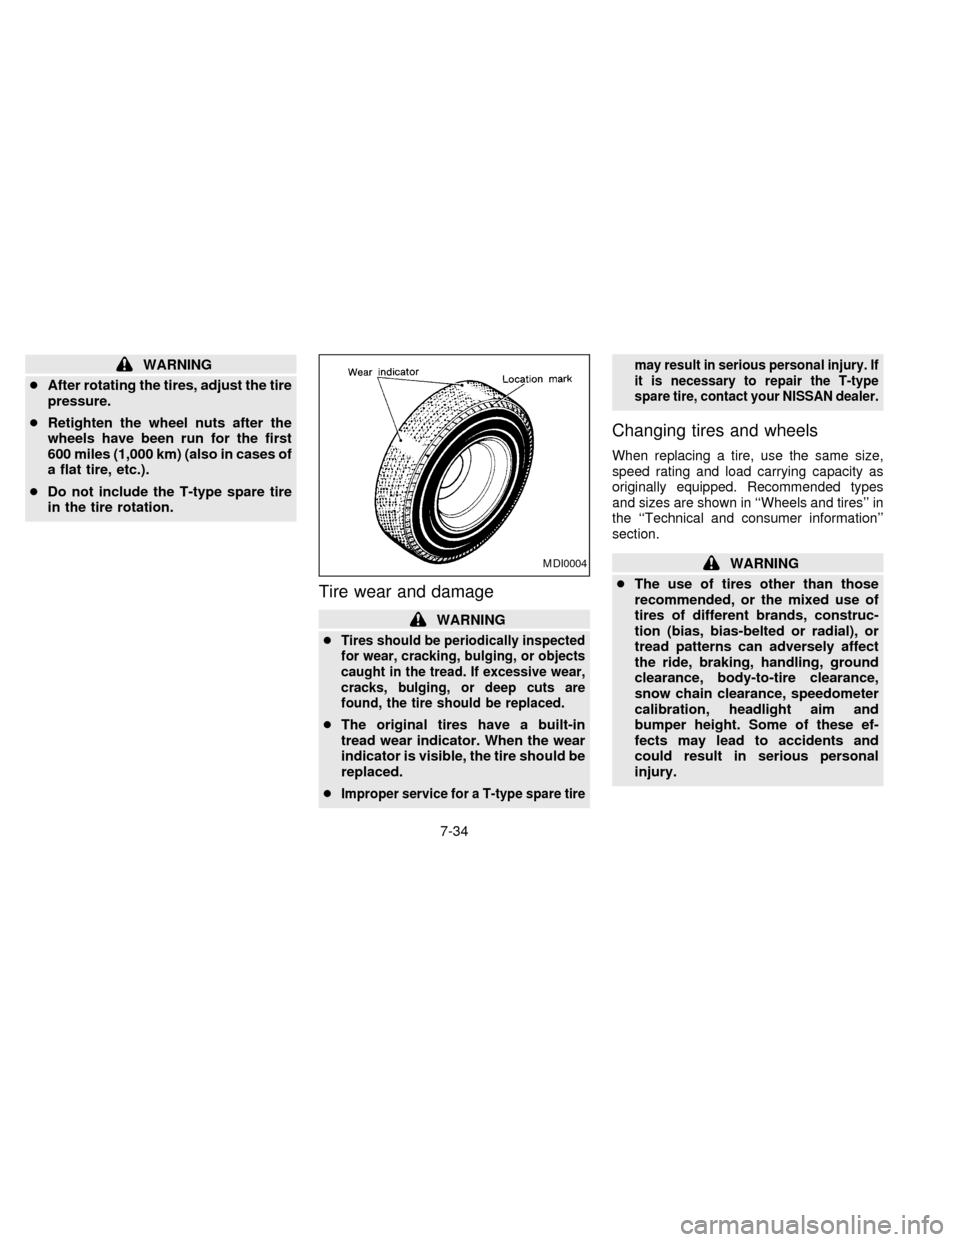
cThe original tires have a built-in
tread wear indicator. When the wear
indicator is visible, the tire should be
replaced.
c
Improper service for a T-type spare tiremay result in serious personal injury. If
it is necessary to repair the T-type
spare tire, contact your NISSAN dealer.
Changing tires and wheels
When replacing a tire, use the same size,
speed rating and load carrying capacity as
originally equipped. Recommended types
and sizes are shown in ``Wheels and tires'' in
the ``Technical and consumer information''
section.
WARNING
cThe use of tires other than those
recommended, or the mixed use of
tires of different brands, construc-
tion (bias, bias-belted or radial), or
tread patterns can adversely affect
the ride, braking, handling, ground
clearance, body-to-tire clearance,
snow chain clearance, speedometer
calibration, headlight aim and
bumper height. Some of these ef-
fects may lead to accidents and
could result in serious personal
injury.MDI0004
7-34
ZX