1997 NISSAN SENTRA ECU
[x] Cancel search: ECUPage 56 of 194
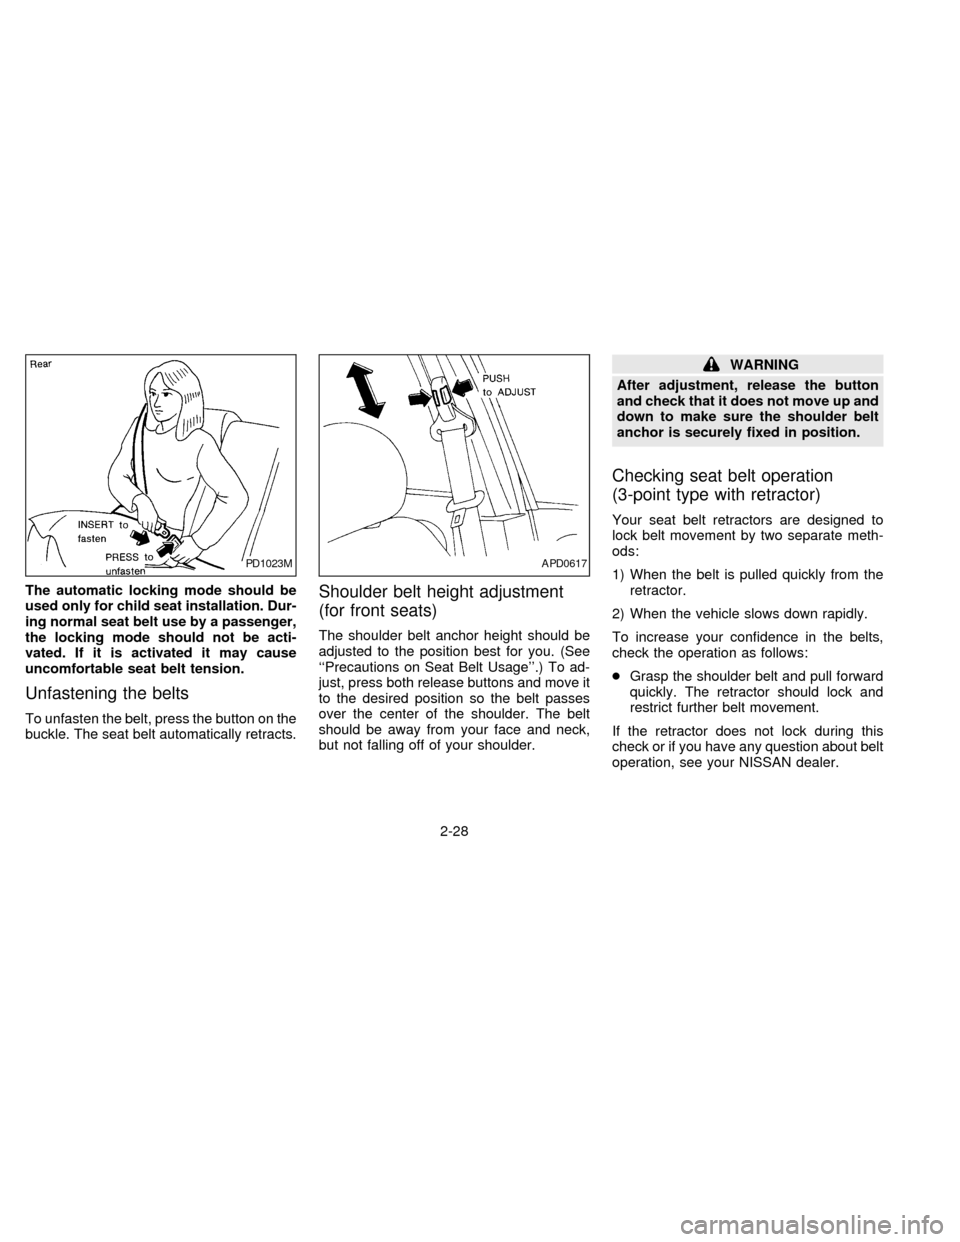
The automatic locking mode should be
used only for child seat installation. Dur-
ing normal seat belt use by a passenger,
the locking mode should not be acti-
vated. If it is activated it may cause
uncomfortable seat belt tension.
Unfastening the belts
To unfasten the belt, press the button on the
buckle. The seat belt automatically retracts.
Shoulder belt height adjustment
(for front seats)
The shoulder belt anchor height should be
adjusted to the position best for you. (See
``Precautions on Seat Belt Usage''.) To ad-
just, press both release buttons and move it
to the desired position so the belt passes
over the center of the shoulder. The belt
should be away from your face and neck,
but not falling off of your shoulder.
WARNING
After adjustment, release the button
and check that it does not move up and
down to make sure the shoulder belt
anchor is securely fixed in position.
Checking seat belt operation
(3-point type with retractor)
Your seat belt retractors are designed to
lock belt movement by two separate meth-
ods:
1) When the belt is pulled quickly from the
retractor.
2) When the vehicle slows down rapidly.
To increase your confidence in the belts,
check the operation as follows:
cGrasp the shoulder belt and pull forward
quickly. The retractor should lock and
restrict further belt movement.
If the retractor does not lock during this
check or if you have any question about belt
operation, see your NISSAN dealer.
PD1023MAPD0617
2-28
ZX
Page 60 of 194
cAfter attaching the child restraint,
test it before you place the child in it.
Tilt it from side to side. Try to tug it
forward and check to see if the belt
holds the restraint in place. If the
restraint is not secure, tighten the
belt as necessary, or put the restraint
in another seat and test it again.
cFor a front facing child restraint, if
the seat position where it is installed
has a 3-point type lap/shoulder belt,
check to make sure the shoulder belt
does not go in front of the child's
face or neck. If it does, put the shoul-
der belt behind the child restraint.
c
When your child restraint is not in
use, keep it secured with a seat belt to
prevent it from being thrown around
in case of a sudden stop or accident.
CAUTION
Remember that a child restraint left in a
closed vehicle can become very hot.
Check the seating surface and buckles
before placing your child in the child
restraint.
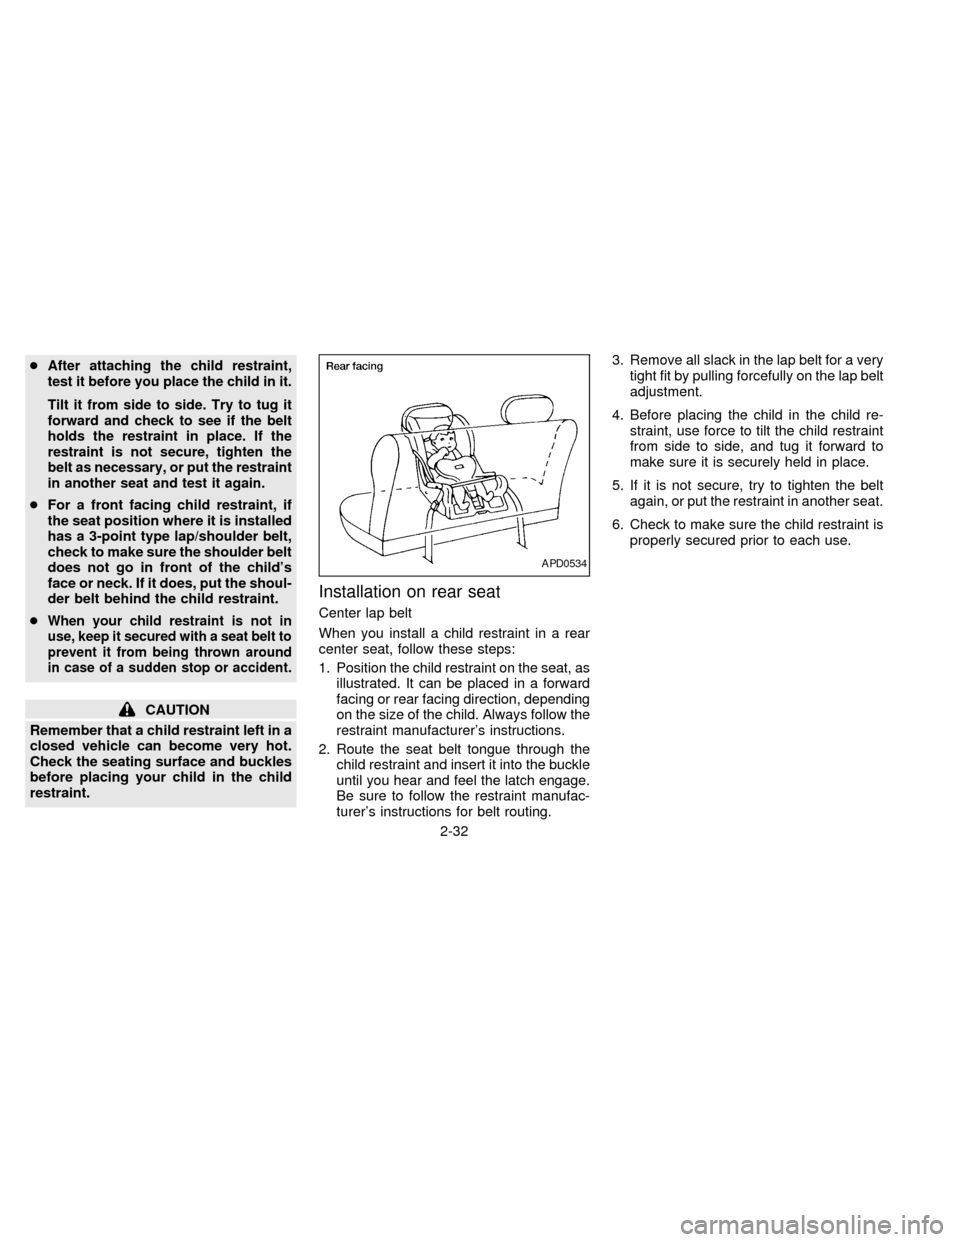
Installation on rear seat
Center lap belt
When you install a child restraint in a rear
center seat, follow these steps:
1. Position the child restraint on the seat, as
illustrated. It can be placed in a forward
facing or rear facing direction, depending
on the size of the child. Always follow the
restraint manufacturer's instructions.
2. Route the seat belt tongue through the
child restraint and insert it into the buckle
until you hear and feel the latch engage.
Be sure to follow the restraint manufac-
turer's instructions for belt routing.3. Remove all slack in the lap belt for a very
tight fit by pulling forcefully on the lap belt
adjustment.
4. Before placing the child in the child re-
straint, use force to tilt the child restraint
from side to side, and tug it forward to
make sure it is securely held in place.
5. If it is not secure, try to tighten the belt
again, or put the restraint in another seat.
6. Check to make sure the child restraint is
properly secured prior to each use.
APD0534
2-32
ZX
Page 61 of 194
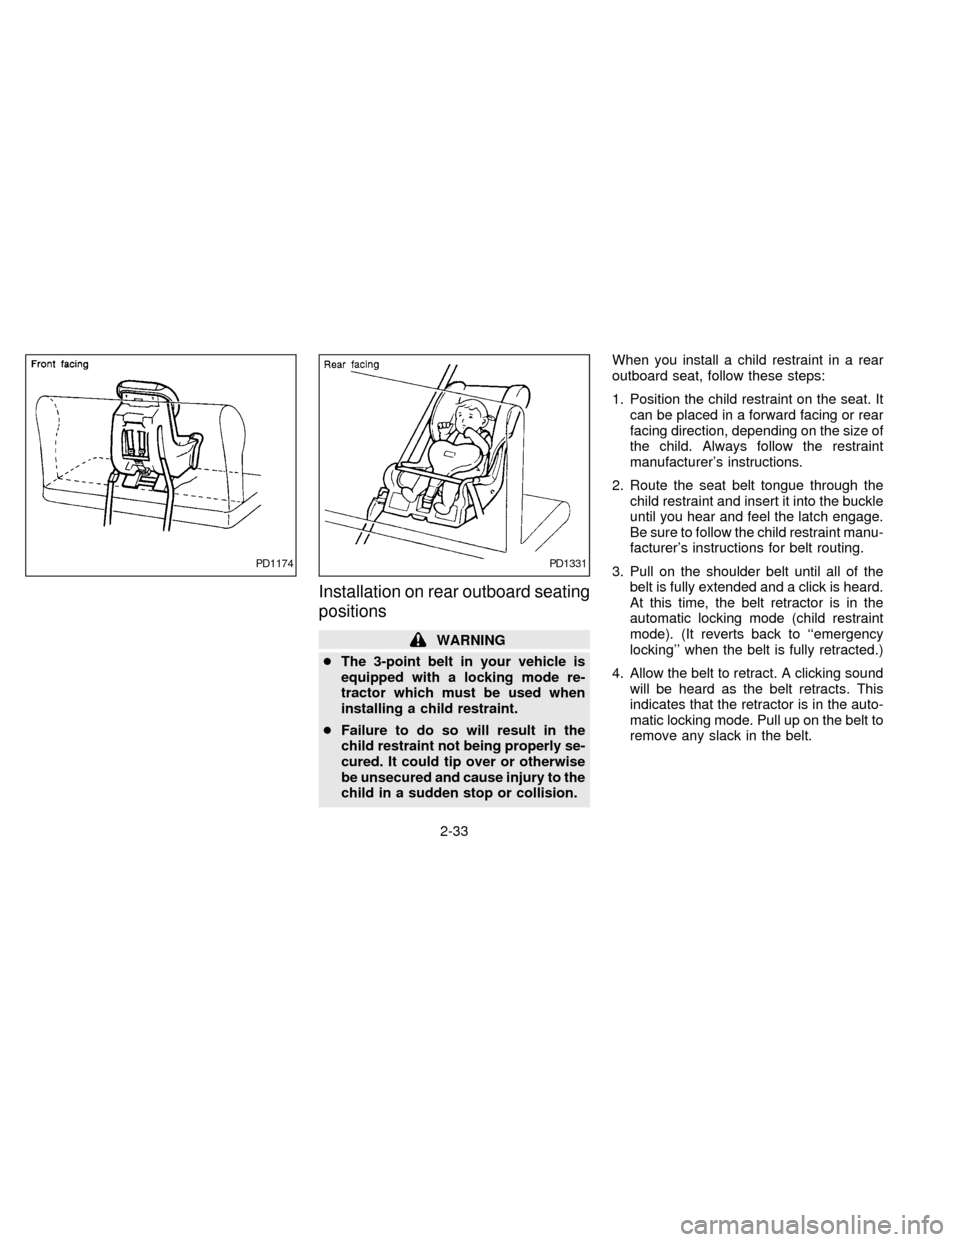
Installation on rear outboard seating
positions
WARNING
cThe 3-point belt in your vehicle is
equipped with a locking mode re-
tractor which must be used when
installing a child restraint.
cFailure to do so will result in the
child restraint not being properly se-
cured. It could tip over or otherwise
be unsecured and cause injury to the
child in a sudden stop or collision.When you install a child restraint in a rear
outboard seat, follow these steps:
1. Position the child restraint on the seat. It
can be placed in a forward facing or rear
facing direction, depending on the size of
the child. Always follow the restraint
manufacturer's instructions.
2. Route the seat belt tongue through the
child restraint and insert it into the buckle
until you hear and feel the latch engage.
Be sure to follow the child restraint manu-
facturer's instructions for belt routing.
3. Pull on the shoulder belt until all of the
belt is fully extended and a click is heard.
At this time, the belt retractor is in the
automatic locking mode (child restraint
mode). (It reverts back to ``emergency
locking'' when the belt is fully retracted.)
4. Allow the belt to retract. A clicking sound
will be heard as the belt retracts. This
indicates that the retractor is in the auto-
matic locking mode. Pull up on the belt to
remove any slack in the belt.
PD1174PD1331
2-33
ZX
Page 62 of 194
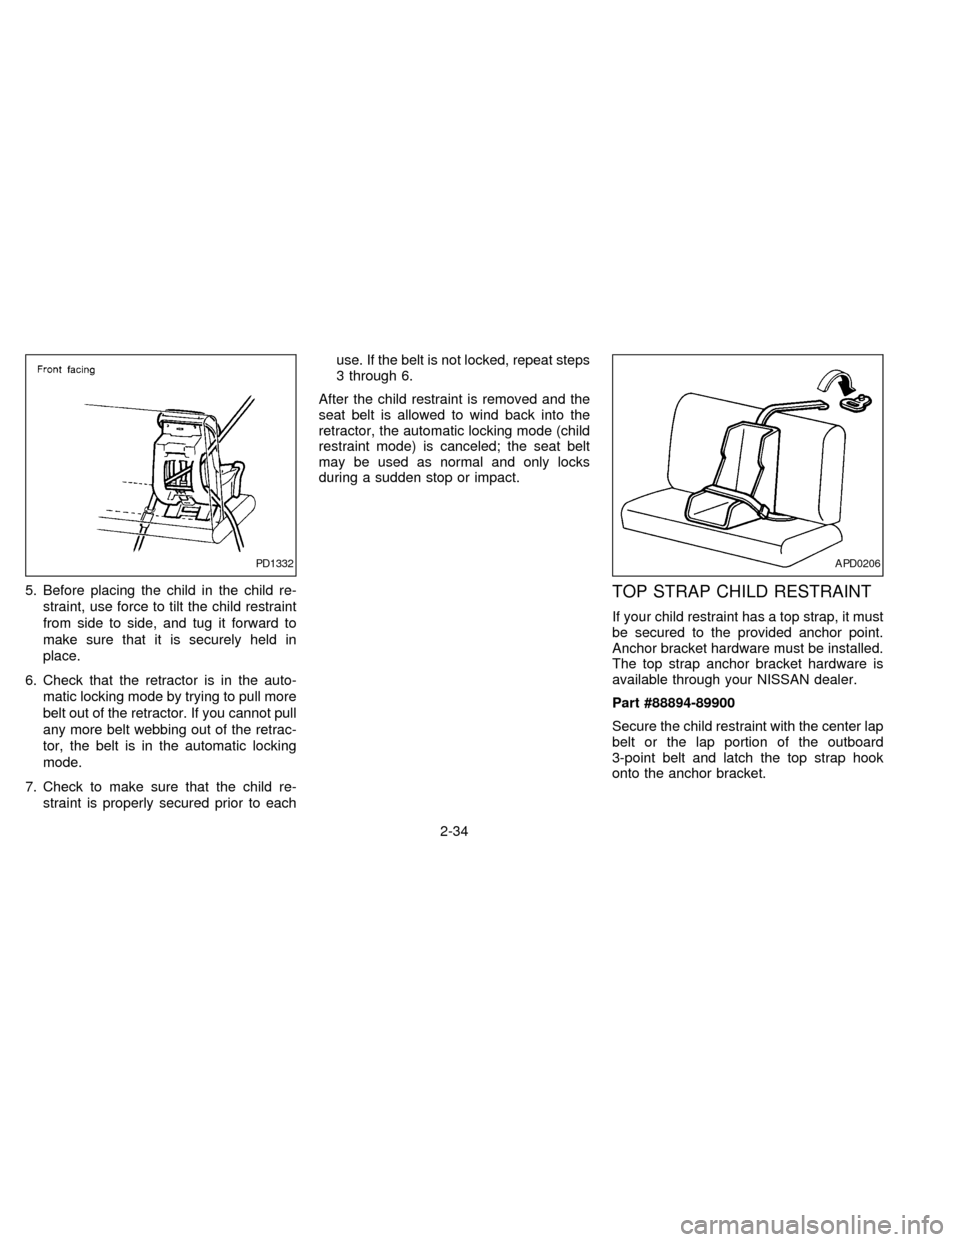
5. Before placing the child in the child re-
straint, use force to tilt the child restraint
from side to side, and tug it forward to
make sure that it is securely held in
place.
6. Check that the retractor is in the auto-
matic locking mode by trying to pull more
belt out of the retractor. If you cannot pull
any more belt webbing out of the retrac-
tor, the belt is in the automatic locking
mode.
7. Check to make sure that the child re-
straint is properly secured prior to eachuse. If the belt is not locked, repeat steps
3 through 6.
After the child restraint is removed and the
seat belt is allowed to wind back into the
retractor, the automatic locking mode (child
restraint mode) is canceled; the seat belt
may be used as normal and only locks
during a sudden stop or impact.TOP STRAP CHILD RESTRAINT
If your child restraint has a top strap, it must
be secured to the provided anchor point.
Anchor bracket hardware must be installed.
The top strap anchor bracket hardware is
available through your NISSAN dealer.
Part #88894-89900
Secure the child restraint with the center lap
belt or the lap portion of the outboard
3-point belt and latch the top strap hook
onto the anchor bracket.
PD1332APD0206
2-34
ZX
Page 63 of 194
To install the anchor bracket, a metric bolt of
the dimensions listed below must be used.
Bolt diameter: 8.0 mm
Bolt length: more than 1.18 in (30 mm)
Thread pitch: 1.25 mm
The top strap should be secured to the
attaching bolt which provides the straightest
installation of the top strap.
WARNING
Child restraint anchor points are de-
signed to withstand only those loads
imposed by correctly fitted child re-
straints. Under no circumstances are
they to be used for adult seat belts or
harnesses.
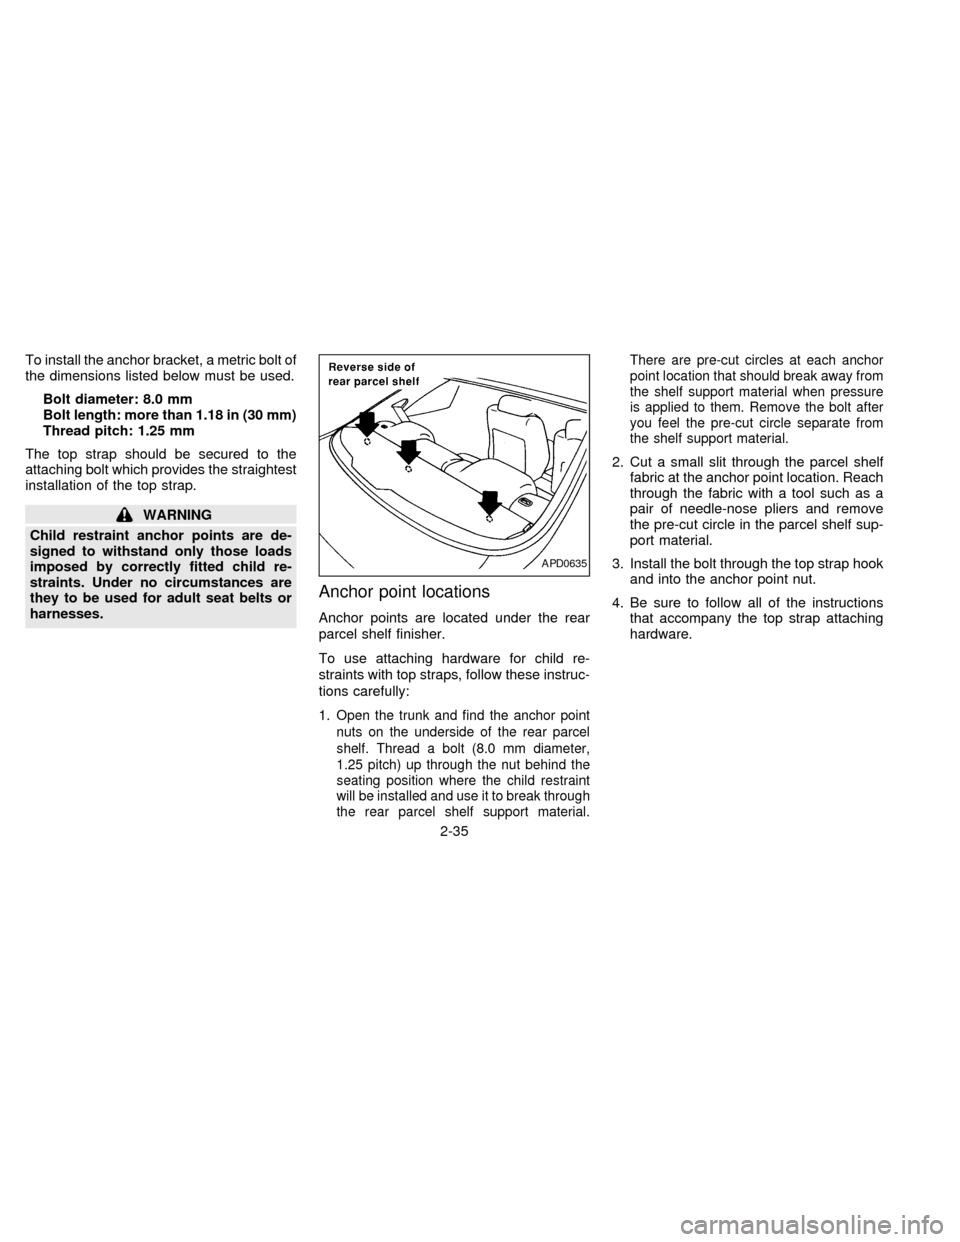
Anchor point locations
Anchor points are located under the rear
parcel shelf finisher.
To use attaching hardware for child re-
straints with top straps, follow these instruc-
tions carefully:
1.
Open the trunk and find the anchor point
nuts on the underside of the rear parcel
shelf. Thread a bolt (8.0 mm diameter,
1.25 pitch) up through the nut behind the
seating position where the child restraint
will be installed and use it to break through
the rear parcel shelf support material.There are pre-cut circles at each anchor
point location that should break away from
the shelf support material when pressure
is applied to them. Remove the bolt after
you feel the pre-cut circle separate from
the shelf support material.
2. Cut a small slit through the parcel shelf
fabric at the anchor point location. Reach
through the fabric with a tool such as a
pair of needle-nose pliers and remove
the pre-cut circle in the parcel shelf sup-
port material.
3. Install the bolt through the top strap hook
and into the anchor point nut.
4. Be sure to follow all of the instructions
that accompany the top strap attaching
hardware.
APD0635
2-35
ZX
Page 64 of 194
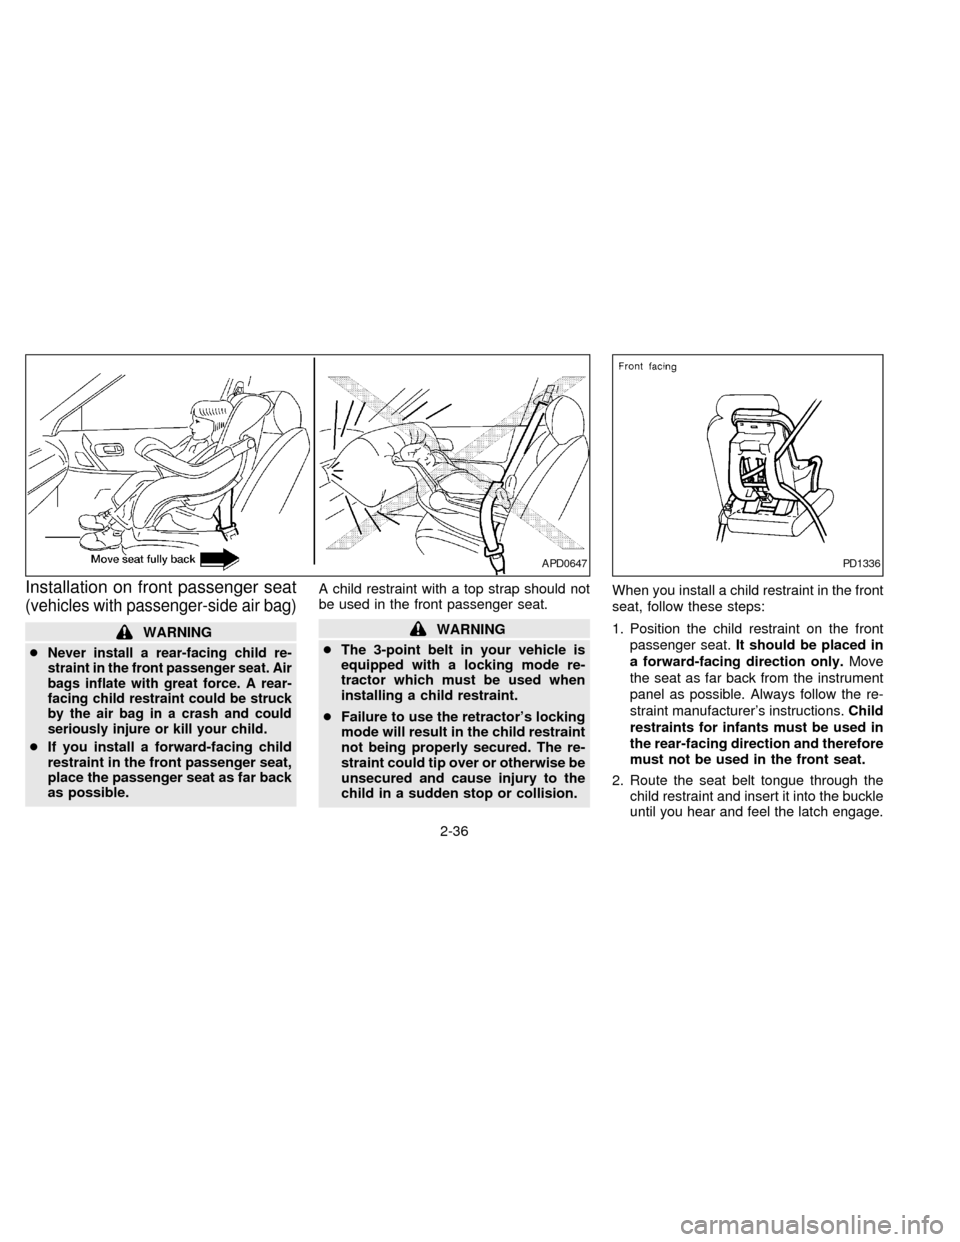
Installation on front passenger seat
(vehicles with passenger-side air bag)
WARNING
c
Never install a rear-facing child re-
straint in the front passenger seat. Air
bags inflate with great force. A rear-
facing child restraint could be struck
by the air bag in a crash and could
seriously injure or kill your child.
cIf you install a forward-facing child
restraint in the front passenger seat,
place the passenger seat as far back
as possible.A child restraint with a top strap should not
be used in the front passenger seat.
WARNING
cThe 3-point belt in your vehicle is
equipped with a locking mode re-
tractor which must be used when
installing a child restraint.
cFailure to use the retractor's locking
mode will result in the child restraint
not being properly secured. The re-
straint could tip over or otherwise be
unsecured and cause injury to the
child in a sudden stop or collision.When you install a child restraint in the front
seat, follow these steps:
1. Position the child restraint on the front
passenger seat.It should be placed in
a forward-facing direction only.Move
the seat as far back from the instrument
panel as possible. Always follow the re-
straint manufacturer's instructions.Child
restraints for infants must be used in
the rear-facing direction and therefore
must not be used in the front seat.
2. Route the seat belt tongue through the
child restraint and insert it into the buckle
until you hear and feel the latch engage.
APD0647PD1336
2-36
ZX
Page 65 of 194
Be sure to follow the child restraint manu-
facturer's instructions for belt routing.
3. Pull on the shoulder belt until all of the
belt is fully extended and a click is heard.
At this time, the belt retractor is in the
automatic locking mode (child restraint
mode). (It reverts back to ``emergency
locking'' when the belt is fully retracted.)
4. Allow the belt to retract. A clicking sound
is heard as the belt retracts. This indi-
cates that the retractor is in the automatic
locking mode. Pull up on the belt to
remove any slack in the belt.
5. Before placing the child in the child re-
straint, use force to tilt the child restraint
from side to side, and tug it forward to
make sure it is securely held in place.
6.
Check that the retractor is in the automatic
locking mode by trying to pull more belt
out of the retractor. If you cannot pull any
more belt webbing out of the retractor, the
belt is in the automatic locking mode.
7. Check to make sure the child restraint is
properly secured prior to each use. If the
lap belt is not locked, repeat steps 3
through 6.
After the child restraint is removed and the
seat belt is allowed to wind back into theretractor, the automatic locking mode (child
restraint mode) is canceled; the seat belt
may be used as normal and will only lock
during a sudden stop or impact.
NOTE:
For Canada, some vehicles are not
equipped with a Supplemental Air Bag
System and do not have a passenger-side
supplemental air bag. If your vehicle does
not have a passenger-side air bag, a rear
facing child restraint may be used in the
front passenger seat. Follow the instruc-
tions in ``Installation on rear outboard
seating positions'' earlier in this section.
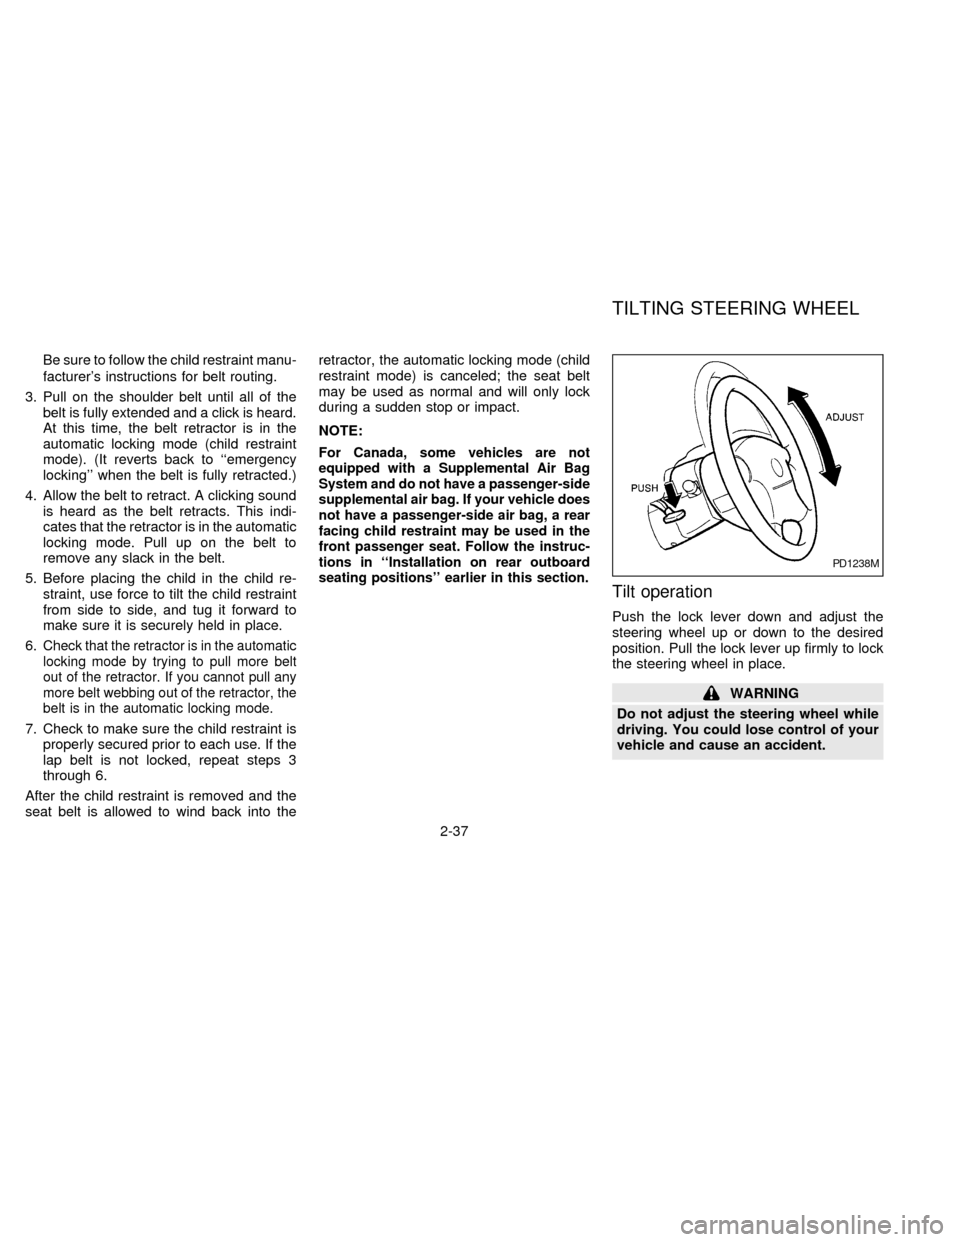
Tilt operation
Push the lock lever down and adjust the
steering wheel up or down to the desired
position. Pull the lock lever up firmly to lock
the steering wheel in place.
WARNING
Do not adjust the steering wheel while
driving. You could lose control of your
vehicle and cause an accident.
PD1238M
TILTING STEERING WHEEL
2-37
ZX
Page 86 of 194
WARNING
Do not leave children, unreliable
adults, or pets alone in your vehicle.
They could accidentally injure them-
selves or others through inadvertent
operation of the vehicle. Also, on hot,
sunny days, temperatures in a closed
vehicle could quickly become high
enough to cause severe or possibly
fatal injuries to people or animals.
EXHAUST GAS (carbon monoxide)
WARNING
Do not breathe exhaust gases; they
contain colorless and odorless carbon
monoxide. Carbon monoxide is dan-
gerous. It can cause unconsciousness
or death.
cIf you suspect that exhaust fumes
are entering the vehicle, drive with
all windows fully open, and have the
vehicle inspected immediately.
cDo not run the engine in closed
spaces such as a garage.cDo not park the vehicle with the
engine running for any extended
length of time.
cKeep the trunk lid closed while driv-
ing, otherwise exhaust gases could
be drawn into the passenger com-
partment. If you must drive in this
manner for some reason, take the
following steps:
1. Open all the windows.
2.
Set the air recirculation button (if
so equipped) off and the fan control
dial to 4 (high) to circulate the air.
3. Be sure the rear seats are secured
and latched in the upright
position.
cIf electrical wiring or other cable
connections must pass to a trailer
through the seal on the trunk lid or
the body, follow the manufacturer's
recommendation to prevent carbon
monoxide entry into the vehicle.
cThe exhaust system and body
should be inspected by a qualified
mechanic whenever:a. The vehicle is raised for service.
b. You suspect that exhaust fumes
are entering into the passenger
compartment.
c. You notice a change in the sound
of the exhaust system.
d.
You have had an accident involv-
ing damage to the exhaust system,
underbody, or rear of the vehicle.
THREE WAY CATALYST
The three way catalyst is an emission con-
trol device installed in the exhaust system.
Exhaust gases in the three way catalyst are
burned at high temperatures to help reduce
pollutants.
WARNING
c
The exhaust gas and the exhaust sys-
tem are very hot. Keep people or flam-
mable materials away from the ex-
haust pipe.
cDo not stop or park the vehicle over
flammable materials such as dry
grass, waste paper or rags. They
may ignite and cause a fire.
PRECAUTIONS WHEN
STARTING AND DRIVING
4-2
ZX