1997 NISSAN FRONTIER change wheel
[x] Cancel search: change wheelPage 43 of 204
cNo unauthorized changes should be
made to any components or wiring
of the supplemental air bag system.
This is to prevent accidental inflation
of the supplemental air bag or dam-
age to the supplemental air bag
system.
cDo not make unauthorized changes
to your vehicle's electrical system,
suspension system or front end
structure. This could affect proper
operation of the supplemental air
bag system.
cTampering with the supplemental air
bag system may result in serious
personal injury. Tampering includes
changes to the steering wheel by
placing material over the steering
wheel pad or by installing additional
trim material around the supplemen-
tal air bag system.cWork around and on the supplemen-
tal air bag system should be done by
an authorized NISSAN dealer. Instal-
lation of electrical equipment should
also be done by an authorized NIS-
SAN dealer. The yellow SRS wiring
should not be modified or discon-
nected. Unauthorized electrical test
equipment and probing devices
should not be used on the supple-
mental air bag system.
cSRS wiring harnesses are covered
with yellow insulation either just be-
fore the harness connectors or over
the complete harness for easy iden-
tification.
When selling your vehicle, we request that
you inform the buyer about the supplemen-
tal air bag system and guide the buyer to the
appropriate sections in this Owner's
Manual.
2-16
ZX
Page 90 of 204
uncomfortable shift shocks as the trans-
mission repeatedly shifts between 3rd
and overdrive. In this case, set the over-
drive switch in the OFF
position. The
indicator light in the instrument panel
comes on at this time.
When driving conditions change, reset the
overdrive switch in the ONposition.
Remember not to drive at high speeds for
extended periods of time with the overdrive
switch set in the OFF
position. This
reduces fuel economy.
Shifting with manual transmission
To change gears, fully depress the clutch
pedal, then move the gearshift lever. After
shifting, release the clutch slowly.
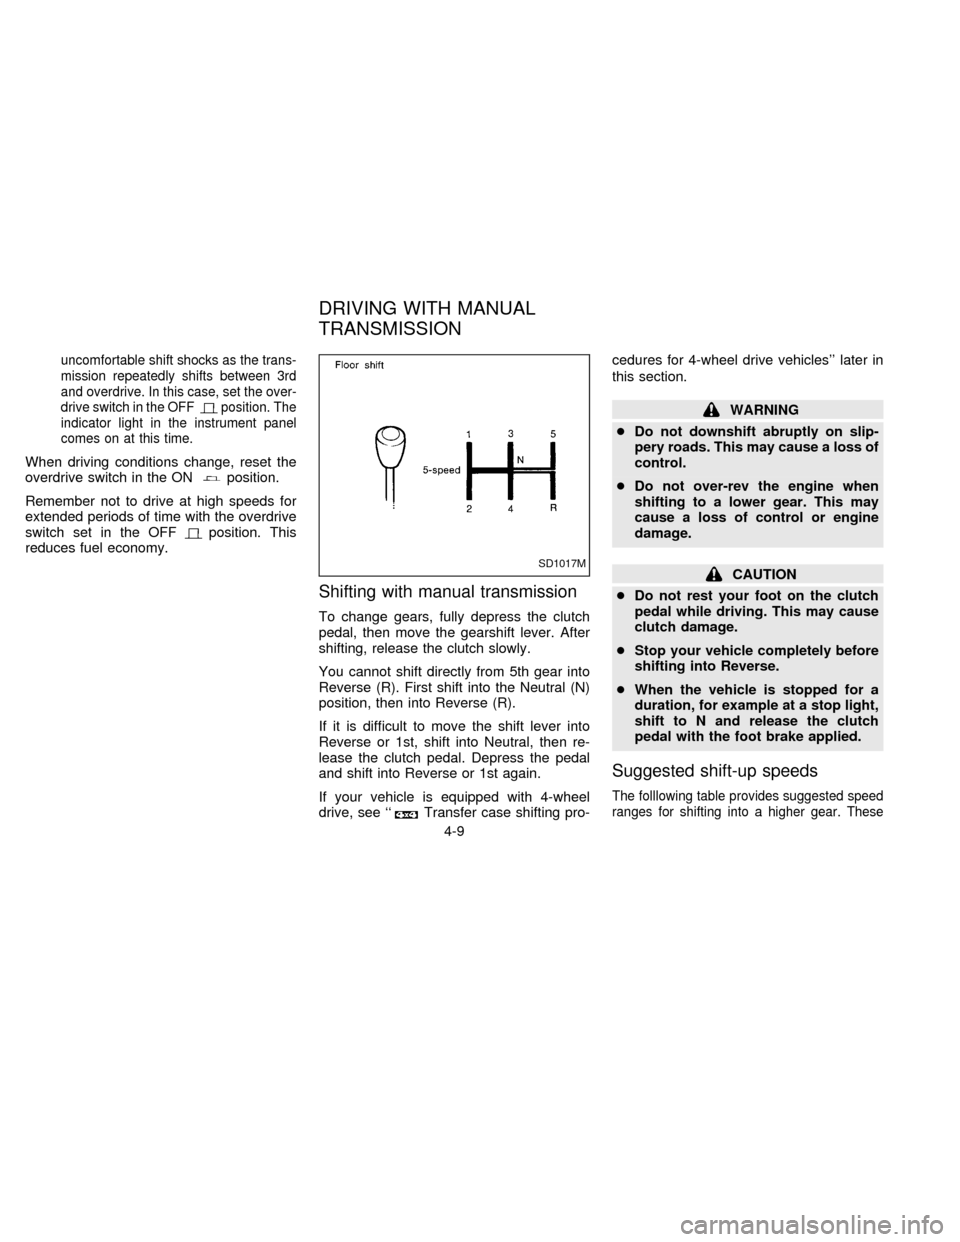
You cannot shift directly from 5th gear into
Reverse (R). First shift into the Neutral (N)
position, then into Reverse (R).
If it is difficult to move the shift lever into
Reverse or 1st, shift into Neutral, then re-
lease the clutch pedal. Depress the pedal
and shift into Reverse or 1st again.
If your vehicle is equipped with 4-wheel
drive, see ``
Transfer case shifting pro-cedures for 4-wheel drive vehicles'' later in
this section.
WARNING
cDo not downshift abruptly on slip-
pery roads. This may cause a loss of
control.
cDo not over-rev the engine when
shifting to a lower gear. This may
cause a loss of control or engine
damage.
CAUTION
cDo not rest your foot on the clutch
pedal while driving. This may cause
clutch damage.
cStop your vehicle completely before
shifting into Reverse.
cWhen the vehicle is stopped for a
duration, for example at a stop light,
shift to N and release the clutch
pedal with the foot brake applied.
Suggested shift-up speeds
The folllowing table provides suggested speed
ranges for shifting into a higher gear. These
SD1017M
DRIVING WITH MANUAL
TRANSMISSION
4-9
ZX
Page 99 of 204

TO SHIFT
TRANSFER CASE:SHIFT PROCEDURE FOR AUTO-LOCK FREE-RUNNING HUBS
From 2H to 4HMove the transfer lever to 4H at speeds below 25 MPH (40 km/h). It is not necessary to depress the clutch pedal. Perform
this operation when driving straight.
From 4H to 2HMove the transfer lever to 2H. This can be done at any speed, and it is not necessary to depress the clutch pedal. Per-
form this operation when driving straight.
NOTE:
For 2-wheel drive operation, set the free-running hubs in the disengaged position. AUTO-LOCK hubs will not disen-
gage until the vehicle is moved about 3 feet (1 m) in the opposite direction of travel:
cWhen driving forward, stop and move 3 feet (1 m) in reverse.
cWhen backing up, stop and move 3 feet (1 m) forward, then move the vehicle about 3 feet (1 m) in reverse.
This will allow for better fuel economy, quieter ride and less component wear.
From 4H to 4L or 4L to
4H1. Stop the vehicle.
2. Depress the clutch pedal.
3. Depress the transfer lever and move it to the desired 4L or 4H position.
From 2H to 4L1. Stop the vehicle.
2. Depress the clutch pedal.
3. Depress the transfer lever and move it to 4L. Change gears quickly and smoothly.
From 4L to 2H1. Stop the vehicle.
2. Depress the clutch pedal.
3. Depress the transfer lever and move it to 2H.
NOTE:
Follow the NOTE shown in shifting from 4H to 2H.
4-18
ZX
Page 101 of 204

TO SHIFT TRANSFER
CASE:SHIFT PROCEDURE FOR MANUAL-LOCK FREE-RUNNING HUBS
From 2H to 4H1. Stop the vehicle.
2. Set free-running hubs in the LOCK position.
3. Move the transfer lever to 4H. It is not necessary to depress the clutch pedal.
From 4H to 2HMove the transfer lever to 2H. This can be done at any speed, and it is not necessary to depress the clutch pedal. Per-
form this operation when driving straight.
NOTE:
For 2-wheel drive operation, set the free-running hubs in the FREE position. This will allow for better fuel economy,
quieter ride and less component wear.
From 4H to 4L or 4L to
4H1. Stop the vehicle.
2. Depress the clutch pedal.
3. Depress the transfer lever and move it to the desired 4L or 4H position.
From 2H to 4L1. Stop the vehicle.
2. Set free-running hubs in the LOCK position.
3. Depress the clutch pedal.
4. Depress the transfer lever and move it to 4L. Change gears quickly and smoothly.
From 4L to 2H1. Stop the vehicle.
2. Depress the clutch pedal.
3. Depress the transfer lever and move it to 2H.
NOTE:
Follow the NOTE shown in shifting from 4H to 2H.
4-20
ZX
Page 104 of 204
Tire inflation pressure
Periodically check the pressure in all tires,
including the spare, with a gauge. Adjust to
the specified pressure if necessary. Tire
pressures are shown on the tire placard
affixed to the glove box.
Tire chain
Tire chains must be installed only on the
rear wheels and not on the front wheels.
Do not drive with tire chains on paved roads
which are clear of snow. Driving with chains
in such conditions can cause damage to the
various mechanisms of the vehicle due to
some overstress. When driving on clear
paved roads, be sure to change to 2WD.
WARNING
cDo not park the vehicle over flam-
mable materials such as dry grass,
waste paper or rags. They may ignite
and cause a fire.
c
The transfer control lever
must be in the 2H, 4H or 4L position
and the parking brake set to prevent
the vehicle from rolling.
cNever place the transfer control le-
ver in the N position. Otherwise, the
vehicle could roll unexpectedly evenif the manual transmission is in gear or
the automatic transmission is in the P
position. This could result in serious
personal injury or property damage.
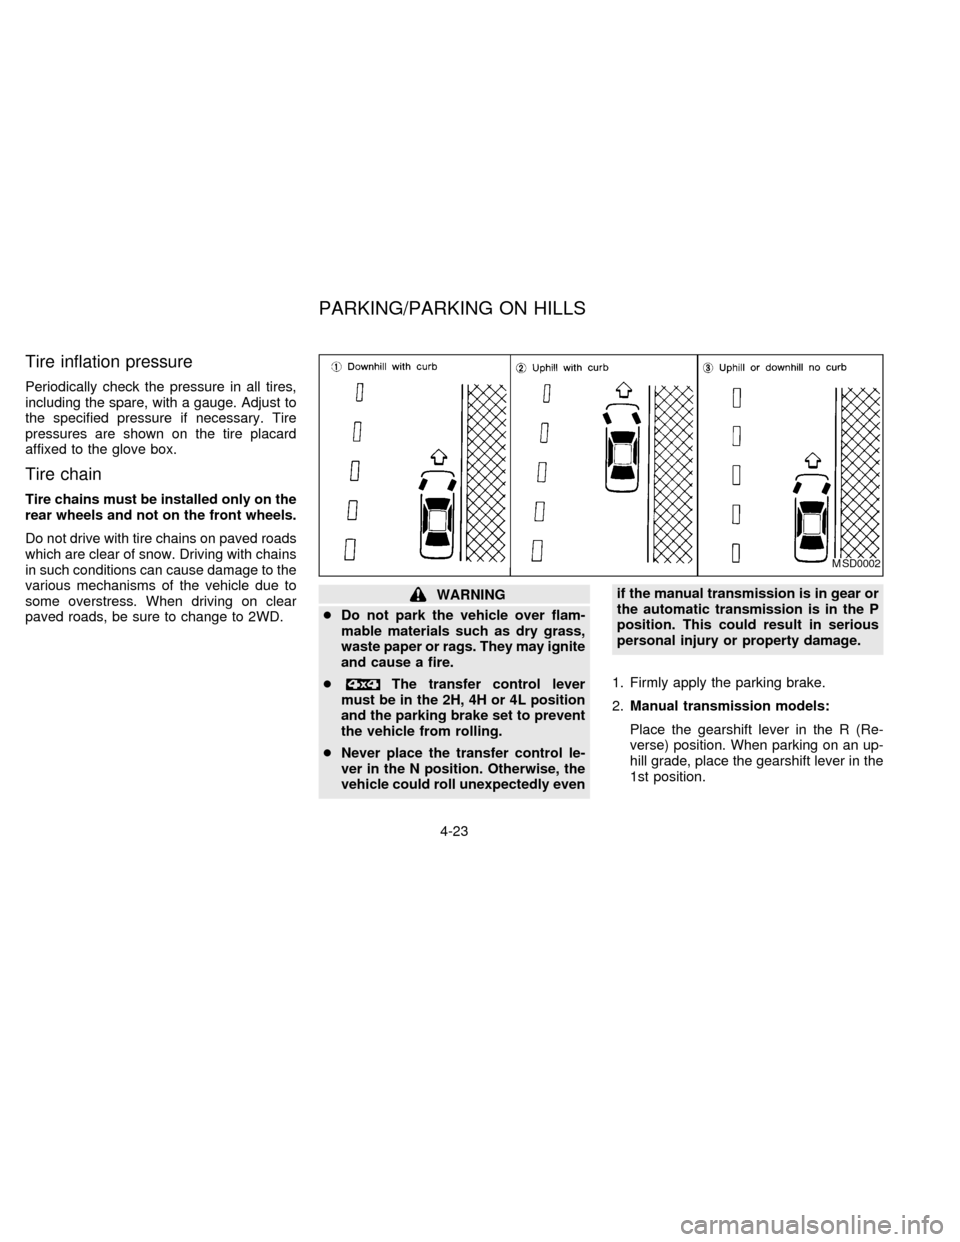
1. Firmly apply the parking brake.
2.Manual transmission models:
Place the gearshift lever in the R (Re-
verse) position. When parking on an up-
hill grade, place the gearshift lever in the
1st position.
MSD0002
PARKING/PARKING ON HILLS
4-23
ZX
Page 111 of 204
If you have a flat tire, follow the instructions
below:
Stopping the vehicle
1. Safely move the vehicle off the road and
away from traffic.
2. Turn on the hazard warning flashers.
3. Park on a level surface and apply the
parking brake. Shift the manual transmis-
sion into R (Reverse), or the automatic
transmission into P (Park).
WARNING
c
The transfer control lever
must be in the 2H, 4H or 4L position.
cNever place the transfer control le-
ver in the N position. Otherwise, the
vehicle could roll unexpectedly even
if the manual transmission is in gear
or the automatic transmission is in
the P position. This could result in
serious personal injury or property
damage.
4. Turn off the engine.
5. Raise the hood to warn other traffic and
to signal professional road assistancepersonnel that you require assistance.
6. Have all passengers get out of the ve-
hicle and stand in a safe place away from
traffic and clear of the vehicle.
WARNING
cMake sure that the parking brake is
securely applied and the manual
transmission is shifted into R (Re-
verse), or the automatic transmis-
sion into P (Park).
cNever change tires when the vehicle
is on a slope, ice or a slippery area.
This is hazardous.
cNever change tires if oncoming traf-
fic is close to your vehicle. Wait for
professional road assistance.
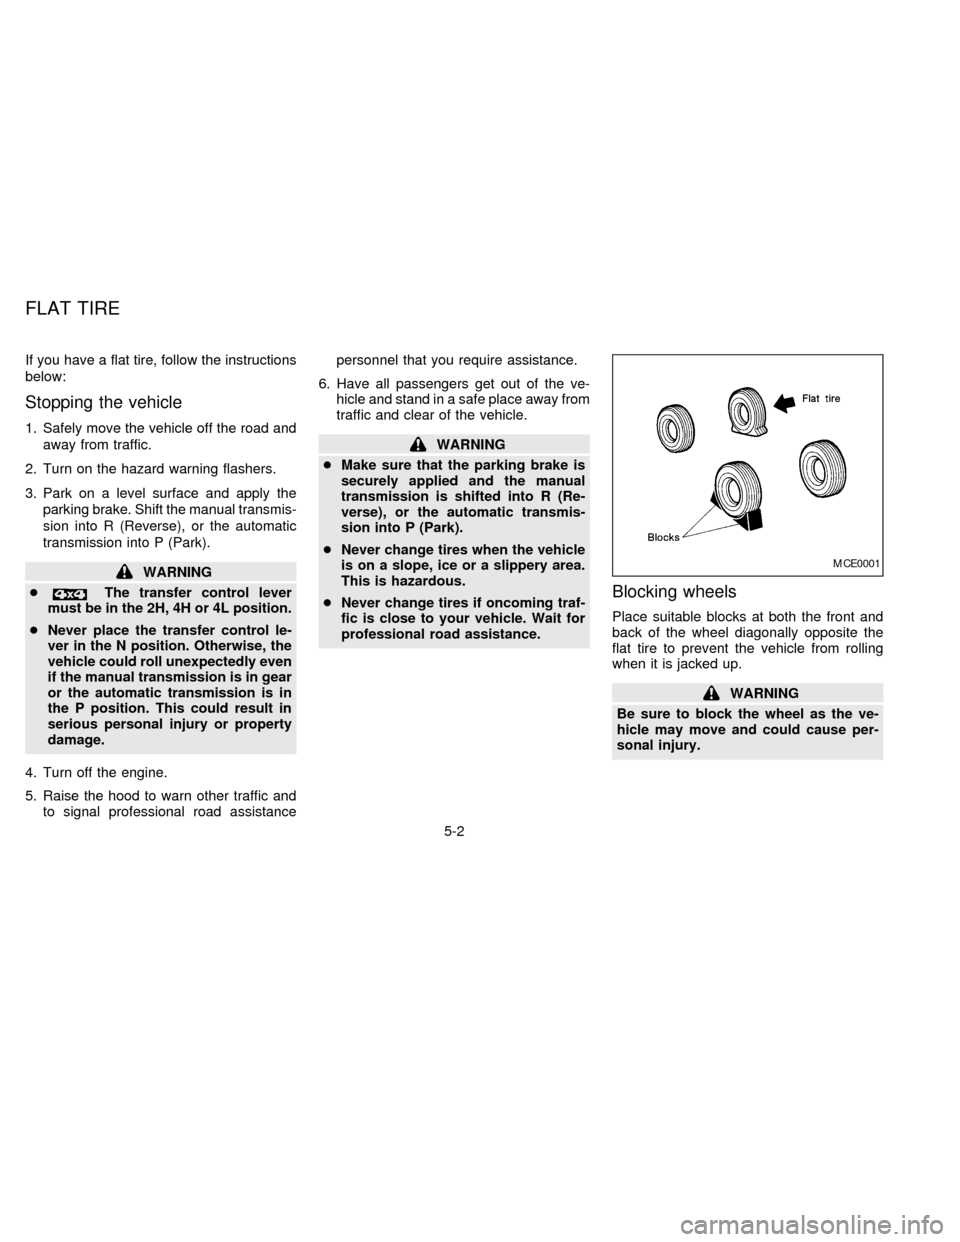
Blocking wheels
Place suitable blocks at both the front and
back of the wheel diagonally opposite the
flat tire to prevent the vehicle from rolling
when it is jacked up.
WARNING
Be sure to block the wheel as the ve-
hicle may move and could cause per-
sonal injury.
MCE0001
FLAT TIRE
5-2
ZX
Page 114 of 204
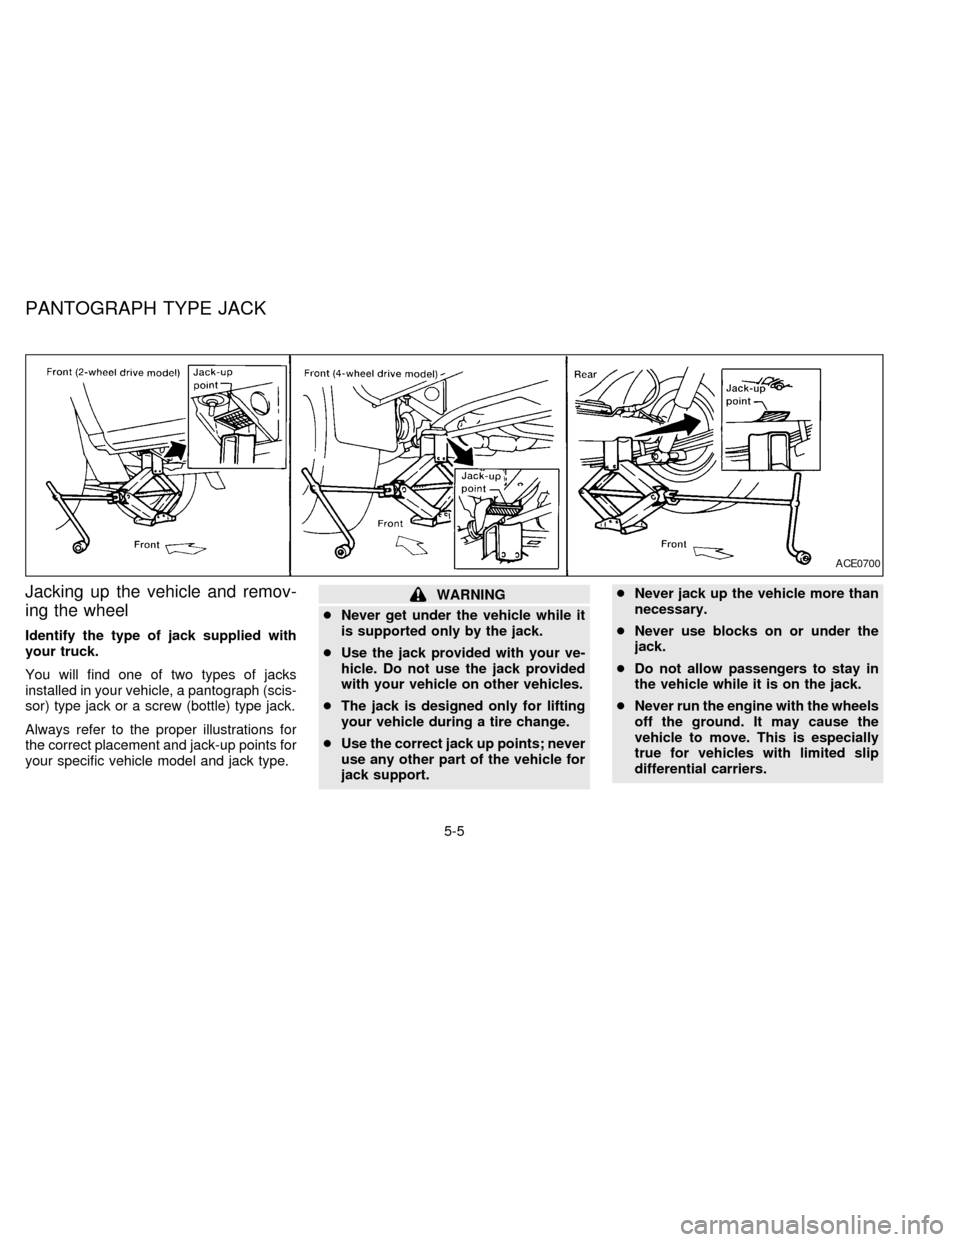
Jacking up the vehicle and remov-
ing the wheel
Identify the type of jack supplied with
your truck.
You will find one of two types of jacks
installed in your vehicle, a pantograph (scis-
sor) type jack or a screw (bottle) type jack.
Always refer to the proper illustrations for
the correct placement and jack-up points for
your specific vehicle model and jack type.
WARNING
cNever get under the vehicle while it
is supported only by the jack.
cUse the jack provided with your ve-
hicle. Do not use the jack provided
with your vehicle on other vehicles.
cThe jack is designed only for lifting
your vehicle during a tire change.
cUse the correct jack up points; never
use any other part of the vehicle for
jack support.cNever jack up the vehicle more than
necessary.
cNever use blocks on or under the
jack.
cDo not allow passengers to stay in
the vehicle while it is on the jack.
cNever run the engine with the wheels
off the ground. It may cause the
vehicle to move. This is especially
true for vehicles with limited slip
differential carriers.
ACE0700
PANTOGRAPH TYPE JACK
5-5
ZX
Page 148 of 204
Self-adjusting brakes
Your vehicle is equipped with self-adjusting
brakes.
The front disc-type brakes self-adjust every
time the brake pedal is applied. The rear
drum-type brakes on two-wheel drive trucks
self-adjust every time the parking brake is
applied. The rear drum-type brakes on four-
wheel drive trucks self-adjust every time the
brake pedal is applied. If the brake pedal
goes down farther than normal, it may be
due to a lack of adjustment of the rear drum
brakes. Apply the parking brake several
times.
WARNING
If the brake pedal height does not re-
turn to normal, see your NISSAN dealer
and have it checked.
Brake pad wear indicators
The disc brake pads on your vehicle have
audible wear indicators. When a brake pad
requires replacement, it will make a high
pitched scraping or screeching sound when
the vehicle is in motion whether or not the
brake pedal is depressed. Have the brakeschecked as soon as possible if the wear
indicator sound is heard.
Under some driving or climate conditions,
occasional brake squeak, squeal or other
noise may be heard. Occasional brake
noise during light to moderate stops is nor-
mal and does not affect the function or
performance of the brake system.
The rear drum brakes (if so equipped) do
not have audible wear indicators. Should
you ever hear an unusually loud noise from
the rear drum brakes, have them inspected
as soon as possible by your NISSAN
dealer.
Proper brake inspection intervals should
be followed.For more information regard-
ing brake inspections, see the appropriate
maintenance schedule information in the
``Maintenance Schedule'' section of this
manual.Check the brake booster function with the
following steps:
1. With the engine off, press and release
the brake pedal several times. When
brake pedal movement (distance of
travel) remains the same from one pedal
application to the next, continue on to
next step.
2. While depressing the brake pedal, start
the engine. The pedal height should drop
a little.
3. With the brake pedal depressed, stop the
engine. Keeping the pedal depressed for
about 30 seconds, the pedal height
should not change.
4. Run the engine for one minute without
depressing the brake pedal, then turn it
off. Depress the brake pedal several
times. The pedal travel distance will de-
crease gradually with each depression
as the vacuum is released from the
booster.
If the brakes do not operate properly, have
the brakes checked by your NISSAN dealer.
BRAKE BOOSTER
7-19
ZX