1997 MERCEDES-BENZ ML350 interior lights
[x] Cancel search: interior lightsPage 502 of 4133
35
Antitheft alarm system
Te ch n ica l
data
Instruments
and controls Operation
Driving Instrument
cluster display Practical hints Car care Index
Antitheft alarm system
The indicator lamp is located in the center console.
The antitheft alarm is automatically armed or disarmed
with the remote control by locking or unlocking the
vehicle.
The antitheft alarm is armed within approximately
15 seconds after locking the vehicle with the remote
control.
A blinking lamp in the center console indicates that the
alarm is armed.
Notes:
Use of the key in the front door locks does not arm or
disarm the antitheft alarm system.
The alarm sounds when unlocking the driver’s door
with the mechanical key. Cancel alarm by turning key in
steering lock to position 1, or with the remote control by
pressing button Œ.
If the vehicle battery voltage falls below 10 volts, the
alarm is automatically canceled and the antitheft alarm
system is disarmed. When the voltage is above this
value again, the antitheft alarm system is armed again. Operation:
Once the alarm system has been armed, the turn signal
lamps will flash rapidly (approximately 3 minutes) and
the horn will sound intermittently (approximately
30 seconds) when someone:
• opens a door,
• opens the liftgate,
• opens the hood,
• breaks a window,
• attempts to raise the vehicle.
The alarm will stay on even if the activating element (a
door, for example) is immediately closed.
If the alarm stays on for more than 20 seconds, an
emergency call is initiated automatically. See Tele Aid
on page 148.
Note:
The alarm system will cycle three times when triggered.
The interior lights are automatically switched on when
the alarm comes on and go out when canceling the
alarm.
Page 539 of 4133
72
Rear view mirrors
Te ch n ica l
data
Instruments
and controls Operation
Driving Instrument
cluster display Practical hints Car care Index
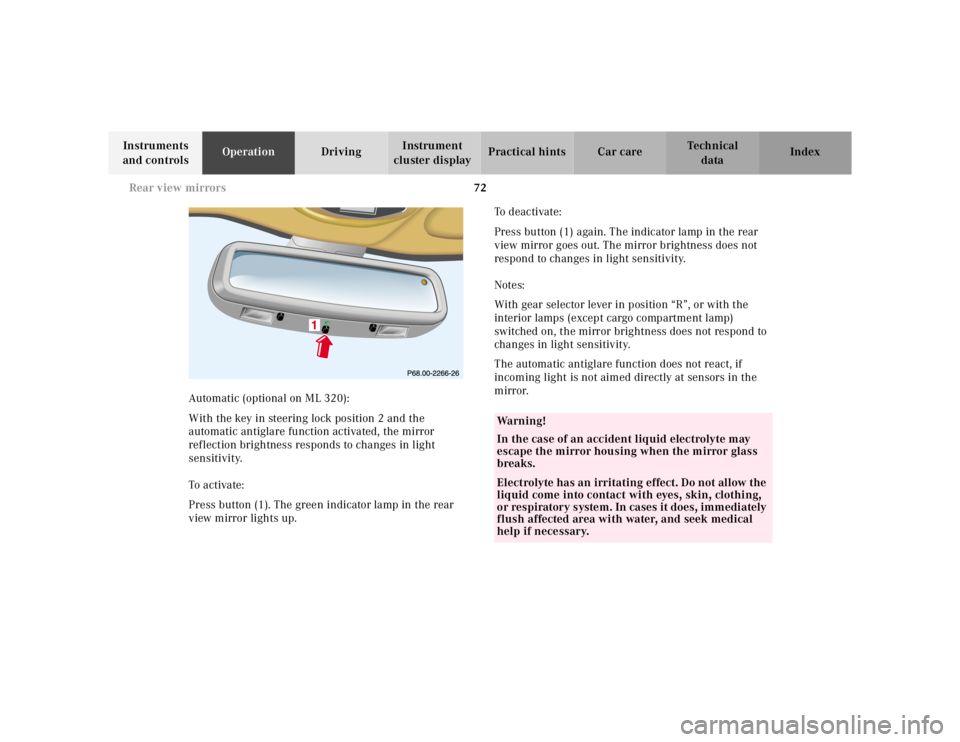
Automatic (optional on ML 320):
With the key in steering lock position 2 and the
automatic antiglare function activated, the mirror
reflection brightness responds to changes in light
sensitivity.
To a ctiva te:
Press button (1). The green indicator lamp in the rear
view mirror lights up. To deactivate:
Press button (1) again. The indicator lamp in the rear
view mirror goes out. The mirror brightness does not
respond to changes in light sensitivity.
Notes:
With gear selector lever in position “R”, or with the
interior lamps (except cargo compartment lamp)
switched on, the mirror brightness does not respond to
changes in light sensitivity.
The automatic antiglare function does not react, if
incoming light is not aimed directly at sensors in the
mirror.
Wa r n i n g !
In the case of an accident liquid electrolyte may
escape the mirror housing when the mirror glass
breaks.Electrolyte has an irritating effect. Do not allow the
liquid come into contact with eyes, skin, clothing,
or respiratory system. In cases it does, immediately
flush affected area with water, and seek medical
help if necessary.
Page 569 of 4133

102
Climate control
Te ch n ica l
data
Instruments
and controls Operation
Driving Instrument
cluster display Practical hints Car care Index
Windshield fogged up on outside.
Switch on wiper motor.
Set air distribution control switch to position d
or a .
Dust filter
Nearly all dust particles and pollen are filtered out
before outside air enters the passenger compartment
through the air distribution system.
Note:
Keep the air intake grille in front of windshield free of
snow and debris.
Climate control – OFF
To switch the climate control off, set air volume control
switch to position 0.
Switch off air conditioning mode œ. Control lamp in
button goes out. Air recirculation
This mode can be selected to temporarily reduce the
entry of annoying odors or dust into the vehicle’s
interior.
Outside air is not supplied to the vehicles’s interior.
To select, press O button. Indicator lamp in button
lights up.
To cancel, press O button again. Indicator lamp in
button goes out.
If the windows should fog up from the inside, switch
from recirculated air back to fresh air.
Page 772 of 4133

305
Index
Te ch n ica l
data
Instruments
and controls Operation Driving
Instrument
cluster display Practical hints Car care
Index
Headlamp cleaning system ............................................ 94
Headlights ......................................................................... 90
Heated seats ..................................................................... 44
Hood ................................................................................. 231
Hooks ............................................................................... 133
IIdentification labels .......................................................285
Illuminated vanity mirrors ............................................113
Indicator lamps in the instrument cluster ................... 78
Infant and child restraint system Installation ................................................................... 67
Infant and child restraint systems ................................ 65
Inflating the space-saver tire .......................................249
Information call See Tele Aid ............................................................... 148
Instrument cluster ........................................................... 76
Activating display ....................................................... 80
Display illumination ................................................... 80
Indicator lamps ........................................................... 78
Malfunction and indicator lamps ........................... 218
Instrument lamps ............................................................ 80 Instruments and controls ............................................... 18
Interior General notes ............................................................. 114
Interior lighting .............................................................. 110
JJump starting ................................................................. 253KKeys, vehicle .....................................................................24LLamps, exterior .............................................................. 260 Adjusting headlamp aim ......................................... 268
Auxiliary fog lamp ............................................. 92, 264
Fog lamps .....................................................................93
Headlamp assembly ......................................... 261, 262
Headlamps .................................90, 261, 262, 268, 280
High mounted stop lamp ......................................... 267
License plate lamps ................................................. 267
Low and high beam ............................................90, 263
Page 1526 of 4133
INTERIOR LIGHTING (IL), FUNCTION - GF82.20-P-0002GH
MODEL 163
The interior lighting can be switched on in two ways: Manually with
the switches for the individual light
automatically by
opening the doors
Switching off the ignition
Locking the vehicle with the central locking feature
Following an accident
CONTENTS - FUNCTION DESCRIPTION OF INTERIOR LIGHTING (IL) - GF82.20-P-0998GH
MODEL 163
Switching on interior
lighting manually GF82.20-P-2009GH
Switching on interior
lighting automatically GF82.20-P-2010GH
Interior lighting, location of
components GF82.20-P-0002-01GH
Function description,
interior lights GF82.20-P-0002GH
Switching interior lights
on/off manually, function GF82.20-P-2009GH
Switching interior lights
on/off automatically,
function GF82.20-P-2010GH
Control of operating period
of interior lights, function GF82.20-P-3001GH
Dimming interior lights,
function GF82.20-P-3002GH
Actuating rear dome lamp,
function GF82.20-P-4005GH
Actuating entrance/exit
lamps, functionas of 12.99GF82.20-P-4004GH
Actuating footwell lamps,
functionas of 12.99GF82.20-P-4008GH
Rotary tumbler GF82.20-P-4105GH
2001 Mercedes-Benz ML320
1998-2005 ACCESSORIES & BODY, CAB Electrical System - Body - 163 Chassis
me
Saturday, October 02, 2010 3:30:04 PMPage 31 © 2006 Mitchell Repair Information Company, LLC.
Page 1527 of 4133
SWITCHING INTERIOR LIGHTS ON/OFF MANUALLY, FUNCTION - GF82.20-P-2009GH
MODEL 163
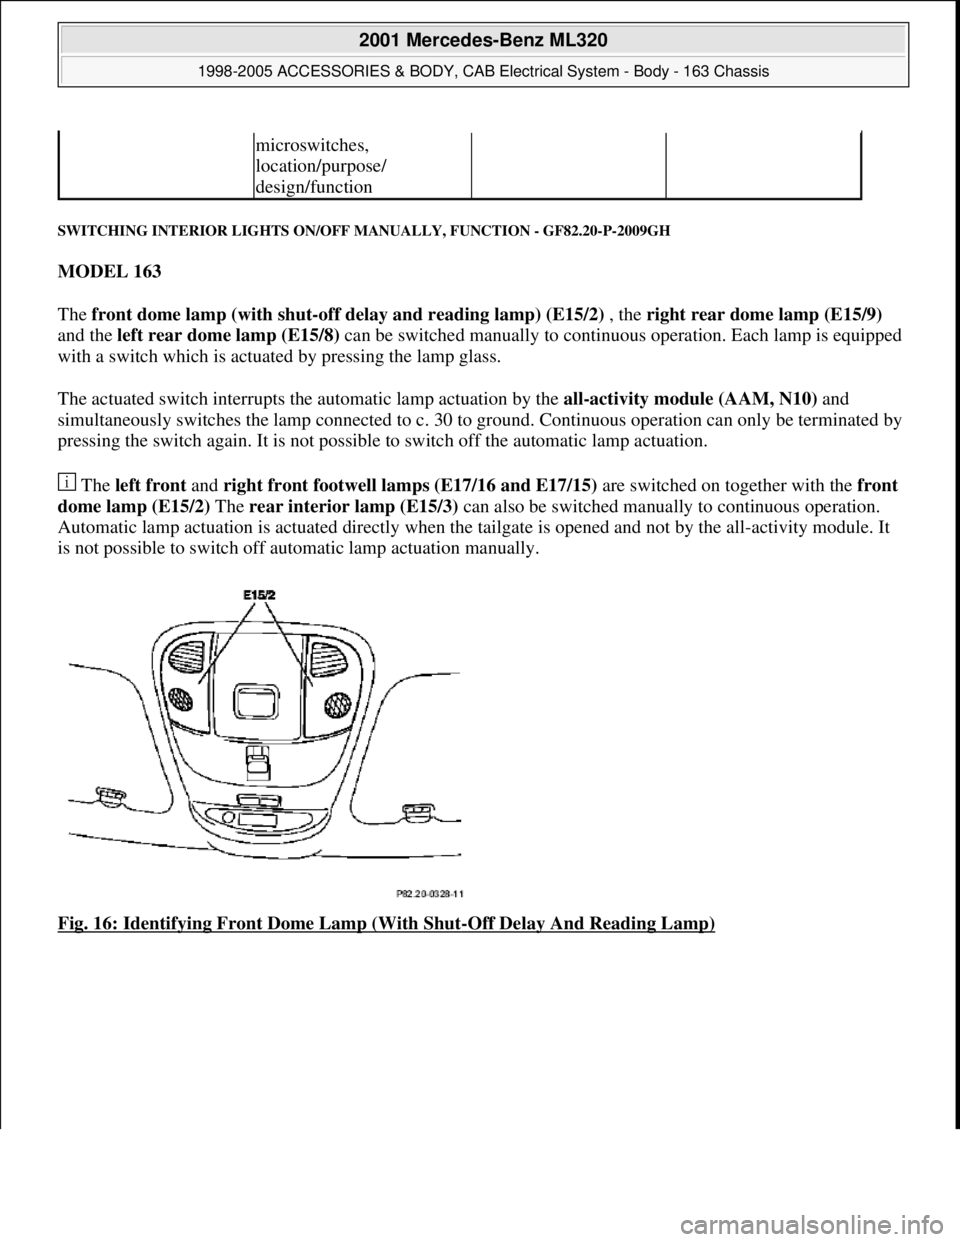
The front dome lamp (with shut-off delay and reading lamp) (E15/2) , the right rear dome lamp (E15/9)
and the left rear dome lamp (E15/8) can be switched manually to continuous operation. Each lamp is equipped
with a switch which is actuated by pressing the lamp glass.
The actuated switch interrupts the automatic lamp actuation by the all-activity module (AAM, N10) and
simultaneously switches the lamp connected to c. 30 to ground. Continuous operation can only be terminated by
pressing the switch again. It is not possible to switch off the automatic lamp actuation.
The left front and right front footwell lamps (E17/16 and E17/15) are switched on together with the front
dome lamp (E15/2) The rear interior lamp (E15/3) can also be switched manually to continuous operation.
Automatic lamp actuation is actuated directly when the tailgate is opened and not by the all-activity module. It
is not possible to switch off automatic lamp actuation manually.
Fig. 16: Identifying Front Dome Lamp (With Shut
-Off Delay And Reading Lamp)
microswitches,
location/purpose/
design/function
2001 Mercedes-Benz ML320
1998-2005 ACCESSORIES & BODY, CAB Electrical System - Body - 163 Chassis
me
Saturday, October 02, 2010 3:30:04 PMPage 32 © 2006 Mitchell Repair Information Company, LLC.
Page 1528 of 4133
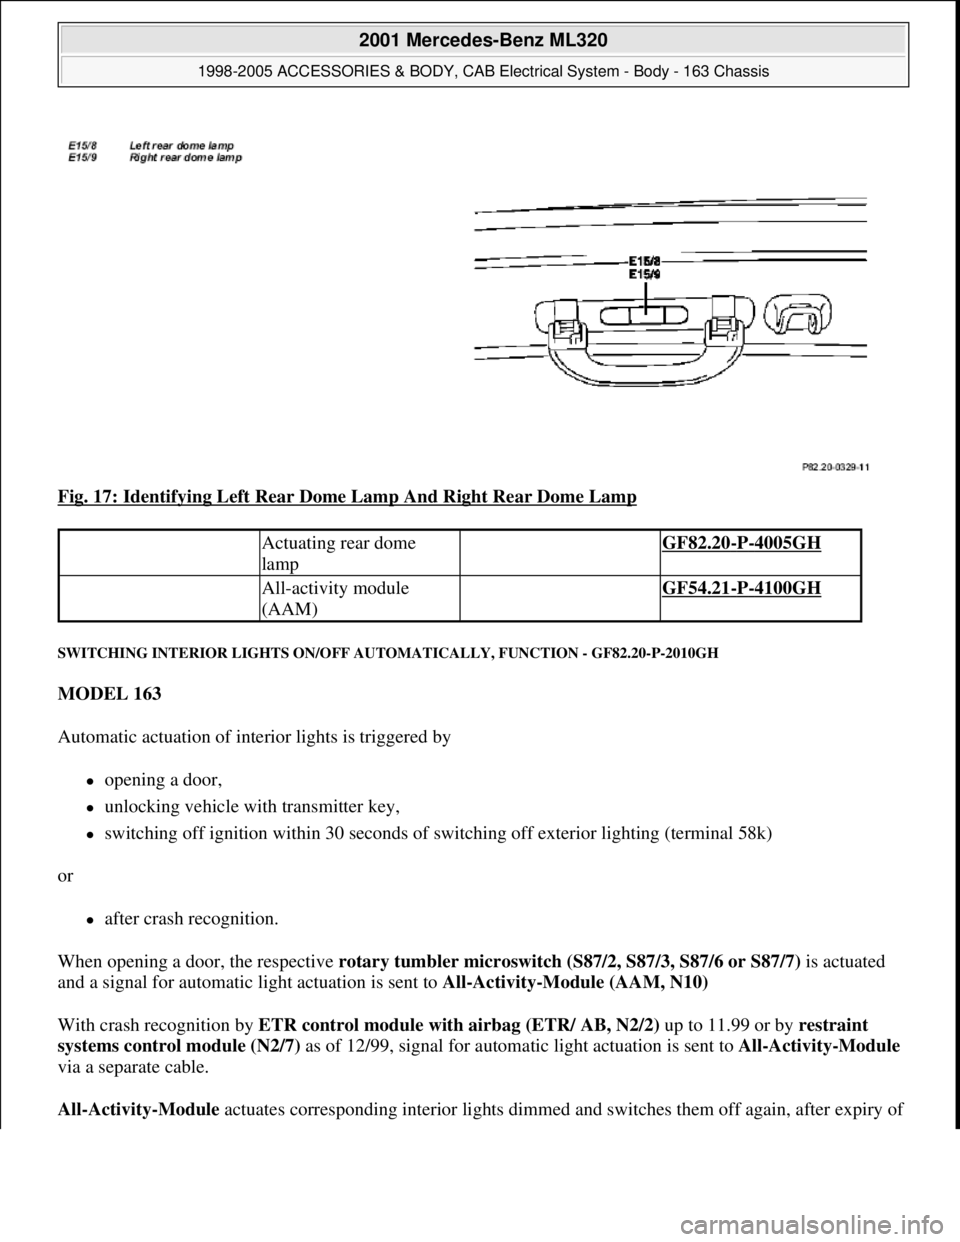
Fig. 17: Identifying Left Rear Dome Lamp And Right Rear Dome Lamp
SWITCHING INTERIOR LIGHTS ON/OFF AUTOMATICALLY, FUNCTION - GF82.20-P-2010GH
MODEL 163
Automatic actuation of interior lights is triggered by
opening a door,
unlocking vehicle with transmitter key,
switching off ignition within 30 seconds of switching off exterior lighting (terminal 58k)
or
after crash recognition.
When opening a door, the respective rotary tumbler microswitch (S87/2, S87/3, S87/6 or S87/7) is actuated
and a signal for automatic light actuation is sent to All-Activity-Module (AAM, N10)
With crash recognition by ETR control module with airbag (ETR/ AB, N2/2) up to 11.99 or by restraint
systems control module (N2/7) as of 12/99, signal for automatic light actuation is sent to All-Activity-Module
via a separate cable.
All-Activity-Module actuates correspondin
g interior lights dimmed and switches them off again, after expiry of
Actuating rear dome
lamp GF82.20-P-4005GH
All-activity module
(AAM) GF54.21-P-4100GH
2001 Mercedes-Benz ML320
1998-2005 ACCESSORIES & BODY, CAB Electrical System - Body - 163 Chassis
me
Saturday, October 02, 2010 3:30:04 PMPage 33 © 2006 Mitchell Repair Information Company, LLC.
Page 1529 of 4133
switched-on time.
Lights switched on manually cannot be switched off by All-Activity-Module.
Rear interior lamp (E15/3) is actuated directly by opening of rear door and not via All-Activity-Module.
Front and rear entrance and exit lamps (E17/3, E17/4, E17/5 and E17/6) introduced as of 12/99 are
actuated via the Extended-Activity-Module (EAM) when corresponding door is opened.
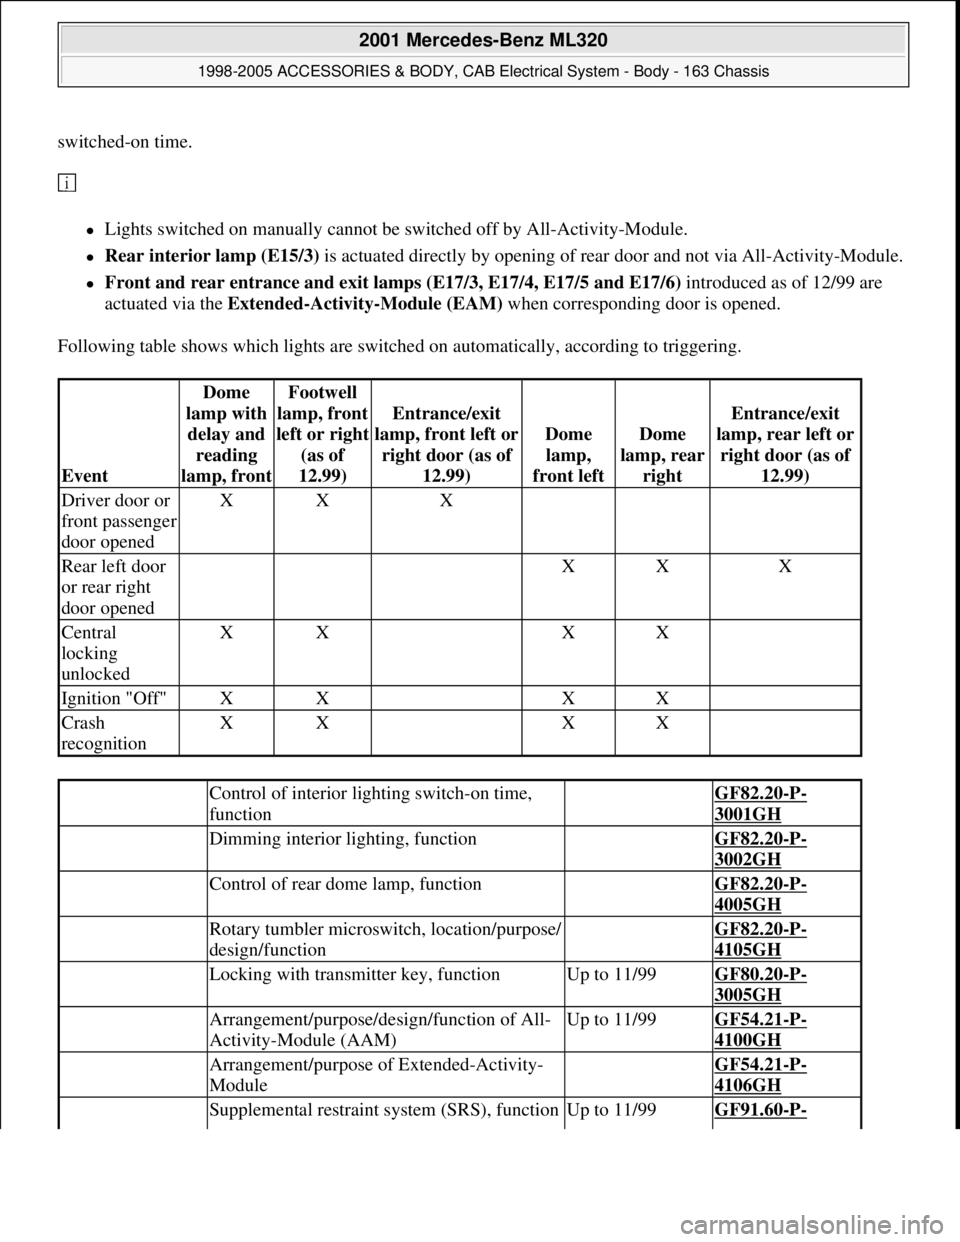
Following table shows which lights are switched on automatically, according to triggering.
Event
Dome
lamp with
delay and
reading
lamp, frontFootwell
lamp, front
left or ri
ght
(as of
12.99)
Entrance/exit
lamp, front left or
right door (as of
12.99)
Dome
lamp,
front leftDome
lamp, rear
right
Entrance/exit
lamp, rear left or
right door (as of
12.99)
Driver door or
front passenger
door openedXXX
Rear left door
or rear right
door opened XXX
Central
locking
unlockedXX XX
Ignition "Off"XX XX
Crash
recognitionXX XX
Control of interior lighting switch-on time,
function GF82.20-P-
3001GH
Dimming interior lighting, function GF82.20-P-
3002GH
Control of rear dome lamp, function GF82.20-P-
4005GH
Rotary tumbler microswitch, location/purpose/
design/function GF82.20-P-
4105GH
Locking with transmitter key, functionUp to 11/99GF80.20-P-
3005GH
Arrangement/purpose/design/function of All-
Activity-Module (AAM)Up to 11/99GF54.21-P-
4100GH
Arrangement/purpose of Extended-Activity-
Module GF54.21-P-
4106GH
Supplemental restraint system (SRS), functionUp to 11/99GF91.60-P-
2001 Mercedes-Benz ML320
1998-2005 ACCESSORIES & BODY, CAB Electrical System - Body - 163 Chassis
me
Saturday, October 02, 2010 3:30:04 PMPage 34 © 2006 Mitchell Repair Information Company, LLC.