Page 2233 of 4133

11
Check oil level approx. 5 min. after switching
off warm engine
Insert oil dipstick up to the stop and keep
to a residence time of at least 3 seconds.
Model 163, 210 with Engine 612
*BE18.00-P-1001-02B
Model 203, Model 209 with Engine 612
On Model 203, Model 209 after oil level
check pay attention to correct seating of the
cap, otherwise it could result in engine
damage.
Only Model 203:
Up to engine end number: 134 163 oil level
MAX. 135
mm,
MIN 110
mm.
As of engine end number: 134 164 oil level
MAX. 124,5
mm,
MIN 99,5
mm.
Measuring rod
*120589072100
12
Install trim panel of cylinder head cover
AR01.20-P-5014-02B
*BA01.20-P-1002-01A
*BA01.20-P-1003-01A
Test values for engine lubrication - general
Number
Designation
Engine
612.961
Engine
612.963
BE18.00-P-1001-02B
Dipstick marking
Color red
t
1
Color black
t
2
Color green
t
3
Color gentian blue
t
4
Numbers on handle
Number
6020760206
Round handle
Color
--
Bottle opener-shaped
handle
Color
11
Designation
Engine
612.961/962/
963/965/966,
613.961
Engine
612.967
Engine
612.990
BA01.45-P-1003-01A
Oil drain plug at oil pan
M12
Nm
---
M14
Nm
303030
Engine lubrication, oil filter
Number
Designation
Engine
612.961/962/
963/967/990,
613.960/961
BA18.20-P-1002-01G
Screw cap at oil filter
Nm
25
Crankcase ventilation, cylinder head cover
Number
Designation
Engine
612.961/
962/967
Engine
612.963
Engine
612.990
Copyright DaimlerChrysler AG 20.05.2006 CD-Ausgabe G/10/04 . This WIS print-out will not be recorde
d by Modification services.
Page 2
Page 2419 of 4133

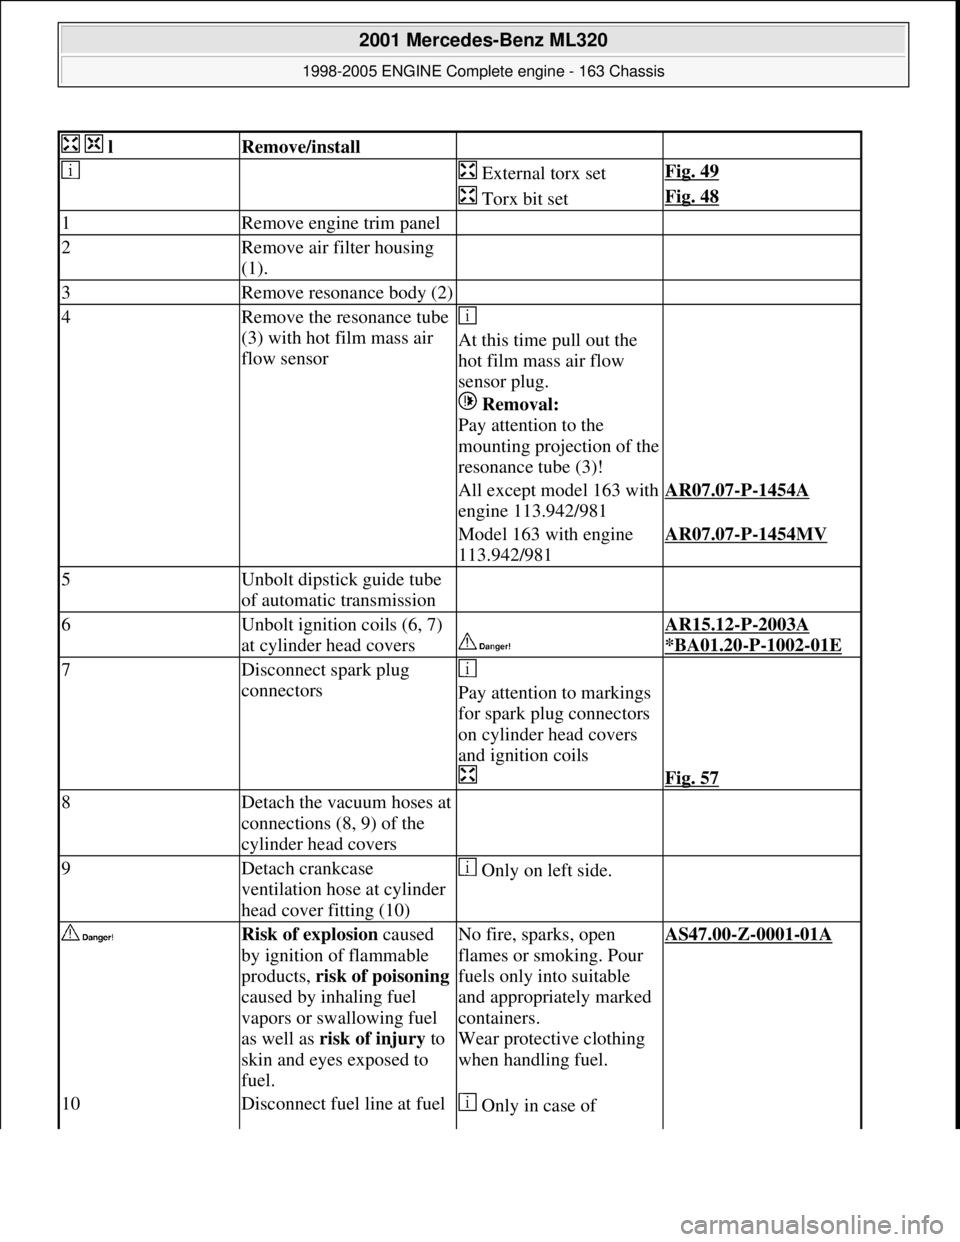
lRemove/install
External torx setFig. 49
Torx bit setFig. 48
1Remove engine trim panel
2Remove air filter housing
(1).
3Remove resonance body (2)
4Remove the resonance tube
(3) with hot film mass air
flow sensor
At this time pull out the
hot film mass air flow
sensor plug.
Removal:
Pay attention to the
mounting projection of the
resonance tube (3)!
All except model 163 with
engine 113.942/981AR07.07-P-1454A
Model 163 with engine
113.942/981AR07.07-P-1454MV
5Unbolt dipstick guide tube
of automatic transmission
6Unbolt ignition coils (6, 7)
at cylinder head covers
AR15.12-P-2003A
*BA01.20
-P-1002-01E
7Disconnect spark plug
connectors
Pay attention to markings
for spark plug connectors
on cylinder head covers
and ignition coils
Fig. 57
8Detach the vacuum hoses at
connections (8, 9) of the
cylinder head covers
9Detach crankcase
ventilation hose at cylinder
head cover fitting (10) Only on left side.
Risk of explosion caused
by ignition of flammable
products, risk of poisoning
caused by inhaling fuel
vapors or swallowing fuel
as well as risk of injury to
skin and eyes exposed to
fuel.No fire, sparks, open
flames or smoking. Pour
fuels only into suitable
and appropriately marked
containers.
Wear protective clothing
when handling fuel.AS47.00-Z-0001-01A
10Disconnect fuel line at fuel Only in case of
2001 Mercedes-Benz ML320
1998-2005 ENGINE Complete engine - 163 Chassis
me
Saturday, October 02, 2010 3:17:56 PMPage 63 © 2006 Mitchell Repair Information Company, LLC.
Page 2423 of 4133

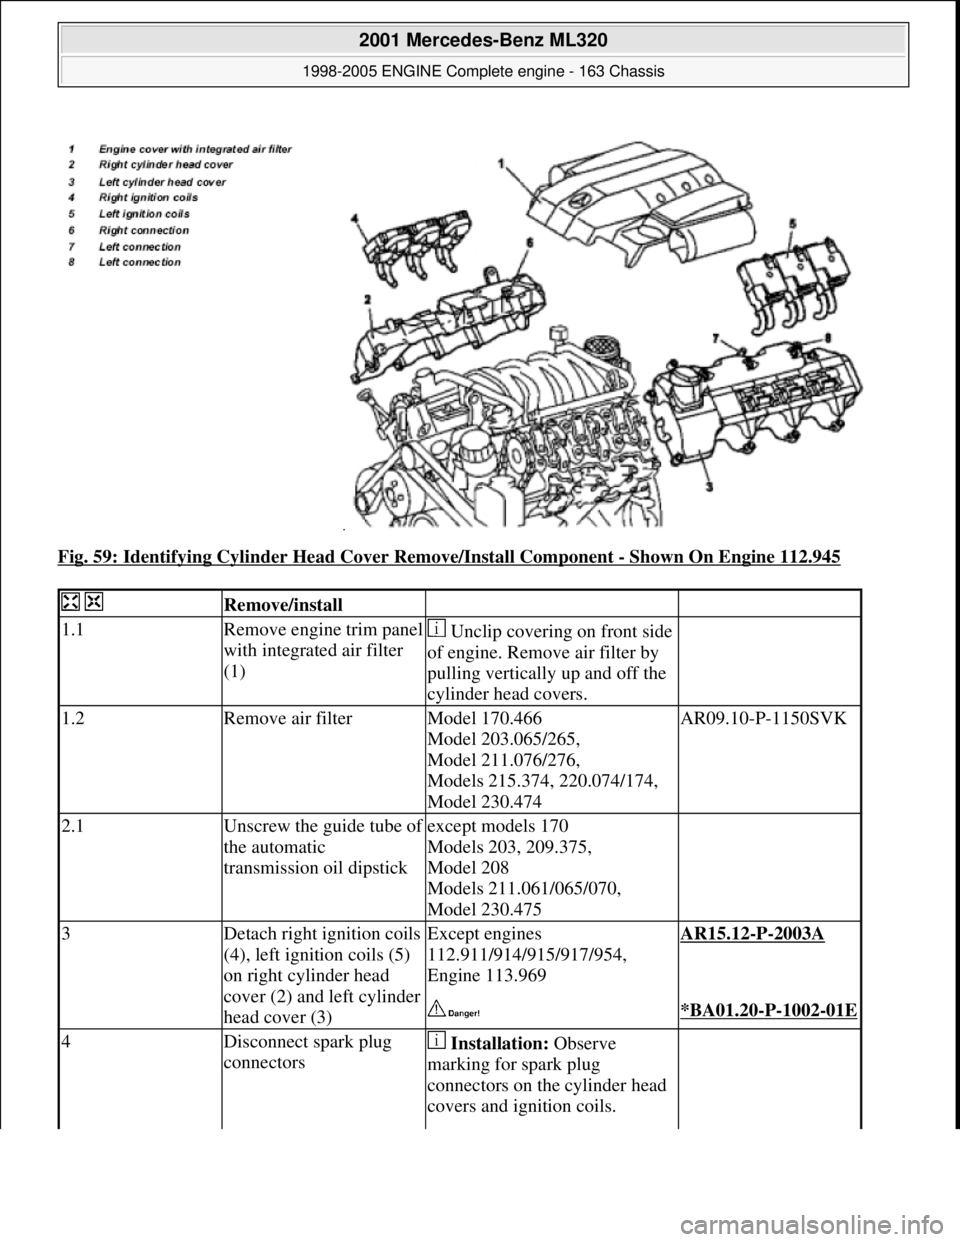
Fig. 59: Identifying Cylinder Head Cover Remove/Install Component - Shown On Engine 112.945
Remove/install
1.1Remove engine trim panel
with integrated air filter
(1) Unclip covering on front side
of engine. Remove air filter by
pulling vertically up and off the
cylinder head covers.
1.2Remove air filterModel 170.466
Model 203.065/265,
Model 211.076/276,
Models 215.374, 220.074/174,
Model 230.474AR09.10-P-1150SVK
2.1Unscrew the guide tube of
the automatic
transmission oil dipstickexcept models 170
Models 203, 209.375,
Model 208
Models 211.061/065/070,
Model 230.475
3Detach right ignition coils
(4), left ignition coils (5)
on right cylinder head
cover (2) and left cylinder
head cover (3)Except engines
112.911/914/915/917/954,
Engine 113.969AR15.12-P-2003A
*BA01.20-P-1002-01E
4Disconnect spark plug
connectors Installation: Observe
marking for spark plug
connectors on the cylinder head
covers and ignition coils.
2001 Mercedes-Benz ML320
1998-2005 ENGINE Complete engine - 163 Chassis
me
Saturday, October 02, 2010 3:17:56 PMPage 67 © 2006 Mitchell Repair Information Company, LLC.
Page 2487 of 4133
Fig. 106: Identifying Oil Pan Remove/Install Components - Shown On Engine 112
Remove/install
External torx setFig. 49
1Remove oil pan bottom
section (1)Model 163.154/157/172.AR01.45-P-7555V
Model 163.174/175.AR01.45-P-7555VE
*BA01.45-P-1002-01B
2Disconnect electrical line
at oil sensor (oil level,
temperature and quality)
(B40) Remove cable strap at oil
pipe.
3Remove oil pipe (2) from
dipstick Installation: Replace the
sealing ring!AR18.40-P-3510BV
*BA01.20-P-1001-01E
4Remove oil pan top
section(3)Take out oil pan to the front in
direction of travel for this step;
rotate crankshaft slightly, if
necessary.
Installation: Observe
different bolt length and bolt
diameter: ?
Screw diagram of oil panAR01.45-P-7500-06F
Notes on application of
sealant to oil panEngine 112AH01.45-P-0001-01C
2001 Mercedes-Benz ML320
1998-2005 ENGINE Complete engine - 163 Chassis
me
Saturday, October 02, 2010 3:17:58 PMPage 131 © 2006 Mitchell Repair Information Company, LLC.
Page 2512 of 4133
AP18.00-P-0101-02Z
Extract engine oil
Commercially available tools
(see Workshop Equipment Manual)
Number
Designation
Make (e. g.)
Order number
WH58.30-Z-1007-16A
Engine oil extractor
Deutsche Tecalemit
Am Metallwerk 11
33659 Bielefeld
1.386950.2
P18.00-0019-01
Shown on Engine 104
1
Extract engine oil through the dipstick guide tube.
Perform only when engine is at normal operating temperature.
Copyright DaimlerChrysler AG 20.05.2006 CD-Ausgabe G/10/04 . This WIS print-out will not be recorde
d by Modification services.
Page 1
Page 3498 of 4133

AF54.30-P-8400A
Instrument cluster indicates: Oil sensor defective, oil level below min. or oil level
above max. with engine running and at operating temperature. No DTC stored.
19.5.98
MODEL
129.0, 163.1, 202.0, 208.3 /4, 210.0 /2 /6, 220.0 /1 with ENGINE 112
MODEL
129.0, 163.1, 202.0, 208.3 /4, 210.0 /2, 220.0 /1 with ENGINE 113
Damage code
Cause
Remedy
54 201 90
Oil low, connector defective or coding error
1
Shut off engine and wait 2 min. (key
position 0)
Instrument cluster indicates oil sensor
defective, oil level below min. or oil level
above max. with engine warm and running.
No DTC stored in DTC memory!
2
Check oil level with oil dipstick
3
Check oil level on instrument cluster:
- Key in steering wheel lock position 2,
engine not running
- Wait until - - - - - - appears on
instrument cluster
- When this is displayed press the reset
button for the tripodometer twice within
1 sec. (display appears only after
expiration of a waiting time (max. 30
min.) depending on engine oil
temperature)
Oil level is at bottom mark on oil dipstick
and instrument cluster indicates:
-1L
, -
1,5L
or -2L
#
4
Add quantity of oil indicated on
instrument cluster display and repeat
test.
Oil level at upper mark on dipstick and
instrument cluster indicates either oil level
okay or -1L
, -
1,5L
, -2L
#
5
Recode instrument cluster
AF54.30-P-8600A
Problem still present
#
6
Check cable to oil sensor, oil sensor
connectors, control module and fuse
box (see wiring diagram) for good contact
Copyright DaimlerChrysler AG 05.06.2006 CD-Ausgabe G/10/04 . This WIS print-out will not be recorde
d by Modification services.
Page 1
Page 3909 of 4133

1998-2005 SUSPENSION
Suspension - 163 Chassis
GENERAL INFORMATION
GENERAL NOTES ON WORKING ON VEHICLES WITH LEVEL CONTROL/ADS - AH32.00-P-0002-01A
All models with code 216b, 216c, 217a, 480
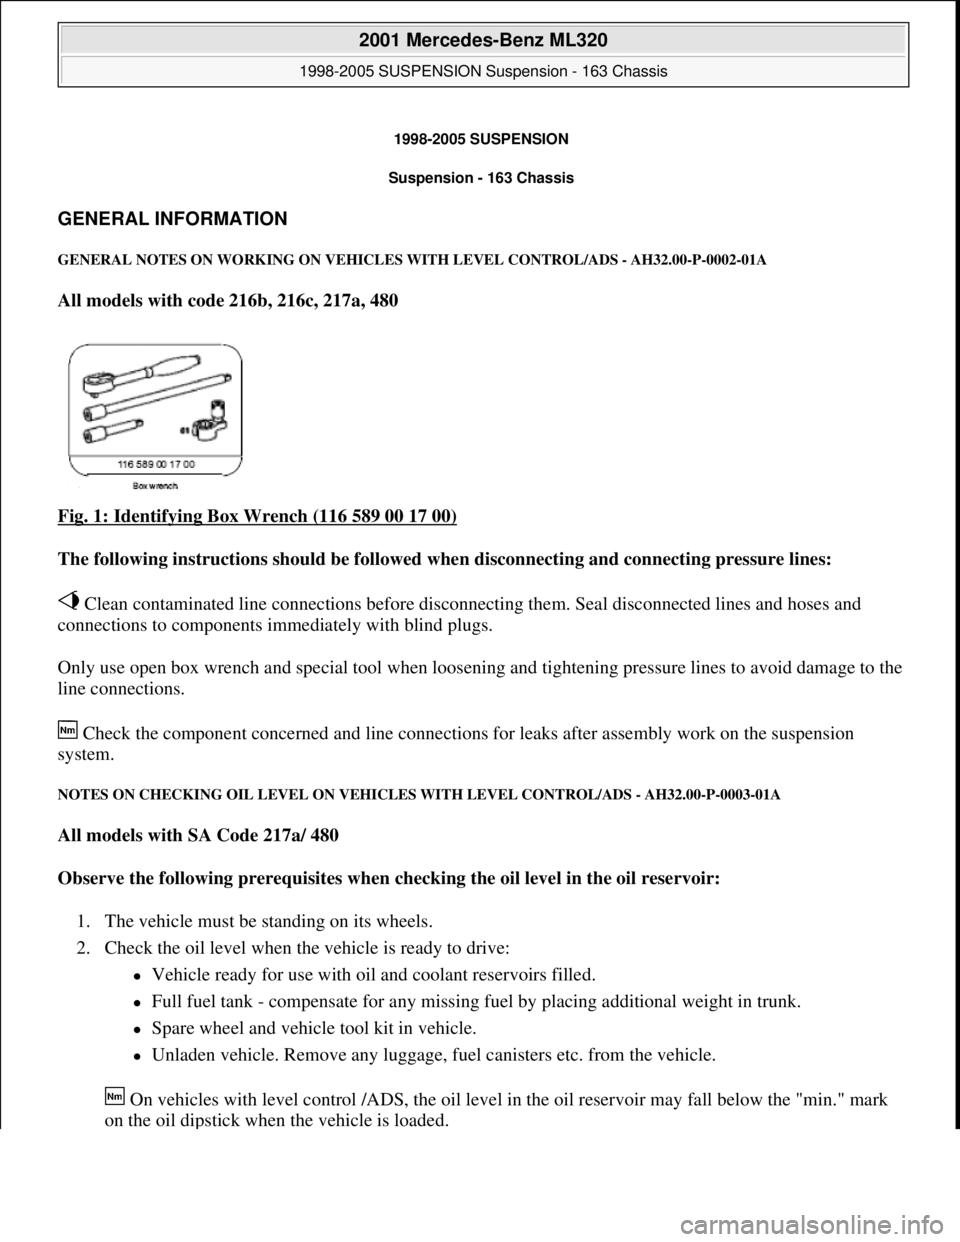
Fig. 1: Identifying Box Wrench (116 589 00 17 00)
The following instructions should be followed when disconnecting and connecting pressure lines:
Clean contaminated line connections before disconnecting them. Seal disconnected lines and hoses and
connections to components immediately with blind plugs.
Only use open box wrench and special tool when loosening and tightening pressure lines to avoid damage to the
line connections.
Check the component concerned and line connections for leaks after assembly work on the suspension
system.
NOTES ON CHECKING OIL LEVEL ON VEHICLES WITH LEVEL CONTROL/ADS - AH32.00-P-0003-01A
All models with SA Code 217a/ 480
Observe the following prerequisites when checking the oil level in the oil reservoir:
1. The vehicle must be standing on its wheels.
2. Check the oil level when the vehicle is ready to drive:
Vehicle ready for use with oil and coolant reservoirs filled.
Full fuel tank - compensate for any missing fuel by placing additional weight in trunk.
Spare wheel and vehicle tool kit in vehicle.
Unladen vehicle. Remove any luggage, fuel canisters etc. from the vehicle.
On vehicles with level control /ADS, the oil level in the oil reservoir may fall below the "min." mark
on the oil dipstick when the vehicle is loaded.
2001 Mercedes-Benz ML320
1998-2005 SUSPENSION Suspension - 163 Chassis
2001 Mercedes-Benz ML320
1998-2005 SUSPENSION Suspension - 163 Chassis
me
Saturday, October 02, 2010 3:37:35 PMPage 1 © 2006 Mitchell Repair Information Company, LLC.
me
Saturday, October 02, 2010 3:37:38 PMPage 1 © 2006 Mitchell Repair Information Company, LLC.
Page:
< prev 1-8 9-16 17-24