Page 40 of 305

35
Luxury Audio SystemUsing the Controls on Your New RadioHow to turn the radio on and offPress the ªVOL/PUSH ONº knob to turn the radio
on. Press again to turn it off.How to adjust the volumeTurn the ªVOL/PUSH ONº knob clockwise to
increase the volume and counter-clockwise to
decrease the volume.
Volume may also be controlled by the Redundant
Control Switch located on your steering wheel (if
equipped). PressAon the ªVOLº button to
increase the volume andBon the ªVOLº button
to decrease the volume.NOTE:If the volume is set above a certain level
when the ignition is turned off, the volume level
will reset to a ªnominalº listening level when the
ignition switch is turned back on. However, if the
radio is turned off with the ªVOL/PUSH ONº knob,
the volume will not reset and will stay at the same
level when the radio is turned back on.
Selecting the AM or FM frequency bandPush the ªAMº or ªFM1/FM2º button to select the
desired frequency band. Pushing the ªFM1/FM2º
button more than once will alternate between FM1
and FM2. These functions are used with the
memory preset buttons described underHow to
tune radio stations.
You may also select AM, FM1 or FM2 by
depressing the ªBANDº button located on the
Redundant Control Switch on your steering wheel
(if equipped).
File:04fnast.ex
Update:Thu Jun 20 15:13:21 1996
Page 74 of 305
70To turn on the parking lamps, tail lamps, side
markers, and license plate lamps, turn the knob
clockwise to the first position.
For more information about how the high beams
work, see the high beam section later in this
chapter.Setting the Autolamp On/Off Delay
SystemBy using the autolamp, you can set the headlamps
to:q
turn on the lamps automatically at night
q
turn off the lamps automatically during daylight
q
keep the lamps on for up to three minutes after
you turn the key to OFF.The controls for the autolamp
To use the autolamp:
1. Make sure the headlamp control is in the OFF
position. If the control for the headlamps is
ON, you cancel the autolamp.
2. Turn the ignition key to ON or start your
vehicle.
File:05fncft.ex
Update:Mon Jun 17 13:49:49 1996
Page 75 of 305

71
3. Rotate the headlamp switch counterclockwise
from the OFF position.
4. The autolamp will automatically turn the lamps
on and off for you.
Do not put any articles on top of the photocell that
is located in the top left corner of the instrument
panel. This photocell controls the autolamp. If you
cover it, the photocell reacts as if it is nighttime,
and the lamps turn on.
To turn the autolamp off, rotate the headlamp
switch clockwise to the OFF position.You can set the autolamp so the headlamps stay on
for up to three minutes after you turn your vehicle
off.
q
The further you rotate the headlamp switch
counterclockwise, the longer the lamps will stay
on after you leave your vehicle. Similarly, if you
rotate the switch only slightly, the headlamps
stay on for only a short time after you turn
your vehicle off.
Turning On Interior LightsTo turn on the interior lights, push the headlamp
switch in.Instrument Panel IlluminationWith the light knob in the parking lamps or the
headlamps position, you can brighten or dim the
lights in the instrument panel with the rocker
switch.
File:05fncft.ex
Update:Mon Jun 17 13:49:49 1996
Page 76 of 305
72The switch that controls the light on the
instrument panel illumination
ClockThe digital clock1. To set the hour, press and hold the hour
button. When the desired hour appears, release
the button.
2. To set the minutes, press and hold the minute
button. When the desired minute appears,
release the button.
File:05fncft.ex
Update:Mon Jun 17 13:49:49 1996
Page 205 of 305

203
The key wrench has a registration number attached
to it. Keep the registration number in a safe place.
Complete the registration card and return it to the
manufacturer as soon as you buy the vehicle. To
replace the key wrench, send the I.D. card to the
manufacturer.Anti-Theft Wheel Lug Nuts
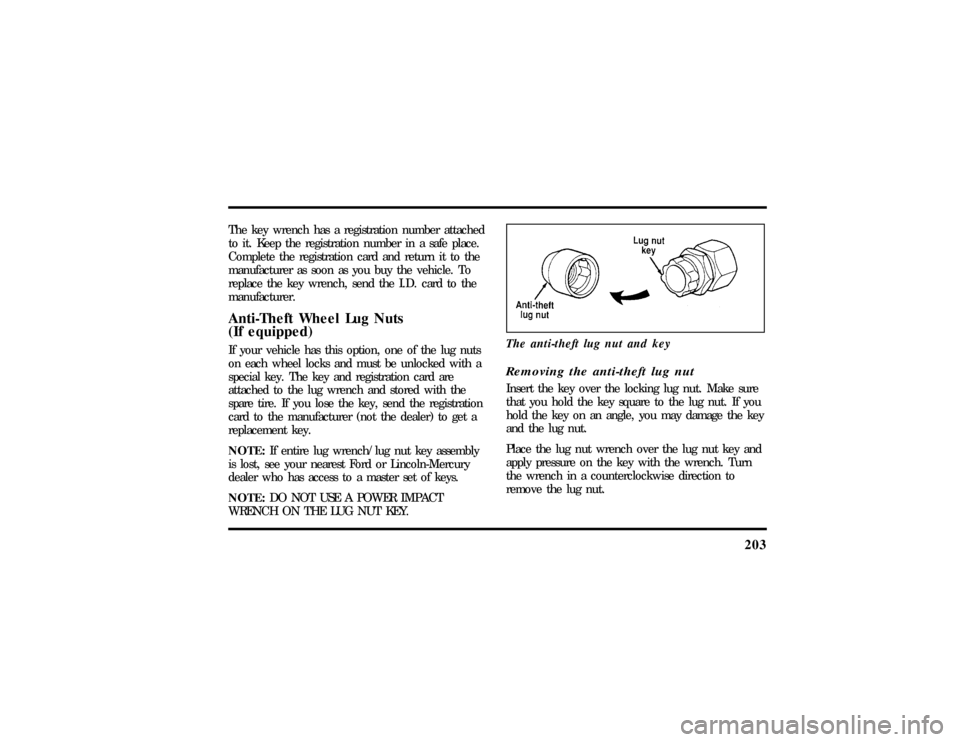
(If equipped)If your vehicle has this option, one of the lug nuts
on each wheel locks and must be unlocked with a
special key. The key and registration card are
attached to the lug wrench and stored with the
spare tire. If you lose the key, send the registration
card to the manufacturer (not the dealer) to get a
replacement key.
NOTE:If entire lug wrench/lug nut key assembly
is lost, see your nearest Ford or Lincoln-Mercury
dealer who has access to a master set of keys.
NOTE:DO NOT USE A POWER IMPACT
WRENCH ON THE LUG NUT KEY.The anti-theft lug nut and key
Removing the anti-theft lug nutInsert the key over the locking lug nut. Make sure
that you hold the key square to the lug nut. If you
hold the key on an angle, you may damage the key
and the lug nut.
Place the lug nut wrench over the lug nut key and
apply pressure on the key with the wrench. Turn
the wrench in a counterclockwise direction to
remove the lug nut.
File:10fnert.ex
Update:Thu Jun 20 15:16:36 1996
Page 290 of 305

299
Climate control system
air conditioning........... 55
electronic automatic temperature
control.............. 55
heating............... 55
Clock................. 72
Cold engine starting.......... 162
Combination lap and shoulder belts.... 126
Compact disc radio (see Electronic
sound system)............ 35
Controls, mirrors............ 89
Coolant (see Engine coolant)
checking and adding......... 224
preparing for storage......... 261
refill capacities............ 258
specifications............ 259
temperature gauge.......... 10Cooling fan.............. 214
Cupholder(s).............. 73
Customer Assistance Centre,
Ford of Canada............ 270
D
Daytime running light system...... 68
Defects, reporting............ 263
Defrost, windshield........... 63
Dipstick................ 219
automatic transmission fluid...... 230
engine oil.............. 219
power steering fluid......... 229
Disabled vehicle (see Towing)...... 209
Dispute Settlement Board........ 266
Doors................. 96
door ajar warning message....... 31
lubricant specifications........ 259
File:fnixt.ex
Update:Mon Jun 17 13:58:01 1996