Page 120 of 241

Automatic Transmission
Your Honda's transmission has fourforward speeds, and is electronically controlled for smoother shifting. It
also has a "lock-up" torque converter
for better fuel economy. You may
feel what seems like another shift
when the converter locks. Shift Lever Position Indicator
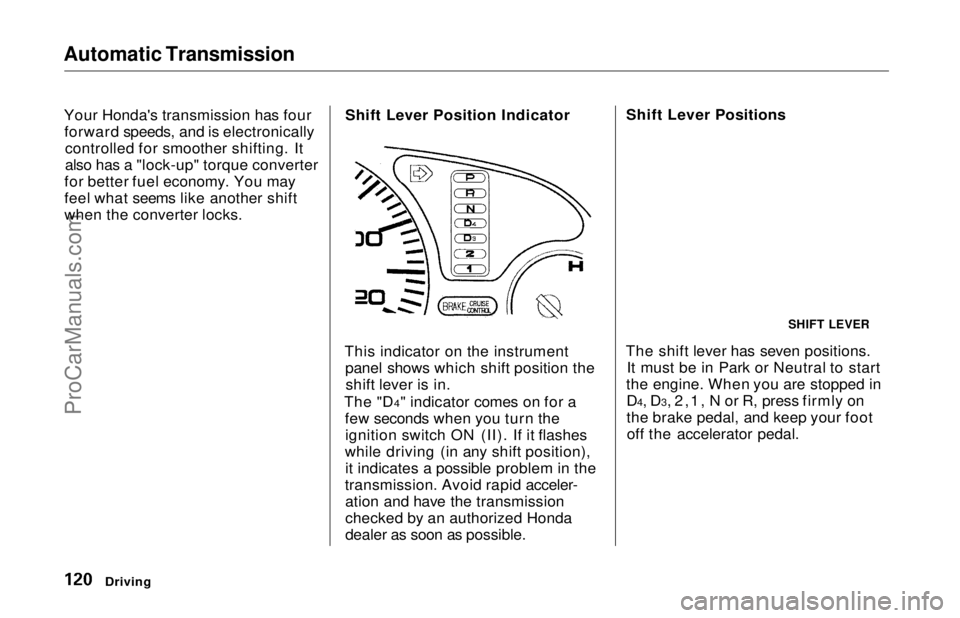
This indicator on the instrument panel shows which shift position theshift lever is in.
The "D4" indicator comes on for a few seconds when you turn theignition switch ON (II). If it flashes
while driving (in any shift position), it indicates a possible problem in the
transmission. Avoid rapid acceler- ation and have the transmission
checked by an authorized Honda
dealer as soon as possible. Shift Lever Positions
The shift lever has seven positions. It must be in Park or Neutral to start
the engine. When you are stopped in D4, D3, 2,1, N or R, press firmly on
the brake pedal, and keep your footoff the accelerator pedal.
Driving
SHIFT LEVERProCarManuals.comMain Menu Table of Contents s t
Page 154 of 241

Cooling System
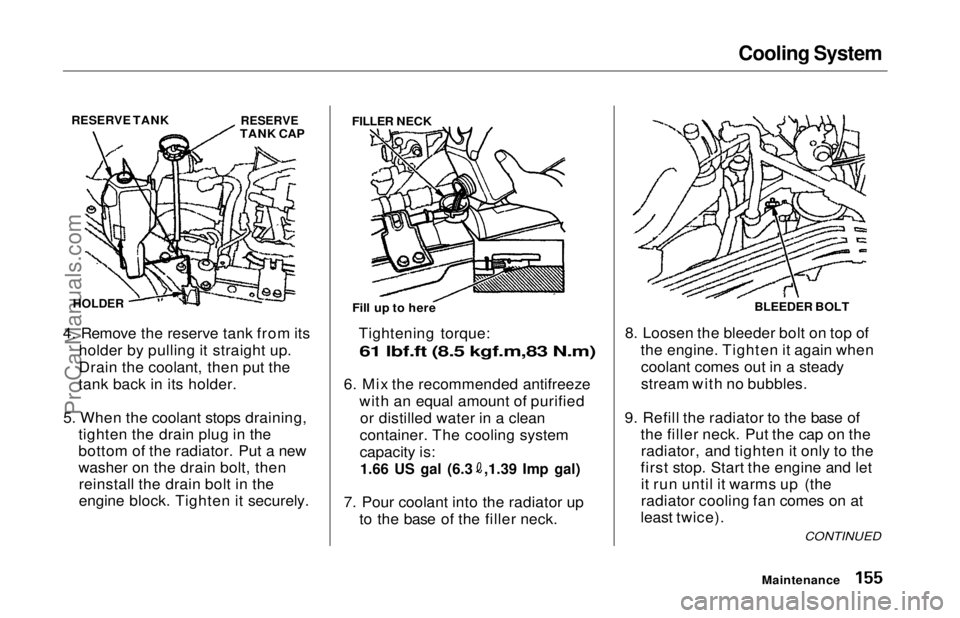
4. Remove the reserve tank from its holder by pulling it straight up.
Drain the coolant, then put the
tank back in its holder.
5. When the coolant stops draining, tighten the drain plug in the
bottom of the radiator. Put a new
washer on the drain bolt, thenreinstall the drain bolt in the
engine block. Tighten it securely. Tightening torque:
61 lbf.ft (8.5 kgf.m,83 N.m)
6. Mix the recommended antifreeze
with an equal amount of purifiedor distilled water in a clean
container. The cooling system
capacity is:
1.66 US gal (6.3 ,1.39 Imp gal)
7. Pour coolant into the radiator up to the base of the filler neck. 8. Loosen the bleeder bolt on top of
the engine. Tighten it again whencoolant comes out in a steady
stream with no bubbles.
9. Refill the radiator to the base of the filler neck. Put the cap on theradiator, and tighten it only to the
first stop. Start the engine and let it run until it warms up (the
radiator cooling fan comes on at
least twice).
Maintenance
CONTINUED
RESERVE TANK
RESERVE
TANK CAP
HOLDER
FILLER NECK
Fill up to here BLEEDER BOLT
ProCarManuals.comMain Menu Table of Contents s t
Page 162 of 241
Spark Plugs
5. Torque the spark plug. (If you do not have a torque wrench, tighten
the spark plug two-thirds of a turn
after it contacts the cylinder head.)
Tightening torque:
13 lbf.ft (1.8 kgf.m, 18 N.m)
Tighten the spark plugs carefully. A
spark plug that is too loose can
overheat and damage the engine. Overtightening can cause damage to
the threads in the cylinder head.
6. Install the spark plug cap.
7. Repeat this procedure for the
other three spark plugs.
Maintenance
Specifications:
NGK:
Nippondenso:
ZFR5F-11
KJ16CR-L11
Spark Plug Gap:
0,043in (1.1mm
NOTICE
ProCarManuals.comMain Menu Table of Contents s t
Page 197 of 241
Changing a Flat Tire
15.Lower the car to the ground and remove the jack.
16.Tighten the wheel nuts securely in
the same crisscross pattern. Have
the wheel nut torque checked atthe nearest automotive service
facility.
Tighten the wheel nuts to: 80 lbf.ft (11 kgf.m, 108 N.m)
17.Put the flat tire in the supplied
vinyl bag.
EX model:
Remove the center cap.
CONTINUED
Taking Care of the UnexpectedProCarManuals.comMain Menu Table of Contents s t