Page 72 of 167

Tether anchorage hardware
Attachment holes (at each rear outboard seating
position) have been provided in your vehicle to
attach anchor hardware, if required. Tether
anchorage hardware kits (part number 613D74)
including instructions, may be obtained at no charge
from any Ford or Lincoln-Mercury dealer. All
vehicles built for sale in Canada include a tether
anchor hardware kit.
Be sure to follow the child safety seat
manufacturer's instructions.
Tighten the anchor according to
specifications. Otherwise, the safety seat
may not be properly secured and the child may be
injured in a sudden stop or collision.
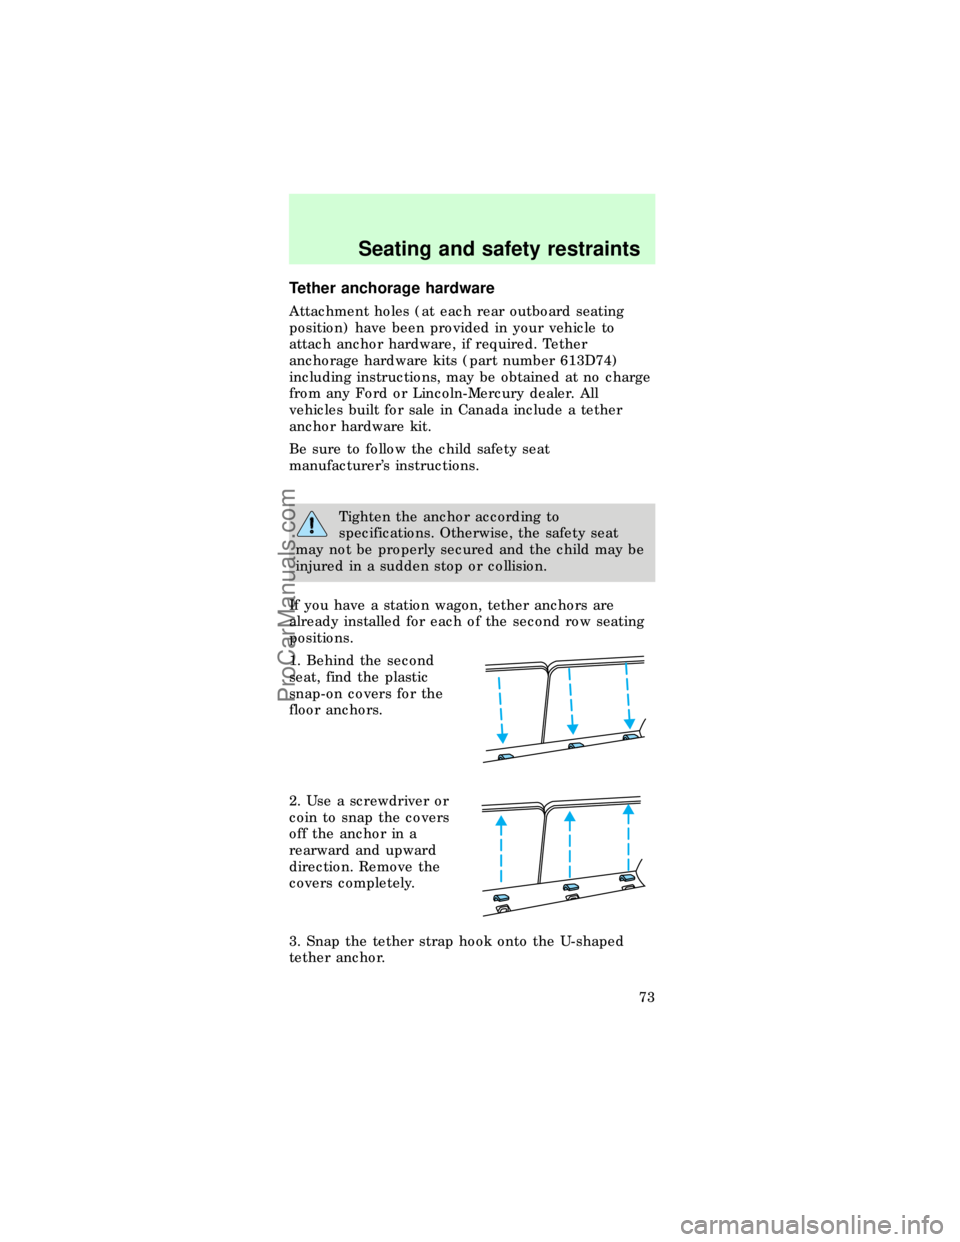
If you have a station wagon, tether anchors are
already installed for each of the second row seating
positions.
1. Behind the second
seat, find the plastic
snap-on covers for the
floor anchors.
2. Use a screwdriver or
coin to snap the covers
off the anchor in a
rearward and upward
direction. Remove the
covers completely.
3. Snap the tether strap hook onto the U-shaped
tether anchor.
Seating and safety restraints
73
ProCarManuals.com
Page 73 of 167

BUILT-IN CHILD SEATS
Built-in child safety seat (wagon - if equipped)
The second row bench seat may include a built-in
child seat. This child seat conforms to all Federal
and local motor vehicle safety standards. Read the
labels located on the child seat cushion and shoulder
belt for information on the built-in child seat.
Use the built-in child seatonlyif the child is at least
one year old, weighs 10±27 kg (22±60 lbs.) and the
child's shoulders fit below the shoulder harness slots
on the built-in child seat.
Children not meeting these requirements should be
secured in an approved aftermarket seat. Refer to
Children and infant or child safety seatsin this
chapter.
Built-in child seat retractors
The belts on built-in child seats are equipped with a
retractor that locks when both tongues are latched
into the crotch safety belt buckle. The retractor will
automatically snug the belts around the child. If the
belts do not remain snug, take the vehicle to the
dealer for child seat repair. The belts will not snug
during a collision.
Placing your child in the built-in child seat
Failure to follow all of the instructions on
the use of this child restraint system can
result in your child striking the vehicle's interior
during a sudden stop or crash.
Never use the Built-In Child Seat as a
booster cushion with the adult safety belts.
A child using the adult belts could slide forward
and out from under the safety belts.
Seating and safety restraints
74
ProCarManuals.com
Page 88 of 167
Understanding gearshift positions
P (Park)
Always come to a
complete stop before
shifting into P (Park).
Make sure the gearshift
is securely latched in P
(Park). This locks the
transaxle and prevent
the front wheels from
rotating.
R (Reverse)
With the gearshift in R
(Reverse), the vehicle
will move backward.
You should always
come to a complete
stop before shifting
into and out of R
(Reverse).
P RND21 PRNDD1
P RND21 PRNDD1
Driving
89
ProCarManuals.com
Page 91 of 167

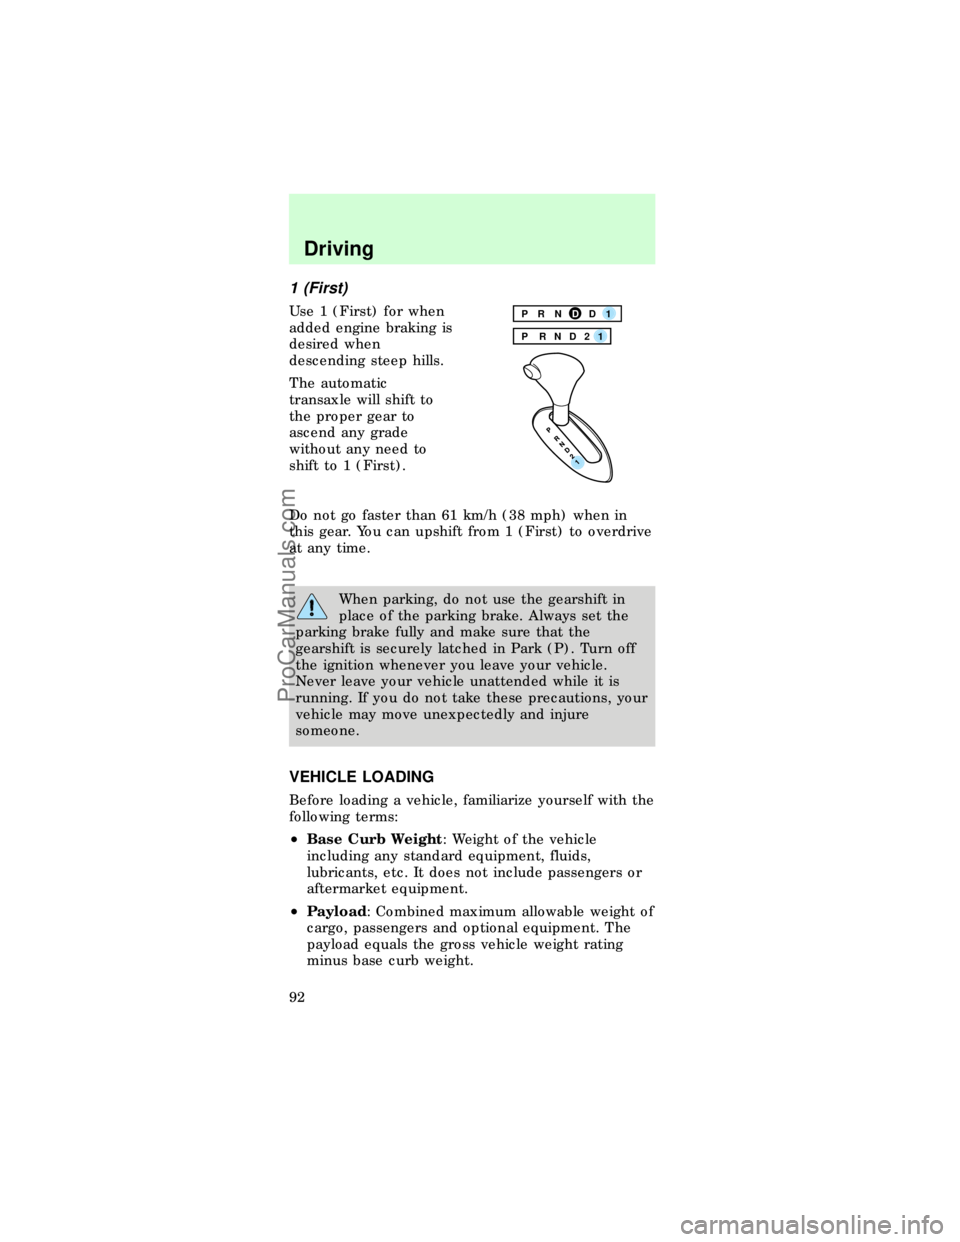
1 (First)
Use 1 (First) for when
added engine braking is
desired when
descending steep hills.
The automatic
transaxle will shift to
the proper gear to
ascend any grade
without any need to
shift to 1 (First).
Do not go faster than 61 km/h (38 mph) when in
this gear. You can upshift from 1 (First) to overdrive
at any time.
When parking, do not use the gearshift in
place of the parking brake. Always set the
parking brake fully and make sure that the
gearshift is securely latched in Park (P). Turn off
the ignition whenever you leave your vehicle.
Never leave your vehicle unattended while it is
running. If you do not take these precautions, your
vehicle may move unexpectedly and injure
someone.
VEHICLE LOADING
Before loading a vehicle, familiarize yourself with the
following terms:
²Base Curb Weight: Weight of the vehicle
including any standard equipment, fluids,
lubricants, etc. It does not include passengers or
aftermarket equipment.
²Payload: Combined maximum allowable weight of
cargo, passengers and optional equipment. The
payload equals the gross vehicle weight rating
minus base curb weight.
PRNDD1
P RND21
Driving
92
ProCarManuals.com
Page 118 of 167
²Keep all lit cigarettes, open flames and other lit
material away from the battery and all fuel related
parts.
If you disconnect the battery, the engine must
ªrelearnº its idle conditions before your vehicle will
drive properly, as explained inBatteryin this
chapter.
Working with the engine off
1. Set the parking
brake fully and make
sure the gearshift is
securely latched is P
(Park).
2. Turn off the engine
and remove the key.
3. Block the wheels
fully to prevent the
vehicle from moving
unexpectedly.
Working with the engine on
1. Set the parking
brake fully and make
sure the gearshift is
securely latched is P
(Park).
2. Block the wheels
fully to prevent the
vehicle from moving
unexpectedly.
P R N D 2 1
P R N D 2 1
Maintenance and care
119
ProCarManuals.com
Page 122 of 167

CHECKING AND ADDING ENGINE OIL
Checking the engine oil
Check the engine oil each time you fuel your
vehicle.
To check the oil:
1. Make sure the vehicle is on level ground. If the
engine is warm, turn the engine off and wait a few
minutes for the oil to drain into the oil pan.
2. Set the parking brake and ensure the gearshift is
securely latched in P (Park).
3. Open the hood. Protect yourself from engine heat.
4. Locate and carefully
remove the engine oil
dipstick.
5. Wipe the dipstick clean. Insert the dipstick fully,
then remove it again. The oil level should be in the
range shown on the dipstick.
6. If the oil level is below the MIN line or the ADD 1
QUART line, add oil as necessary. If the oil level is
beyond the MAX or FULL line, engine damage or
high engine oil consumption may occur and some oil
must be removed from the engine by a service
technician.
7. Put the dipstick back in and ensure it is fully
seated.
Adding engine oil
1. Check the engine oil. For instructions, refer to
Checking the engine oilin this chapter.
2. If the fluid level is not within the normal range,
add only certified engine oil of the preferred
viscosity. Add engine oil through the oil filler cap.
ADD 1 QTFULL
Maintenance and care
123
ProCarManuals.com
Page 130 of 167

Checking the automatic transaxle fluid
Your vehicle should be at normal operating
temperature to get an accurate reading on the
transaxle fluid dipstick. Normal operating
temperature is reached after driving approximately
32 km (20 miles). If the vehicle has been operating
for extended periods of time at high speeds, driven
in city traffic during hot weather or has been pulling
a trailer, the vehicle should be turned off for at least
30 minutes to allow the fluid to cool before
checking.
With the vehicle on a
level surface and the
brake pedal firmly
applied, move the
gearshift through all
the gears. Allow
sufficient time for each
position to engage.
Securely latch the
gearshift in P (Park),
leave the engine
running and set the
parking brake.
Wipe off the dipstick
cap and pull the
dipstick out. Wipe the
dipstick clean, put the
dipstick back in the filler tube completely, then pull
it back out and read the fluid level. The fluid should
be in the crosshatched area (not necessarily at the
top of the crosshatched area).
Your vehicle should not be driven until some fluid
has been added if the fluid level is below the bottom
hole on the dipstick and the outside temperature is
below 10ÉC (50ÉF). Add only enough fluid to bring
the level above the bottom hole.
P R N D 2 1
DON’T ADD IF IN CROSSHATCH AREA--CHECH WHEN HOT-IDLING
Maintenance and care
131
ProCarManuals.com
Page 137 of 167

Tires that are larger or smaller than your vehicle's
original tires may also affect the accuracy of your
speedometer.
SNOW TIRES AND CHAINS
The tires on your vehicle have all weather treads to
provide traction in rain and snow. However, in some
climates, you may need to use snow tires and
chains. Follow these guidelines when using snow
tires and chains:
²Use only SAE Class S chains.
²Install chains securely, verifying that the chains do
not touch any wiring, brake lines or fuel lines.
²Drive cautiously. If you hear the chains rub or
bang against your vehicle, stop and re-tighten the
chains. If this does not work, remove the chains
to prevent damage to your vehicle.
²If possible, avoid fully loading your vehicle.
²Do not use tire chains on aluminum wheels.
²Do not use tire chains if your vehicle is equipped
with P225/55VR16 tires.
²Remove the tire chains when they are no longer
needed. Do not use tire chains on dry roads.
²The suspension insulation and bumpers will help
prevent vehicle damage. Do not remove these
components from your vehicle when using snow
tires and chains.
WHAT YOU SHOULD KNOW ABOUT
AUTOMOTIVE FUELS
Important safety precautions
Do not overfill the fuel tank. The pressure in
an overfilled tank may cause leakage and
lead to fuel spray and fire.
Maintenance and care
138
ProCarManuals.com