Page 63 of 191

Do not place objects or
mount equipment on or
near the air bag cover on the
steering wheel or in front seat
areas that may come into contact
with a deploying air bag. Failure
to follow this instruction may
increase the risk of personal
injury in the event of a collision.
Do not attempt to service,
repair, or modify the air
bag SRS or its fuses. See your
Ford or Lincoln-Mercury dealer.
AIR BAG SYSTEM
DESCRIPTION
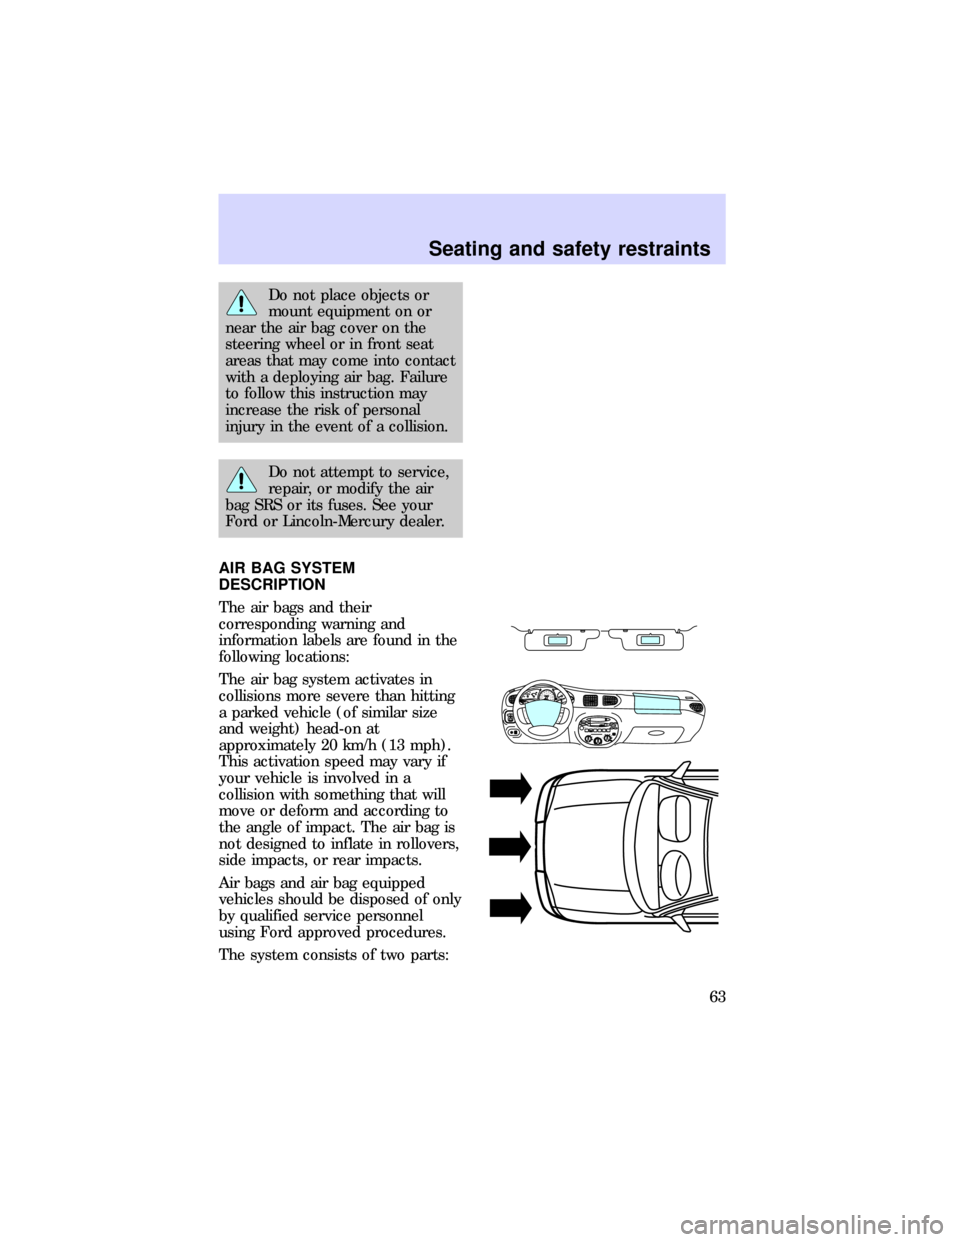
The air bags and their
corresponding warning and
information labels are found in the
following locations:
The air bag system activates in
collisions more severe than hitting
a parked vehicle (of similar size
and weight) head-on at
approximately 20 km/h (13 mph).
This activation speed may vary if
your vehicle is involved in a
collision with something that will
move or deform and according to
the angle of impact. The air bag is
not designed to inflate in rollovers,
side impacts, or rear impacts.
Air bags and air bag equipped
vehicles should be disposed of only
by qualified service personnel
using Ford approved procedures.
The system consists of two parts:
HI LOOFF*A/C*MAX
A/CTUNE
DISCS
SEEK
TUNE
SCAN
EJ REW FF
BAL BASSTREBFADE TAPE
CD AM
FM
–+1
SIDE 1-22
345
COMP1
SIDE 1-2VOL–
PUSH ONLMIRRORR00000000002030405060
70
80
90
10 0
11 020 40608010 0
12 0
16 0
18 0 140
200FUEL FILLCHEF1/22
13RPM x 1000RSM
SET
ACC
CST OFF ONOFFINT
1 OFF MIST
Seating and safety restraints
63
Page 64 of 191

²The driver air bag in the middle
of the steering wheel and the
passenger air bag above the
glove compartment.
²The electrical system, made up
of impact sensors, a diagnostic
module, and a backup power
supply.
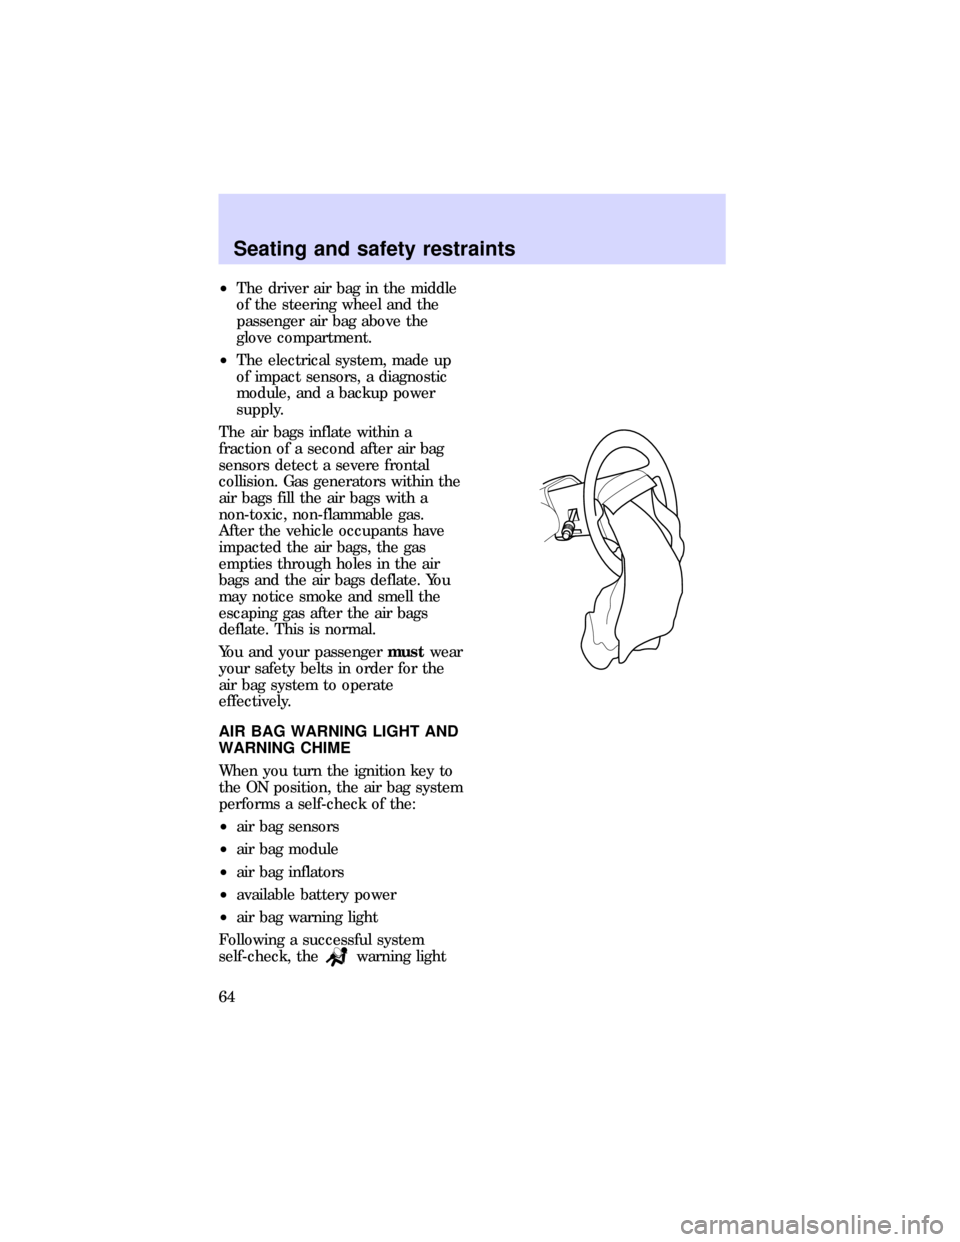
The air bags inflate within a
fraction of a second after air bag
sensors detect a severe frontal
collision. Gas generators within the
air bags fill the air bags with a
non-toxic, non-flammable gas.
After the vehicle occupants have
impacted the air bags, the gas
empties through holes in the air
bags and the air bags deflate. You
may notice smoke and smell the
escaping gas after the air bags
deflate. This is normal.
You and your passengermustwear
your safety belts in order for the
air bag system to operate
effectively.
AIR BAG WARNING LIGHT AND
WARNING CHIME
When you turn the ignition key to
the ON position, the air bag system
performs a self-check of the:
²air bag sensors
²air bag module
²air bag inflators
²available battery power
²air bag warning light
Following a successful system
self-check, the
warning light
Seating and safety restraints
64
Page 65 of 191

in the instrument cluster
illuminates for approximately six
seconds to indicate that the
system is functional.
If you hear a group of five beeps,
or if the
warning light does
not illuminate, stays lit, or flashes,
the air bag system requires
immediate service. Have the
vehicle serviced by your dealer.
CHILD RESTRAINT
PRECAUTIONS
You are required by law to use
safety restraints for children in the
United States and Canada. If small
children ride in your vehicle
(generally children who are four
years of age or younger and who
weigh 18 kg [40 lb] or less), you
must put them in safety seats
made specially for children. Check
your local and state laws for
specific requirements regarding the
safety of your children.
Never let a passenger hold
a child on his or her lap
while the vehicle is moving. The
passenger cannot protect the
child from injury in a collision.
Always follow the instructions and
warnings that come with any infant
or child restraint you might use.
If possible, place children in the
rear seat of your vehicle. Accident
statistics suggest that children are
safer when properly restrained in
rear seating positions than when
Seating and safety restraints
65
Page 94 of 191
The ABS brake system conducts a
self-test each time the vehicle is
driven. A mechanical noise may be
heard while the system conducts
its self-test.
ABS warning light
TheABSlight in the instrument
cluster illuminates and remains
illuminated if an ABS fault is
detected. Have your vehicle
serviced by a qualified service
technician as soon as possible.
Normal braking operation is still
effective unless the
P!BRAKElight is
also illuminated.
Parking brake
The parking brake should be used
whenever the vehicle is parked.
To set the parking brake:
The parking brake is not designed
to stop a moving vehicle. However,
if the normal brakes fail, the
parking brake can be set to stop
the vehicle. The vehicle's stopping
distance will increase greatly and
vehicle steering response will be
limited.
When the ignition is turned to ON,
the
P!BRAKElight in the instrument
cluster illuminates and remains
illuminated until the parking brake
is released.
Driving
94
Page 95 of 191
If the parking brake is fully
released but the
P!BRAKEwarning light remains on,
have the brakes checked
immediately. They may not be
working properly.
Always set the parking
brake fully and make sure
that the gearshift is securely
latched in P (automatic
transaxle) or first gear (manual
transaxle).
To release the parking brake:
²While pressing the release
button, pull the handle upward
to release the brake.
²Push handle downward to the
off position.
Driving
95
Page 104 of 191

and change the weight on the
hitch.
Using trailer brakes
Use electric brakes or manual,
automatic, or surge-type hydraulic
brakes that meet federal and local
regulations. Install and adjust the
brakes according to the
manufacturer's instructions.
Do not connect a trailer's
hydraulic brake system
directly to your vehicle's brake
system. Your vehicle may not
have enough braking power and
your chances of having a
collision greatly increase.
Using safety chains
Always connect the trailer's safety
chains to the vehicle. To connect
the chains, cross the chains under
the trailer tongue and attach to the
vehicle frame or hook retainers
(not the bumper). Make sure there
is enough slack to allow the vehicle
to turn corners.
Using trailer lamps
See your local trailer dealer or
rental agency for the proper
instructions and equipment for
hooking up trailer lamps.
Do not hook the trailer lights
directly into the vehicle's lighting
system wiring. If the trailer lamps
are not installed properly, the
warning lights in the instrument
cluster may not work properly.
Driving
104
Page 112 of 191
Number Fuse amperage
ratingCircuits protected
9 Meter 10 amp Backup lamps, shift
lock, gauges, speed
control, turn signals,
key-in-ignition
reminder chime
10 Wiper 20 amp Windshield wipers
and washer
11 (Rear wiper) 10 amp Rear wiper and
washer
12 Hazard 15 amp Hazard flashers, turn
signals
13 Room 10 amp Clock, interior lamp,
luggage compartment
lamp, safety belt
warning chime, radio
power
14 Engine 15 amp Engine control system
15 Mirrors 5 amp Power mirrors
16 Ð Ð Not used
17 Ð Ð Not used
18 (Fog) 10 amp Daytime running
lamps / fog lamps
19 Ð Ð Not used
20 Cigar 20 amp Cigar lighter
21 (Radio) 15 amp Radio (Premium
sound)
Roadside emergencies
112
Page 171 of 191

The interior overhead lamp is
equipped with a battery saver
control system designed to prevent
excessive wear on the battery.
When a door is not closed
properly, the battery saver control
system timer is activated. The
timer will give you between eight
and ten minutes to close the door
before it automatically turns off
the interior overhead lamp. If the
door is left open, closed, and then
left open again, the timer will
automatically reset.
The battery saver control system is
not activated when the headlamps
are left on. A warning chime will
sound when the engine is turned
off to draw your attention to
headlamps left on.
Map lamp
The map lamps are located in the
rear portion of the interior
overhead lamp assembly.
Replacement of the two bulbs
requires removal of the bulb
assembly cover and the use of
several different tools. See a
qualified service technician or your
dealer for replacement of the map
lamp bulbs.
Hazard flasher
For more information on the
hazard flasher and hazard switch,
refer toUsing the hazard switch
in theRoadside emergencies
chapter. For bulb replacement, see
your dealer or a qualified service
technician.
Maintenance and care
171