1997 CHEVROLET TAHOE Index
[x] Cancel search: IndexPage 323 of 433
Downloaded from www.Manualslib.com manuals search engine Windshield Wiper Blade Replacement
For proper type and length, see “Normal Maintenance
Replacement Parts” in the Index.
To replace the
windshield wiper blade assembly:
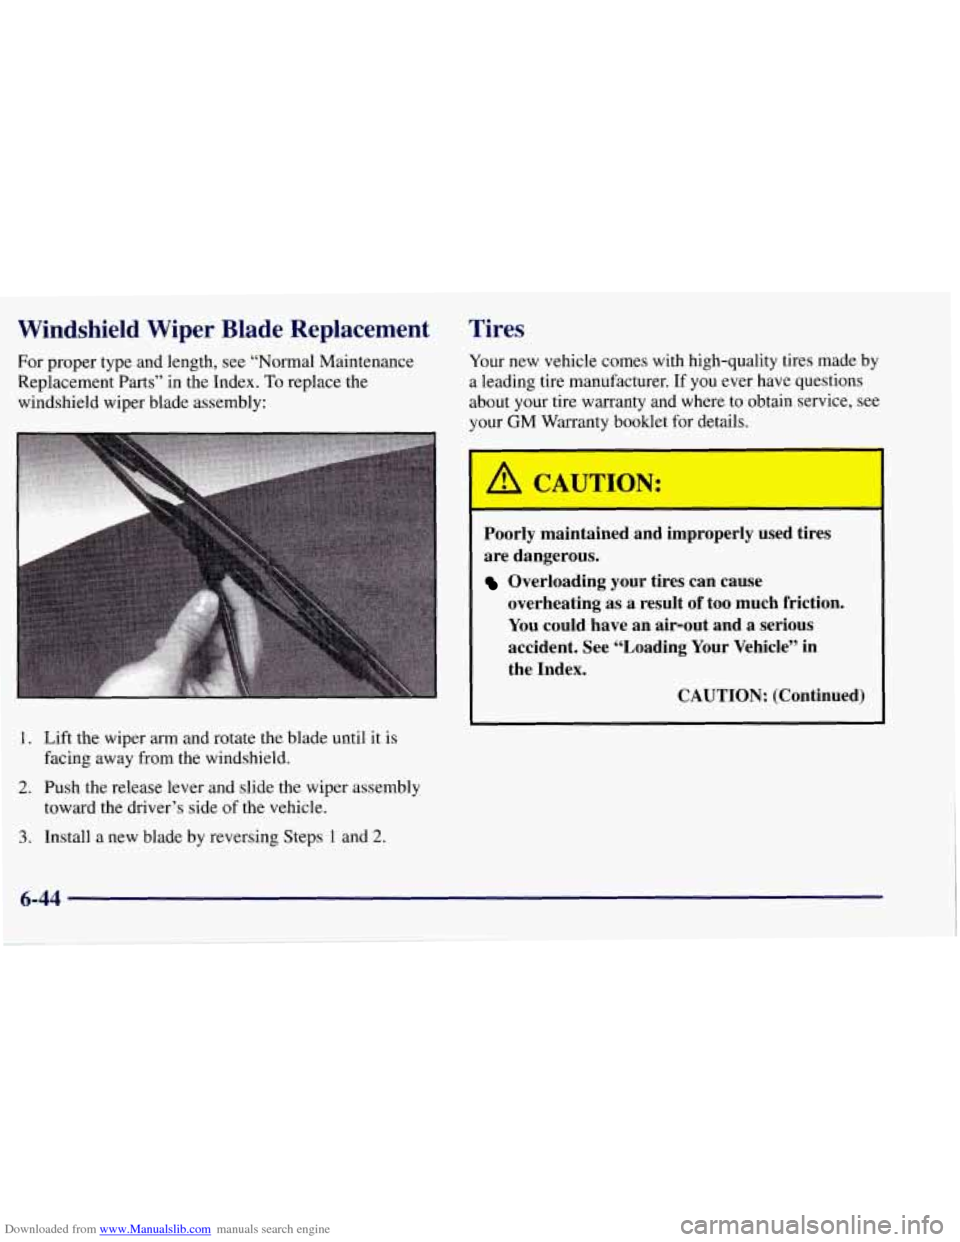
1. Lift the wiper arm and rotate the blade until
it is
2. Push the release lever and slide the wiper assembly
3. Install a new blade by reversing Steps 1 and 2.
facing away from the windshield.
toward the driver’s side of the vehicle.
Tires
Your new vehicle comes with high-quality tires made by
a leading tire manufacturer. If you ever have questions
about your tire warranty and where to obtain service, see
your GM Warranty booklet for details.
Poorly maintained and improperly used tires
are dangerous.
Overloading your tires can cause
overheating as a result
of too much friction.
You could have an air-out and a serious
accident. See “Loading Your Vehicle” in
the Index.
CAUTION: (Continued)
J
6-44
Page 325 of 433
Downloaded from www.Manualslib.com manuals search engine NOTICE:
Don’t let anyone tell you that underinflation or
overinflation is all right. It’s not.
If your tires
don’t have enough air (underinflation), you can
get the following:
Too much flexing
Too much heat
Tire overloading
Bad wear
0 Bad handling
Bad fuel economy.
If your tires have too much air (overinflation),
you can get the following:
Unusual wear
Bad handling
Rough ride
Needless damage from road hazards.
When to Check
Check your tires once a month or more. Also, check the
tire pressure of the spare tire.
How to Check
Use a good quality pocket-type gage to check tire
pressure. You can’t tell
if your tires are properly inflated
simply by looking at them. Radial tires may look
properly inflated even when they’re underinflated.
Be sure to put the valve caps back on the valve stems.
They help prevent
leaks by keeping out dirt and moisture.
Tire Inspection and Rotation
Tires should be rotated every 6,000 to 8,000 miles
(10 000 to 13 000 km). Any time you notice unusual
wear, rotate your tires as soon as possible and check
wheel alignment. Also check for damaged tires or
wheels. See “When It’s Time for New Tires” and
“Wheel Replacement” later in this section for
more information.
The purpose
of regular rotation is to achieve more
uniform wear for all tires on the vehicle. The first
rotation is the most important. See “Scheduled
Maintenance Services” in the Index for scheduled
rotation intervals.
Page 326 of 433
Downloaded from www.Manualslib.com manuals search engine FRT
f DO5
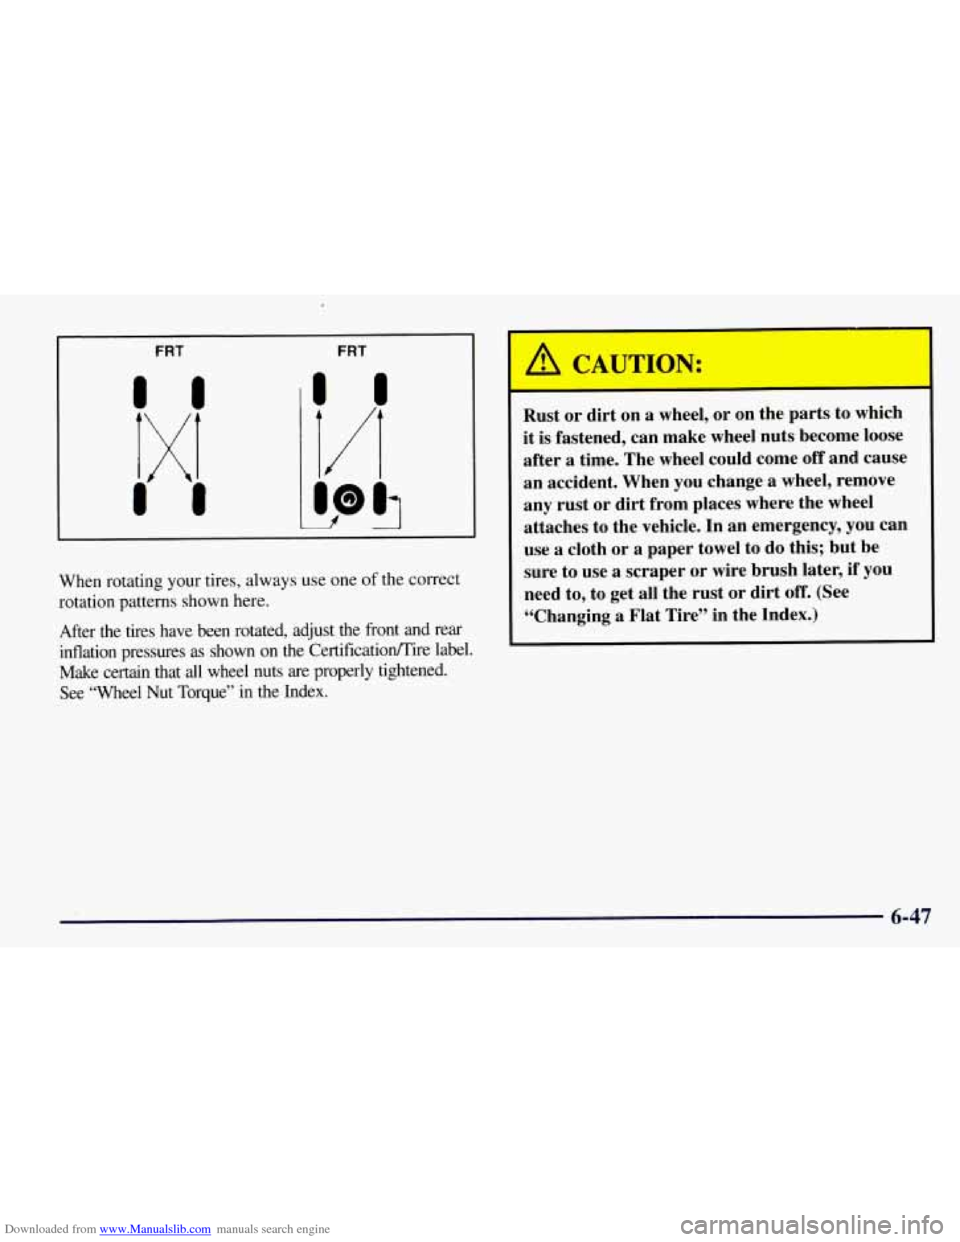
When rotating your tires, always use one of the correct
rotation patterns shown here.
After the tires have been rotated, adjust the front and rear
inflation pressures as shown
on the Certificatioflire label.
Make certain that
all wheel nuts are properly tightened.
See “Wheel Nut Torque” in the Index.
I A C. UTION:
Rust or dirt on a wheel, or on the parts to which
it is fastened, can make wheel nuts become loose
after
a time. The wheel could come off and cause
an accident. When you change a wheel, remove
any rust
or dirt from places where the wheel
attaches to the vehicle. In an emergency, you can
use a cloth or a paper towel to do this; but be
sure to use a scraper or wire brush later,
if you
need to, to get all the rust or dirt
off. (See
“Changing a Flat Tire” in the Index.)
6-47
Page 330 of 433
Downloaded from www.Manualslib.com manuals search engine I A CAUTION:
Using the wrong replacement wheels, wheel bolts
or wheel nuts on your vehicle can be dangerous.
It could affect the braking and handling of your
vehicle, make your tires lose air and make you
lose control. You could have a collision in which
you or others could be injured. Always use the
correct wheel, wheel bolts and wheel nuts
for replacement.
-
I NOTICE:
The wrong wheel can also cause problems with
bearing life, brake cooling, speedometer or
odometer calibration, headlamp aim, bumper
height, vehicle ground clearance and tire or tire
chain clearance to the body and chassis.
See “Changing a Flat
Tire” in the Index for
more information. Used
Replacement Wheels
I
Putting a used wheel on your vehicle is
dangerous. You can’t know how
it’s been used or
how far it’s been driven. It could fail suddenly
and cause an accident. If you have to replace
a
wheel, use a new GM original equipment wheel.
Tire Chains
NOTICE:
If your vehicle has P265/75R16 size tires, don’t
use tire chains. They can damage your vehicle
because there’s not enough clearance.
NOTICE: (Continued)
6-51
Page 336 of 433
Downloaded from www.Manualslib.com manuals search engine Cleaning Exterior LampsLenses Weatherstrips
silicone grease on weatherstrips will make them last
longer, seal better, and not stick or squeak. Apply silicone
grease with a clean cloth at least every six months. During
very cold, damp weather more frequent application may
be required. (See “Recommended Fluids and Lubricants” in the Index.)
Cleaning the Outside of Your Vehicle
The paint finish on your vehicle provides beauty, depth
of color, gloss retention and durability.
Washing Your Vehicle
The best way to preserve your vehicle’s finish is to keep it
clean by washing it often with lukewarm or cold water.
Don’t wash your vehicle in the direct rays
of the sun.
Don’t use strong soaps or chemical detergents. Use
liquid hand, dish or car washing (mild detergent) soaps.
Don’t use cleaning agents that are petroleum based, or
that contain acid or abrasives. All cleaning agents
should be flushed promptly and not allowed to dry on
the surface, or they could stain. Dry the finish with a
soft, clean chamois or an all-cotton towel to avoid
surface scratches and water spotting. Use lukewarm
or cold water, a soft cloth and a liquid
hand, dish or car washing (mild detergent) soap to clean
exterior lamps and lenses. Follow instructions under
“Washing Your Vehicle.”
Finish Care
Occasional waxing or mild polishing of your vehicle by
hand may be necessary to remove residue from the paint
finish. You can get GM-approved cleaning products
from your dealer. (See “Appearance Care and Materials”
in the Index.)
Your vehicle has a “basecoatklearcoat” paint finish. The
clearcoat gives more depth and gloss to the colored basecoat.
Always use waxes and polishes that are non-abrasive and
made for a basecoatklearcoat paint finish.
I NOTICE:
Machine compounding or aggressive polishing on
a basecoatklearcoat paint finish may dull the
finish
or leave swirl marks.
High pressure car washes may cause water to enter
your vehicle.
6-57
Page 341 of 433
Downloaded from www.Manualslib.com manuals search engine Electrical System
Add-on Electrical Equipment
NOTICE:
Don’t add anything electrical to your vehicle
unless you check with your dealer first. Some
electrical equipment can damage your vehicle
and the damage wouldn’t be covered by your
warranty. Some add-on electrical equipment
can keep other components from working as
they should.
Your vehicle has an air bag system. Before attempting to
add anything electrical to your vehicle, see “Servicing
Your Air Bag-Equipped Vehicle” in the Index.
Headlamps
The headlamp wiring is protected by a circuit breaker in
the lamp switch. An electrical overload will cause the
lamps to flicker on and off, or in some cases to remain
off. If this happens, have your headlamp wiring checked
right away.
Windshield Wipers
The windshield wiper motor is protected by a circuit
breaker and a fuse. If the motor overheats due
to heavy
snow, etc., the wiper will stop until the motor cools.
Although the circuit is protected from electrical
overload, overload due to heavy snow, etc., may cause
wiper linkage damage. Always clear ice and heavy snow
from the the windshield before using the windshield
wipers. If the overload is caused by some electrical
problem and not snow, etc., be sure to get it fixed.
6-62
Page 342 of 433
Downloaded from www.Manualslib.com manuals search engine Power Windows and Other Power Options
Circuit breakers in the fuse panel protect the power
windows and other power accessories. When the current
load is too heavy, the circuit breaker opens and closes.
This protects the circuit until the current load returns
to
normal or the problem is fixed.
Fuses and Circuit Breakers
The wiring circuits in your vehicle are protected from
short circuits by a combination of fuses, circuit breakers
and fusible thermal links in the wiring itself. This
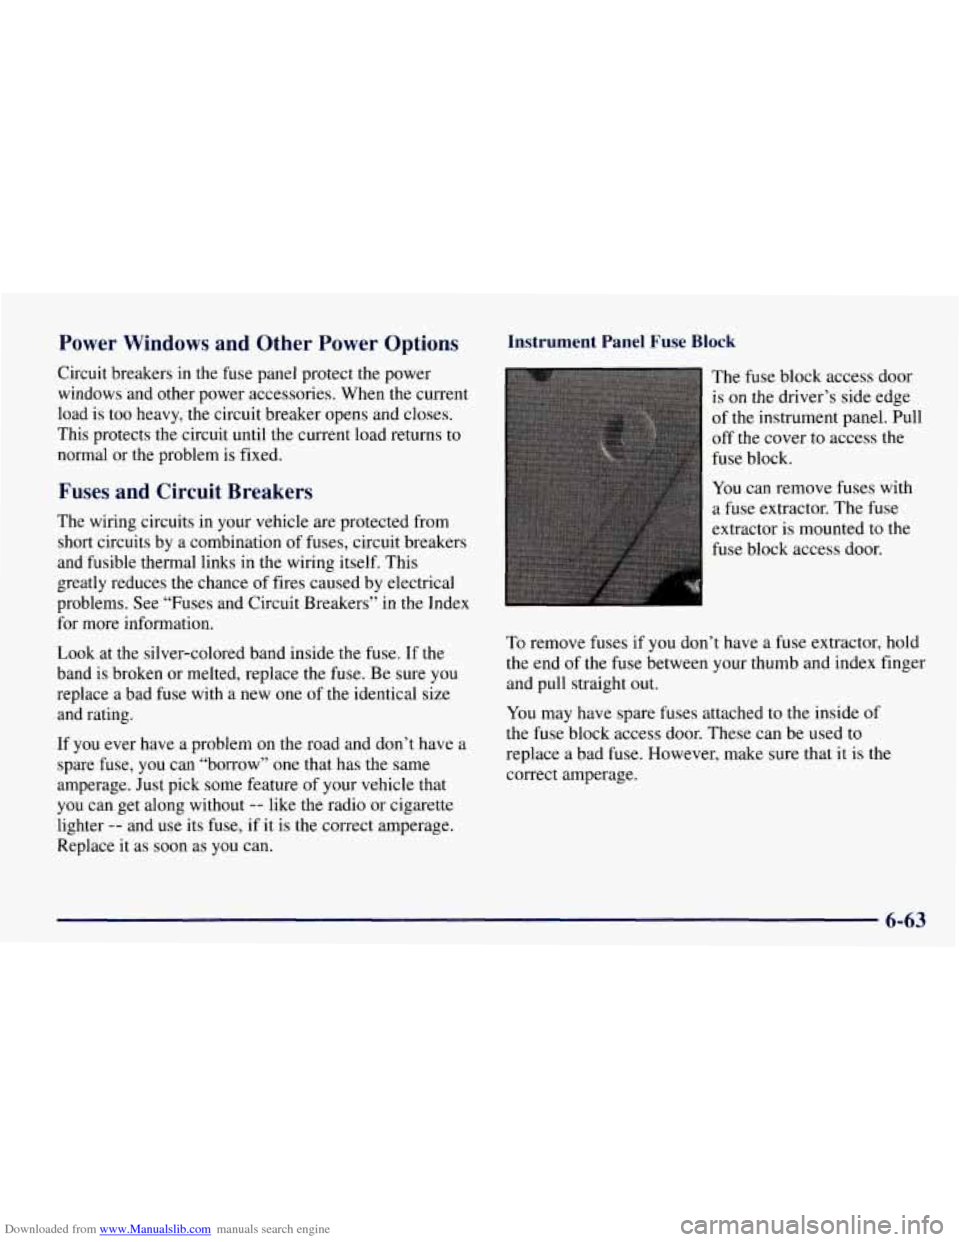
Instrument Panel Fuse Block
The fuse block access door
is on the driver’s side edge
of the instrument panel. Pull
off the cover to access the
fuse block.
You can remove fuses with
a fuse extractor. The fuse
extractor is mounted to the
fuse block access door.
greatly reduces the chance of fires caused by electrical
problems. See “Fuses and Circuit Breakers” in the Index
for more information.
Look at the silver-colored band inside the fuse. If the
band is broken or melted, replace the fuse. Be sure
you
replace a bad fuse with a new one of the identical size
and rating.
If you ever have a problem on the road and don’t have a
spare fuse, you can “borrow” one that has the same
amperage. Just pick some feature
of your vehicle that
you can get along without
-- like the radio or cigarette
lighter
-- and use its fuse, if it is the correct amperage.
Replace it as soon as you can.
To remove fuses if you don’t have a fuse extractor, hold
the end of the fuse between your thumb and index finger
and pull straight out.
You may have spare fuses attached to the inside of
the fuse block access door. These can be used to
replace a bad fuse. However, make sure that it is the
correct amperage.
6-63
Page 344 of 433
Downloaded from www.Manualslib.com manuals search engine 15
16
Fuse/Circuit Breaker Usage
14 4WD Indicator, Cluster, Front and
Rear Comfort Controls, Instrument
Switches, Radio Illumination,
Chime Module
DRL Relay, Fog Lamp Relay
17
18
19
20
21
22
23
24
A
B Front and Rear Turn Signals,
Back-up
Lamps, BTSI Solenoid
Radio (Ignition)
4WALNCM, ABS, Cruise Control
Radio (Battery)
PRNDL, Automatic Transmission, Speedometer, Check Gages,
Warning Lights
Variable Effort Steering
Not Used
Rear Wiper, Rear Washer Pump
Front Axle, 4WD Indicator Lamp,
TP2 Relay (Gasoline Engine)
Power Door Lock, Six-Way Power
Seat, Keyless Entry Module
Power Windows
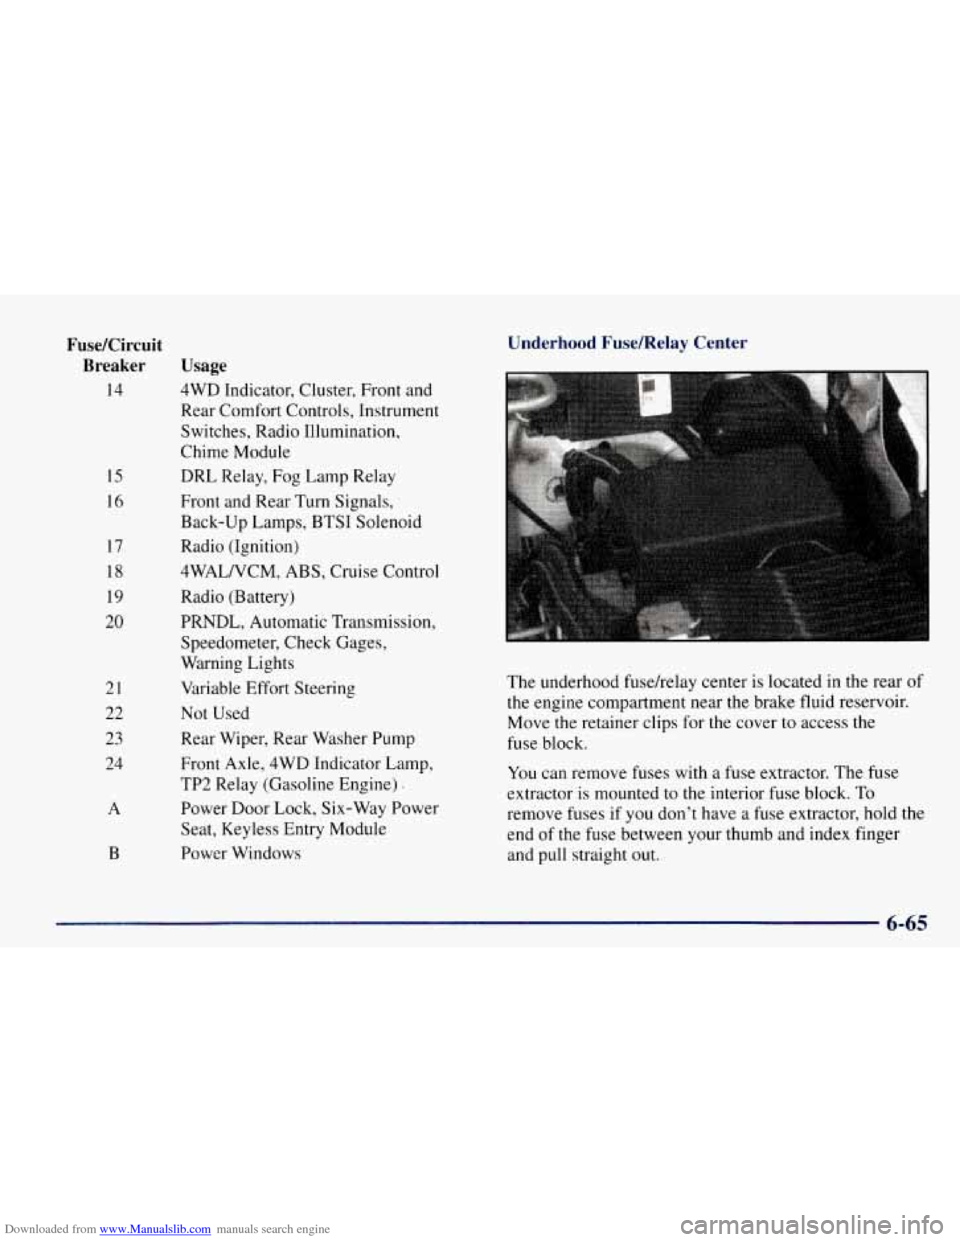
Underhood Fuse/Relay Center
The underhood fusehelay center is located in the rear of
the engine compartment near the brake fluid reservoir.
Move the retainer clips for the cover to access the
fuse block.
You can remove fuses with a fuse extractor. The fuse
extractor is mounted to the interior fuse block. To
remove fuses if you don't have a fuse extractor, hold the
end of the fuse between your thumb and index finger
and pull straight out.
6-65