Page 131 of 433
Downloaded from www.Manualslib.com manuals search engine Instrument Panel
2-60
Page 136 of 433

Downloaded from www.Manualslib.com manuals search engine Air Bag Readiness Light
There is an air bag readiness light on the instrument
panel, which shows
AIR BAG. The system checks the
air bag’s electrical system for malfunctions. The light
tells you if there is an electrical problem. The system
check includes the air bag sensors, the air bag module,
the wiring and the diagnostic module. For more
information on the air bag system, see “Air Bag” in
the Index.
AIR
BAG
This light will come on
when
you start your engine,
and it will flash for a few
seconds. Then the light
should go out. This means
the system is ready. If
the air bag readiness light stays on after you start the
engine or comes on when you are driving, your air bag
system may not work properly. Have your vehicle
serviced right away.
The air bag readiness light should flash for a few
seconds when you turn the ignition key to
RUN. If the
light doesn’t come on then, have it fixed
so it will be
ready to warn you
if there is a problem.
Charging System Warning Light
The charging system
warning light should come
on briefly when you turn on
the ignition, before starting
the engine, as a check to
show you it is working.
2-65
Page 149 of 433
Downloaded from www.Manualslib.com manuals search engine Comfort Controls
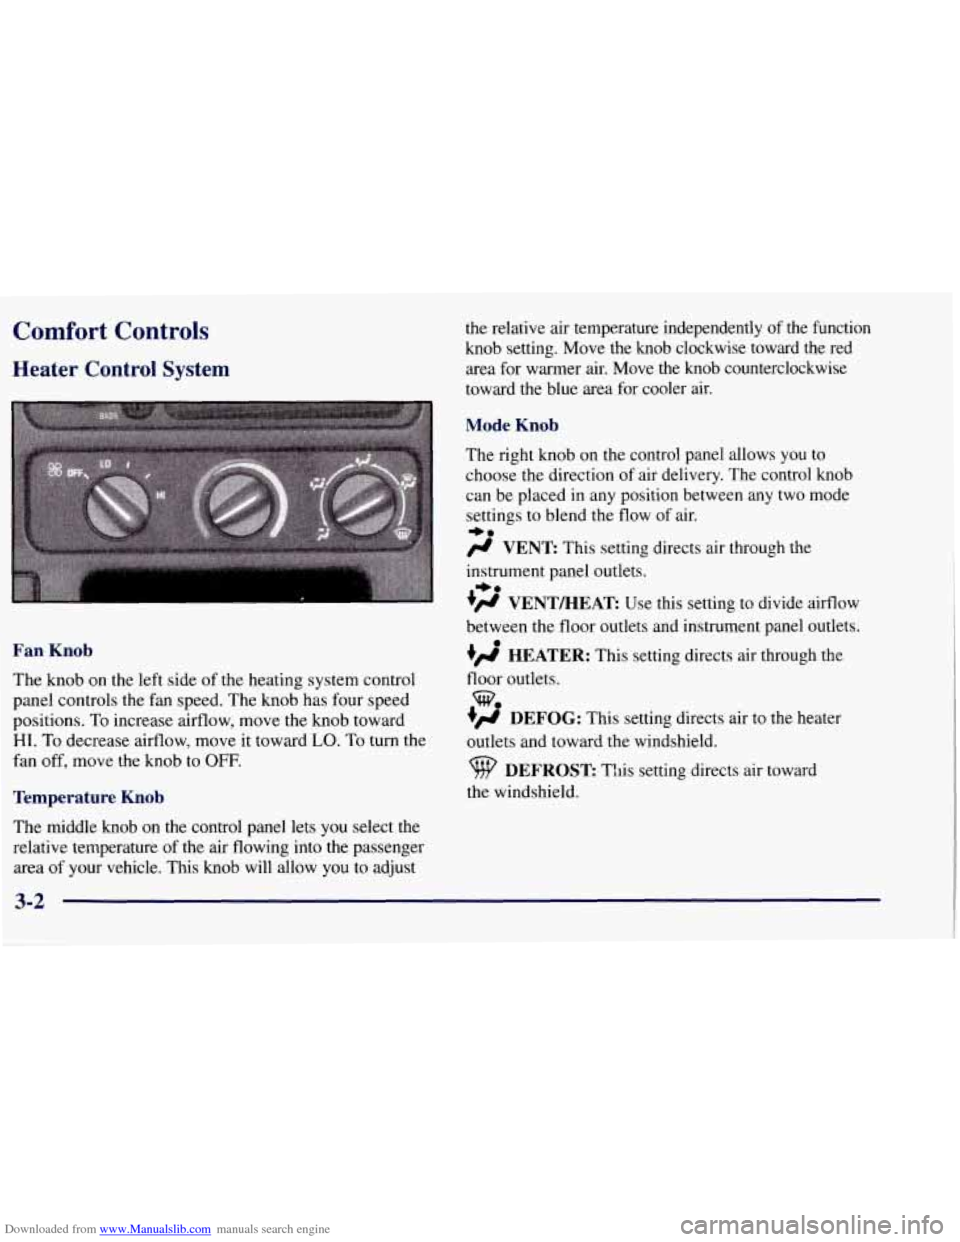
Heater Control System
Fan Knob
The knob on the left side of the heating system control
panel controls the fan speed. The knob has four speed
positions. To increase aifflow, move the knob toward
HI. To decrease aifflow, move it toward LO. To turn the
fan off, move the knob to
OFF.
Temperature Knob
The middle knob on the control panel lets you select the
relative temperature of the air flowing into the passenger
area
of your vehicle. This knob will allow you to adjust the
relative air temperature independently of the function
knob setting. Move the knob clockwise toward the red
area for warmer air. Move
the knob counterclockwise
toward the blue area for cooler air.
Mode Knob
The right knob on the control panel allows you to
choose the direction
of air delivery. The control knob
can be placed in any position between any two mode
settings to blend the flow
of air.
+.
fl VENT This setting directs air through the
instrument panel outlets.
+# VENT/HEAT Use this setting to divide airflow
*e
between the floor outlets and instrument panel outlets.
0
+fl HEATER: This setting directs air through the
floor outlets.
+# DEFOG: This setting directs air to the heater
outlets and toward the windshield.
w.
DEFROST This setting directs air toward
the windshield.
3-2
Page 150 of 433
Downloaded from www.Manualslib.com manuals search engine Heater and Air Conditioning Control
System
(If Equipped)
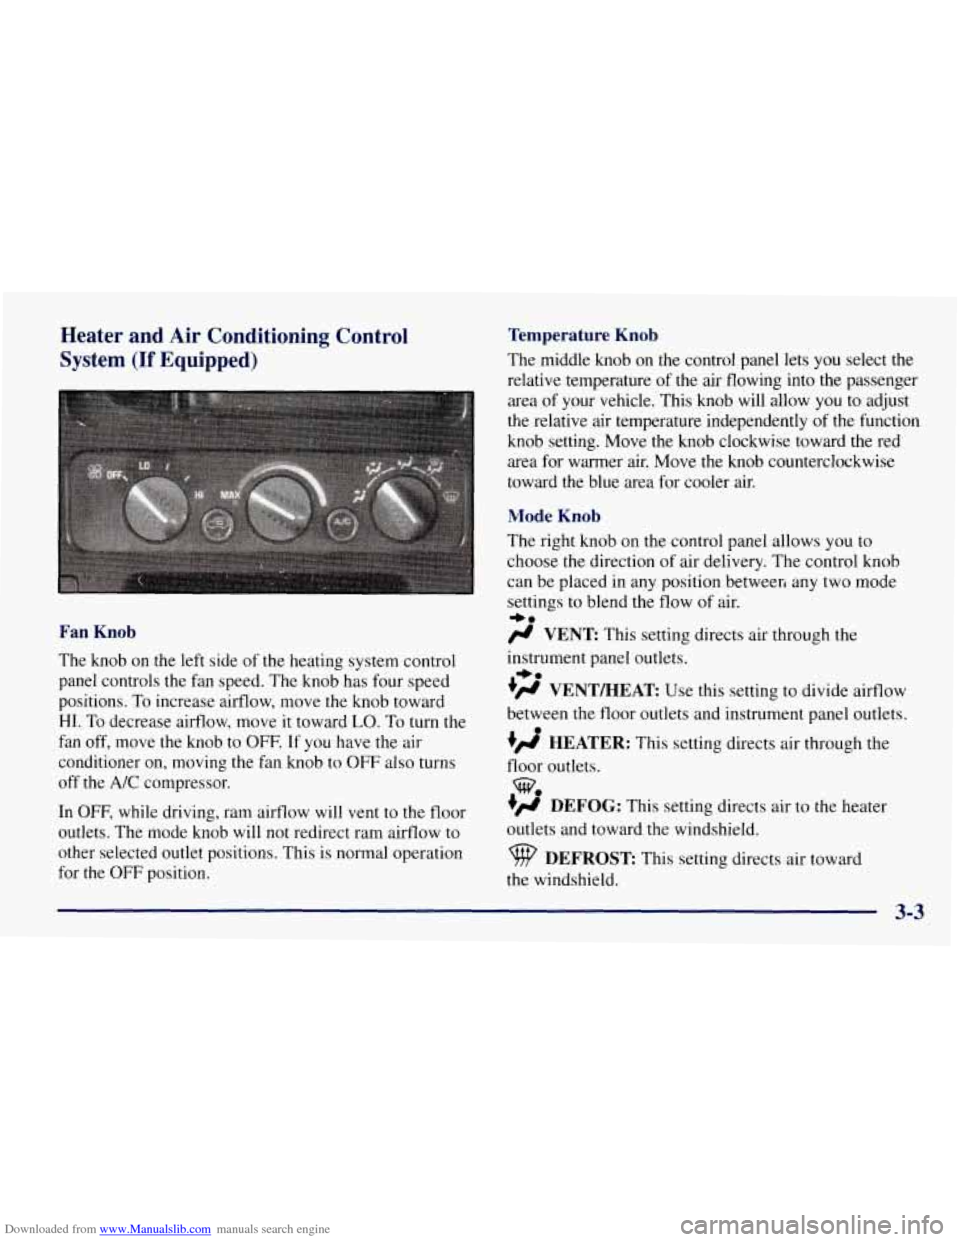
Fan Knob
The knob on the left side of the heating system control
panel controls the fan speed. The knob has four speed
positions.
To increase airflow, move the knob toward
HI. To decrease airflow, move it toward LO. To turn the
fan off, move the knob to OFF.
If you have the air
conditioner on, moving the fan knob to OFF also turns
off the
A/C compressor.
In OFF, while driving, ram airflow will vent to the floor
outlets. The mode knob will not redirect ram airflow to
other selected outlet positions. This is normal operation
for the OFF position.
Temperature Knob
The middle knob on the control panel lets you select the
relative temperature
of the air flowing into the passenger
area
of your vehicle. This knob will allow you to adjust
the relative air temperature independently
of the function
knob setting. Move the
knob clockwise toward the red
area for warmer air. Move the knob counterclockwise
toward
the blue area for cooler air.
Mode Knob
The right knob on the control panel allows you to
choose the direction
of air delivery. The control knob
can be placed in any position betweeri any two mode
settings
to blend the flow of air.
# VENT This setting directs air through the
instrument panel outlets.
+’ VENTBEAT Use this setting to divide airflow
between the floor outlets and instrument panel outlets.
+’ HEATER: This setting directs air through the
+e
+e
e
floor outlets.
+’ DEFOG: This setting directs air to the heater
outlets and toward the windshield.
w.
DEFROST This setting directs air toward
the windshield.
3-3
Page 152 of 433
Downloaded from www.Manualslib.com manuals search engine To use the rear control, first turn the front control knob
to REAR CNTL. Then, the rear control can be used to
increase and decrease the airflow.
Rear Heater (Without Rear Air Conditioning)
(If Equipped)
If you have a rear
heater (without rear air
conditioning), the control switch
is located on the
instrument panel.
To increase and decrease the flow of heated air to the
rear floor vents, move the switch marked REAR HEAT
to the blower speed
you want.
The knob has three speed positions. To increase the
flow
of heated air, move the switch toward HIGH. To
decrease the flow of heated air, move it toward
LOW.
To turn the fan off, move the switch to OFF.
3-5
Page 155 of 433
Downloaded from www.Manualslib.com manuals search engine Heating Ventilation System
The heater works best if you keep your windows closed
while using it. On cold days, use the HEATER or
VENT/HEAT setting with the temperature knob in
the
red area.
If you use the engine coolant heater before starting your
engine in cold weather,
20°F (-8 O C) or lower, your
heating system will produce warmer air faster, to heat
the passenger compartment in cold weather.
The use
of an engine coolant heater also reduces the
time it takes for the engine to reach normal operating
temperature, and shortens the time it takes the heater to
reach full output. For more information, see “Engine
Coolant Heater” in the Index. For
mild outside temperatures when little heating or
cooling is needed, use VENT to direct outside air
through your vehicle. Air will flow through the
instrument panel outlets.
Your vehicle’s ventilation system supplies outside air
to the inside of your vehicle when it is moving. With
the side windows closed, air will flow into the front
air inlet grilles, through the vehicle, and out the air
exhaust valves.
Outside air will also enter the vehicle when the heater or
the air conditioning fan
is running, unless you have the
recirculation button pushed
in. For more information on
the recirculation button, see
“Air Conditioning” earlier
in this section.
Page 156 of 433
Downloaded from www.Manualslib.com manuals search engine Ventilation Tips
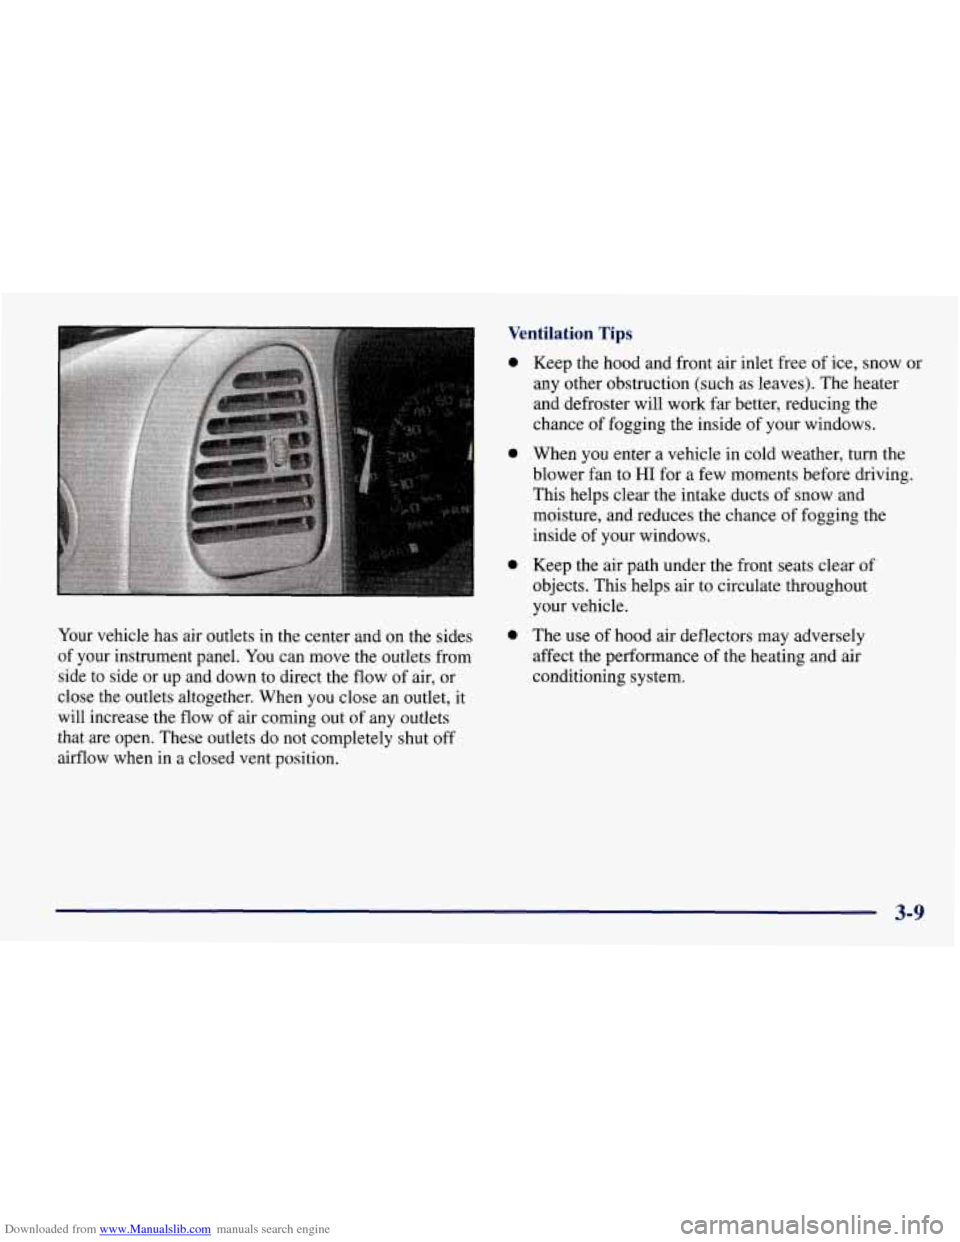
Your vehicle has air outlets in the center and on the sides
of your instrument panel. You can move the outlets from
side to side or up and down to direct the flow of air, or
close the outlets altogether. When you close
an outlet, it
will increase the flow
of air coming out of any outlets
that are open. These outlets do not completely shut off
airflow when in a closed vent position.
0
0
0
0
Keep the hood and front air inlet free of ice, snow or
any other obstruction (such as leaves). The heater
and defroster will work far better, reducing the
chance
of fogging the inside of your windows.
When you enter a vehicle in cold weather, turn the
blower fan to
HI for a few moments before driving.
This helps clear the intake ducts
of snow and
moisture, and reduces the chance
of fogging the
inside
of your windows.
Keep the air path under the front seats clear of
objects. This helps air to circulate throughout
your vehicle.
The use of hood air deflectors may adversely
affect the performance of the heating and air
conditioning system.
3-9
Page 231 of 433
Downloaded from www.Manualslib.com manuals search engine Making ’hms
NOTICE:
Making very sharp turns while trailering could
cause the trailer to come in contact with the
vehicle. Your vehicle could be damaged. Avoid
making very sharp turns while trailering.
When you’re turning with a trailer, make wider turns than
normal.
Do this so your trailer won’t strike soft shoulders,
curbs, road signs, trees or other objects. Avoid jerky or
sudden maneuvers. Signal well
in advance.
Turn Signals When Towing a Trailer
The arrows on your instrument panel will flash
whenever you signal a turn or lane change. Properly
hooked up, the trailer lamps will also flash, telling other
drivers you’re about to turn, change lanes or stop.
When towing a trailer, the arrows on your instrument
panel will flash for turns even
if the bulbs on the trailer
are burned out. Thus, you may think drivers behind you
are seeing your signal when they are not. It’s important
to check occasionally to be sure the trailer bulbs are
still working.
Driving On Grades
Reduce speed and shift to a lower gear before you start
down a long or steep downgrade. If you don’t shift
down, you might have
to use your brakes so much that
they would get hot and no longer work well.
On a long uphill grade, shift down and reduce your
speed to around
45 mph (70 kmh) to reduce the
possibility of engine and transmission overheating.
If you have an automatic transmission, you can tow
in
AUTOMATIC OVERDRIVE (0). You may want to
shift the transmission to THIRD
(3) or, if necessary, a
lower gear selection if the transmission shifts too often
(e.g., under heavy loads and/or hilly conditions).
When towing at high altitude on steep uphill grades,
consider the following: Engine coolant will boil at a
lower temperature than at normal altitudes. If you turn
your engine off immediately after towing at high altitude
on steep uphill grades, your vehicle may show signs
similar
to engine overheating. To avoid this, let the
engine run while parked (preferably on level ground)
with the automatic transmission in PARK
(P) for a few
minutes before turning the engine off. If you do get the
overheat warning, see “Engine Overheating” in
the Index.
4-52