1997 CHEVROLET TAHOE tire type
[x] Cancel search: tire typePage 192 of 433
Downloaded from www.Manualslib.com manuals search engine 0
0
0
0
Check your mirrors, glance over your shoulder and
start your left lane change signal before moving out
of the right lane to pass. When you are far enough
ahead of the passed vehicle to see its front in your
inside mirror, activate your right lane change signal
and move back into the right lane. (Remember that if
your right outside mirror is convex, the vehicle you
just passed may seem to be farther away from you
than it really is.)
Try not to pass more than one vehicle at a time
on two-lane roads. Reconsider before passing the
next vehicle.
Don’t overtake a slowly moving vehicle
too rapidly.
Even though the brake lamps are not flashing, it may
be slowing down or starting
to turn.
If you’re being passed, make it easy for the
following driver to get ahead of you. Perhaps you
can ease a little to the right.
Loss of Control
Let’s review what driving experts say about what
happens when the three control systems (brakes, steering
and acceleration) don’t have enough friction where the
tires meet the road to
do what the driver has asked.
In any emergency, don’t give up. Keep
trying to steer and
constantly seek
an escape route or area of less danger.
Skidding
In a skid, a driver can lose control of the vehicle.
Defensive drivers avoid most skids by taking reasonable
care suited to existing conditions, and by not
“overdriving” those conditions. But skids are
always possible.
The three types of skids correspond to your vehicle’s
three control systems. In the braking skid, your wheels
aren’t rolling. In the steering or cornering skid, too
much speed or steering in a curve causes tires to slip and
lose cornering force. And in the acceleration skid, too
much throttle causes the driving wheels to spin.
A cornering skid and an acceleration skid are best
handled by easing your foot
off the accelerator pedal.
If your vehicle starts to slide, ease your foot off the
accelerator pedal and quickly steer the way you want the
vehicle
to go. If you start steering quickly enough, your
vehicle may straighten out. Always be ready for a
second skid if
it occurs.
Of course, traction is reduced when water, snow, ice,
gravel or other material is
on the road. For safety, you’ll
want to slow down and adjust your driving
to these
conditions. It is important to slow down on slippery
surfaces because stopping distance will be longer and
vehicle control more limited.
4-13
Page 193 of 433
Downloaded from www.Manualslib.com manuals search engine While driving on a surface with reduced traction, try
your best to avoid sudden steering, acceleration
or
braking (including engine braking by shifting to a lower
gear). Any sudden changes could cause the tires to slide.
You may not realize the surface is slippery until your
vehicle is skidding. Learn to recognize warning
clues
-- such as enough water, ice or packed snow on
the road to make a “mirrored surface”
-- and slow down
when you have any doubt.
Remember:
Any anti-lock brake system (ABS) helps
avoid only the braking skid.
Driving Guidelines
This multipurpose passenger vehicle is defied as a utility
vehicle in Consumer Information Regulations issued by
the National Highway Trafpc Safety Administration
(NHTSA) of the United States Department of
Transportation. Utility vehicles have higher ground
clearance and a narrower track to make them capable of
performing in a wide variety of off-road applications.
Specific design characteristics give them a higher center of
gravity than ordinary cars.
An advantage of the higher
ground clearance is a better view of the road allowing you
to anticipate problems. They are not designed for
cornering at the same speeds as conventional
two-wheel-drive vehicles any more than low-slung
sports
cars are designed to perform satisfactorily under off-road conditions.
If at
all possible, avoid sharp turns or abrupt
maneuvers. As with other vehicles of this type, failure to
operate
this vehicle correctly may result in loss of control
or vehicle rollover.
Off-Road Driving with Your
Four-Wheel-Drive Vehicle
This off-road guide is for vehicles that have
four-wheel drive.
Also, see “Anti-Lock Brakes”
in the Index.
If your vehicle doesn’t have four-wheel drive, you
shouldn’t drive off-road unless you’re on
a level,
solid surface.
Off-road driving can
be great fun. But it does have some
definite hazards. The greatest of these is the terrain itself.
“Off-roading” means you’ve left the great North
American road system behind. Traffic lanes aren’t
marked. Curves aren’t banked. There are no road signs.
Surfaces can be slippery, rough, uphill or downhill. In
short, you’ve gone right back to nature.
Off-road driving involves some new skills.
And that’s
why it’s very important that you read this guide. You’ll
find many driving tips
and suggestions. These will help
make your off-road driving safer and more enjoyable.
4-14
Page 323 of 433
Downloaded from www.Manualslib.com manuals search engine Windshield Wiper Blade Replacement
For proper type and length, see “Normal Maintenance
Replacement Parts” in the Index.
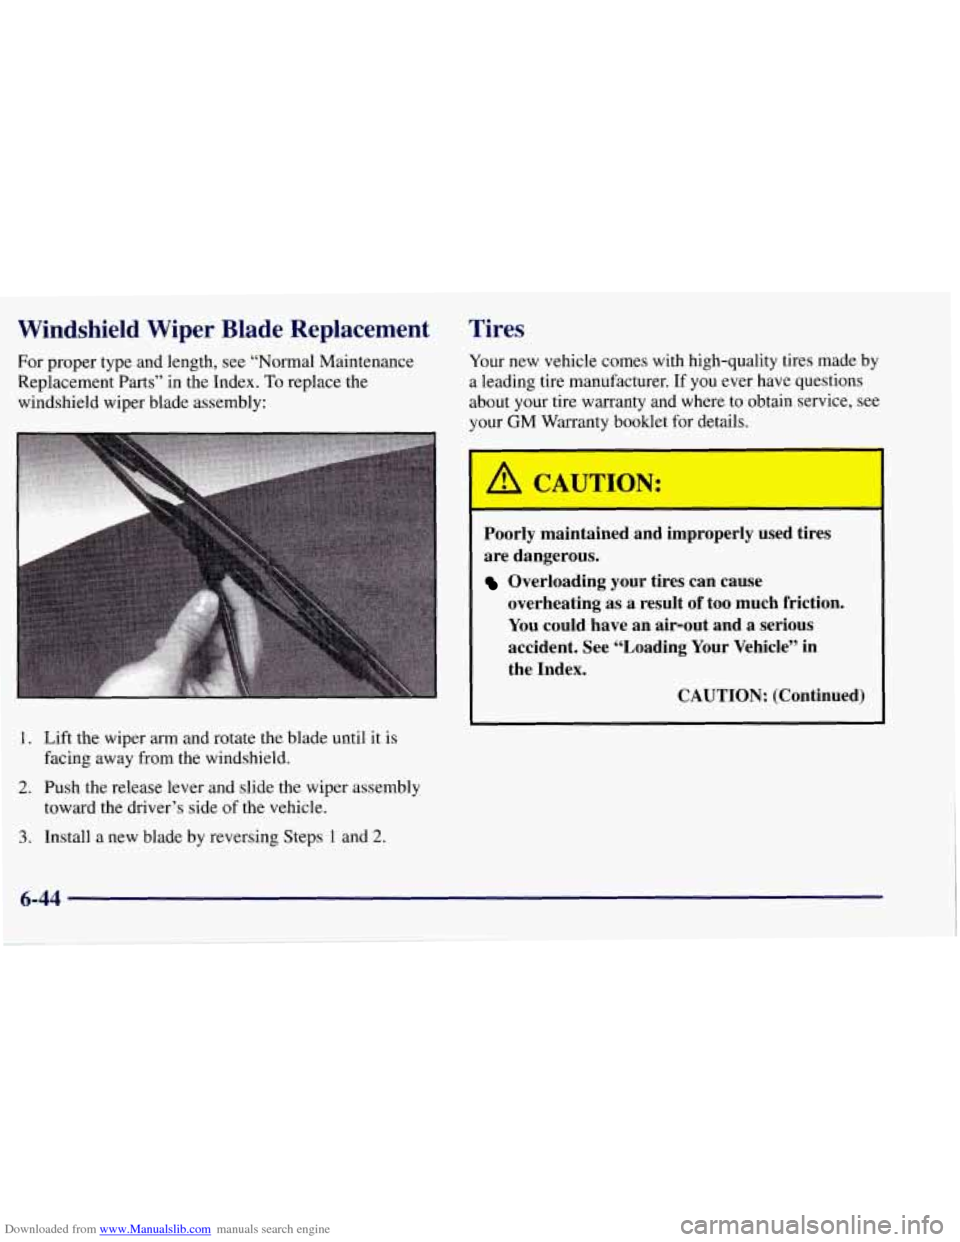
To replace the
windshield wiper blade assembly:
1. Lift the wiper arm and rotate the blade until
it is
2. Push the release lever and slide the wiper assembly
3. Install a new blade by reversing Steps 1 and 2.
facing away from the windshield.
toward the driver’s side of the vehicle.
Tires
Your new vehicle comes with high-quality tires made by
a leading tire manufacturer. If you ever have questions
about your tire warranty and where to obtain service, see
your GM Warranty booklet for details.
Poorly maintained and improperly used tires
are dangerous.
Overloading your tires can cause
overheating as a result
of too much friction.
You could have an air-out and a serious
accident. See “Loading Your Vehicle” in
the Index.
CAUTION: (Continued)
J
6-44
Page 325 of 433
Downloaded from www.Manualslib.com manuals search engine NOTICE:
Don’t let anyone tell you that underinflation or
overinflation is all right. It’s not.
If your tires
don’t have enough air (underinflation), you can
get the following:
Too much flexing
Too much heat
Tire overloading
Bad wear
0 Bad handling
Bad fuel economy.
If your tires have too much air (overinflation),
you can get the following:
Unusual wear
Bad handling
Rough ride
Needless damage from road hazards.
When to Check
Check your tires once a month or more. Also, check the
tire pressure of the spare tire.
How to Check
Use a good quality pocket-type gage to check tire
pressure. You can’t tell
if your tires are properly inflated
simply by looking at them. Radial tires may look
properly inflated even when they’re underinflated.
Be sure to put the valve caps back on the valve stems.
They help prevent
leaks by keeping out dirt and moisture.
Tire Inspection and Rotation
Tires should be rotated every 6,000 to 8,000 miles
(10 000 to 13 000 km). Any time you notice unusual
wear, rotate your tires as soon as possible and check
wheel alignment. Also check for damaged tires or
wheels. See “When It’s Time for New Tires” and
“Wheel Replacement” later in this section for
more information.
The purpose
of regular rotation is to achieve more
uniform wear for all tires on the vehicle. The first
rotation is the most important. See “Scheduled
Maintenance Services” in the Index for scheduled
rotation intervals.
Page 327 of 433
Downloaded from www.Manualslib.com manuals search engine When It’s Time for New Tires
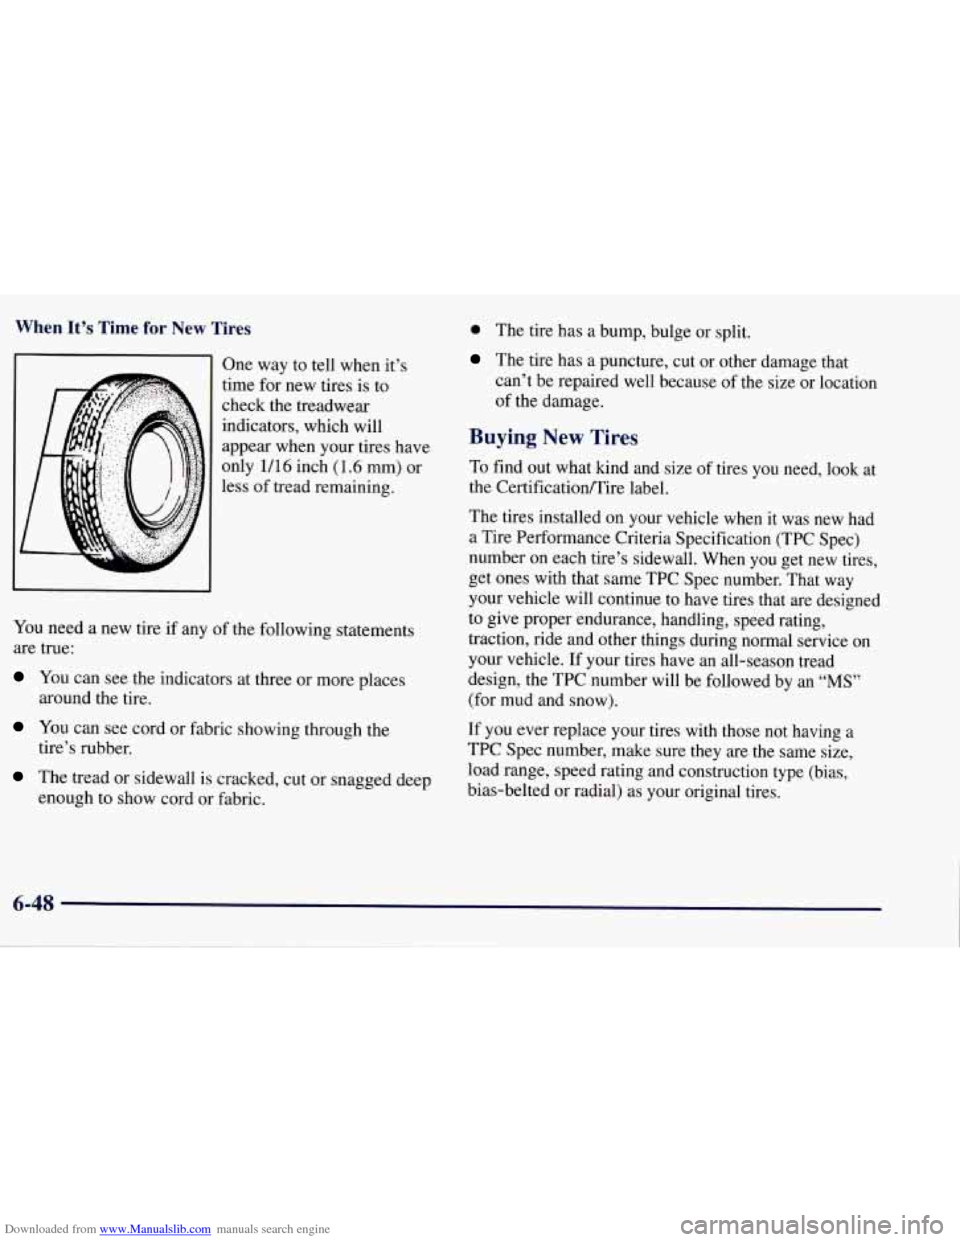
One way to tell when it’s
time for new tires is to
check the treadwear
indicators, which will
appear when your tires have
only 1/16 inch (1.6 mm) or
less of tread remaining.
YOU need a new tire if any of the following statements
are true:
You can see the indicators at three or more places
You can see cord or fabric showing through the
around
the tire.
tire’s rubber.
The tread or sidewall is cracked, cut or snagged deep
enough to show cord or fabric.
0 The tire has a bump, bulge or split.
The tire has a puncture, cut or other damage that
can’t be repaired well because of the size or location
of the damage.
Buying New Tires
To find out what kind and size of tires you need, look at
the Certificatioflire label.
The tires installed on your vehicle when it was new had
a Tire Performance Criteria Specification (TPC Spec)
number on each tire’s sidewall. When
you get new tires,
get ones with that same TPC Spec number. That way
your vehicle will continue to have tires that are designed
to give proper endurance, handling, speed rating,
traction, ride and other things during normal service on
your vehicle. If your tires have an all-season tread
design, the TPC number will be followed by an
“MS”
(for mud and snow).
If you ever replace your tires with those not having a
TPC Spec number, make sure they are the same size,
load range, speed rating and construction type (bias,
bias-belted or radial) as your original tires.
Page 328 of 433
Downloaded from www.Manualslib.com manuals search engine Mixing tires could cause you to lose control while
driving.
If you mix tires of different sizes or types
(radial and bias-belted tires), the vehicle may not
handle properly, and you could have a crash.
Using tires
of different sizes may also cause
damage to your vehicle. Be sure to
use the same
size and type tires on all wheels.
Uniform Tire Quality Grading
The following information relates to the system developed
by the United States National Highway Traffic Safety Administration, which grades tires by treadwear, traction
and temperature performance.
(This applies only to
vehicles sold in the United States.) The grades are molded
on the sidewalls of most passenger car tires. The Uniform
Tire Quality Grading system does not apply to deep tread,
winter-type snow tires, space-saver or temporary use spare
tires, tires with nominal rim diameters of 10 to 12 inches
(25 to
30 cm), or to some limited-production tires.
While the tires available on General Motors passenger
cars and light trucks may vary with respect to these grades,
they must also conform to Federal safety
requirements and additional General Motors Tire
Performance Criteria (TPC) standards.
Treadwear
The treadwear grade is a comparative rating based on
the wear rate of the tire when tested under controlled
conditions on a specified government test course. For
example,
a tire graded 150 would wear one and a half
(1 1/2) times as well on the government course as a tire
graded
100. The relative performance of tires depends
upon the actual conditions
of their use, however, and
may depart significantly from the norm due to variations
in driving habits, service practices and differences in
road characteristics and climate.
Traction -- A, B, C
The traction grades, from highest to lowest, are A, B, and
C, and they represent the tire’s ability to stop on wet
pavement as measured under controlled conditions on
specified government test surfaces of asphalt and concrete.
A tire marked C may have poor traction performance.
Warning: The traction grade assigned to this tire
is based
on braking (straightahead) traction tests and does not
include cornering (turning) traction.
6-49
Page 331 of 433
Downloaded from www.Manualslib.com manuals search engine NOTICE: (Continued)
Use another type of traction device only if its
manufacturer recommends it for use on your
vehicle and tire size combination and road
conditions. Follow that manufacturer’s
instructions.
To help avoid damage to your
vehicle, drive slowly, readjust or remove the
device if it’s contacting your vehicle, and don’t spin
your wheels.
If you do find traction devices that will fit, install
them on the rear tires.
If you have a tire size other than P26975Rl6, use
tire chains only where legal and only when you
must. Use chains that are the proper size for your
tires. Install them on the tires of the rear axle.
Don’t use chains on the tires of the front axle.
Tighten them
as tightly as possible with the ends
securely fastened. Drive slowly and follow the chain
manufacturer’s instructions.
If you can hear the
chains contacting your vehicle, stop and retighten
them.
If the contact continues, slow down until it
stops. Driving too fast or spinning the wheels with
chains on
will damage your vehicle.
Appearance Care
Remember, cleaning products can be hazardous. Some
are toxic. Others can burst into flame
if you strike a
match or get them on a hot part of the vehicle. Some are
dangerous if
you breathe their fumes in a closed space.
When you use anything from a container to clean your
vehicle, be sure to follow the manufacturer’s warnings
and instructions. And always open your doors or
windows when you’re cleaning the inside.
Never use these to clean your vehicle:
Gasoline
Benzene
Naphtha
0 Carbon Tetrachloride
Acetone
Paint Thinner
Turpentine
Lacquer Thinner
Nail Polish Remover
They can all
be hazardous -- some more than
others
-- and they can all damage your vehicle, too.
6 ‘2
Page 332 of 433
Downloaded from www.Manualslib.com manuals search engine Don’t use any of these unless this manual says you can.
In many uses, these will damage your vehicle:
0 Alcohol
Laundry Soap
Bleach
0 Reducing Agents
Cleaning the Inside of Your Vehicle
Use a vacuum cleaner often to get rid of dust and loose
dirt. Wipe vinyl or leather with a clean, damp cloth.
Your GM dealer has two cleaners, a solvent-type spot
lifter and a foam-type powdered cleaner. They will clean
normal spots and stains very well. Do not use them on
vinyl or leather.
Here are some cleaning tips:
1. Always read the instructions on the cleaner label.
2. Clean up stains as soon as you can -- before they set.
3. Use a clean cloth or sponge, and change to a clean
area often. A soft brush may be used if stains
are stubborn.
4. Use solvent-type cleaners in a well-ventilated area
only. If you use them, don’t saturate the stained area.
5. If a ring forms after spot cleaning, clean the entire
area immediately or it will set.
Using Foam-Type Cleaner on Fabric
1. Vacuum and brush the area to remove any loose dirt.
2. Always clean a whole trim panel or section. Mask
3. Mix Multi-Purpose Powdered Cleaner following the
surrounding trim along stitch
or welt lines.
directions on the container label.
4. Use suds only and apply with a clean sponge. Don’t
saturate the material and don’t rub it roughly.
5. As soon as you’ve cleaned the section, use a sponge
to remove the suds.
6. Rinse the section with a clean, wet sponge.
7. Wipe off what’s left with a slightly damp paper towel
or cloth.
8. Dry it immediately with a blow dryer.
9. Wipe with a clean cloth.
6-53