1997 CHEVROLET TAHOE load capacity
[x] Cancel search: load capacityPage 128 of 433

Downloaded from www.Manualslib.com manuals search engine Luggage Carrier (If Equipped)
If you have the optional luggage carrier, you can load
things on top of your vehicle.
The luggage carrier has slats and side rails attached to
the roof, and crossrails which can be moved toward the
front or the rear in the side rails
to help secure cargo. Tie
the load to the side rails or side rail supports.
NOTICE:
Loading cargo that weighs more than 200 lbs.
(90.6 kg) on the luggage carrier may damage
your vehicle. When
you carry large things, never
let them hang over the rear or the sides
of your
vehicle. Load your cargo
so that it rests on the
slats and does not scratch or damage the vehicle.
Put the cargo against the side rails and fasten
it
securely to the luggage carrier.
Don’t exceed the maximum vehicle capacity when
loading your vehicle. For more information on vehicle
capacity and loading, see “Loading Your Vehicle”
in
the Index. To
prevent damage or loss of cargo as you’re driving,
check now and then to make sure the luggage carrier and
cargo are still securely fastened.
Be sure the cargo is properly loaded.
If small heavy objects are placed on the roof, place
the load in the area over the rear wheels (behind
the
rear side door on Suburbans). If you need to, cut a
piece of 3/8 inch plywood to fit inside the crossrails
and side rails to spread the load, If plywood is used,
tie it to the side rail supports.
Tie the load to the crossrails or the side rail supports.
Use the crossrails only to keep the load from sliding.
0 If you need to carry long items, move the crossrails
as far apart as they will go. Tie the load to the
crossrails and the side rails or side rail supports. Also
tie the load to the bumpers. Do not tie the load
so
tightly that the crossrails or side rails are damaged.
0 After moving the crossrails, be sure to tighten all the
slider screws.
For the purpose of wind noise reduction, locate
the front crossrail approximately
18-24 inches
(46 cm to 58 cm) rearward of the front supports.
2-57
Page 139 of 433

Downloaded from www.Manualslib.com manuals search engine Anti-Lock Brake System Warning Light
With the anti-lock brake
system, this light will come
ANTI -
LOCK
on when you start your
engine and may stay on for
several seconds.
That’s normal.
Engine Coolant Temperature Gage
This gage shows the engine
coolant temperature.
If the light stays on, or comes on when you’re driving,
your vehicle needs service. If the regular brake system
warning light isn’t on, you still have brakes, but you
don’t have anti-lock brakes. If the regular brake system
warning light is also on, you don’t have anti-lock brakes
and there’s a problem with your regular brakes. See
“Brake System Warning Light” earlier in this section.
The anti-lock brake system warning light should come
on briefly when you turn the ignition key to
RUN. If the
light doesn’t come on then, have it fixed
so it will be
ready to warn you if there is a problem.
It also provides an indicator of how hard your vehicle is
working. During a majority of the operation, the gage
will read
2 10 OF ( 100 ” C) or less. If you are pulling a
load or going up hills, it is normal for the temperature
to
fluctuate and approach the 260 OF( 160” C) mark. If the
gage reaches the
260”F( 160°C) mark, it indicates that
the cooling system
is working beyond its capacity.
In “Problems on the Road,” this manual shows what to
do. See “Engine Overheating” in the Index.
2-68
Page 145 of 433

Downloaded from www.Manualslib.com manuals search engine Fuel Gage
When the ignition is on, the
fuel gage tells you about
how much fuel you have
left in your tank.
The gage will first indicate
EMPTY (E) before you are
out
of fuel, and you should get more fuel as soon
as possible.
Listed
are four situations you may experience with your
fuel gage:
At the gas station, the fuel pump shuts off before the
gage reads FULL (F).
It takes a little more or less fuel to fill up than the
fuel gage indicated. For example, the gage may have
indicated the tank was half full, but
it actually took a
little more or less than half the tank’s capacity to fill
the tank.
The gage moves a little when you turn a corner or
speed up.
The gage doesn’t go back to EMPTY (E) when you
turn off the ignition.
None
of these indicate a problem with the fuel gage.
For information on how to fill your fuel tank,
see “Fuel
-- Filling Your Tank” in the Index.
For your fuel tank capacity, see “Fuel
-- Tank Capacity”
in the Index.
For the diesel engine fuel gage, see your Diesel
Engine Supplement.
2-74
Page 221 of 433

Downloaded from www.Manualslib.com manuals search engine Loading Your Vehicle
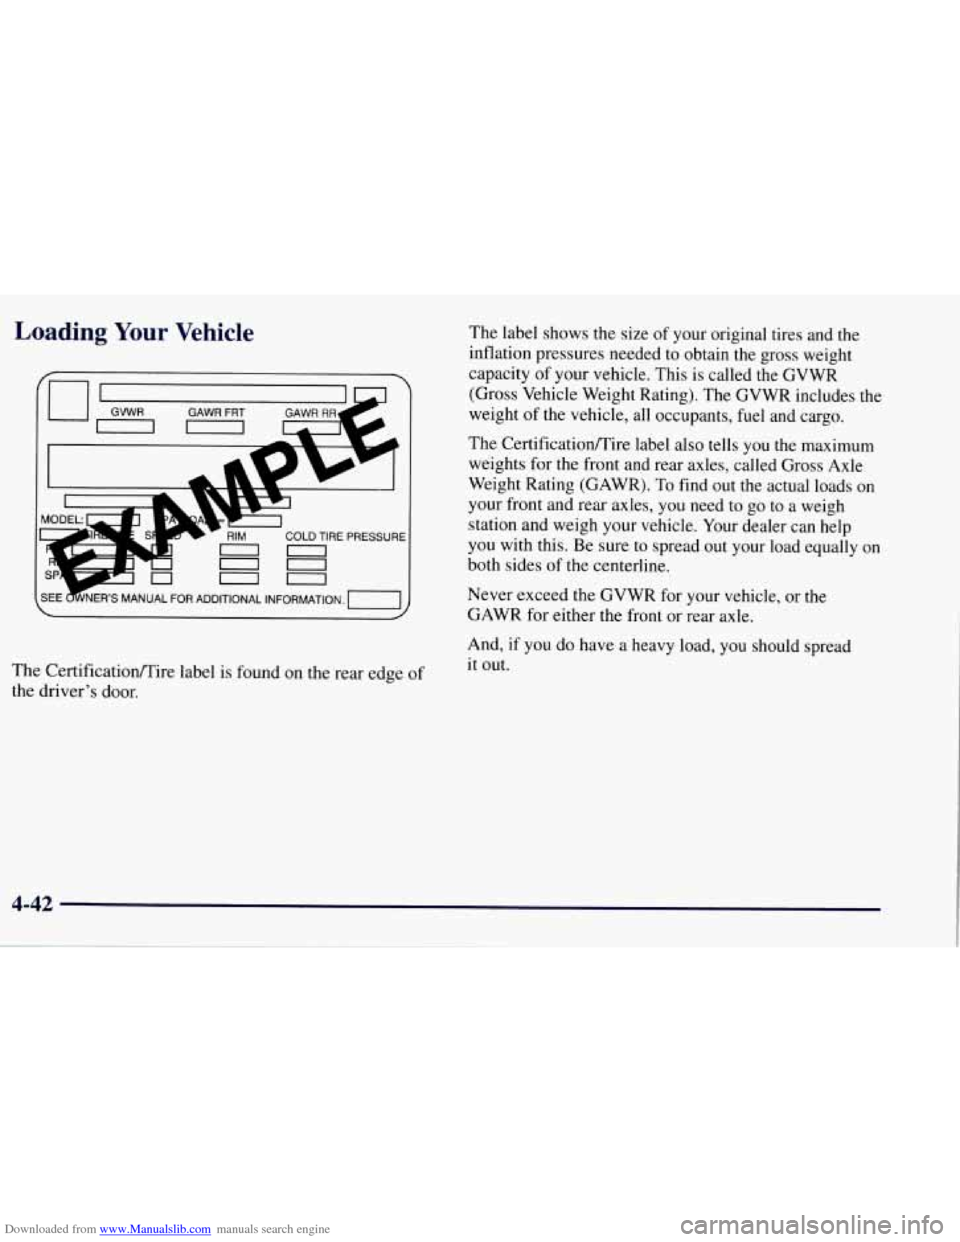
The Certificatiomire label is found on the rear edge of
the driver's door. The
label shows the size of your original tires and the
inflation pressures needed to obtain the gross weight
capacity of your vehicle. This is called the GVWR
(Gross Vehicle Weight Rating). The GVWR includes the
weight
of the vehicle, all occupants, fuel and cargo.
The Certificatioflire label also tells you
the maximum
weights for the front and rear axles, called Gross Axle
Weight Rating (GAWR). To find out the actual loads on
your front and rear axles, you need to go to a weigh
station and weigh your vehicle. Your dealer can help
you with this. Be sure to spread out your load equally on
both sides
of the centerline.
Never exceed the GVWR for your vehicle, or the
GAWR for either the front or rear axle.
And, if
you do have a heavy load, you should spread
it out.
4-42
Page 224 of 433

Downloaded from www.Manualslib.com manuals search engine If You Do Decide To Pull A Trailer
If you do, here are some important points:
0
0
0
0
0
There are many different laws, including speed limit
restrictions, having to do with trailering. Make sure
your rig will be legal,
not only where you live but
also where you’ll be driving. A good source for this
information can be state or provincial police.
Consider using a sway control if your trailer will
weigh less than the capacity stamped on your step
bumper. You should always use a sway control if
your trailer will weigh more than the capacity
stamped on your step bumper. You can ask a hitch
dealer about sway controls.
Don’t tow a trailer at all during the first
500 miles
(800 km) your new vehicle is driven. Your engine,
axle or other parts could be damaged.
Then, during the first
500 miles (800 km) that you
tow a trailer, don’t drive over
50 mph (80 kmh) and
don’t make starts at
full throttle. This helps your
engine and other parts of your vehicle wear in at the
heavier loads.
If you have an automatic transmission, you can tow
in OVERDRIVE
(@). You may want to shift the
transmission to THIRD
(3) or, if necessary, a lower
gear selection
if the transmission shifts too often
(e.g., under heavy loads and/or hilly conditions). Three important
considerations have to do with weight:
the weight of the trailer,
0 the weight of the trailer tongue
0 and the weight on your vehicle’s tires.
Weight of the Trailer
How heavy can a trailer safely be?
It depends on how
you plan to use your rig. For
example, speed, altitude, road grades, outside
temperature and how much your vehicle is used to pull a
trailer are all important. And, it can also depend on any
special equipment that you have on your vehicle.
Use the following chart to determine how much your vehicle
can weigh, based upon your vehicle model and options.
Maximum trailer weight is calculated assuming the
driver and
one passenger are in the tow vehicle and it
has all the required trailering equipment. The weight
of
additional optional equipment, passengers and cargo in
the tow vehicle must be subtracted from the maximum
trailer weight.
Above the
2,000 lbs. (908 kg) trailer rating, the engine
oil cooler is required on
C/K-1500 and C/K-2500
models. Refer to the Trailering Guide for oil
cooler recommendations.
4-45
Page 227 of 433

Downloaded from www.Manualslib.com manuals search engine You can ask your dealer for our trailering information or
advice, or you can write
us at the address listed in your
Warranty and Owner Assistance Information Booklet.
In Canada, write to:
General Motors of Canada Limited
Customer Communication Centre
1908 Colonel Sam Drive
Oshawa, Ontario
LlH 8P7
Weight of the Trailer Tongue
The tongue load (A) of any trailer is an important
weight
to measure because it affects the total or gross
weight of your vehicle. The Gross Vehicle Weight
(GVW) includes the curb weight of the vehicle, any
cargo
you may carry in it, and the people who will be
riding in the vehicle. And if you will tow a trailer, you
must add the tongue load to the GVW because your
vehicle will be carrying that weight, too. See “Loading
Your Vehicle” in the Index for more information about
your vehicle’s maximum load capacity.
B
If you’re using a weight-carrying hitch, the trailer
tongue (A) should weigh
10 percent of the total loaded
trailer weight
(B). If you’re using a weight-distributing
hitch, the trailer tongue
(A) should weigh 12 percent of
the total loaded trailer weight
(B).
After you’ve loaded your trailer, weigh the trailer and
then the tongue, separately, to see if
the weights are
proper. If they aren’t, you may be able to get them right
simply by moving some items around in the trailer.
Page 228 of 433

Downloaded from www.Manualslib.com manuals search engine Total Weight on Your Vehicle’s Tires
Be sure your vehicle’s tires are inflated to the upper
limit for cold tires. You’ll find these numbers on the
Certification label at the rear edge of the driver’s door or
see “Tire Loading’’ in the Index. Then be sure you don’t
go over the GVW limit for your vehicle, including the
weight of the trailer tongue.
Hitches
It’s important to have the correct hitch equipment.
Crosswinds, large trucks going by and rough roads are
a
few reasons why you’ll need the right hitch. Here are
some rules to follow:
If you use a step-bumper hitch, your bumper could
be damaged in sharp turns. Make sure you have
ample room when turning to avoid contact between
the trailer and the bumper.
If you’ll be pulling a trailer that, when loaded, will
weigh more than the capacity stamped on your step
bumper, be sure to use a properly mounted,
weight-distributing hitch and sway control of the
proper size. This equipment is very important for
proper vehicle loading and good handling when
you’re driving.
Will you have to make any holes in the body of your
vehicle when you install a trailer hitch?
If you do, then be sure to seal the holes later when
you remove the hitch. If you don’t seal them, deadly
carbon monoxide (CO) from your exhaust can get
into your vehicle (see “Carbon Monoxide”
in the
Index). Dirt and water can, too.
Safety Chains
You should always attach chains between your vehicle
and your trailer. Cross the safety chains under the tongue
of the trailer so that the tongue will not drop to the road
if
it becomes separated from the hitch. Instructions
about safety chains may be provided
by the hitch
manufacturer or
by the trailer manufacturer. Follow the
manufacturer’s recommendation for attaching safety
chains and do not attach them to the bumper. Always
leave just enough slack
so you can turn with your rig.
And, never allow safety chains to drag
on the ground.
4-49
Page 294 of 433

Downloaded from www.Manualslib.com manuals search engine When to Add Oil
If the oil is at or below the ADD mark, then you’ll need
to add at least one quart of oil. But you must use the
right kind. This part explains what kind
of oil to use. For
crankcase capacity, see “Capacities and Specifications”
in the Index.
NOTICE:
Don’t add too much oil. If your engine has so
much oil that the oil level gets above the upper
mark that
shows the proper operating range,
your engine could be damaged.
The engine oil fill cap on the “VORTEC” 5700 is
located on the driver’s side engine valve cover. The
engine oil fill cap on the “VORTEC”
7400 is located on
the front
of the engine, near the radiator.
Be sure to fill it enough to put the level somewhere in
the proper operating range. Push the dipstick all the way
back in when you’re through.
What Kind of Oil to Use
Oils recommended for your vehicle can be identified by
looking for the “Starburst” symbol. This symbol
indicates that the oil has been certified by the American
Petroleum Institute (API).
Do not use any oil which
does not carry this Starburst symbol.
If you change your own oil,
be sure you use oil that has
the Starburst symbol
on the
front of the oil container.
If you have your oil changed for you, be sure the oil put
into your engine is American Petroleum Institute
certified for gasoline engines.
You should also use the proper viscosity oil for your
vehicle, as shown in the following chart:
6-15