Page 227 of 386

Downloaded from www.Manualslib.com manuals search engine I
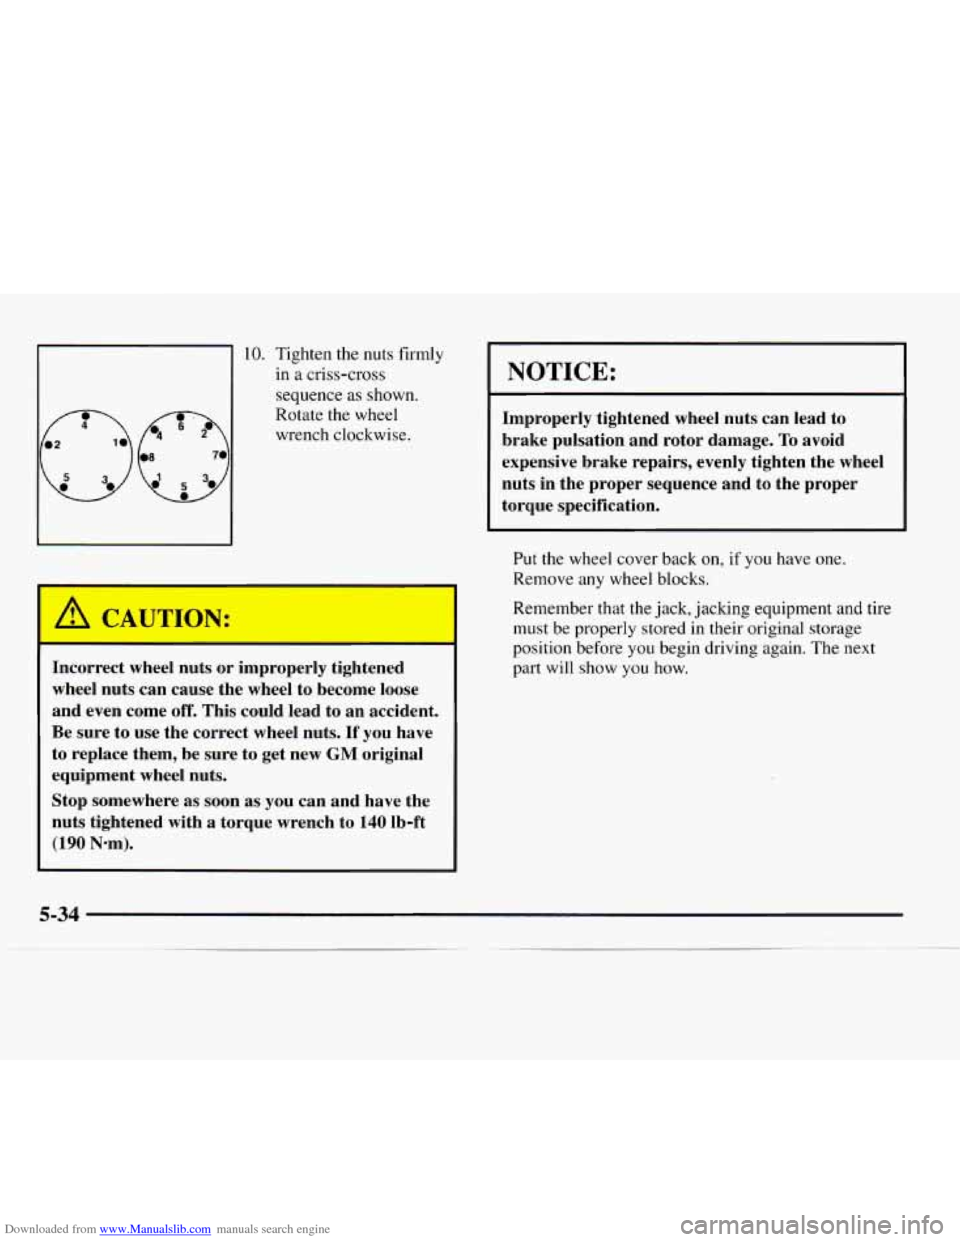
10. Tighten the nuts firmly in
a criss-cross
sequence
as shown.
(f3, e
Rotate the wheel
wrench clockwise.
A CA "TION:
I
Incorrect wheel nuts or improperly tightened
wheel nuts can cause the wheel to become loose
and even come
off. This could lead to an accident.
Be sure to use the correct wheel nuts.
If you have
to replace them, be sure to get new
GM original
equipment wheel nuts.
Stop somewhere as soon as you can and have the
nuts tightened with
a torque wrench to 140 Ib-ft
(190 N*m).
NOTICE:
Improperly tightened wheel nuts can lead to
brake pulsation and rotor damage.
To avoid
expensive brake repairs, evenly tighten the wheel
nuts in the proper sequence and to the proper
torque specification.
Put the wheel cover back on, if you have one.
Remove
any wheel blocks.
Remember that the jack, jacking equipment and tire
must be properly stored in their original storage
position before you begin driving again. The next
part will show you how.
5-34
Page 228 of 386
Downloaded from www.Manualslib.com manuals search engine Storing a Flat or Spare Tire and Tools
-m
Storing a jack, a tire or other equipment in the
passenger compartment
of the vehicle could
cause injury. In
a sudden stop or collision, loose
equipment could strike someone. Store all these
in the proper place.
1. Put the tire on the ground at the rear of the vehicle,
with the valve stem pointed down.
2. Pull the retaining bar through the center of the
wheel, making sure
it is properly attached.
Page 229 of 386
Downloaded from www.Manualslib.com manuals search engine 3. Pull the wheel toward the rear of the vehicle keep the
cable tight. 4. Attach the ratchet, with the UP side facing you, to
the extension.
5-36
Page 230 of 386

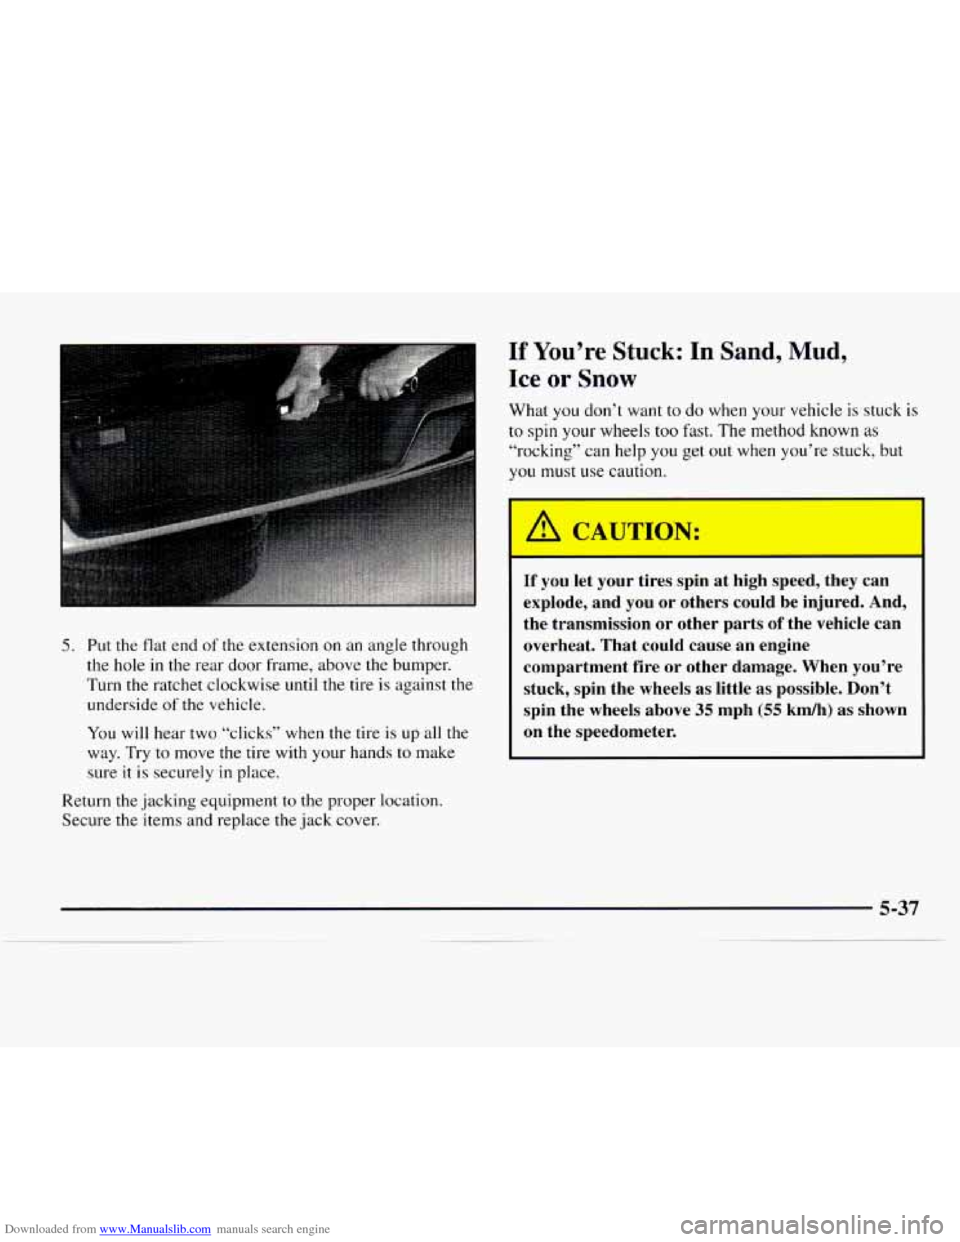
Downloaded from www.Manualslib.com manuals search engine 5. Put the flat end of the extension on an angle through
the hole in the rear door frame, above the bumper.
Turn the ratchet clockwise until the tire is against the
underside
of the vehicle.
You will hear two “clicks” when the tire is up all the
way. Try to move the tire with your hands to make
sure
it is securely in place.
Return the jacking equipment to the proper location.
Secure the items and replace the jack cover.
If You’re Stuck: In Sand, Mud,
Ice or Snow
What you don’t want to do when your vehicle is stuck is
to spin your wheels too fast. The method known as
“rocking” can help you get out when you’re stuck, but
you
must use caution.
I
A CAUTION:
If you let your tires spin at high speed, they can
explode, and you or others could be injured. And,
the transmission
or other parts of the vehicle can
overheat. That could cause an engine
compartment fire or other damage. When you’re
stuck, spin the wheels
as little as possible. Don’t
spin the wheels above
35 mph (55 kmk) as shown
on the speedometer.
Page 231 of 386
Downloaded from www.Manualslib.com manuals search engine NOTICE:
Spinning your wheels can destroy parts of your
vehicle as
well as the tires. If you spin the wheels
too fast while shifting
your transmission back
and forth, you can destroy your transmission.
For information about using tire chains on your vehicle,
see “Tire Chains” in the Index.
Rocking Your Vehicle To Get It Out
First, turn your steering wheel left and right. That will
clear the area around your front wheels. Then shift back
and forth between REVERSE (R) and a forward gear,
spinning
the wheels as little as possible. Release the
accelerator pedal while you shift, and press lightly
on
the accelerator pedal when the transmission is in gear.
If that doesn’t get you out after a few tries,
you may
need to be towed out. If you do need
to be towed out,
see “Towing Your Vehicle” in the Index.
Page 234 of 386

Downloaded from www.Manualslib.com manuals search engine Section 6 Service and Appearance Care
Here you will find information about the care of your vehicle. This section begins with service and fuel information,
and then it shows how to check important fluid and lubricant levels. There
is also technical information about your
vehicle, and
a part devoted to its appearance care.
6-2
6-3
6-5
6-5
6-7
6-1 1
6-12 6-17
6-18
6-22
6-22
6-25
6-26 6-26
6-27
6-28 6-32 Service
Fuel (Gasoline Engine)
Fuels in Foreign Countries
Filling Your Tank
Checking Things Under the Hood
Noise Control System
Engine Oil (Gasoline Engine)
Air Cleaner (Gasoline Engines)
Automatic Transmission Fluid
Rear Axle
Engine Coolant Radiator Pressure Cap
Thermostat Power Steering Fluid
Windshield Washer Fluid
Brakes
Battery 6-32
6-32
6-40
6-4
1
6-49
6-50
6-54
6-55
6-55
6-55
6-56
6-57
6-5 8
6-59
6-63
6-66
6-67 Bulb Replacement
Halogen Bulbs
Windshield Wiper Blade Replacement
Tires Appearance Care
Cleaning the Inside
of Your Vehicle
Cleaning the Outside of Your Vehicle
Cleaning Aluminum Wheels
(If Equipped)
Cleaning Tires Sheet Metal Damage
Finish Damage
Appearance Care Materials Chart
Vehicle Identification Number (VIN)
Electrical System
Capacities and Specifications
Air Conditioning Refrigerants
Lamp and Bulb Data
Page 264 of 386

Downloaded from www.Manualslib.com manuals search engine Some driving conditions or climates may cause a brake
squeal when the brakes are first applied or lightly
applied. This does
not mean something is wrong with
your brakes.
Properly torqued wheel
nuts are necessary to help
prevent brake pulsation. When tires are rotated, inspect
brake pads for wear and evenly torque wheel nuts in the
proper sequence to
GM specifications.
Your rear drum brakes don’t have wear indicators, but
if you ever hear a rear brake rubbing noise, have the
rear brake linings inspected. Also, the rear brake drums
should be removed and inspected each time the tires
are removed for rotation or changing. When you have
the front brake pads replaced, have the rear brakes
inspected,
too.
Brake linings should always be replaced as complete
axle sets.
See “Brake System Inspection” in Section
7 of this
manual under Part
C “Periodic Maintenance
Inspections”.
Brake Pedal Travel
See your dealer if the brake pedal does not return to
normal height, or if there is a rapid increase in pedal
travel. This could be
a sign of brake trouble.
Brake Adjustment
Every time you make a brake stop, your disc brakes
adjust for wear.
If your brake pedal goes down farther than normal, your
rear drum brakes may need adjustment. Adjust them by
backing up and firmly applying the brakes a few times.
Replacing Brake System Parts
The braking system on a modern vehicle is complex.
Its many parts have to be
of top quality and work well
together if the vehicle is to have really good braking.
Your vehicle was designed and tested with top-quality
GM brake parts. When you replace parts of your braking
system
-- for example, when your brake linings wear
down and you have
to have new ones put in -- be sure
you get new approved
GM replacement parts. If you
don’t, your brakes may no longer work properly. For
example,
if someone puts in brake linings that are wrong
for your vehicle, the balance between your front and
rear brakes can change
-- for the worse. The braking
performance you’ve come to expect can change in many
other ways
if someone puts in the wrong replacement
brake parts.
Page 276 of 386

Downloaded from www.Manualslib.com manuals search engine Tire Inspection and Rotation
Tires should be rotated every 6,000 to 8,000 miles
(10 000 to 13 000 km). Any time you notice unusual
wear, rotate your tires as soon as possible and check
wheel alignment. Also check for damaged tires or
wheels. See “When It’s Time for New Tires” and
“Wheel Replacement” later in
this section for more
information. If your vehicle has dual rear wheels, also
see “Dual Tire Operation” later in this section.
The purpose of regular rotation is to achieve more
uniform wear for
all tires on the vehicle. The first
rotation is the most important. See “Scheduled
Maintenance Services’’
in the Index for scheduled
rotation intervals.
I FRT FRT
If your vehicle has single rear wheels, always use one of
the correct rotation patterns shown here when rotating
your tires.
If your vehicle has dual rear wheels, always use one
of
the correct rotation patterns shown here when rotating
your tires.
When you install dual wheels, be sure the vent holes in
the inner and outer wheels on each side are lined
up.