1997 CHEVROLET CORVETTE trunk release
[x] Cancel search: trunk releasePage 6 of 356
Downloaded from www.Manualslib.com manuals search engine Supplement to the 1997 Chevrolet Corvette Owner’s Manual
This text under “Remote HatchlTrunk Lid Release ”
may replace the manual release cable information
located
in Section 2 of your Owner’s Manual.
Locate the manual release cables
in your vehicle. If they
are located in the slots
of the bottom of the latch trim
covers (underneath the center storage compartment
in
the trunk area), refer to page 2-14 in your Owner’s
Manual.’
If not, follow the. directions listed here.
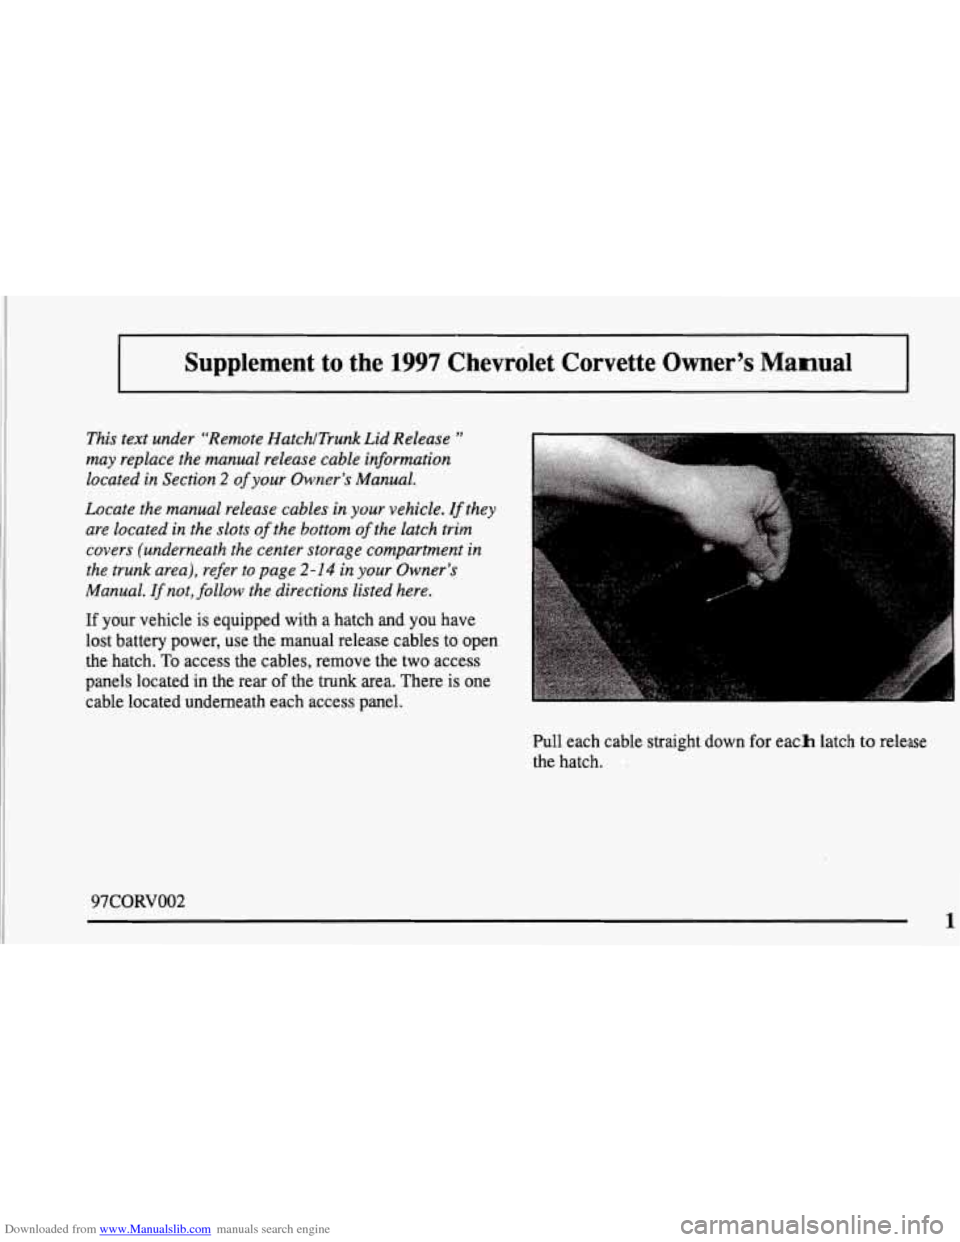
If your vehicle is equipped with a hatch and you have
lost battery power, use the manual release cables to open
the hatch.
To access the cables, remove the two access
panels located in the rear
of the trunk area. There is one
cable located underneath each access panel.
Pull each cable straight down
for each latch to release
the hatch.
97CORVOO2
1
Page 63 of 356
Downloaded from www.Manualslib.com manuals search engine Remote Hatch Release
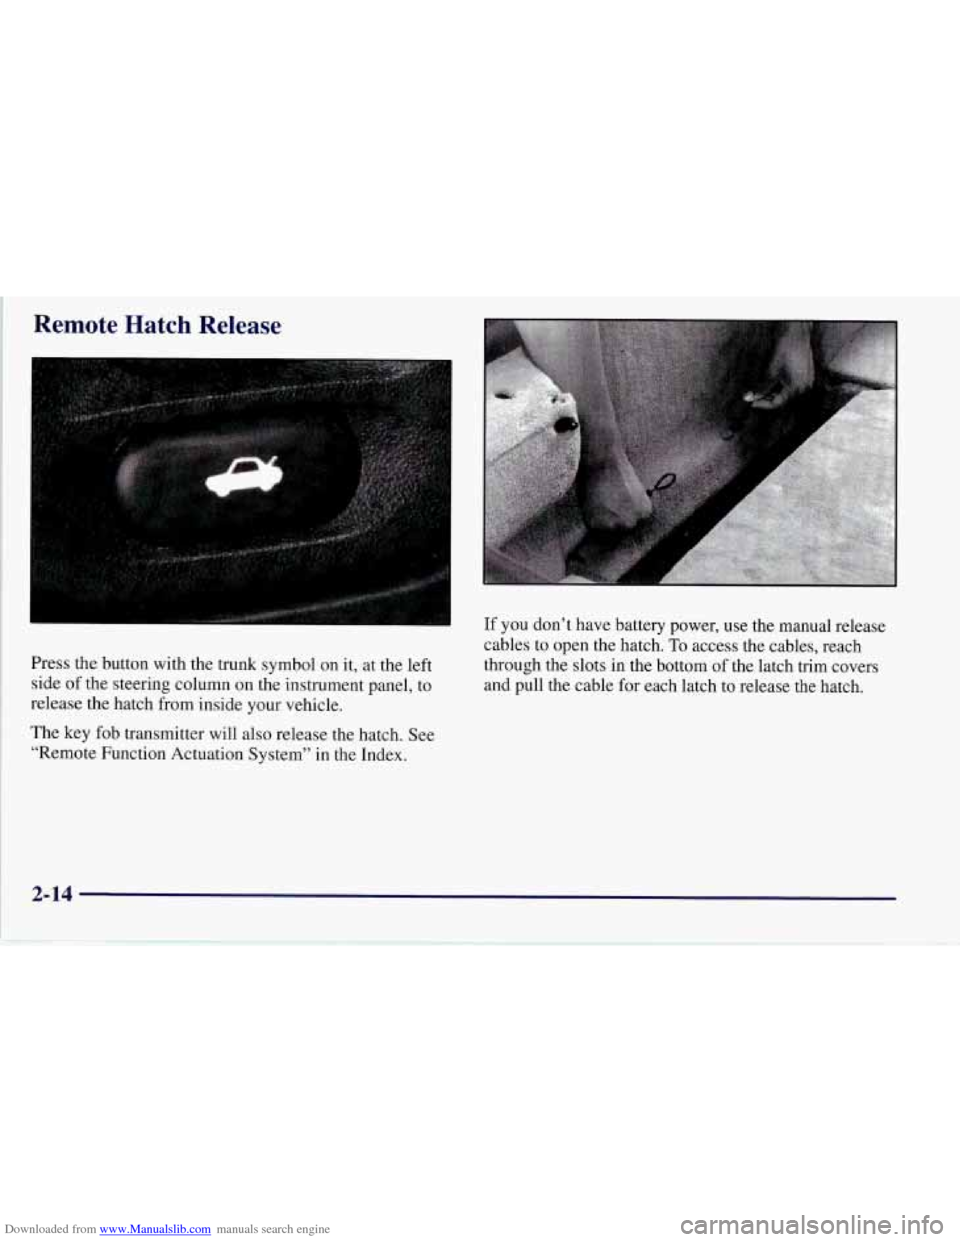
Press the’ button with the trunk symbol on it, at the left
side of the steering column on the instrument panel, to
release the hatch from inside your vehicle.
The key fob transmitter will also release the hatch. See
“Remote Function Actuation System” in the Index. If you
don’t have battery power, use the manual release
cables to open the hatch. To access the cables, reach
through the slots in the bottom of the latch trim covers
and pull the cable for each latch to release the hatch.
2-14
Page 171 of 356
Downloaded from www.Manualslib.com manuals search engine changer except the EJECT button for ejecting the CD
magazine.
PREV (1): Press this button or the SEEK left arrow to
go to the previous track if the current selection has been
playing for less than eight seconds.
If the PREV button
is pressed and the current selection has been playing for
more than eight seconds, it will go to the beginning of
the current selection. If you hold or press this button
more than once, the player will continue moving back
through the disc. The sound will mute while seeking.
PROG (2): Press this button to select a disc. The disc
number and track number will be displayed.
NEXT (3): Press this button or the SEEK right arrow to
go to the next track. If you hold the button
or press it
more than once, the player will continue moving
forward through the disc. The sound will mute while
seeking.
REV (4): Press and hold this button to reverse quickly
through a track selection. Release it to resume playing.
FWD (6): Press and hold this button to advance quickly
through a track selection. Release
it to resume playing.
SEEK: Press the right arrow to seek to the next
selection on the
CD. Press the left mow to search for
the previous selection on the CD. The sound will mute
while seeking.
SCAN: When you press SCAN while playing a CD, you.
will hear the first few seconds of each disc. Press SCAN
again to stop on
a CD. The CD will mute while scanning
and SCAN will appear on the display.
P.SCAN: Press this button to hear the tracks in random,
rather than sequential, order. RANDOM will appear on
the display. Press P.SCAN again to turn off random play.
TAPE AUX: Press this button if you have a disc loaded
in the changer and the radio is turned on, to play a
compact disc. Press AM-FM to return
to the radio when
a compact disc is playing. Press TAPE AUX to switch
between the tape and compact disc if both are loaded.
To eject the disc holder in the trunk mounted CD
changer, slide the CD changer door all the way open and
the disc holder will automatically eject.
If your vehicle is equipped with the AM-FM Stereo with
CD Player and Automatic Tone Control, the following
buttons are used for the trunk mounted
CD changer
except the EJECT button for ejecting the
CD magazine.
PREV (1): Press this button or the SEEK left arrow to
go to the previous track if the current selection has been
playing for less than eight seconds. If the PREV button
is pressed and the current selection has been playing
for
more than eight seconds, it will go to the beginning of
3-24
Page 172 of 356
Downloaded from www.Manualslib.com manuals search engine the current selection. If you hold or press this button
more than once, the player will continue moving back
through the disc. The sound will mute while seeking.
RDM (2): Press this button to hear the tracks in random,
rather than sequential, order.
RANDOM will appear on
the display. Press
RDM again to turn off random play.
NEXT (3): Press this button or the SEEK right arrow
to go to the next track.
If you hold the button or press
it more than once, the player will continue moving
forward through the disc. The sound will mute
while seeking.
REV (4): Press and hold this button to reverse quickly
through a track selection. Release it to resume playing.
FWD (6): Press and hold this button to advance quickly
through a track selection. Release it to resume playing.
SEEK: Press the right arrow to seek to the next .
selection on the CD. Press the left arrow to search for
the previous selection on the CD. The sound will mute
while seeking.
SCAN: When you press SCAN while playing a CD, you
will hear the first few seconds of each disc. Press SCAN
again to stop on a CD. The CD will mute while scanning
and SCAN will appear on the display.
P. SCAN: Press this button to hear the tracks in random,
rather than sequential, order. RANDOM will appear on
the display. Press P.SCAN again to turn
off random play.
CD AUX: Press this button if you have a disc loaded in
the changer and the radio is turned on, to play a compact
disc. Press
AM-FM to return to the radio when a compact
disc is playing. Press CD AUX to switch between the CD
player and compact disc if both are loaded.
To eject the disc holder in the trunk mounted CD
changer, slide the CD changer door all the way open
and the disc holder will automatically eject.
Compact Disc Changer Errors
If an error occurs while trying to play a CD in the
compact disc changer, the following conditions may
have caused the error:
The road is too rough. The disc should play when
the road is smoother.
The disc is dirty, scratched, wet or loaded label
side up.
The air is very humid. If so, wait about an hour
and try again.
3-25
Page 300 of 356
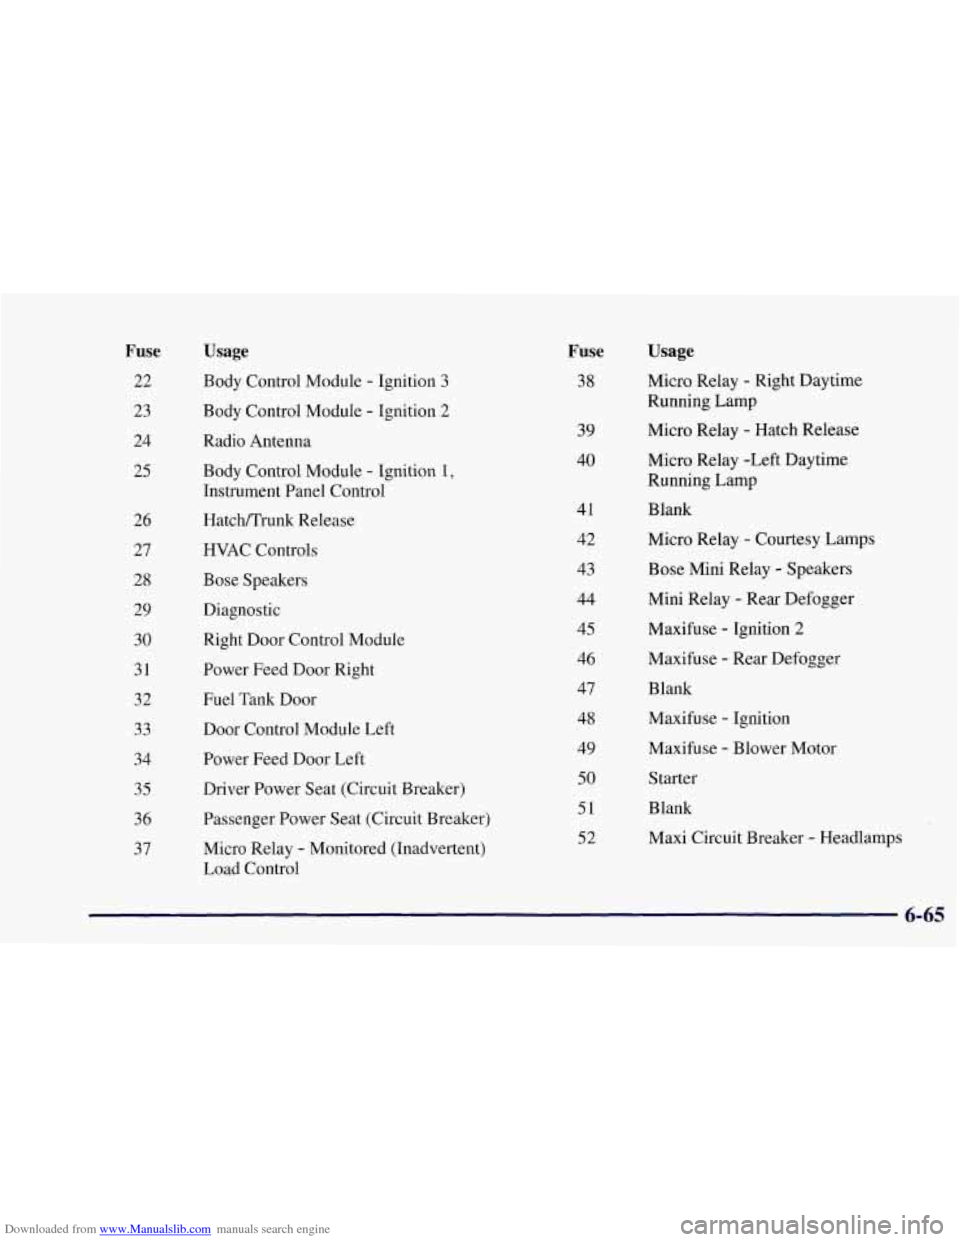
Downloaded from www.Manualslib.com manuals search engine Fuse
22
23
24
25
26
27
28
29
30
31
32
33
34
35 36
37
Usage
Body Control Module - Ignition 3
Body Control Module - Ignition 2
Radio Antenna
Body Control Module
- Ignition I,
Instrument Panel Control
Hatch/Trunk Release
HVAC Controls
Bose Speakers
Diagnostic
Right Door Control Module Power Feed Door Right
Fuel Tank Door
Door Control Module Left
Power Feed Door Left
Driver Power Seat (Circuit Breaker)
Passenger Power Seat (Circuit Breaker)
Micro Relay
- Monitored (Inadvertent)
Load Control 41
42
43
44
45
46
47
48
49
50
51
52
39
40
Fuse Usage
38 Micro Relay - Right Daytime
Running Lamp
Micro Relay
- Hatch Release
Micro Relay -Left Daytime
Running Lamp
Blank
Micro Relay
- Courtesy Lamps
Bose Mini Relay
- Speakers
Mini Relay
- Rear Defogger
Maxifuse
- Ignition 2
Maxifuse - Rear Defogger
Blank
Maxifuse
- Ignition
Maxifuse
- Blower Motor
Starter
Blank Maxi Circuit Breaker
- Headlamps
6-65