1997 BUICK PARK AVENUE stop start
[x] Cancel search: stop startPage 78 of 420

This device complies with Part 15 of the FCC Rules.
Operation
is subject to the following two conditions:
(1) ths device may not cause harmful interference,
and
(2) this device must accept any interference
received, including interference that may cause
undesired operation.
This device complies with
RSS-210 of Industry and
Science Canada. Operation is subject to the following
two conditions:
(1) this device may not cause
interference, and
(2) this device must accept any
interference received, including interference that may cause undesired operation of the device.
Changes or modifications to this system by other than
an authorized service facility could void authorization
to use this equipment.
When the PASS-Key
III system senses that someone is
using the wrong key, it shuts down the vehicle’s starter
and fuel systems. The starter will not work and fuel
will stop being delivered to the engine. Anyone using
a trial-and-error method to start the vehicle will be
discouraged because of the high number of electrical
key codes. If
when trying to start the vehicle, the engine does not
start and the
SECURITY light comes on, the key may
have a damaged transponder. Turn the ignition off
and
try again.
If the engine still does not start, and the key appears to
be undamaged, try another ignition key. At this time,
you may also want to check the fuse (see “Fuses and
Circuit Breakers” in the Index). If the engine still does
not start with the other key, your vehicle needs service.
If your vehicle does start, the first key may be faulty.
See your Buick dealer or a locksmith who can service
the PASS-Key I11 to have a new key made.
It is possible for the PASS-Key
111 decoder to learn the
transponder value of
a new or replacement key. Up to
ten additional keys may be programmed for the vehicle.
This procedure is for learning additional keys only. If all
the currently programmed keys are lost or do not
operate, you must see your Buick dealer or a locksmith
who can service PASS-Key
I11 to have keys made and
programmed to the system.
See your dealer or a locksmith who can service
PASS-Key
I11 to get a new key blank that is a cut
exactly as a current black colored driver’s key that
operates the system.
Do not use a gray colored valet
key for this procedure.
2-18
~
ProCarManuals.com
Page 79 of 420

To program the new key:
1, Insert the current driver’s key (black in color) in the
ignition and start the engine. If the engine will not
start, see your dealer for service.
2. After the engine has started, turn the key to OFF and
remove the key.
3. Insert the key to be programmed and turn it to RUN
within ten seconds of removing the previous key.
4. The SECURITY telltale light will turn off once the
key has been programmed. It may not be apparent
that the SECURITY light went on due to how
quickly the key is programmed.
5. Repeat Steps 1 through 4 if additional keys are to
be programmed.
If you are ever driving and the SECURITY light comes
on and stays on, you will be able to restart your engine if
you turn it
off. Your PASS-Key I11 system, however, is
not working properly and must be serviced by your
Buick dealer. Your vehicle is not protected by the
PASS-Key
I11 system at this time.
A .- . , . ---- cle “Break-In”
NOTICE:
Your modern Buick doesn’t need an elaborate
“break-in.” But it will perform better
in the long
run if you follow these guidelines:
Don’t drive at any one speed -- fast or
slow
-- for the first 500 miles (805 km).
Don’t make full-throttle starts.
200 miles (322 km) or so. During this time
your new brake linings aren’t yet broken
in. Hard stops with new linings can mean
premature wear and earlier replacement.
Follow this breaking-in guideline every
time you get new brake linings.
See “Towing a Trailer” in the Index for
more information.
0 Avoid making hard stops for the first
0 Don’t tow a trailer during break-in.
ProCarManuals.com
Page 81 of 420
START (E): This position starts your engine. When the
engine starts, release the key. The ignition switch will
return to
RUN for normal driving.
NOTICE:
If your key seems stuck in LOCK and you can’t
turn it, be sure you are using the correct key; if
so, is it all the way in? If it is, then turn the
steering wheel left and right while you turn the
key hard. But turn the key only with your hand.
Using
a tool to force it could break the key or the
ignition switch.
If none of this works, then your
vehicle needs service.
Key Reminder Warning
If you leave your key in the ignition, in the OFF
position, you will hear a warning chime when you open
the driver’s door.
Retained Accessory Power
After you turn your ignition off and even remove the
key, you will still have electrical power to such
accessories as the radio and power windows for up to
10 minutes. But if you open a door, power is shut off.
Starting Your Engine
Move your shift lever to PARK (P) or NEUTRAL (N).
Your engine won’t start in any other position -- that’s a
safety feature. To restart when you’re already moving,
use NEUTRAL (N) only.
NOTICE:
Don’t try to shift to PARK (P) if your Buick is
moving.
If you do, you could damage the
transaxle. Shift to
PARK (P) only when your
vehicle is stopped.
1. Without pushing the accelerator pedal, turn your
ignition key to START. When the engine starts, let
go of the key. The idle speed will go down as your
engine gets warm.
2-21
ProCarManuals.com
Page 82 of 420
NOTICE:
I
Holding your key in START for longer than
15 seconds at a time will cause your battery to be
drained much sooner. And the excessive heat can
damage your starter motor.
2. If it doesn’t start right away, hold your key in
START for about three to five seconds at a time until
your engine starts. Wait about
15 seconds between
each try to help avoid draining your battery.
3. If your engine still won’t start (or starts but then
stops), it could be flooded with too much gasoline.
Try pushing your accelerator pedal all the way to the
floor and holding it there as you hold the key in
START for about three seconds. If the vehicle starts
briefly but then stops again, do the same thing, but
this time keep the pedal down for five or six seconds.
This clears
the extra gasoline from the engine.
After waiting about
15 seconds, repeat the normal
starting procedure.
NOTICE:
Your engine is designed to work with the
electronics in your vehicle.
If you add electrical
parts or accessories, you could change the way
the engine operates. Before adding electrical
equipment, check with your dealer.
If you don’t,
your engine might not perform properly.
If you ever have to have your vehicle towed, see
the part of this manual that tells how to
do it
without damaging your vehicle. See “Towing
Your Vehicle” in the Index.
Engine Coolant Heater (Option)
In very cold weather, 0°F (- 1 8 O C) or colder, the engine
coolant heater can help. You’ll get easier starting and
better fuel economy during engine warm-up. Usually,
the coolant heater should be plugged in a minimum
of
four hours prior to starting your vehicle.
2-22
ProCarManuals.com
Page 84 of 420
PARK (P): This locks your front wheels. It’s the best
position to use when you start your engine because your
vehicle can’t move easily.
It is dangerous to get out of your vehicle if the
shift lever is not fully in
PARK (P) with the
~ parking brake firmly set. Your vehicle can roll.
Don’t leave your vehicle when the engine
is
running unless you have to. If you have left the
engine running, the vehicle can move suddenly.
You or others could be injured.
To be sure your
vehicle won’t move, even when you’re on fairly
level ground, always set your parking brake and
move the shift lever to
PARK (P).
See “Shifting Into PARK (P)” in the Index. If
you’re pulling a trailer, see “Towin9: a Trailer” in
I theIndex* I
Ensure the shift lever is fully in PARK (P) range before
starting
the engine. Your Buick has a brake-transaxle
shift interlock.
You have to fully apply your regular
brakes
before you can shift from PARK (P) when the
ignition key is in the
RUN position. If you cannot shift
out of PARK
(P), ease pressure on the shift lever -- push
the shift lever all the way into PARK (P) as you
maintain brake application. Then move the shift lever
into the gear you wish. See “Shifting Out of PARK
(P)”
in the Index.
REVERSE (R): Use this gear to back up.
NOTICE:
Shifting to REVERSE (R) while your vehicle is
moving forward could damage your transaxle. Shift to
REVERSE (R) only after your vehicle
is stopped.
To rock your vehicle back and forth to get out of snow,
ice or sand without damaging your transaxle, see “If
You’re Stuck:
In Sand, Mud, Ice or Snow” in the Index.
2-24
ProCarManuals.com
Page 97 of 420
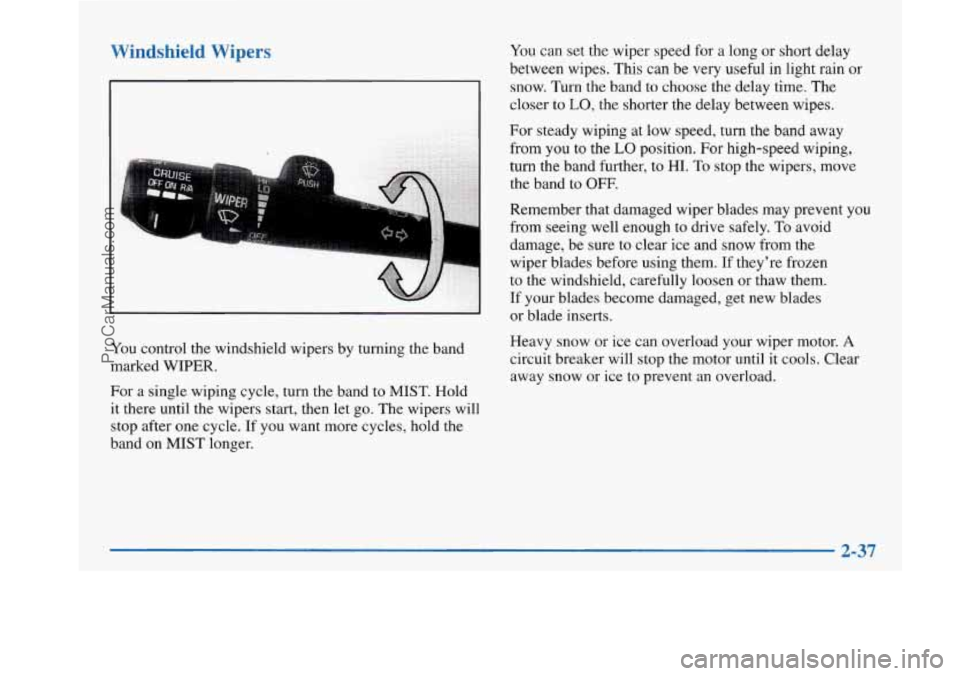
Windshield Wipers You can set the wiper speed for a long or short delay
between wipes. This can be very useful in light rain
or
snow. Turn the band to choose the delay time. The
. .I . . . /, ., . closer to LO, the shorter the delay between wipes. ,. .
You control the windshield wipers by turning the band
marked
WIPER.
For a single wiping cycle, turn the band to MIST. Hold
it there until the wipers start, then let go. The wipers will
stop after one cycle. If you want more cycles, hold the
band on MIST longer. For
steady wiping at low speed, turn the band away
from you to the
LO position. For high-speed wiping,
turn the band further, to HI. To stop the wipers, move
the band to OFF.
Remember that damaged wiper blades may prevent you
from seeing well enough to drive safely.
To avoid
damage, be sure to clear ice and snow from the
wiper blades before using them. If they’re frozen
to the windshield, carefully loosen or thaw them.
If your blades become damaged, get new blades
or blade inserts.
Heavy snow or ice can overload your wiper motor.
A
circuit breaker will stop the motor until it cools. Clear
away snow or ice to prevent an overload.
2-37
ProCarManuals.com
Page 121 of 420
Convenience Net
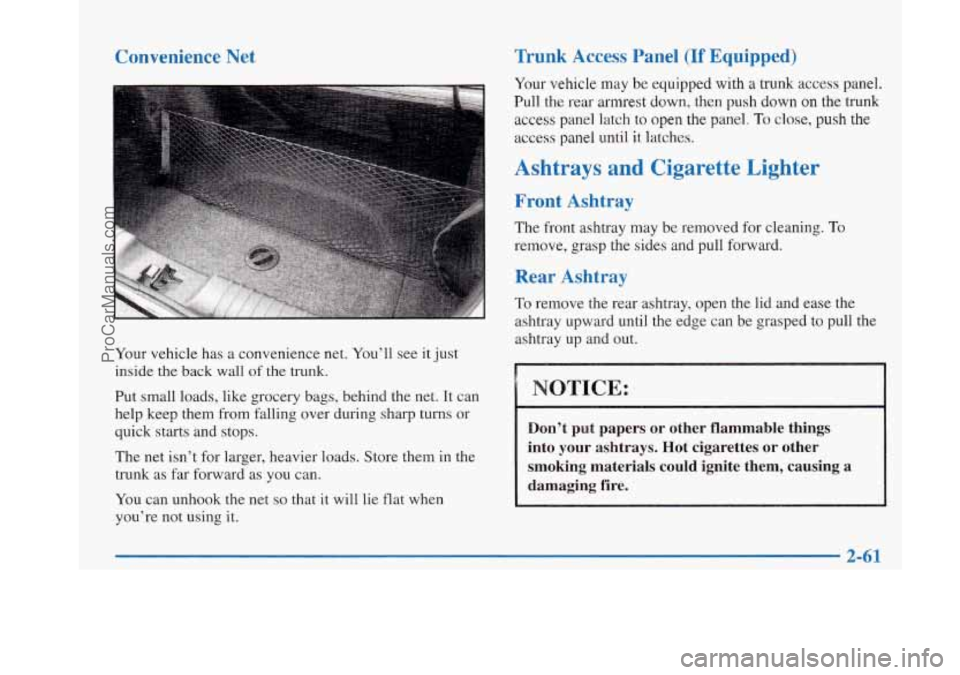
Your vehicle has a convenience net. You’ll see it just
inside the back wall
of the trunk.
Put small loads, like grocery bags, behind the net. It can
help keep them from falling over during sharp turns or
quick starts and stops.
The net isn’t for larger, heavier loads. Store them in the
trunk as far forward as you can.
You can unhook the net
so that it will lie flat when
you’re not using it.
Trunk Access Panel (If Equipped)
Your vehicle may be equipped with a trunk access panel.
Pull the rear armrest down, then push down on the
trunk
access panel latch to open the panel. To close, push the
access panel until it latches.
Ashtrays and Cigarette Lighter
Front Ashtray
The front ashtray may be removed for cleaning. To
remove, grasp the sides and pull forward.
Rear Ashtray
To remove the rear asnrray, open the lid and ease the
ashtray upward until the edge can be grasped to pull the
ashtray up and out.
NOTICE:
Don’t put papers or other flammable things
into your ashtrays. Hot cigarettes or other
smoking materials could ignite them, causing a
damaging fire.
2-61
ProCarManuals.com
Page 125 of 420
It will operate garage doors and gates, or other devices
controlled by radio frequency such as home/office
lighting systems.
The transmitter will learn and transmit the frequencies
of most current transmitters and is powered by your
vehicle’s battery and charging system.
This device complies with Part
15 of the FCC Rules.
Operation is subject to the following two conditions:
(1) This device may not cause harmful interference,
and
(2) This device must accept any interference
received, including interference that may cause
undesired operation.
Programming the Transmitter
Do not use the universal transmitter with any garage
door opener that does not have the “stop and reverse”
safety feature. This includes any garage door opener
model manufactured before April 1, 1982.
Be sure that people and objects are clear of the garage
door
you are programming!
Your vehicle’s engine should be turned off while
programming your transmitter. Follow these steps to
program up to three channels:
1.
2.
3.
4.
If you have previously programmed a universal
transmitter channel, proceed to Step
2. Otherwise,
hold down the two outside buttons on the universal
transmitter until the amber light begins to flash
rapidly (approximately
20 seconds). Then release the
buttons. This procedure initializes the memory and
erases any previous settings for all three channels.
Hold the end of your hand-held transmitter against
the bottom surface of the universal transmitter
so
that you can still see the amber light.
Decide which one of the three channels you want to
program. Using both hands, press the hand-held
transmitter button and the desired button on the
universal transmitter. Continue to hold both buttons
through Step
4.
Hold down both buttons until you see the amber light
on the universal transmitter first flash slowly, then
rapidly. The rapid flashing, which could take up to
90 seconds, indicates that the universal transmitter
has been programmed. Release both buttons once the
light starts
to flash rapidly.
2-65
ProCarManuals.com