1997 BUICK PARK AVENUE ECO mode
[x] Cancel search: ECO modePage 70 of 420

Synchronization
If only the instant alarm button works, the transmitter
needs to be resynchronized to the receiver. Do this by
pressing and holding both the LOCK and
UNLOCK
buttons on the transmitter for about eight seconds; you
must be within range of the vehicle.
Once the transmitter has been resynchronized, the horn
will chirp and the exterior lamps will flash once. The
system should now operate properly.
Theft-Deterrent System
The remote keyless entry transmitter will arm the
theft-deterrent system whenever the doors are
closed and you push the
LOCK button when the
ignition is
OFF. It will disarm the system when you
push UNLOCK.
Personal Choice Features (If Equipped)
-Each remote keyless entry transmitter can be
programmed to the driver’s preference for memory door locks, security feedback, delayed locking and perimeter
lighting. See each feature in the Index. You can also
personalize your comfort control temperature, mode and
fan settings. See “Comfort Controls Personal Choice” in
the Index.
If your vehicle is equipped with the Driver Information
Center (DIC), you can also program these features
through the DIC. See “Driver Information Center” in
the Index.
2-10
ProCarManuals.com
Page 72 of 420

This feature lets the driver delay the actual locking of
the vehicle. When the power door lock switch
is pressed
with the key removed from the ignition and the driver’s
door open, a chime will sound three times to signal that
the lock delay mode is active. When all doors have been
closed, the doors will lock automatically after five
seconds.
If any door is opened before this, the
five-second timer will reset itself once all the doors have
been closed again.
Pressing the door lock switch twice within two seconds
will override this feature.
The delayed locking feature can be turned on or
off for
each remote keyless entry transmitter.
To turn the feature on:
1.
2.
3.
4.
Press and hold the power door lock switch on the door
throughout this procedure.
All the doors will lock.
Press the UNLOCK button on the transmitter to
enter the programming mode. The lock delay is still
off and all doors will remain locked.
Press the UNLOCK button on the transmitter again.
Lock delay is now active and all doors will unlock.
Release the power door lock switch.
If your vehicle is equipped with the Driver Information
Center (DIC),
you can also program these features
through the DIC. See “Driver Information Center” in
the Index.
To
turn this feature off, repeat the above procedure.
Matching Transmitter(s) To Your Vehicle
Each remote keyless entry transmitter is coded to
prevent another transmitter from unlocking your vehicle.
If a transmitter is lost or stolen, a replacement can be
purchased through your dealer. Remember to bring any
remaining transmitters with you when you go to your
dealer. When the dealer matches the replacement
transmitter to your vehicle, any remaining transmitters
must also be matched. Once your dealer has coded the
new transmitter, the lost transmitter will not unlock your
vehicle. Each vehicle can have up to four transmitters
matched to it.
See your dealer to match additional transmitters to
your vehicle.
2-12
ProCarManuals.com
Page 79 of 420

To program the new key:
1, Insert the current driver’s key (black in color) in the
ignition and start the engine. If the engine will not
start, see your dealer for service.
2. After the engine has started, turn the key to OFF and
remove the key.
3. Insert the key to be programmed and turn it to RUN
within ten seconds of removing the previous key.
4. The SECURITY telltale light will turn off once the
key has been programmed. It may not be apparent
that the SECURITY light went on due to how
quickly the key is programmed.
5. Repeat Steps 1 through 4 if additional keys are to
be programmed.
If you are ever driving and the SECURITY light comes
on and stays on, you will be able to restart your engine if
you turn it
off. Your PASS-Key I11 system, however, is
not working properly and must be serviced by your
Buick dealer. Your vehicle is not protected by the
PASS-Key
I11 system at this time.
A .- . , . ---- cle “Break-In”
NOTICE:
Your modern Buick doesn’t need an elaborate
“break-in.” But it will perform better
in the long
run if you follow these guidelines:
Don’t drive at any one speed -- fast or
slow
-- for the first 500 miles (805 km).
Don’t make full-throttle starts.
200 miles (322 km) or so. During this time
your new brake linings aren’t yet broken
in. Hard stops with new linings can mean
premature wear and earlier replacement.
Follow this breaking-in guideline every
time you get new brake linings.
See “Towing a Trailer” in the Index for
more information.
0 Avoid making hard stops for the first
0 Don’t tow a trailer during break-in.
ProCarManuals.com
Page 107 of 420

Theater Dimming
This feature allows for a three to five-second fade out of
the courtesy lamps instead
of immediate turn off.
Delayed Exit Lighting
With this feature, the interior lamps will come on for
25 seconds after you remove the key from the ignition.
This will give you time to find the door pull handle or
lock switches.
Illuminated Entry System
When you open either front door or press the UNLOCK
button on the remote keyless entry transmitter, the
lamps inside your vehicle will turn on. These lamps
will turn
off after about 40 seconds. These lamps will
also turn
off if you start the engine or activate the power
door locks.
Perimeter Lighting
When the UNLOCK button on the Remote Keyless
Entry transmitter is pressed, the daytime running lamps
(high-beams at reduced intensity), parking lamps and
back-up lamps will come on if it is dark enough outside
according to the twilight sentinel. This feature
will only be activated when the security
feedback feature is programmed to be in modes
1, 3 or 5
on the transmitter. Modes 0,2 and 4 do not respond with
exterior lights flashing when unlocking the vehicle
so
perimeter lighting will not be active.
This feature can be prograrnmed'on or off for
each transmitter.
To turn the feature
off
1. Press and hold the door lock switch on the door
throughout this procedure. All doors will lock.
2. Press the instant alarm button on the transmitter to
enter the programming mode. Perimeter lighting
remains on at this time and the horn will chirp
two times.
3. Press the instant alarm button on the key transmitter
again. Perimeter lighting is disabled and the horn
will chirp one time.
4. Release the door lock switch. The perimeter lighting
feature is now off.
NOTE: Pressing the UNLOCK button repeatedly may
cause the back-up lamps to turn on.
2-47
ProCarManuals.com
Page 111 of 420

Press the button at the base of the mirror to turn on the
automatic feature. The button has an indicator light to
show it
is on. Press the button again to turn the
automatic feature
off.
Time Delay
The automatic mirror has a time delay feature which
prevents unnecessary switching from the night back to
the day position. This delay prevents rapid changing
of
the mirror as you drive under lights and through traffic.
Reverse Gear Day Mode
The reverse day mode is another important feature of the
electrochromic mirror. When the shift lever
is placed in
REVERSE (R), the mirror changes to the day mode.
This gives you a bright image in the mirror as you
back up.
Cleaning the Photocells
Use a cotton swab and glass cleaner to clean the
photocells when necessary.
Electrochromic Daymight Rearview Mirror
with Compass
(If Equipped)
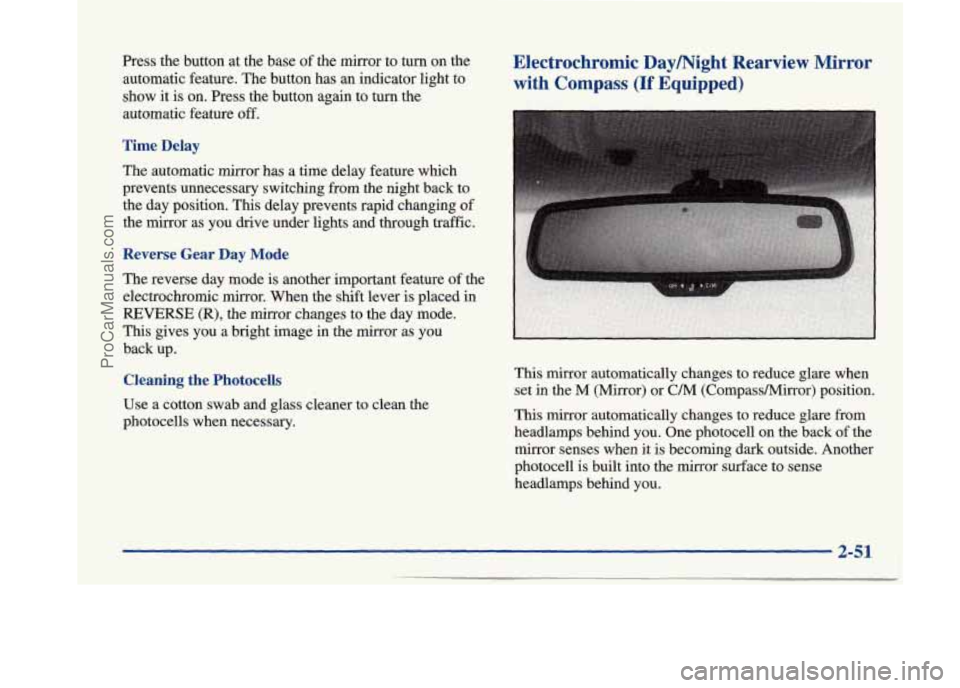
This mirror automatically changes to reduce glare when
set in the
M (Mirror) or C/M (CornpassMirror) position.
This mirror automatically changes to reduce glare from
headlamps behind you. One photocell
on the back of the
mirror senses when it is becoming dark outside. Another
photocell is built into the mirror surface to sense
headlamps behind you.
2-51
ProCarManuals.com
Page 112 of 420

At night, when the glare is too high, the mirror will
gradually darken to reduce glare (this change may
take a
few seconds). The mirror will return to its clear daytime
state when the glare is reduced.
Setting the Mirror
OFF: This setting turns off the dayhight function and
compass. The mirror will stay in the day mode.
M: This turns on the dayhight portion of the mirror to
automatically reduce glare.
C/M: This setting turns on the compass in addition to
the dayhight function. The letter
or letters displayed in
the top right corner of the mirror indicate the direction
in which you are traveling.
Time Delay
This feature prevents rapid changing of the mirror from
the night mode to the day mode as you drive under
lights and through traffic.
Reverse Gear Day Mode
The reverse mode is another important feature of the
electrochromic mirror. When the
shift lever is placed in
REVERSE (R), the mirror changes to the day mode. This
gives you a bright image in the mirror as you back up.
Cleaning the Photocells
Use a cotton swab and glass cleaner to clean the
photocells when necessary.
Compass Calibration
Once the compass is calibrated, it does not need to be
recalibrated as long as the mirror is left in your vehicle
and the vehicle remains in the same geographical zone.
To calibrate the compass:
1. Set the switch on the mirror control to C/M.
2. Turn the vehicle ignition switch on. If the letter C
is not displayed in the mirror compass window, hold
the
CAL switch for more than 10 seconds. To hold
in the
CAL switch, insert a paper clip into the small
hole on the bottom
of the mirror housing. The
display will show a number first, but keep holding
until the letter
C appears.
360-degree circle at less than
5 mph (8 km/h) until
the display reads a compass direction.
3. For
quick calibration, drive the vehicle in a
For normal calibration, drive the vehicle on
your everyday routine, and the compass will
eventually calibrate.
2-52
ProCarManuals.com
Page 125 of 420

It will operate garage doors and gates, or other devices
controlled by radio frequency such as home/office
lighting systems.
The transmitter will learn and transmit the frequencies
of most current transmitters and is powered by your
vehicle’s battery and charging system.
This device complies with Part
15 of the FCC Rules.
Operation is subject to the following two conditions:
(1) This device may not cause harmful interference,
and
(2) This device must accept any interference
received, including interference that may cause
undesired operation.
Programming the Transmitter
Do not use the universal transmitter with any garage
door opener that does not have the “stop and reverse”
safety feature. This includes any garage door opener
model manufactured before April 1, 1982.
Be sure that people and objects are clear of the garage
door
you are programming!
Your vehicle’s engine should be turned off while
programming your transmitter. Follow these steps to
program up to three channels:
1.
2.
3.
4.
If you have previously programmed a universal
transmitter channel, proceed to Step
2. Otherwise,
hold down the two outside buttons on the universal
transmitter until the amber light begins to flash
rapidly (approximately
20 seconds). Then release the
buttons. This procedure initializes the memory and
erases any previous settings for all three channels.
Hold the end of your hand-held transmitter against
the bottom surface of the universal transmitter
so
that you can still see the amber light.
Decide which one of the three channels you want to
program. Using both hands, press the hand-held
transmitter button and the desired button on the
universal transmitter. Continue to hold both buttons
through Step
4.
Hold down both buttons until you see the amber light
on the universal transmitter first flash slowly, then
rapidly. The rapid flashing, which could take up to
90 seconds, indicates that the universal transmitter
has been programmed. Release both buttons once the
light starts
to flash rapidly.
2-65
ProCarManuals.com
Page 146 of 420

ODO/TRIP
When this button is pressed, the display will show the
total mileage, and Trip
1 or Trip 2 miles. Trip 1 and
Trip
2 will display the miles traveled since the last reset.
To reset the trip odometer, press the ODO/TRIP button
until the trip miles are shown in the DIC display, then
press the RESET button. The trip odometer will now
accumulate miles until the next reset.
FUEL INFO
Average Fuel Economy:
Press the FUEL button until
the display shows FUEL ECONOMY AVERAGE.
Average fuel economy is viewed as a long term
approximation of your overall driving and driving
conditions. To learn the average fuel economy from a
new starting point, press the RESET button while the
average fuel economy is displayed in the DIC.
Instantaneous Fuel Economy: Press the FUEL button
until the display shows FUEL ECONOMY INST.
Instantaneous fuel economy varies with your driving
conditions, such as acceleration, braking and the grade
of
the road being traveled. The RESET button does not
function in this mode.
Fuel Range: Press the FUEL button until the display
shows FUEL RANGE. The fuel range will calculate the
remaining distance you can drive without refueling. This
calculation is based on the average fuel economy for the
last
25 miles driven, and the fuel remaining in the fuel
tank. The
RESET button does not function in this mode.
Fuel Used: Press the FUEL button until the display
shows FUEL USED. This display will show you how
much fuel has been used since the last reset. To learn
how much fuel is used from a new starting point, press
the RESET button while the fuel used is displayed in
the DIC.
GAGES
Oil Pressure:
Press the GAGES button until OIL
PRESSURE appears in the display. If there are no
problems detected with the oil pressure, the display will
show OIL PRESSURE NORMAL. If a low oil pressure
condition
is detected, the display will show OIL
PRESSURE LOW. If you see the OIL PRESSURE
LOW message, you could be low on oil or your oil is
not going through the engine properly. See your dealer
for service.
2-86
ProCarManuals.com