Page 116 of 1002

Downloaded from www.Manualslib.com manuals search engine
1 13-22
Cylinder Head Removal and Installation
CYLINDER HEAD REMOVAL AND
~NSTALLATION (M52 TU AND N154
ENGINES)
WARNING -
Due to risk ofpersonal injur)c be sure the engine is cold be-
fore
beqinning the removal procedure.
Cylinder head removal and installation is a time consuming
repair procedure requiring multiple special service tools.
Read the entire procedure before beginning the repair.
This topic includes the following procedures:
* Cylinder head, removing, M52 TU and M54 engines
Cylinder head, installing,
M52 TU and M54 engines
Cylinder head, removing,
M52 TU and M54 engines
Allow engine to cool before beginning this procedure.
- Disconnect negative (-) cable from battery.
CAUTION-
Prior to disconnecting the battery, read the battery discon-
nection cautions in
001 General Cautions and Warnings.
4 Remove left and right interior ventilation ducts (left side
shown):
Release ventilation filter cover latch
(A) and remove cover.
Release plastic locking tab
(6) or release locking tabs on
top of duct (later models).
= Turn duct counterclocltwise to unlock from bullthead and
remove (arrow).
Disconnect electrical harness from hood switch (C).
Release spring lock fastener
(D).
- Slide filter housing away from inner fender to remove.
Removal of right side ventilation
dud
Remove rear bulkhead panel:
Lift off rubber sealing
gasket (arrow)
- Remove 3 mounting clips (A).
Remove 4 retaining screws (6).
Lift off panel.
: is similar
Page 117 of 1002

Downloaded from www.Manualslib.com manuals search engine
- --
Cylinder Head Removal and Installation 1 --
< Remove complete air filter housing assembly with mass air
flow sensor:
Loosen
intalte duct hose clamp (A) at throttle assembly.
Loosen clamp and remove idle control line from intake duct
(B) and disconnect idle speed control valve electrical har-
ness connector.
Disconnect electrical harness connector
(C) from mass air
flow sensor.
Remove air filter housing mounting screw
(D).
Disconnect vent tube (E).
. Loosen air intalte duct clamp (F).
Carefully lifl air filter housing, mass air flow sensor, and in-
take duct hose out of engine bay.
4 Disconnect positive battery cable and remove intake rnani-
fold cover:
Remove protective cover from positive (+)jumper post.
Loosen and remove battery lead mounting nut (A).
Remove lead and push down through intake manifold.
* Remove trim covers (arrows) from fuel injector cover.
Remove cover hold down fasteners and lifl off cover.
4 Worlting above engine, disconnect the following:
Vent line from cylinder head cover. To remove, pinch clips
(arrows).
Electrical harness connector from VANOS solenoid valve
(A).
- Remove oxygen sensors and exhaust manifolds. See 180
Exhaust System.
CAUTION-
Remove oxygen sensors before removing exhaust mani-
fold to prevent damage.
Label oxygen sensor harness connectors so that they
can be reassembled correctly Do not interchange con-
nectors.
NOTE-
Front exhaust manifold must be removed before rear
manifold.
Page 118 of 1002

Downloaded from www.Manualslib.com manuals search engine
. .- -
Cylinder Head Removal and Installation
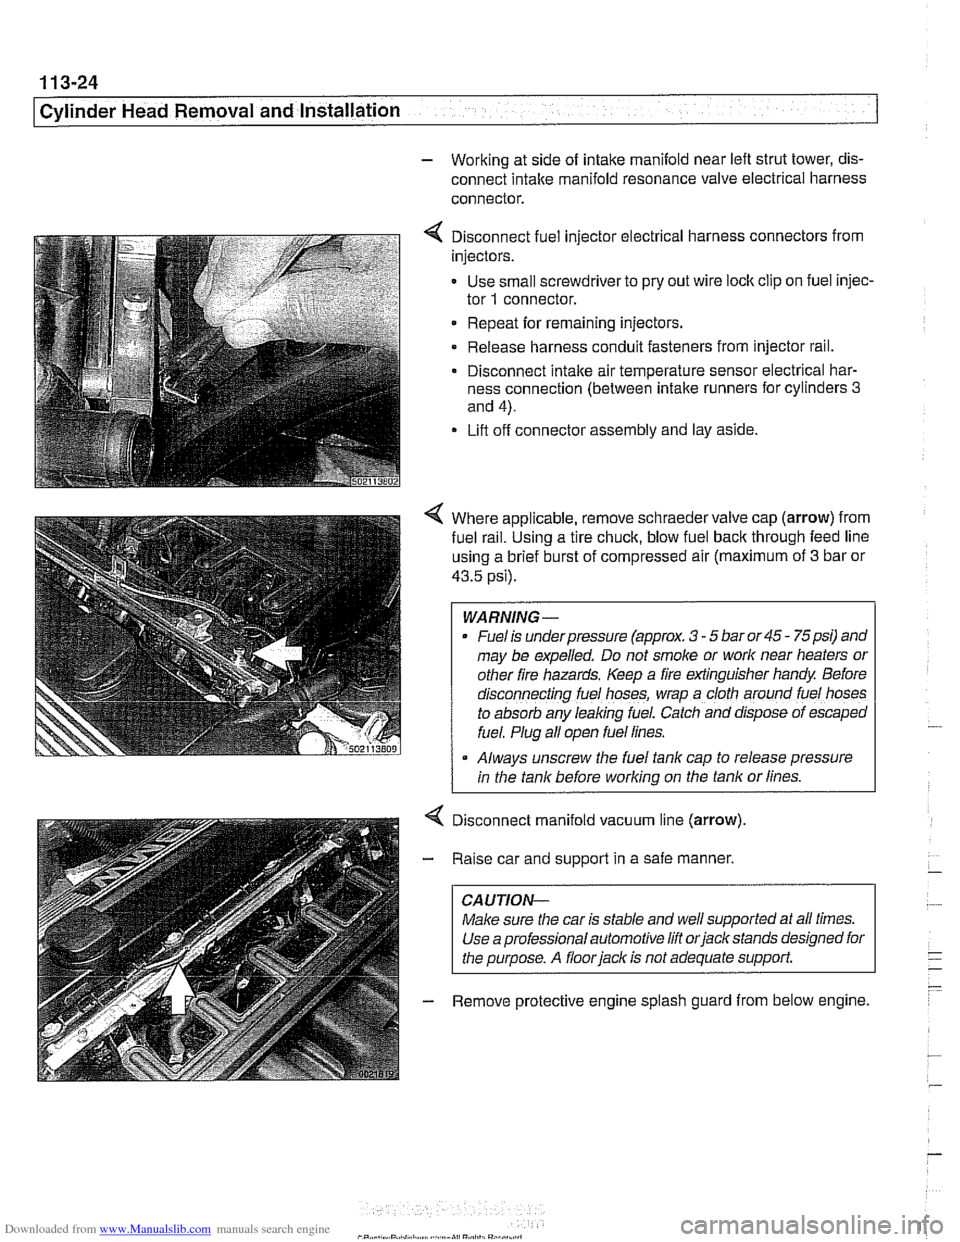
- Working at side of intake manifold near left strut tower, dis-
connect intake manifold resonance valve electrical harness
connector.
4 Disconnect fuel injector electrical harness connectors from
injectors.
- Use small screwdriver to pry out wire lock clip on fuel injec-
tor
1 connector.
Repeat for remaining injectors.
Release harness conduit fasteners from injector rail.
- Disconnect intake air temperature sensor electrical har-
ness connection (between intake runners for cylinders
3
and 4).
Lift off connector assembly and lay aside.
4 Where applicable, remove schraeder valve cap (arrow) from
fuel
ra~l. Using a tire chuck, blow fuel back through feed line
using a brief burst of compressed air (maximum of
3 bar or
43.5 psi).
WARNING-
Fuel is underpressure (approx. 3 - 5 bar or 45 - 75psi) and
may be expelled. Do not smoke or
work near heaters or
other fire hazards. Keep a fire extinguisher handy Before
d~sconnecting fuel hoses, wrap a cloth around fuel hoses
to absorb any leaking fuel. Catch and
dfspose of escaped
fuel. Plug all open fuel lines.
Always unscrew the fuel tank cap to release pressure
I in the tank before working on the tank or lines.
Disconnect manifold vacuum line (arrow)
Raise car and support in a safe manner,
CAUTION-
Make sure the car is stable and well supported at all times.
Use a professional automotive lift
orjack stands designed for
the purpose. A
floorjack is not adequate support.
Remove protective engine splash guard from below engine.
Page 119 of 1002

Downloaded from www.Manualslib.com manuals search engine
11 3-25
Cylinder Head Removal and Installation
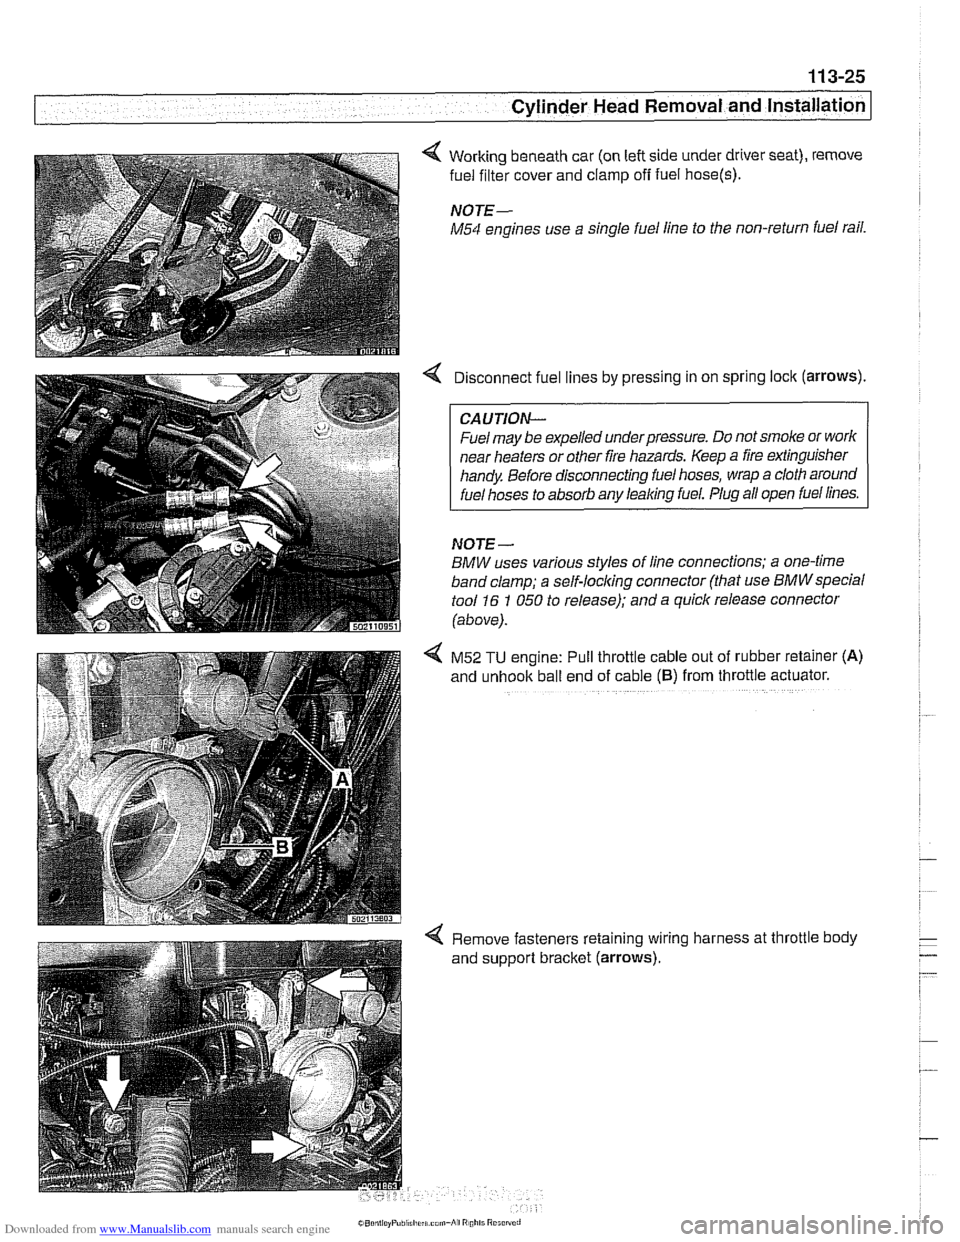
4 Working beneath car (on left side under driver seat), remove
fuel filter cover and clamp
off fuel hose(s).
NOTE-
M54 engines use a single fuel line to the non-return fuel rail.
Disconnect fuel lines by pressing in on spring lock (arrows).
CAUTION--
Fuel may be expelled underpressure. Do not smoke or worlc
near heaters or other fire hazards. Keep a fire extinguisher
handy Before disconnecting fuel hoses, wrap a cloth around
fuel hoses to absorb any leaking fuel. Plug all open fuel lines.
NOJE-
BMW uses various styles of line connections; a one-time
band clamp; a
self-locl(ing connector (that use BMWspecial
tool 16 1 050 to release); and a quick release connector
(above).
4 M52 TU engine: Pull throttle cable out of rubber retainer (A)
and unhook ball end of cable (6) from throttle actuator.
4 Remove fasteners retaining wiring harness at throttle body
and support bracket (arrows).
Page 120 of 1002
Downloaded from www.Manualslib.com manuals search engine
. - --
j Cylinder Head Removal and Installation
4 Working at throttle housing, unscrew and disconnect electri-
cal harness plug
(arrow).
4 Disconnect electrical harness connector at fuel tank venting
valve
(A) and vent hose at quick disconnect fitting (arrow).
- Working under intake manifold, disconnect the following:
Engine oil dipstick tube support.
Oil separator return line from dipstick tube.
Knock sensor harness connector from support.
4 Working underneath car, remove intake manifold support
mounting nut
(arrow), located adjacent to left engine mount.
Page 121 of 1002
Downloaded from www.Manualslib.com manuals search engine
11 3-27
Cylinder Head Removal and Installation
< Remove fuel rail mounting bolts (arrows):
- Carefully pry fuel rail off manifold.
Separate fuel line support bracket at rear of intake mani-
fold.
Guide fuel
line(s) out of rear of engine compartment while
lifting fuel rail out.
4 Remove intake manifold mountino hardware (arrows).
I from falling into the engine intake. I
4 Remove cylinder head top cover:
- Remove plastic trim caps (arrows).
Remove cover hold down fasteners and
lilt off cover.
Page 122 of 1002

Downloaded from www.Manualslib.com manuals search engine
I Cylinder Head Removal and Installation
4 Drain engine coolant and remove coolant hoses:
Remove expansion tank cap on radiator.
Place a
3 gallon pail beneath engine to capture coolant
Remove coolant drain plug (arrow) located on exhaust
side of cylinder
2 of engine block.
4 Drain radiator into a 3 gallon pail by removing plastic drain
plug (arrow) completely.
Use caution when draining and disposing of engine coolant.
Coolant is poisonous andlethal to humans andpets. Pets are
attracted to coolant because of its sweet smell and taste.
Seek medical
attention immediately if coolant is ingested.
NOTE-
Catch and dispose of drained coolant according to local,
state, and federal laws.
4 Remove thermostat housing:
. Disconnect electrical harness connector at thermostat
housing.
. Remove hoses from thermostat hous~ng by releasing loclts
(arrows).
Unbolt
(4 bolts) and remove thermostat hous~ng.
- On vehicles equipped with mechanical cooling fan: Remove
belt-driven cooling fan and radiator shroud as described in
170 Radiator and Cooling System.
CAUTIOI\C
32 mm radiator fan mounting nut has left hand threads. r
4 Remove fasteners (arrows) from heater bypass tube. Pull
tube out of cylinder head and set to side, leaving heater hose
connected.
- Unbolt power steering fluid reservoir and pull aside without
disconnecting hoses. Secure to fender with cord or stiff wire.
Page 123 of 1002

Downloaded from www.Manualslib.com manuals search engine
Cylinder Head Removal and Installation
4 If applicable, remove secondary air injection pump:
Disconnect hose at one-way valve
(A).
Remove bolts at support bracket on strut tower (arrows).
Disconnect electrical harness from bottom of secondary
air injection pump.
Remove mounting bracket from strut tower.
4 Remove ignition coils:
* Disconnect ignition coil harness connectors.
Remove coil mounting fasteners.
Remove coils.
* Remove ground straps.
CA UTIOI\C
Note location of all ground wires. Failure to reinstall grounds
can result in permanent damage to engine control module or
ignition system components.
Set coil harness to side of engine compartment
- Remove cylinder head cover mounting fasteners and remove
cylinder head cover.
NOTE-
The cylinder head cover mounting bolt insulators and gas-
ltets should be reinstalled in their original locations. Male
note of their arrangement during removal.
- Remove spark plugs
4 Remove oil baffle cover from above intake camshaft.