Page 9 of 20
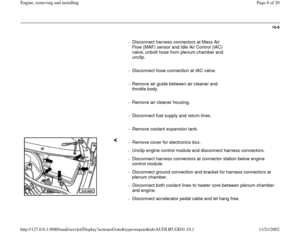
- Disconnect both harness connectors at top of transmission.
Pa
ge 9 of 20 En
gine, removin
g and installin
g
11/21/2002 htt
p://127.0.0.1:8080/audi/servlet/Dis
play?action=Goto&t
yp
e=re
pair&id=AUDI.B5.GE01.10.1
Page 10 of 20
10-7
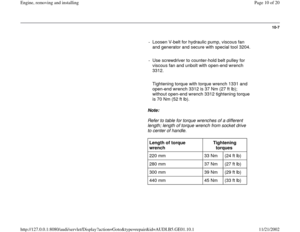
- Loosen V-belt for hydraulic pump, viscous fan
and generator and secure with special tool 3204.
- Use screwdriver to counter-hold belt pulley for
viscous fan and unbolt with open-end wrench
3312.
Tightening torque with torque wrench 1331 and
open-end wrench 3312 is 37 Nm (27 ft lb);
without open-end wrench 3312 tightening torque
is 70 Nm (52 ft lb).
Note:
Refer to table for torque wrenches of a different
length; length of torque wrench from socket drive
to center of handle.
Length of torque
wrench Tightening
torques
220 mm 33 Nm (24 ft lb)
280 mm 37 Nm (27 ft lb)
300 mm 39 Nm (29 ft lb)
440 mm 45 Nm (33 ft lb)
Pa
ge 10 of 20 En
gine, removin
g and installin
g
11/21/2002 htt
p://127.0.0.1:8080/audi/servlet/Dis
play?action=Goto&t
yp
e=re
pair&id=AUDI.B5.GE01.10.1
Page 11 of 20
10-8
- Unbolt hydraulic pump from mounting bracket.
CAUTION!
Hydraulic lines should remain connected.
- Unscrew bolts and secure A/C compressor to
one side with wire.
CAUTION!
Disconnect at mounting points only.
DO NOT open the air conditioning refrigerant
circuit.
Set the A/C compressor aside carefully.
Refrigerant lines kink easily.
The A/C refrigerant circuit must only be
opened by specially trained technicians
using the proper tools and equipment.
- Remove bolts securing exhaust manifold and
front exhaust pipe at top.
- Disconnect battery positive (B+) cable from
starter at right of engine below exhaust manifold.
Pa
ge 11 of 20 En
gine, removin
g and installin
g
11/21/2002 htt
p://127.0.0.1:8080/audi/servlet/Dis
play?action=Goto&t
yp
e=re
pair&id=AUDI.B5.GE01.10.1
Page 12 of 20
- Remove starter, take off insulator at starter
positive (B+) connection, unbolt fixture at engine
block, disconnect ground wire from engine
support.
- Unscrew four engine mounting bolts.
Pa
ge 12 of 20 En
gine, removin
g and installin
g
11/21/2002 htt
p://127.0.0.1:8080/audi/servlet/Dis
play?action=Goto&t
yp
e=re
pair&id=AUDI.B5.GE01.10.1
Page 13 of 20
10-9
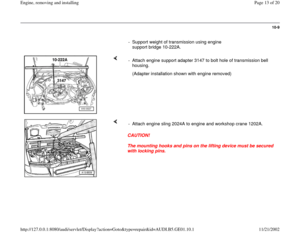
- Support weight of transmission using engine
support bridge 10-222A.
- Attach engine support adapter 3147 to bolt hole of transmission bell
housing.
(Adapter installation shown with engine removed)
CAUTION!
The mounting hooks and pins on the lifting device must be secured
with locking pins. - Attach engine sling 2024A to engine and workshop crane 1202A.
Pa
ge 13 of 20 En
gine, removin
g and installin
g
11/21/2002 htt
p://127.0.0.1:8080/audi/servlet/Dis
play?action=Goto&t
yp
e=re
pair&id=AUDI.B5.GE01.10.1
Page 14 of 20
10-10
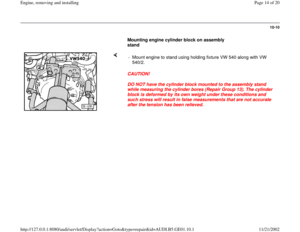
Mounting engine cylinder block on assembly
stand
CAUTION!
DO NOT have the cylinder block mounted to the assembly stand
while measuring the cylinder bores (Repair Group 13). The cylinder
block is deformed by its own weight under these conditions and
such stress will result in false measurements that are not accurate
after the tension has been relieved. - Mount engine to stand using holding fixture VW 540 along with VW
540/2.
Pa
ge 14 of 20 En
gine, removin
g and installin
g
11/21/2002 htt
p://127.0.0.1:8080/audi/servlet/Dis
play?action=Goto&t
yp
e=re
pair&id=AUDI.B5.GE01.10.1
Page 15 of 20

10-11
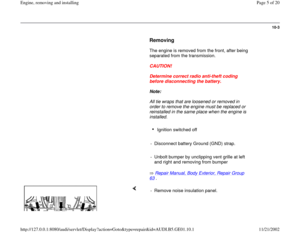
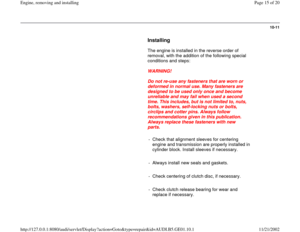
Installing
The engine is installed in the reverse order of
removal, with the addition of the following special
conditions and steps:
WARNING!
Do not re-use any fasteners that are worn or
deformed in normal use. Many fasteners are
designed to be used only once and become
unreliable and may fail when used a second
time. This includes, but is not limited to, nuts,
bolts, washers, self-locking nuts or bolts,
circlips and cotter pins. Always follow
recommendations given in this publication.
Always replace these fasteners with new
parts.
- Check that alignment sleeves for centering
engine and transmission are properly installed in
cylinder block. Install sleeves if necessary.
- Always install new seals and gaskets.
- Check centering of clutch disc, if necessary.
- Check clutch release bearing for wear and
replace if necessary.
Pa
ge 15 of 20 En
gine, removin
g and installin
g
11/21/2002 htt
p://127.0.0.1:8080/audi/servlet/Dis
play?action=Goto&t
yp
e=re
pair&id=AUDI.B5.GE01.10.1
Page 16 of 20
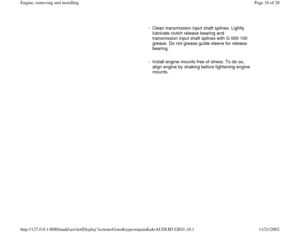
- Clean transmission input shaft splines. Lightly
lubricate clutch release bearing and
transmission input shaft splines with G 000 100
grease. Do not grease guide sleeve for release
bearing.
- Install engine mounts free of stress. To do so,
align engine by shaking before tightening engine
mounts.
Pa
ge 16 of 20 En
gine, removin
g and installin
g
11/21/2002 htt
p://127.0.0.1:8080/audi/servlet/Dis
play?action=Goto&t
yp
e=re
pair&id=AUDI.B5.GE01.10.1


 connection, unbolt fixture at engine
block, disconnect ground wire from engine
support.
- Unscrew four engine mounting b")

. The")
