1996 TOYOTA TACOMA warning
[x] Cancel search: warningPage 55 of 196
51
(d) Low Oil Pressure Warning Light
This light warns that the engine oil pres-
sure is too low.
If it flickers or stays on while you are driving,
pull off the road to a safe place and stop the
engine immediately. Call a Toyota dealer or
qualified repair shop for assistance.
The light may occasionally flicker when
the engine is idling or it may come on brief-
ly after a hard stop. There is no cause for concern if it then goes out when the en-
gine is accelerated slightly.
The light may come on when the oil level
is extremely low. It is not designed to indi- cate low oil level, and the oil level must bechecked using the level dipstick.
NOTICE
Do not drive the vehicle with the warning light onÐeven for one
block. It may ruin the engine.
(e) Low Fuel Level Warning Light
This light comes on when the fuel level in
the tank becomes nearly empty. Fill up the
tank as soon as possible. (f) Malfunction Indicator Lamp
This lamp comes on in the following cases.
a. The fuel tank is completely empty. (See Fuel gaugeº in Chapter 1-5 for instruc- tions.)
b. The fuel tank cap is not tightened se-
curely. (See Fuel tank capº in Chapter
1-2 for instructions.)
c. There is a problem somewhere in your
engine or automatic transmission electri- cal system.
If it comes on while you are driving in case
c, have your vehicle checked/repaired by
your Toyota dealer as soon as possible.
(g) ABSº Warning Light
This light warns that there is a problem
somewhere in your anti-lock brake sys-tem.
If the light comes on while you are driving,
have your vehicle checked by your T
oyota
dealer as soon as possible.
The light will come on when the ignition key is turned to the ONº position. After
about 3 seconds, the light will go off. When the ABSº warning light is on (and
the brake system warning light is off), thebrake system operates conventionally but
without anti-lock function. Vehicles with rear differential lock systemÐ
The anti-lock brake system does not op-
erate when the rear differential is locked.
It is normal operation for the ABSº warn-
ing light to be on at this time.
(h) SRS Airbag Warning Light
This light will come on when the igni-
tion
key is turned to the ACCº or ONº
position. After about 6 seconds, the
light will go off. This means the airbag
system is operating properly.
The warning light system monitors the air-
bag sensor assembly, inflator, warning light, interconnecting wiring and powersources.
If either of the following conditions occurs, this indicates a malfunction somewhere inthe parts monitored by the warning light
system. Contact your Toyota dealer as
soon as possible to service the vehicle. � The light does not come on when the
ignition key is turned to the ACCº or
ONº position or remains on.
� The light comes on while driving.
(i) Light Reminder Buzzer
This buzzer will sound if the driver's door is opened while the ignition switch is turned to the LOCKº position with the
headlight switch on. Removing the key will
not stop the buzzer as long as the head-light switch is on.
Page 56 of 196
52(j) Key Reminder Buzzer
This buzzer reminds you to remove the
key when you open the driver's door withthe ignition key in the ACCº or LOCKº position.
(k) Unengaged Parkº Warning Light
(vehicles with automatic transmis-sion)
This light warns that the transmission
Parkº mechanism is not engaged. If the
front drive control lever is in the Nº posi-
tion while the selector lever is in the Pº
position, the transmission will disengage
and the wheels will not lock.
To restore the park function, shift
the front drive control lever out of Nº.
CAUTION
!
(l) Automatic Transmission Fluid
Temperature Warning Light
This light warns that the automatic trans- mission fluid temperature is too high.
If this light comes on while you are driving,
slow down and pull off the road. Stop the
vehicle at a safe place and put the selector
lever in Pº. With the engine idling, wait
until the light goes off. If the light goes off,
you may start the vehicle again. If the light
does not go off, call a Toyota dealer or
qualified repair shop for assistance. (m) Low Windshield Washer Fluid
Level Warning Light (Canada)
The light warns that the windshield wash-
er fluid level is too low. Add washer fluid at
your earliest opportunity. (For instruc-
tions, see Adding washer fluidº in Chap- ter 7-3.)
CHECKING SERVICE REMINDER
INDI-
CATORS (except the low fuel level
warning light)
1. Apply the parking brake.
2. Turn ignition key to ACCº.
The SRS airbag warning light should
come on. It goes off after about 6 sec- onds.
3. Turn the ignition key to ONº, but do not
start the engine.
All the service reminder indicators except
the SRS airbag warning light should come
on. The ABSº warning light goes off after
about 3 seconds.
If any service reminder indicator or warn-
ing buzzer does not function as described above, either the bulb is burned out or the
circuit is in need of repair. Have it checked
by your Toyota dealer as soon as pos- sible.
Page 79 of 196

75
RESUMING THE PRESET SPEED
If the preset speed is cancelled by pulling
the control lever or by depressing the
brake pedal or clutch pedal, pushing the
lever up in the RES/ACCº direction will
restore
the speed set prior to cancellation.
However, once the vehicle speed falls be-
low about 40 km/h (25 mph), the preset
speed will not be resumed.
CRUISE CONTROL FAILURE WARNING
If the CRUISEº indicator light in the in-
strument cluster flashes when using the
cruise control, press the CRUISE
ON-OFFº button to turn the system off
and then press it again to turn it on.
If any of the following conditions then oc-
curs, there is some trouble in the cruise control system. � The indicator light does not come on.
� The indicator light flashes again.
� The indicator light goes out after it
comes on.
If this is the case, contact your Toyota
dealer and have your vehicle inspected.
To crank the engine without depress- ing the clutch pedal, push the switch
with the ignition on.
The switch stays on as long as the ignition
is on. And it will automatically turn off
when the ignition is off.
This switch cancels the clutch start sys-
tem, which is designed to keep the starter
motor from operating if the clutch pedal is
not depressed all the way down.
The switch allows the vehicle to be driven
out of difficult situations by cranking the
engine with the clutch engaged. Never use the switch for normal engine
starting. Be sure to
follow the starting pro-
cedure instructed in How to start the en- gineº in Part 3.
Clutch start cancel switch
(four-wheel
drive models with
manual transmission)
Page 107 of 196
103
TANDEM MASTER CYLINDER BRAKE SYSTEM
The tandem master cylinder brake sys-
tem is a hydraulic system with two sepa-
rate sub-systems. If either sub-system
should fa
il, the other will still work. Howev-
er, the pedal will be harder to press, and
your stopping distance will be longer.
Also, the brake system warning light may come on.
CAUTION!
Do not drive your vehicle with only
a single brake system. Have your
brakes fixed immediately.
BRAKE BOOSTER
The brake booster uses engine vacuum to
power-assist the brakes. If the engine
should quit while you are driving, you can
bring the vehicle to a stop with normal
pedal pressure. There is enough reserve vacuum for one or two stopsÐbut no more!
CAUTION!
� Do not pump the brake pedal if the
engine stalls. Each push on the
pedal uses up your vacuum re- serve.
�Even if the power assist is com-
pletely lost, the brakes will still
work. But you will have to push the
pedal hardÐmuch harder than
normal. And your braking distance
will be longer.
ANTI-LOCK BRAKE SYSTEM (with ABSº warning light)
The anti-lock brake system is designed to prevent lock-up of the wheels during sud-
den braking or braking on slippery road surfaces. This assists the driver in con-
trolling the vehicle under these circum-stances.
The anti-lock brake system becomes op- erative after the vehicle has accelerated
to a speed in excess of approximately 10
km/h (6 mph). It stops operating when the
vehicle decelerates to a speed below
approximately 5 km/h (3 mph).
You may hear a sound in the engine
compartment for a few seconds when the
engine is started or just after the vehicleis started. This means that the anti-lock
brake system is in the self check mode,
and does not indicate a malfunction.
When the anti-lock brake system function is in action, you may feel the brake pedal
pulsating and hear a noise. In this situa-
tion, to let the anti-lock brake systemwork for you, just hold the brake pedal
down more firmly. Do not pump the brake. The brake pedal pulsation caused by the
anti-lock brake system may indicate haz- ardous road surface conditions. Althoughthe anti-lock brake system assists in pro-
viding
vehicle control, it is still important to
drive with all due care, because the anti-
lock brake system cannot overcome the
laws of physics that act on your vehicle: � Braking capab ility is dependent on tire
friction with the road surface.
� Even though the anti-lock brake sys-
tem is operating, a driver cannot main- tain full control on certain slippery road
surfaces, when cornering at highspeeds, or in violent maneuvers.
� Avoid high speeds on wet roads. The
anti-lock brake system cannot elimi-
nate the risk of hydroplaning and lossof tire friction.
Always maintain a safe distance from the
vehicle in front of you. Compared with ve-
hicles not fitted with an anti-lock brake
system, your vehicle may require a longer
stopping distance in the following cases: � Driving on rough, gravel or snow-cov-
ered roads.
� Driving with tire chains installed.
� Driving on roads where the road sur-
face is pitted or has other differences in surface height.
Brake system
Page 108 of 196
104
CAUTION!
Do not use tires other than the
manufacturer 's designated tires,
and do not mix tires or wheels of dif-
ferent sizes. You may prevent the
anti-lock brake system from operat-
ing at full effectiveness.
Vehicles with rear differential lock systemÐ
The anti-lock brake system does not op-
erate when the rear differential is locked.
It is normal operation for the ABSº warn-
ing light to be on at this time.
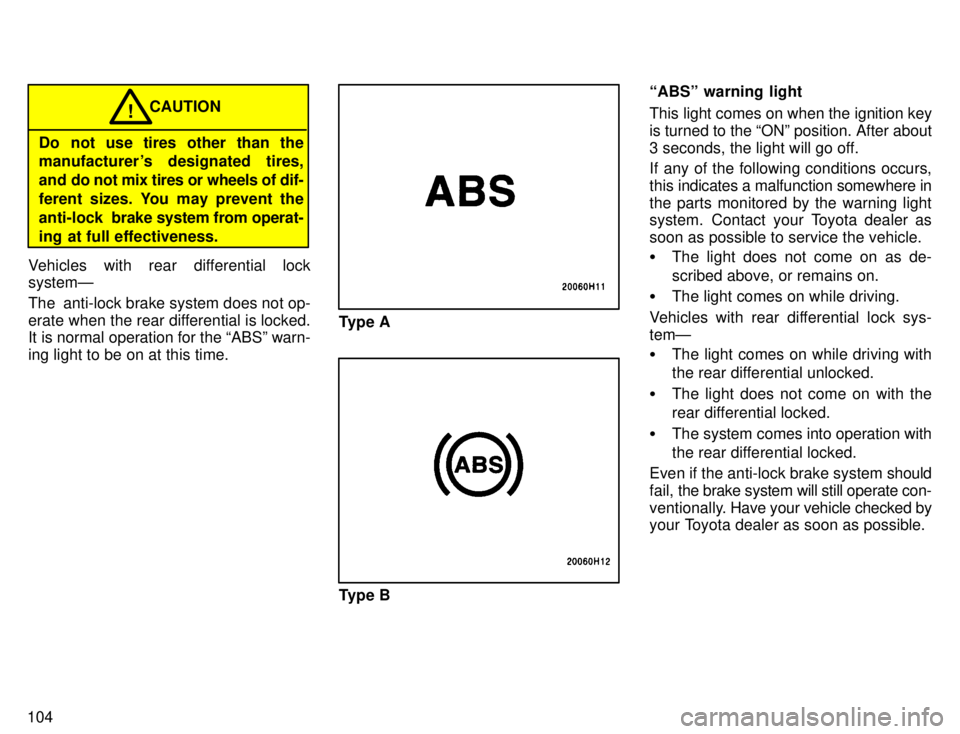
Type A
Type B ABSº warning light
This light comes on when the ignition key is turned to the ONº position. After about
3 seconds, the light will go off.
If any of the following conditions occurs, this
indicates a malfunction somewhere in
the parts monitored by the warning light
system. Contact your Toyota dealer as
soon as possible to service the vehicle. � The light does not come on as de-
scribed above, or remains on.
� The light comes on while driving.
Vehicles with rear differential lock sys- temÐ � The light comes on while driving with
the rear differential unlocked.
� The light does not come on with the
rear differential locked.
� The system comes into operation with
the rear differential locked.
Even if the anti-lock brake system should
fail, the brake system will still operate con-
ventionally. Have your vehicle checked by
your Toyota dealer as soon as possible.
Page 109 of 196
105
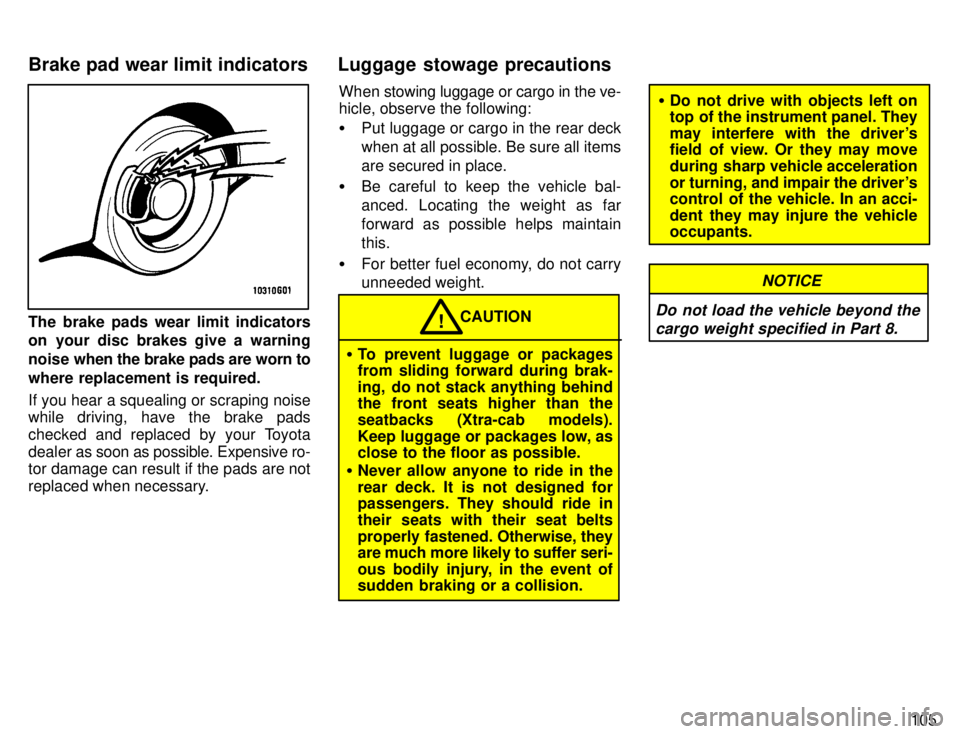
The brake pads wear limit indicators
on your disc brakes give a warning
noise when the brake pads are worn to
where replacement is required.
If you hear a squealing or scraping noise
while driving, have the brake pads
checked and replaced by your Toyota
dealer as soon as possible. Expensive ro-
tor damage can result if the pads are not
replaced when necessary. When stowing luggage or cargo in the ve-
hicle, observe the following: �
Put luggage or cargo in the rear deck
when at all possible. Be sure all itemsare secured in place.
� Be careful to keep the vehicle bal-anced. Locating the weight as far
forward as possible helps maintainthis.
� For better fuel economy, do not carry
unneeded weight.CAUTION!
� To prevent luggage or packages
from sliding forward during brak-
ing, do not stack anything behind
the front seats higher than the
seatbacks (Xtra-cab models).
Keep luggage or packages low, as close to the floor as possible.
� Never allow anyone to ride in the
rear deck. It is not designed for passengers. They should ride in
their seats with their seat belts
properly fastened. Otherwise, they are much more likely to suffer seri-
ous bodily injury, in the event of
sudden braking or a collision.
�Do not drive with objects left on
top of the instrument panel. They
may interfere with the driver's
field of view. Or they may move
during sharp vehicle acceleration
or turning, and impair the driver's
control of the vehicle. In an acci-
dent they may injure the vehicle occupants.
Do not load the vehicle beyond the
cargo weight specified in Part 8.
NOTICE
Luggage stowage precautions
Brake pad wear limit indicators
Page 147 of 196

143
Tire surface and wheel nuts Check the tires carefully
for cuts, damage
or excessive wear. See Chapter 7-2 for
additional information. When checking the tires, make sure no nuts are missing,
and check the nuts for looseness. T ighten
them if necessary.
Tire rotation
Rotate the tires every 12000 km (7500
miles). See Chapter 7-2 for additional in-formation.
Fluid leaks Check underneath for leaking fuel, oil, wa-
ter or other fluid after the vehicle has been
parked for a while. If you smell fuel fumes
or notice any leak, have the cause found
and corrected immediately. Doors and engine hood Check that all doors including tailgate op- erate smoothly and all latches lock se-
curely. M ake sure the engine hood secon-
dary latch secures the hood from opening
when the primary latch is released. INSIDE THE VEHICLE Items listed below should be checked
regularly, e.g. while performing peri-
odic services, cleaning the vehicle,etc. Lights Make sure the headlights, stop lights, tail lights, turn signal lights, and other lights are all working. Check headlight aim. Service reminder indicators and
warn-
ing buzzers Check that all service reminder indicators
and warning buzzers function properly. Steering wheel
Be alert for changes in steering condition, such as hard steering or strange noise. Seats Check that all front seat controls such as
seat adjusters, seatback recliner, etc. op-erate smoothly and that all latches lock
securely in any position. Check that the
head restraints move up and down
smoothly and that the locks hold securely
in any latched position. For folding-down
seatback (bench seat), check that the
latches lock securely. Seat belts
Check that the seat belt system such as
buckles, retractors and anchors operate
properly
and smoothly. Make sure the belt
webbing is not cut, frayed, worn or dam-aged. Accelerator pedal Check the pedal for smooth operation and
uneven pedal effort or catching. Clutch pedal Check the pedal for smooth operation. Brake pedal Check the pedal for smooth operation and
that the pedal has the proper clearance. Check the brake booster function. Brakes
At a safe place, check that the brakes do not pull to one side when applied. Parking brake Check that the lever has the proper travel and that, on a safe incline, your vehicle is
held securely with only the parking brake applied.
Automatic transmission Parkº mech-
anism
Check the lock release button of the se- lector lever (floor shift type) for proper and
smooth operation. On a safe incline, check that your vehicle is held securely
with the selector lever in Pº position andall brakes released.
Page 166 of 196
162
CAUTION
� Do not drive with the snow tires in- correctly inflated.
� Never drive over 120 km/h (75
mph) with any type of snow tires.!
TIRE CHAIN SELECTION Use the tire chains of correct size.
Regulations regarding the use of tire
chains vary according to location or
type of r oad, so always check them be-
fore installing chains.
CHAIN INSTALLATION Install the chains on the front tires as
tightly as possible. Do not use tire
chains on the rear tires. Retighten
chains after driving 0.5 '1.0 km
(1/4 '1/2 mile).
When installing chains on your tires, care- fully follow the instructions of the chain
manufacturer.
If wheel covers are used, they will be
scratched by the chain band, so removethe covers before putting on the chains.
� Do not exceed 50 km/h (30 mph) or
the chain manufacturer's recom-
mended speed limit, whichever is
lower.
� Drive carefully avoiding bumps,
holes, and sharp turns, which may
cause the vehicle to bounce.
� Avoid sharp turns or locked-
wheel braking, as use of chains
may adversely affect vehicle han- dling.
CAUTION! WHEN TO REPLACE YOUR WHEELS
If you have wheel damage such as
bending, cracks or heavy corrosion,
the wheel should be replaced.
If you fail to replace damaged wheels, the
tire may slip off the wheel or they may cause loss of handling control. WHEEL SELECTION
When replacing wheels, care should be
taken to ensure that the wheels are re-
placed by ones with the same load ca-
pacity, diameter, rim width, and offset.
Correct
replacement wheels are available
at your Toyota dealer.
A wheel of a different size or type may ad-
versely affect handling, wheel and bear-
ing life, brake cooling, speedometer/
odometer calibration, stopping ability,
headlight aim, bumper height, vehicle
ground clearance, and tire or snow chain clearance to the body and chassis.
Replacement with used wheels is not rec-
ommended as they may have been sub- jected to rough treatment or high mileage and could fail without warning. Also, bent
wheels which have been straightened
may have structural damage and there-
fore should not be used. Never use an in-
ner tube in a leaking wheel which is de-
signed for a tubeless tire.
Replacing wheels