Page 3 of 217
21. Side vent
2. Tilt steering lock release lever
3. Instrument cluster
4. Center vents
5. Personal lights
6. Electric moon roof switch
7. Power door lock switch
8. Power window switches
9. Automatic transmission selector lever
or manual transmission gear shift lever
10.Parking brake lever
11. Driving pattern selector button
12. Power back window switch
13. Front drive control lever
14. Lower vent
15. Hood lock release lever
16. Fuel filler door opener
17. Power rear view mirror control switch (with power windows)
Instrument panel overview
Page 4 of 217
3
1. Clutch start cancel switch
2. Headlight and turn signal switch
3. Wiper and washer switches
4. Back window defogger switch
5. Emergency flasher switch
6. Clock
7. Cup holder
8. Air conditioning controls
9. Car audio
10. Ashtray
11. Cigarette lighter
12. Ignition switch
13. Cruise control switch
14. Rear differential lock switch
15. Instrument panel light control knob
16. Power
rear view mirror control switch
(without power windows)
17. Power back window lock switch (with-
out power windows)
Page 5 of 217
4
1. Service reminder indicators or indicator
lights
2. Engine coolant temperature gauge
3. Tachometer 4. Speedometer
5. Odometer
6. Trip meter
7. Fuel gauge
8. Trip meter reset knob
Instrument cluster overview
Page 6 of 217
Indicator symbols on the instrument panel5
Unengaged Parkº warning light*1
Brake system warning light*
1
Seat belt reminder light* 1
Discharge warning light* 1
Low oil pressure warning light* 1
Malfunction indicator lamp* 1
Low fuel level warning light* 1 Open door warning light*
1
SRS airbag warning light* 1
Automatic transmission fluid temperature warning light* 1
Turn signal indicator lights
Headlight high beam indicator light
Overdrive-of f indicator light
Anti-lock brake system warning
light * 1 Low windshield washer fluid level
warning light*
1
Page 7 of 217
6
Driving pattern (POWERº mode) indicator light Four-wheel drive indicator light
* 1
: For details, see Service reminder indicators and warning
buzzersº in Chapter 1-5.
* 2
: If this light flashes, see Cruise controlº in Chapter 1-6.
Rear differential lock indicator lightCruise control indicator light*
2
Page 11 of 217

10
CAUTION!
Before driving, be sure that the
doors are closed and locked, espe-
cially when small children are in the
vehicle. Along with the proper use
of seat belts, locking the doors
helps prevent the driver and pas-
sengers from being thrown out from
the vehicle during an accident. It
also helps prevent the doors from
being opened unintentionally.
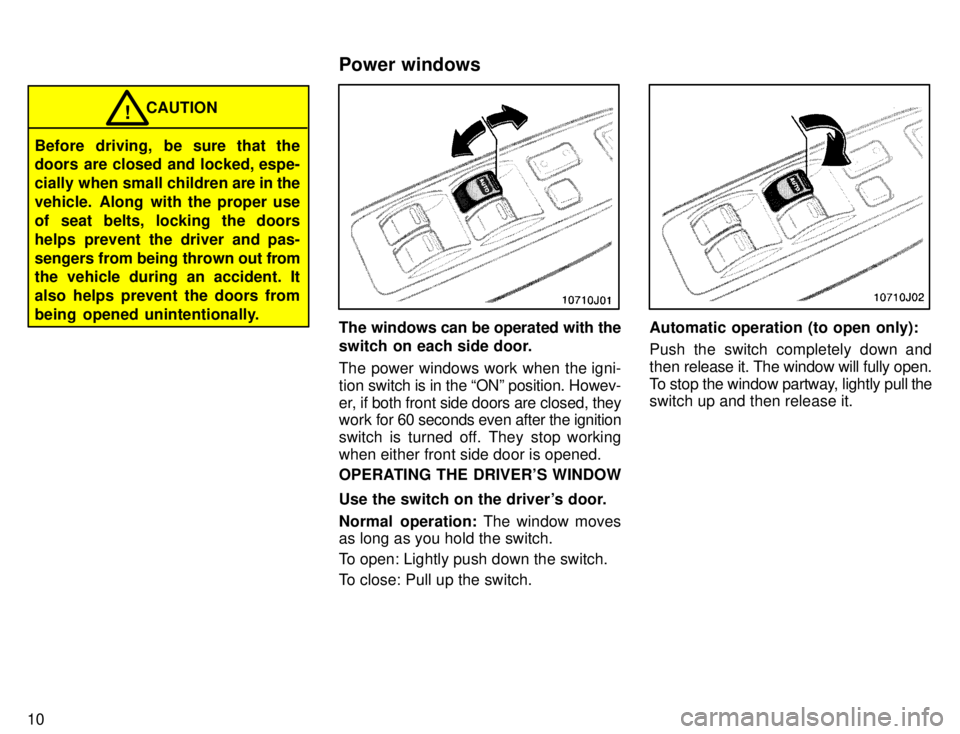
The windows can be operated with the
switch on each side door.
The power windows work when the igni- tion switch is in the ONº position. Howev-
er, if both front side doors are closed, they work for 60 seconds even after the ignition
switch is turned off. They stop working
when either front side door is opened.
OPERATING THE DRIVER'S WINDOW
Use the switch on the driver's door.
Normal operation: The window moves
as long as you hold the switch.
To open: Lightly push down the switch.
To close: Pull up the switch.Automatic operation (to open only):
Push the switch completely down and
then rel ease it. The window will fully open.
To stop the window partway, lightly pull the
switch up and then release it.
Power windows
Page 16 of 217
15
Type C
LOCKING AND UNLOCKING WITH
POWER BACK DOOR LOCK SWITCH Push the switch.
To lock: Push the switch on the LOCKº side.
To unlock: Push the switch on the UN-
LOCKº side.
Vehicles with a power door lock sys-
temÐOperating the power door lock
switch simultaneously locks or unlocks the back door (see Side doorsº).To open the hood, do the following.
1. Pull the hood lock release lever.
The hood will spring up slightly.2. In front of the vehicle, pull up on the
auxiliary catch lever and lift the hood.
Hood
Page 17 of 217

16
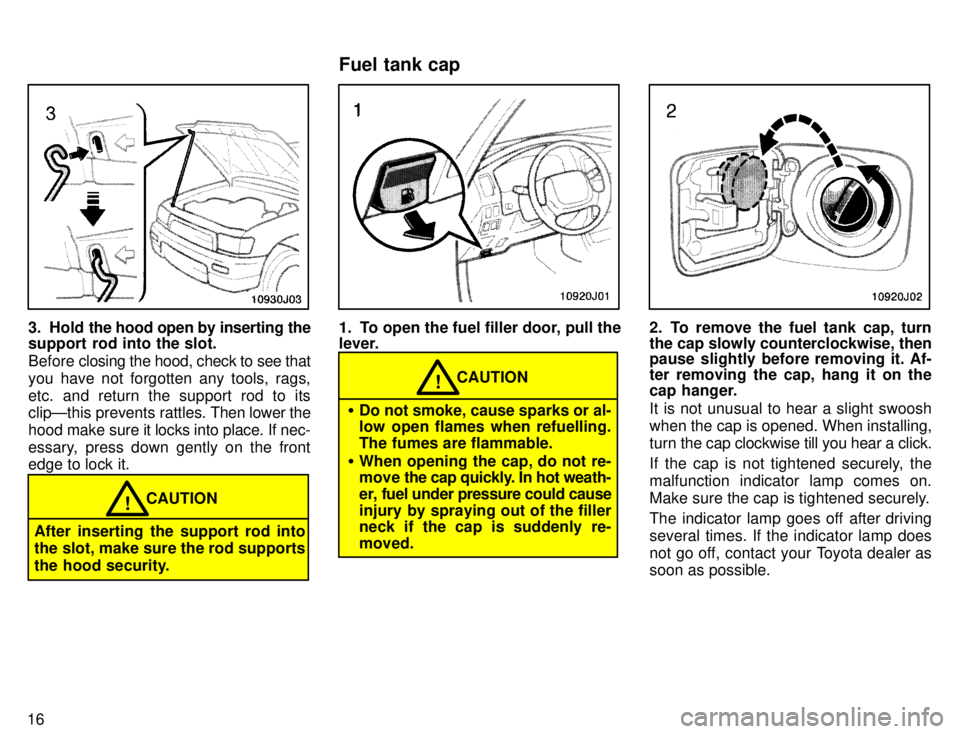
3. Hold the hood open by inserting the
support rod into the slot.
Before closing the hood, check to see that
you have not forgotten any tools, rags,
etc. and return the support rod to its clipÐthis prevents rattles. Then lower the
hood make sure it locks into place. If nec-
essary, press down gently on the front
edge to lock it.
CAUTION!
After inserting the support rod into
the slot, make sure the rod supports
the hood security.
1. To open the fuel filler door, pull the
lever.
CAUTION!
� Do not smoke, cause sparks or al-
low open flames when refuelling.
The fumes are flammable.
� When opening the cap, do not re-
move the cap quickly. In hot weath-
er, fuel under pressure could cause
injury by spraying out of the filler
neck if the cap is suddenly re- moved.
2. To remove the fuel tank cap, turn
the cap slowly counterclockwise, then
pause slightly before removing it. Af-
ter removing the cap, hang it on the
cap hanger.
It is not unusual to hear a slight swoosh
when the cap is opened. When installing,
turn the cap clockwise till you hear a click.
If the cap is not tightened securely, themalfunction indicator lamp comes on.
Make sure the cap is tightened securely.
The indicator lamp goes off after driving several times. If the indicator lamp does
not go off, contact your Toyota dealer as soon as possible.
Fuel tank cap