1996 PONTIAC BONNEVILLE ECO mode
[x] Cancel search: ECO modePage 59 of 387
Panic Mode
When the button with the horn symbol on the key
transmitter is pressed, the horn will sound and the
headlamps and taillamps will flash for
up to two
minutes. This can be turned
off by pressing the panic
button again, unlocking the vehicle with a key or by
turning the ignition to on.
Key Transmitter Response
This provides feedback to the driver when the vehicle
receives a command
from the key transmitter. The
following modes may be selected:
If only the panic button works, the transmitter needs to
'be resynchronized to the receiver,
Do this by pressing
and holding both the
LOCK and UNLOCK buttons
for about eight seconds; you must be within range of
the vehicle.
When the system has been resynchronized, the horn will
chirp and the exterior lamps will flash once. The system
should now operate properly.
Personalization Features
Each key transmitter can be programmed to the driver's
preference for programmable automatic door locks
OF
key transmitter response. See each feature in the Index.
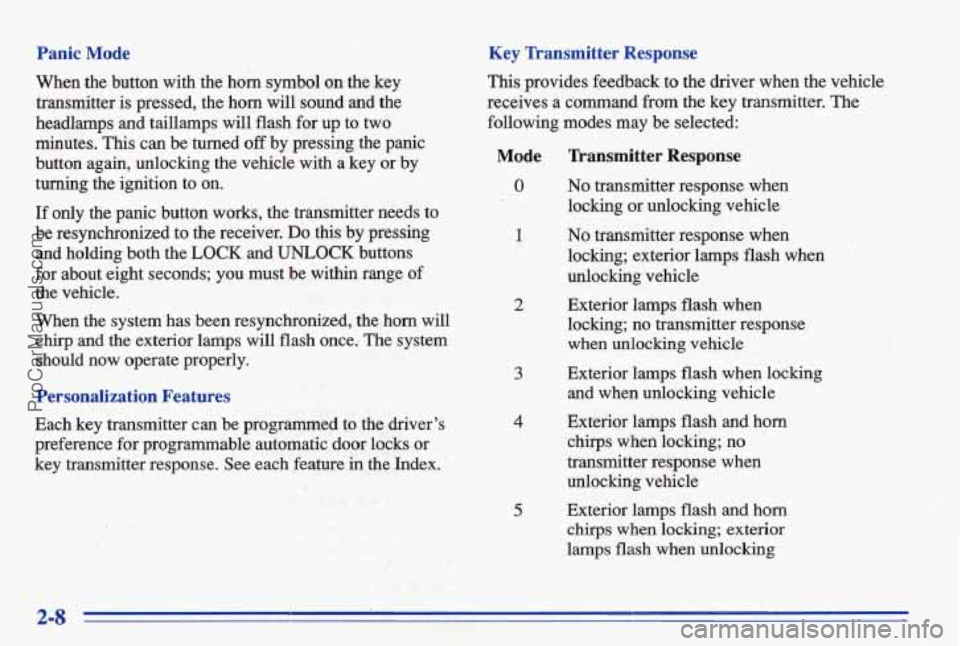
Mode Transmitter Response
0 No transmitter response when
1 No transmitter response when
locking or unlocking vehicle
locking; exterior lamps flash when
'
unlocking vehicle
2 Exterior lamps
flash. when
locking; no transmitter response
when unlocking vehicle
and when unlo8cking vehicle
3 Exterior lamps flash when locking
4 Exterior lamps flash and horn
chirps when locking; no
transmitter responsq
wb,
unlocking vehicle '';{ '8' .. '- . .
chirps when locking; exterior
lamps flash when
unlocking
5 Exterior lamps flash and horn
2-8
ProCarManuals.com
Page 60 of 387
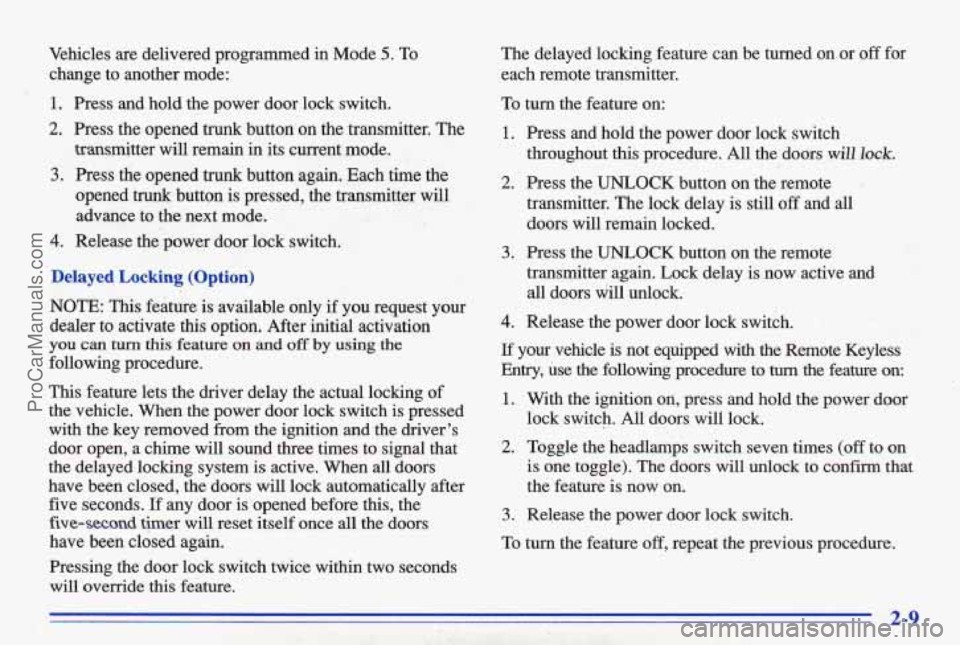
Vehicles are delivered programmed in Mode 5. To
change to another mode:
1. Press and hold the power door lock switch.
2. Press the opened trunk button on the transmitter. The
transmitter will remain
in its current mode.
3. Press the opened trunk button again. Each time the
opened
trunk button is pressed, the transmitter will
advance to the next mode.
4. Release the power door lock switch.
Delayed Locking (Option)
NOTE: This feature is available only if you request your
dealer to activate this option. After initial activation
you can turn this feature on and off by using the
following procedure.
This feature lets the driver delay the actual locking of
the vehicle. When the power door lock switch is pressed
with the key removed from the ignition and the driver's
door open, a chime will sound three times to signal that
the delayed locking system
is active. When all doors
have been closed, the doors will lock automatically after five seconds.
If any door is opened before this, the
five-second twer will reset itself once all the doors
have been closed again.
Pressing the door lock switch twice within two seconds will override
this feature. The delayed locking feature
can be turned on.or
off for
each remote transmitter.
To turn the feature on:
1. Press and hold the power door lock switch
throughout
this procedure. All'the doors will Io&.
2. Press the UNLOCK button on the remote
transmitter. The lock delay is still
off and all
doors will remain locked.
3. Press the UNLOCK button on the remote
transmitter again. Lock delay is now active and
all doors dill unlock.
4. Release the power door lock switch. I
If your vehicle is not equipped with the Remote Keyless
Enby, use the following procedure to
turn the feature on:
1. With the ignition on, press and hold the power door
lock switch.
All doors will lock.
2. Toggle the headlamps switch seven times (off to on
is one toggle). The doors will unlock to confirm that
the feature
is now on.
3. Release the power door lock switch.
To
turn the feature off, repeat the previous procedure.
ProCarManuals.com
Page 76 of 387
Performance Shifting (Option) Computer Command Ride (Option)
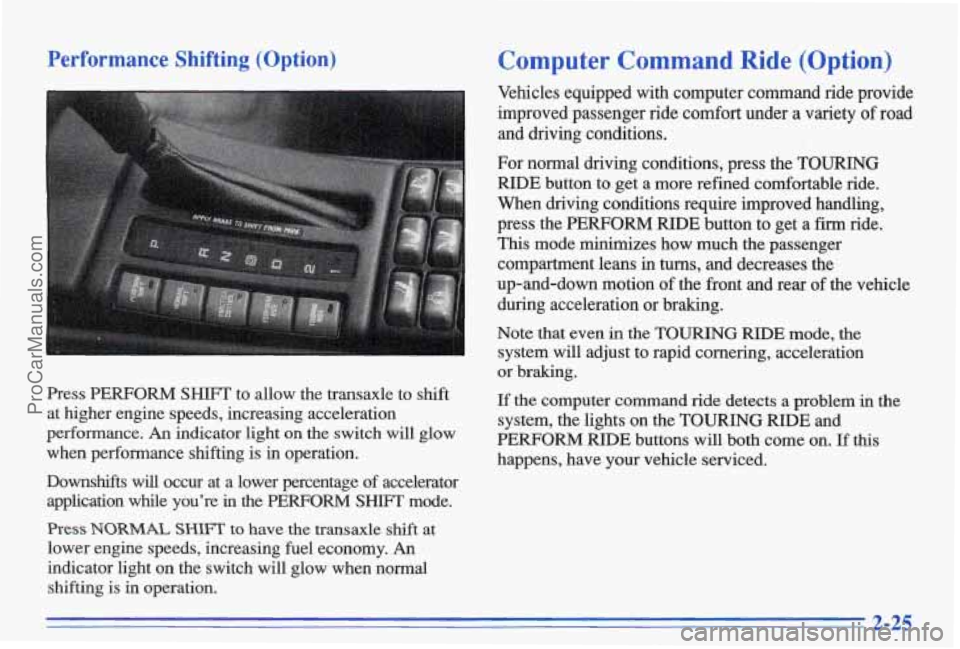
Press PERFORM SHIFT to allow the transaxle to shift
at higher engine speeds, increasing acceleration
performance.
An indicator light on the switch will glow
when performance shifting is in operation.
Vehicles equipped with computer command ride provide
improved passenger ride
comfort under a variety of road
and driving conditions.
Downshifts will occur at a lower percentage of accelerator
application while you're
in the PERFORM SHIFI' mode.
Press NORMAL SHIFT to have the transaxle shift at
lower engine speeds, increasing fuel economy.
An I
indicator light on the switch will glow when normal
shifting is in operation. For normal driving conditions, press the
TOURING
RIDE button to get a more refined comfortable ride.
When driving conditions require improved handling,
press the PERFORM
RIDE button to get a firm ride.
This mode minimizes how much the passenger compartment leans in
turns, and decreases the
up-and-down motion
of the front and rear of the vehicle
during acceleration or braking.
Note that even
in the TOURING RIDE mode, the
system
will adjust to rapid cornering, acceleration
or braking.
If the computer command ride detects a problem in the
system, the lights on the TOURING
RIDE and
PERFORM RIDE buttons will both come on. If this
happens, have your vehicle serviced.
2-25
ProCarManuals.com
Page 88 of 387
Windshield Washer
At the top of the turn signal/multifunction lever there’s a
paddle with the word
PUSH on it. To spray washer fluid
on the windshield, push the paddle for less than a
second. The wipers
will clear the window and either
stop or return to your preset speed. For more washer
cycles, push and hold the paddle. Remember, driving
without washer fluid can be dangerous.
A bad mud
splash can block your vision. You could hit another
vehicle or go
off the road. Check your washer fluid
level often.
Some models have a WASHER
FLUID warning, that
indicates
if the fluid level in the windshield washer
reservoir is low. See “Low Washer Fluid Warning Light”
in
the Index.
A CAUTION:
In freezing weather, don’t use your washer until
the windshield is warmed. Otherwise the washer fluid can form ice on the windshield, blocking
your vision.
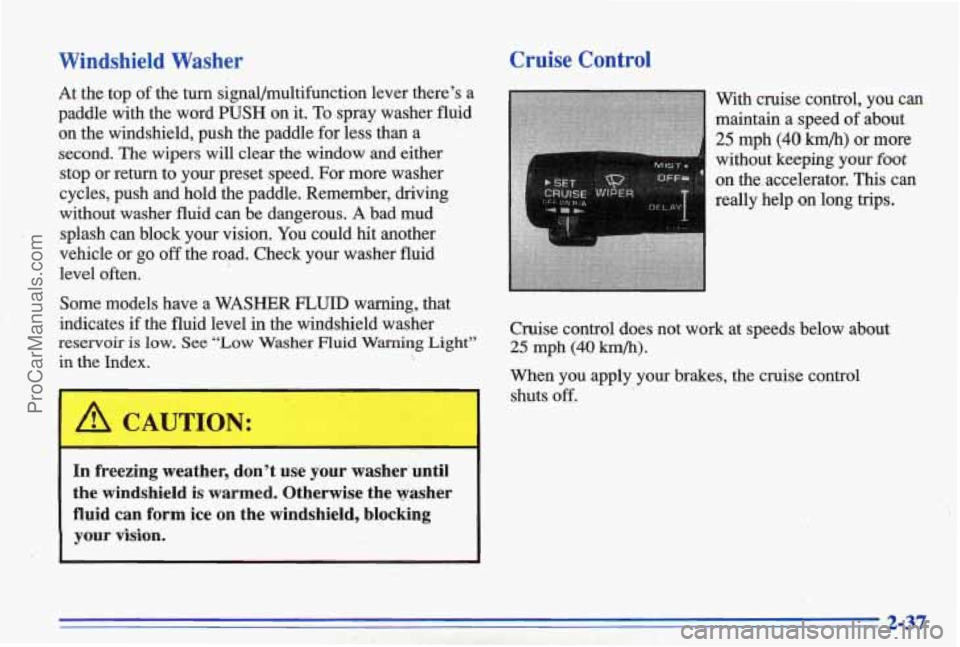
Cruise Control
on the accelerator. his can
really help
on long trips.
Cruise control does not work at speeds below about
25 mph (40 km/h).
When you apply your brakes, the cruise control
shuts
off.
ProCarManuals.com
Page 98 of 387
At night, when the glare is too high, the mirror will
gradually darken to reduce glare (this change may take a
few seconds). The mirror
will return to its clear daytime
state when the glare is reduced.
Press the button at the base
of the mirror to turn on the
automatic feature. The button has an indicator light to
show
it is on. Press the button again to turn the
automatic off.
Time Delay
The automatic mirror has a time delay feature which
prevents unnecessary switching from the night back
to
the day position. This delay prevents rapid changing of
the mirror as
you drive under lights ind through traffic.
Cleaning the Photocells
Use a cotton swab and glass cleaner to clean the
photocells when necessary.
' :... .. ,.
Manual Remote Control. Mirror
The outside rearview mirror should be adjusted so you
can just see the side of your vehicle when you are sitting
in a comfortable driving position.
Adjust the driver's side outside mirror with the control lever on the driver's door.
To adjust your passenger's side mirror, sit in the driver's
seat and have a passenger adjust the mirror for you.
Reverse Gear Day Mode
The reverse day mode is another important feature
of the electrochromic mirror. When you shift into
REVERSE (R), the mirror changes to the day mode.
This gives you a bright image in the mirror as you
back up.
ProCarManuals.com
Page 133 of 387
Choosing Your Zone Number Changing Your Zone Number
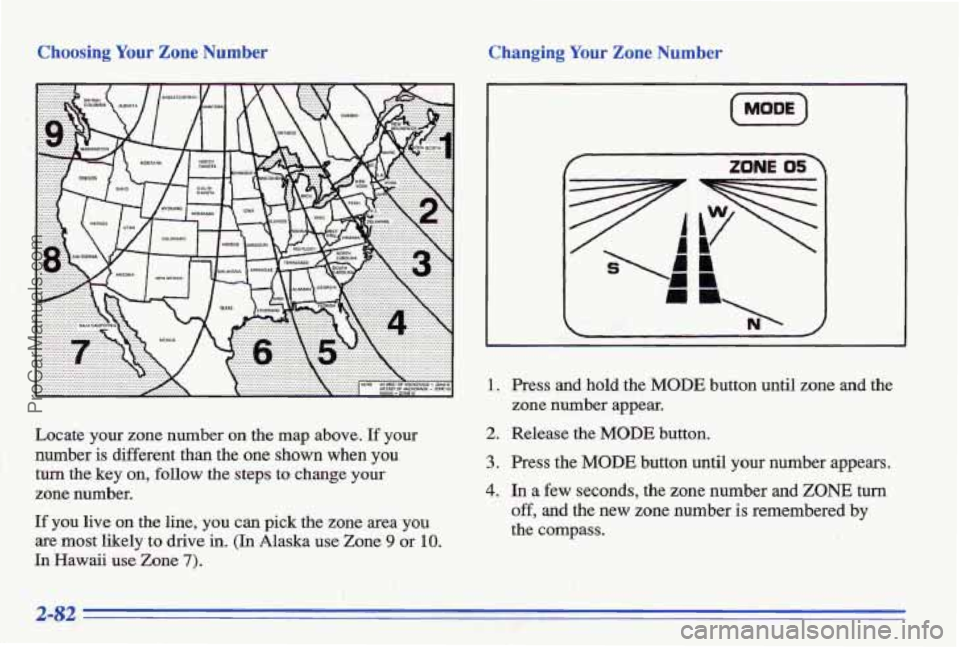
Locate your zone number on the map above. If your
number
is different than the one shown when you
turn the key on, follow the steps to change your
zone number.
If you live on the line, you can pick the zone area you
are most likely to drive in. (In Alaska use Zone 9 or 10.
In Hawaii use Zone 7).
ZONE 05)
1.
2.
3.
4.
Press and hold the MODE button until zone and the
zone number appear.
Release the MODE button.
Press the
MODE button until your number appears.
In a few seconds, the zone number and ZONE turn
off, and the new zone number is remembered by
the compass.
2-82
ProCarManuals.com
Page 141 of 387
Pressing the AUTO button will display the requested
temperature, fan speed'and
air delivery mode for five
seconds, then change to display the outside air
temperature. Be careful not to put anything over the
sensor located in the middle
of the instrument panel near
the windshield, or over the sensor
in the gnlle above the
radio. These sensors are used by the automatic system to
regulate temperature.
The exterior temperature display sensor is in front
of the
car, near the radiator. This displayed temperature is most
accurate when the vehicle
is moving. During stops, or
while idling, the display shows the previous driving
temperature for best system control.
To avoid blowing cold air in cold weather, the system
will delay turning
on the fan until warm air is available.
The length
of delay depends on outside air temperature,
engine coolant temperature, and time since the engine
was last started. Pushing the
fan button will override this
delay and change the fan to a selected single speed.
If you leave your vehicle, the system will remember the
control setting the next time you start your engine.
Manual Operation
You may also manually adjust the delivery mode or
fan speed.
'!! HEAT: Manually selecting HEAT by cycling
through the
MODE settings will deliver air to the floor
outlets.
+# DEFOG: Manually selecting DEFOG by cycling
through the
MODE settings will deliver air to the floor
and windshield outlets.
12 BI-LEVEL: Manually selecting BI-LEVEL by
cycling through the MODE setting will deliver warm air
to the floor and cooler air to the middle instrument panel outlets.
OFF: Press this button to turn the system off. Fresh air
will continue to flow through the vehicle, and the
system
will try to maintain the previously set
temperature. The outside temperature will show in the
display when the system
is OFF.
w.
ProCarManuals.com
Page 142 of 387
A/C: Press this button to turn the air conditioning
on and
off. The system will cool and dehumidify the
air inside the vehicle.
In the AUTO mode, the display
will show that
A/C is active, but the air conditioning
compressor
only operates when the system determines
it
is needed.
RECIRC,: Press this button to limit the amount of fresh
air entering your vehicle. You may use this setting to
limit odors entering your vehicle. Press
REClRC to
change to a manual
MODE and air will recirculate for
10 minutes. RECIRC will show on the display and then
return to
EXT TEMP display.
DEFROST: Press this button to clear the windshield.
The system will automatically control the fan speed
if
you select defrost from AUTO.
OF O C: ‘Press this button to display the temperature in
degrees Fahrenheit or Celsius.
Air Conditioning
On hot days, open the windows long enough to let hot
inside
air escape. This reduces the time it takes for your
vehicle to cool down. Then keep your windows closed
for the air conditioner to work its best.
If you have the standard system, for quick cool-down on
very hot days,
use MAX with the temperature knob in
the blue area. If this setting is used for long periods of
time, the air in your vehicle may become too cold and
dry. For normal cooling on hot days, use A/C with the
temperature
knob in. the blue area. This setting cools the
air entering your vehicle and directs it through the
instrument panel outlets.
If you have the electronic system, press the A/C button
to
turn the system on. The system will cool and
dehumidify the air inside the vehicle.
Also while in
AUTO mode, the system will use FtECIRC as necessary
to cool the air.
&1 cool but sunny days, with the standard system through
manual operation of the electron& system, use BI-LEVEL
to deliver warm air to the floor and cooler air to the
middle instrument panel outlets. To warrn or cool the
air
delivered, push the TE- button up or down.
When the air conditioner is on, you may sometimes notice
slight changes
in your vehicle’s engine speed and power.
This is normal because the system is designed to cycle the
cornpressor on
and off to keep the desired temperature.
ProCarManuals.com