1996 NISSAN SENTRA hood open
[x] Cancel search: hood openPage 15 of 191
Malfunction indicator light
If the MIL comes on or blinks while the
engine is running, it may indicate a potential
emission control problem.
CAUTION
cContinued operation without having
the emission control system
checked and repaired as necessary
could lead to poor driveability, re-
duced fuel economy, and possible
damage to the emission control sys-
tem which may affect your warranty
coverage.
cAlthough the vehicle is still drive-
able, see your nearest NISSAN
dealer as soon as possible. To avoid
system damage, do not drive at
speeds above 45 MPH (72 km/h). If
possible, avoid hard acceleration or
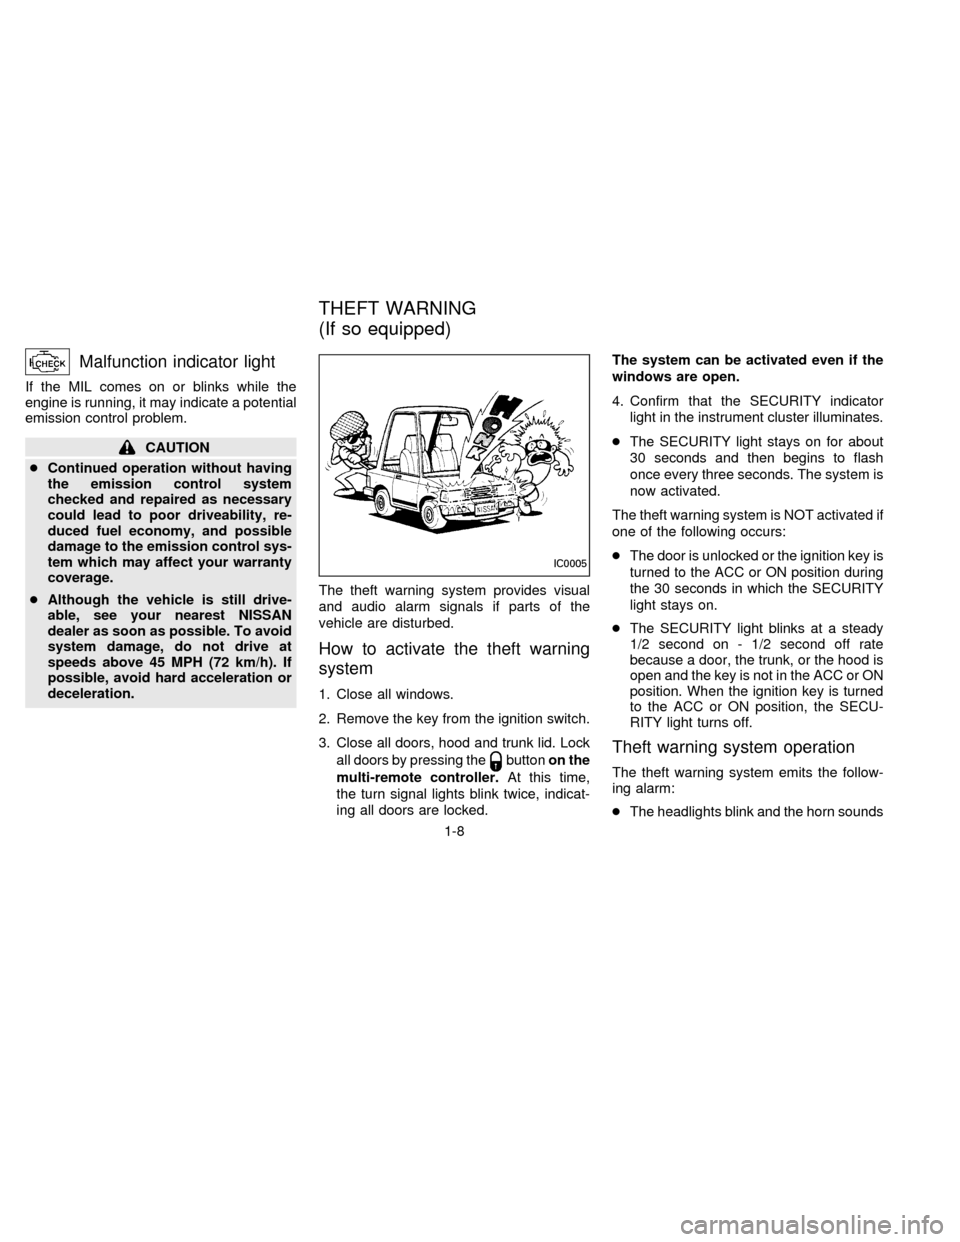
deceleration.The theft warning system provides visual
and audio alarm signals if parts of the
vehicle are disturbed.
How to activate the theft warning
system
1. Close all windows.
2. Remove the key from the ignition switch.
3. Close all doors, hood and trunk lid. Lock
all doors by pressing the
buttonon the
multi-remote controller.At this time,
the turn signal lights blink twice, indicat-
ing all doors are locked.The system can be activated even if the
windows are open.
4. Confirm that the SECURITY indicator
light in the instrument cluster illuminates.
cThe SECURITY light stays on for about
30 seconds and then begins to flash
once every three seconds. The system is
now activated.
The theft warning system is NOT activated if
one of the following occurs:
cThe door is unlocked or the ignition key is
turned to the ACC or ON position during
the 30 seconds in which the SECURITY
light stays on.
cThe SECURITY light blinks at a steady
1/2 second on - 1/2 second off rate
because a door, the trunk, or the hood is
open and the key is not in the ACC or ON
position. When the ignition key is turned
to the ACC or ON position, the SECU-
RITY light turns off.Theft warning system operation
The theft warning system emits the follow-
ing alarm:
cThe headlights blink and the horn sounds
IC0005
THEFT WARNING
(If so equipped)
1-8
ZX
Page 16 of 191
intermittently. In addition, the starter mo-
tor does not operate.
cThe alarm automatically turns off after 2
to 3 minutes. However, the alarm reacti-
vates if the vehicle is tampered with
again. The alarm can be shut off by
unlocking a door or trunk lid with the key
or by pressing the
buttonon the
multi-remote controller.
The alarm is activated by:
copening the door or trunk lid without
using the key (even if the door is un-
locked by releasing the door inside lock
switch) or opening the trunk lid by oper-
ating the opener lever.
copening the hood.
How to stop the alarm
The alarm stops only by unlocking a door or
the trunk lid with the key or by pressing
the
buttonon the multi-remote control-
ler.The alarm does not stop if the ignition
switch is turned to ACC or ON position.
If the system does not operate as de-
scribed above, have it checked by your
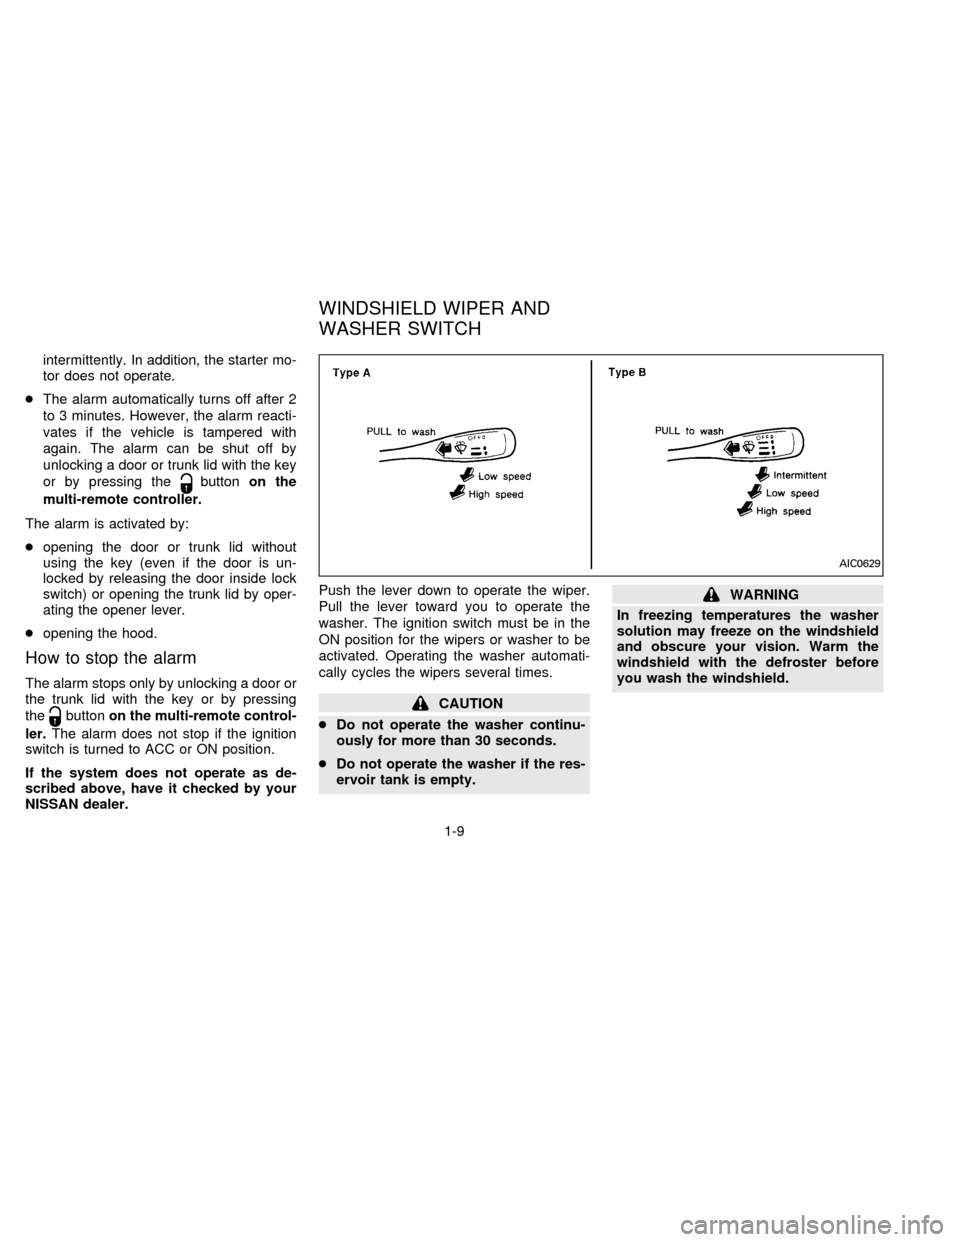
NISSAN dealer.Push the lever down to operate the wiper.
Pull the lever toward you to operate the
washer. The ignition switch must be in the
ON position for the wipers or washer to be
activated. Operating the washer automati-
cally cycles the wipers several times.CAUTION
cDo not operate the washer continu-
ously for more than 30 seconds.
cDo not operate the washer if the res-
ervoir tank is empty.
WARNING
In freezing temperatures the washer
solution may freeze on the windshield
and obscure your vision. Warm the
windshield with the defroster before
you wash the windshield.
AIC0629
WINDSHIELD WIPER AND
WASHER SWITCH
1-9
ZX
Page 108 of 191
If your vehicle is overheating (indicated by
an extremely high temperature gauge read-
ing), or if you feel a lack of engine power,
detect abnormal noise, etc., take the follow-
ing steps:
WARNING
To avoid the danger of being scalded,
never remove the radiator cap while the
engine is still hot. When the radiator
cap is removed, pressurized hot water
will spurt out, possibly causing serious
injury.
1. Move the vehicle safely off the road,
apply the parking brake and move the
gearshift lever to Neutral (automatic
transmission to P).
Do not stop the engine.
2. Turn off the air conditioning. Open all the
windows, move the heater or air condi-
tioner temperature control to maximum
hot and fan control to high speed.
3. Get out of the vehicle. Look and listen for
steam or coolant escaping from the ra-
diator before opening the hood. Wait until
no steam or coolant can be seen before
proceeding.4. Open the engine hood.
WARNING
If steam or water is coming from the
engine, stand clear to prevent getting
burned.
5. If engine overheating is caused by climb-
ing a long hill on a hot day, run the engine
at a fast idle (approximately 1,500 rpm)
until the temperature gauge indication
returns to normal.
6. Visually check drive belts for damage or
looseness. Also check if the cooling fan
is running. The radiator hoses and radia-
tor should not leak water.
WARNING
cBe careful not to allow your hands,
hair or clothing to come into contact
with, or to get caught in, the running
fan, belts, or fan motor. The fan motor
can start at any time when the cool-
ant temperature is high.
cIf coolant is leaking, the water pump
belt is missing or loose, or the cool-
ing fan does not run, stop the engine.7. After the engine cools down, check the
coolant level in the reservoir tank with the
engine running. Add coolant to the res-
ervoir tank if necessary. Have your ve-
hicle repaired at the nearest NISSAN
dealer.
IF YOUR VEHICLE
OVERHEATS
5-9
ZX
Page 113 of 191
In order to maintain the appearance of your
vehicle, it is important to take proper care of
it.
In the following cases, please wash your
vehicle as soon as possible to protect the
paint surface.
cAfter a rainfall
cAfter driving on coastal roads
cWhen things such as soot, bird drop-
pings, tree sap, metal particles or bugs
get on the paint surfacecWhen dust or mud builds up on the
surface
Whenever possible, store or park your ve-
hicle inside a garage or in a covered area.
When it is necessary to park outside, park in
a shady area or protect the vehicle with a
body cover.
Be careful not to scratch the paint sur-
face when putting on or removing the
body cover.
Washing
Wash dirt off with a wet sponge and plenty
of water. Clean the vehicle thoroughly using
a mild soap or detergent (a special vehicle
soap or general purpose dish-washing liq-
uid) mixed with clean, lukewarm (never hot)
water.
CAUTION
Do not use strong household soap,
strong chemical detergents, gasoline
or solvents.
Rinse the vehicle thoroughly with plenty of
clean water.Inside flanges, seams and folds on the
doors, hatches and hood are particularly
vulnerable to the effects of road salt. There-
fore, these areas must be regularly cleaned.
Take care that the drain holes in the lower
edge of the door are open. Spray water
under the body and in the wheel wells to
loosen the dirt and wash away road salt.
A damp chamois can be used to dry the
vehicle to avoid water spots.
Waxing
Regular waxing protects the paint surface
and helps retain new vehicle appearance.
After waxing, polishing is recommended to
remove built-up residue and to avoid a
``weathered'' appearance.
Your NISSAN dealer can assist you in
choosing the proper product.
cWax your vehicle only after a thorough
washing. Follow the instructions supplied
with the wax.
cDo not use a wax containing any abra-
sives, cutting compounds or cleaners
that may damage the vehicle finish.
cIf the surface does not polish easily, use
a ªroad tarº remover and wax again.MAI0001
CLEANING EXTERIOR AND
INTERIOR
6-2
ZX
Page 137 of 191
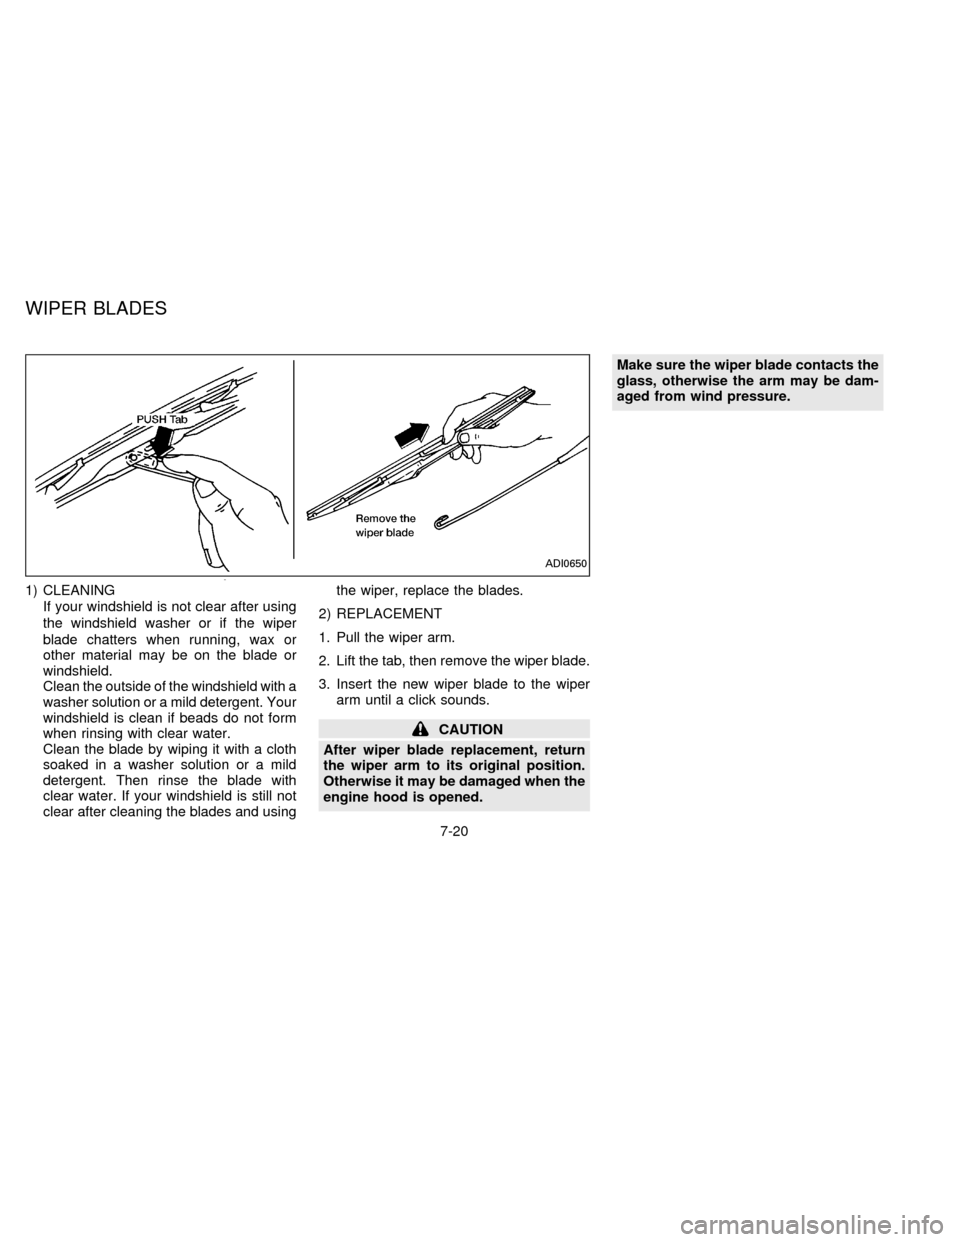
1) CLEANING
If your windshield is not clear after using
the windshield washer or if the wiper
blade chatters when running, wax or
other material may be on the blade or
windshield.
Clean the outside of the windshield with a
washer solution or a mild detergent. Your
windshield is clean if beads do not form
when rinsing with clear water.
Clean the blade by wiping it with a cloth
soaked in a washer solution or a mild
detergent. Then rinse the blade with
clear water. If your windshield is still not
clear after cleaning the blades and usingthe wiper, replace the blades.
2) REPLACEMENT
1. Pull the wiper arm.
2. Lift the tab, then remove the wiper blade.
3. Insert the new wiper blade to the wiper
arm until a click sounds.
CAUTION
After wiper blade replacement, return
the wiper arm to its original position.
Otherwise it may be damaged when the
engine hood is opened.Make sure the wiper blade contacts the
glass, otherwise the arm may be dam-
aged from wind pressure.
ADI0650
WIPER BLADES
7-20
ZX
Page 140 of 191

Press the pedal by hand and be sure the
free travel is within the limits shown above.
If free travel is out of the range shown
above, see your NISSAN dealer.Engine compartment (Headlight
fuses)
If a headlight does not come on, check for
an open fuse.
1. Be sure the ignition key and the headlight
switch are OFF.
2. Open the engine hood.
3. Remove the fuse box cover.
4. Remove the fuse with the fuse puller
provided (inside the passenger compart-
ment fuse panel cover).5. If the fuse is open, replace it with a new
fuse.
Never use a fuse of higher amperage
rating than that specified on the fuse box
cover.
6. If a new fuse opens again, have the
electrical system checked and repaired
by your NISSAN dealer.
If the electrical equipment does not operate
and fuses are in good condition, check the
fusible links. If any of these fusible links are
melted, replace only with genuine NISSAN
parts.
ADI0630ADI0628
CLUTCH PEDAL FUSES
7-23
ZX
Page 142 of 191
HEADLIGHTS
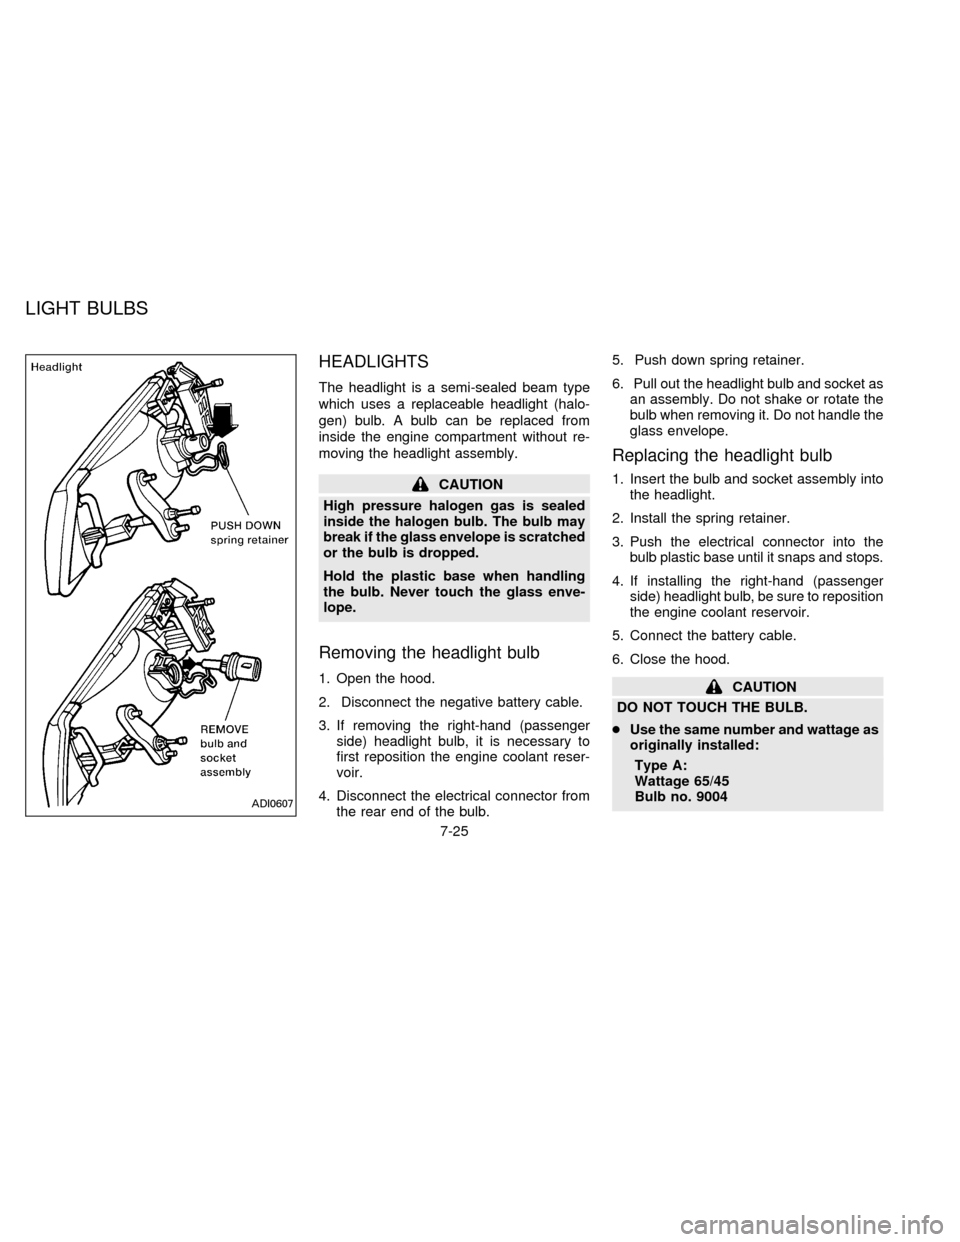
The headlight is a semi-sealed beam type
which uses a replaceable headlight (halo-
gen) bulb. A bulb can be replaced from
inside the engine compartment without re-
moving the headlight assembly.
CAUTION
High pressure halogen gas is sealed
inside the halogen bulb. The bulb may
break if the glass envelope is scratched
or the bulb is dropped.
Hold the plastic base when handling
the bulb. Never touch the glass enve-
lope.
Removing the headlight bulb
1. Open the hood.
2. Disconnect the negative battery cable.
3. If removing the right-hand (passenger
side) headlight bulb, it is necessary to
first reposition the engine coolant reser-
voir.
4. Disconnect the electrical connector from
the rear end of the bulb.5. Push down spring retainer.
6. Pull out the headlight bulb and socket as
an assembly. Do not shake or rotate the
bulb when removing it. Do not handle the
glass envelope.
Replacing the headlight bulb
1. Insert the bulb and socket assembly into
the headlight.
2. Install the spring retainer.
3. Push the electrical connector into the
bulb plastic base until it snaps and stops.
4. If installing the right-hand (passenger
side) headlight bulb, be sure to reposition
the engine coolant reservoir.
5. Connect the battery cable.
6. Close the hood.
CAUTION
DO NOT TOUCH THE BULB.
cUse the same number and wattage as
originally installed:
Type A:
Wattage 65/45
Bulb no. 9004
ADI0607
LIGHT BULBS
7-25
ZX
Page 143 of 191
cAiming is not necessary after replac-
ing the bulb. When aiming adjust-
ment is necessary, contact your NIS-
SAN dealer.
cDo not leave the bulb out of the head-
light reflector for a long period of
time as dust, moisture, and smoke
may enter the headlight body and
affect the performance of the head-
light.
Before adjusting the headlights, make sure
all of the tires are properly inflated, the
vehicle is on level ground and there is no
excess weight in the vehicle that would
affect the level of the vehicle.
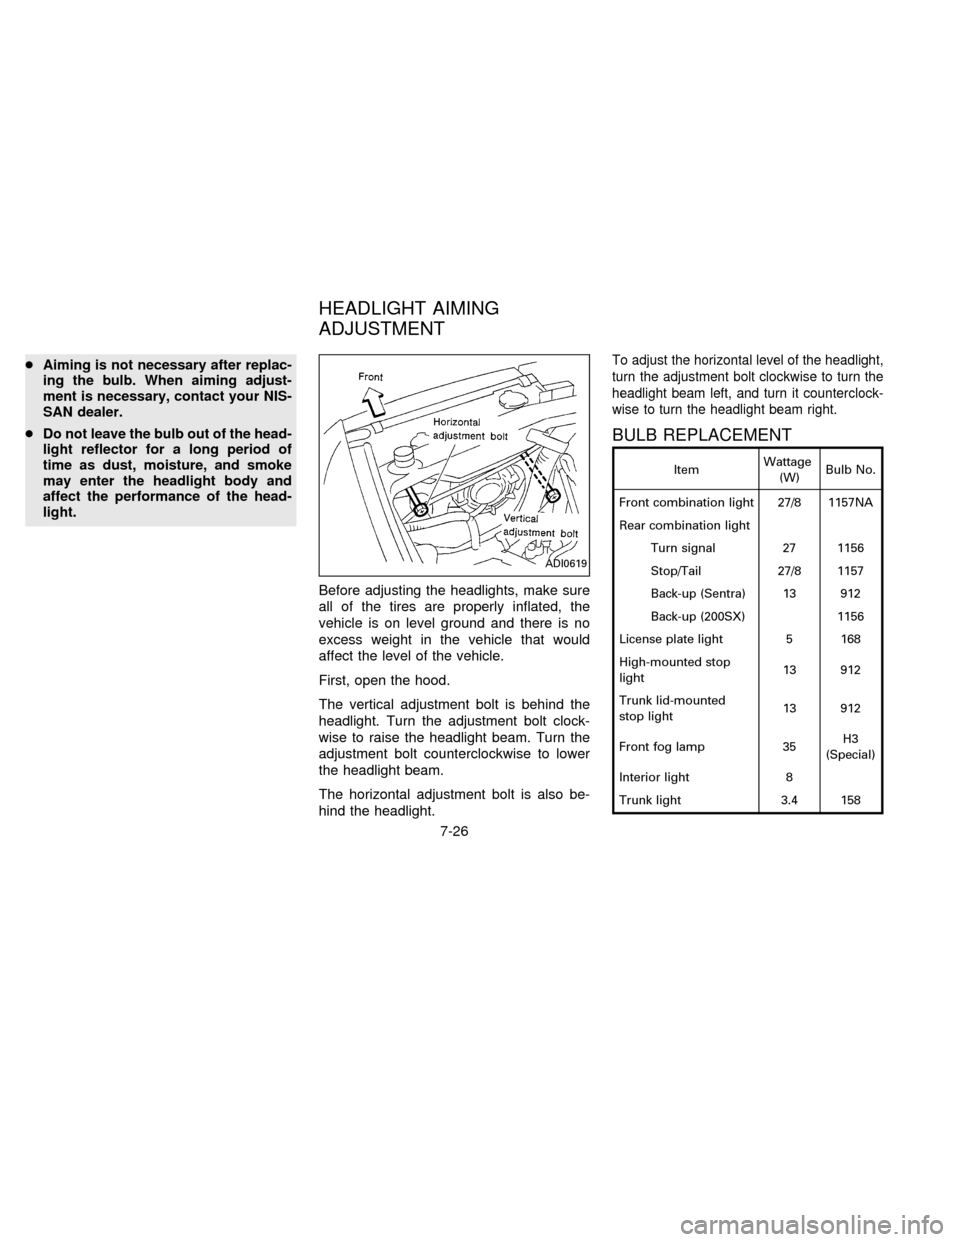
First, open the hood.
The vertical adjustment bolt is behind the
headlight. Turn the adjustment bolt clock-
wise to raise the headlight beam. Turn the
adjustment bolt counterclockwise to lower
the headlight beam.
The horizontal adjustment bolt is also be-
hind the headlight.To adjust the horizontal level of the headlight,
turn the adjustment bolt clockwise to turn the
headlight beam left, and turn it counterclock-
wise to turn the headlight beam right.
BULB REPLACEMENT
ItemWattage
(W)Bulb No.
Front combination light 27/8 1157NA
Rear combination light
Turn signal 27 1156
Stop/Tail 27/8 1157
Back-up (Sentra) 13 912
Back-up (200SX) 1156
License plate light 5 168
High-mounted stop
light13 912
Trunk lid-mounted
stop light13 912
Front fog lamp 35H3
(Special)
Interior light 8
Trunk light 3.4 158
ADI0619
HEADLIGHT AIMING
ADJUSTMENT
7-26
ZX