1996 NISSAN SENTRA flat tire
[x] Cancel search: flat tirePage 84 of 191
1) Move the shift lever into the P position.
2) Turn the ignition key slightly in the ON
direction.
3) Turn the key toward the LOCK position.
4) Remove the key.
If the key is removed from the ignition
switch, the shift lever cannot be moved from
P (Park).The shift lever can be moved if
the ignition switch is in the ACC posi-
tion. The shift lever can also be moved if
the ignition switch is in the ON position
and the foot brake pedal is depressed.
There is an OFF position in between LOCK
and ACC, although it does not show on the
lock cylinder. When the ignition is in OFF
the steering wheel is not locked.
In order for the steering wheel to be locked,
it must be turned about 1/8 of a turn coun-
terclockwise from the straight up position,
and the key must be removed from the
ignition.WARNING
To lock the steering wheel, remove the
key. To unlock the steering wheel, in-
sert the key and turn it gently while
rotating the steering wheel slightly
right and left.
Never remove the key while driving. If
the key is removed, the steering wheel
will lock. This may cause the driver to
lose control of the vehicle and could
result in serious vehicle damage or
personal injury.
OFF (Manual transmission model) (1)
The engine can be turned off without locking
the steering wheel.
ACC (Accessories) (2)
This position activates electrical accesso-
ries such as the radio when the engine is
not running.
ON Normal operating position (3)
This position turns on the ignition system
and the electrical accessories.
START (4)
This position activates the starter motor,
which starts the engine.cMake sure the area around the vehicle is
clear.
cMaintenance items listed here should be
checked periodically, e.g., each time you
check engine oil.
cCheck that all windows and lights are
clean.
cVisually inspect tires for their appearance
and condition. Also check tires for proper
inflation.
cLock all doors.
cPosition seat and adjust head restraints.
cAdjust inside and outside mirrors.
cFasten seat belts and ask all passengers
to do likewise.
cCheck the operation of warning lights
when key is turned to the ON (3) position.
BEFORE STARTING THE
ENGINE
4-5
ZX
Page 93 of 191

cAccelerate slowly and smoothly. Main-
tain cruising speeds with a constant ac-
celerator position.
cDrive at moderate speeds on the high-
way. Driving at high speed lowers fuel
economy.
cAvoid unnecessary stopping and brak-
ing. Maintain a safe distance behind
other vehicles.
cUse a proper gear range which suits road
conditions. On level roads, shift into high
gear as soon as possible.
cAvoid unnecessary engine idling.cKeep your engine tuned up.
cFollow the recommended periodic main-
tenance schedule.
cKeep the tires inflated at the correct
pressure. Low pressure increases tire
wear and waste fuel.
cKeep the front wheels in correct align-
ment. Improper alignment causes not
only tire wear but also lower fuel
economy.
cAir conditioner operation lowers fuel
economy. Use the air conditioner only
when necessary.
cWhen cruising at highway speeds, it is
more economical to use the air condi-
tioner and leave the windows closed to
reduce drag.
SD1001M
INCREASING FUEL
ECONOMY
4-14
ZX
Page 100 of 191

5 In case of emergency
Flat tire ................................................................. 5-2
Jump starting ........................................................ 5-7
Push starting ........................................................ 5-8
If your vehicle overheats ...................................... 5-9
Tow truck towing ................................................ 5-10
ZX
Page 101 of 191
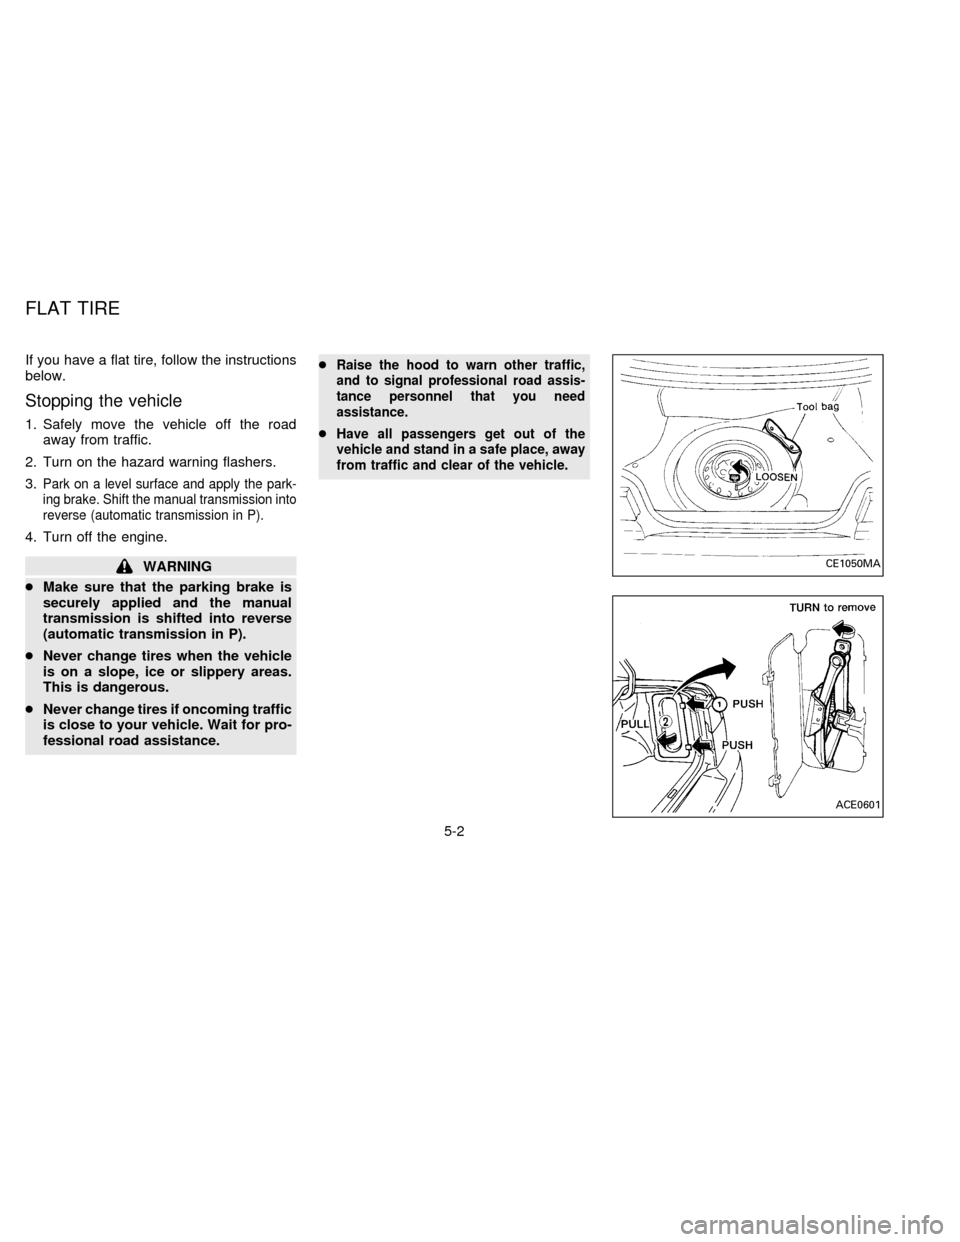
If you have a flat tire, follow the instructions
below.
Stopping the vehicle
1. Safely move the vehicle off the road
away from traffic.
2. Turn on the hazard warning flashers.
3.
Park on a level surface and apply the park-
ing brake. Shift the manual transmission into
reverse (automatic transmission in P).
4. Turn off the engine.
WARNING
cMake sure that the parking brake is
securely applied and the manual
transmission is shifted into reverse
(automatic transmission in P).
cNever change tires when the vehicle
is on a slope, ice or slippery areas.
This is dangerous.
cNever change tires if oncoming traffic
is close to your vehicle. Wait for pro-
fessional road assistance.c
Raise the hood to warn other traffic,
and to signal professional road assis-
tance personnel that you need
assistance.
cHave all passengers get out of the
vehicle and stand in a safe place, away
from traffic and clear of the vehicle.
CE1050MA
ACE0601
FLAT TIRE
5-2
ZX
Page 102 of 191
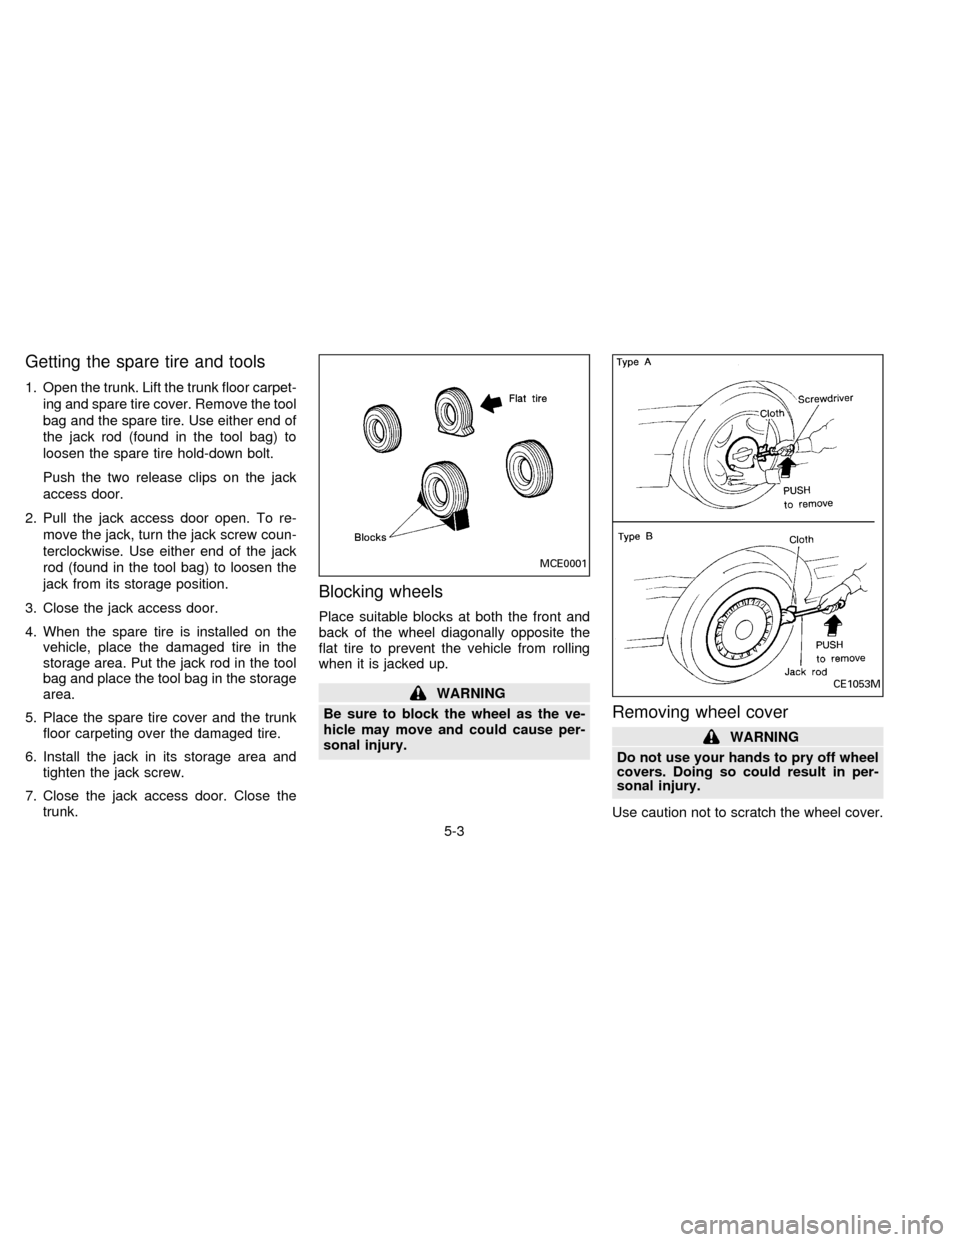
Getting the spare tire and tools
1. Open the trunk. Lift the trunk floor carpet-
ing and spare tire cover. Remove the tool
bag and the spare tire. Use either end of
the jack rod (found in the tool bag) to
loosen the spare tire hold-down bolt.
Push the two release clips on the jack
access door.
2. Pull the jack access door open. To re-
move the jack, turn the jack screw coun-
terclockwise. Use either end of the jack
rod (found in the tool bag) to loosen the
jack from its storage position.
3. Close the jack access door.
4. When the spare tire is installed on the
vehicle, place the damaged tire in the
storage area. Put the jack rod in the tool
bag and place the tool bag in the storage
area.
5. Place the spare tire cover and the trunk
floor carpeting over the damaged tire.
6. Install the jack in its storage area and
tighten the jack screw.
7. Close the jack access door. Close the
trunk.
Blocking wheels
Place suitable blocks at both the front and
back of the wheel diagonally opposite the
flat tire to prevent the vehicle from rolling
when it is jacked up.
WARNING
Be sure to block the wheel as the ve-
hicle may move and could cause per-
sonal injury.
Removing wheel cover
WARNING
Do not use your hands to pry off wheel
covers. Doing so could result in per-
sonal injury.
Use caution not to scratch the wheel cover.
MCE0001
CE1053M
5-3
ZX
Page 143 of 191
cAiming is not necessary after replac-
ing the bulb. When aiming adjust-
ment is necessary, contact your NIS-
SAN dealer.
cDo not leave the bulb out of the head-
light reflector for a long period of
time as dust, moisture, and smoke
may enter the headlight body and
affect the performance of the head-
light.
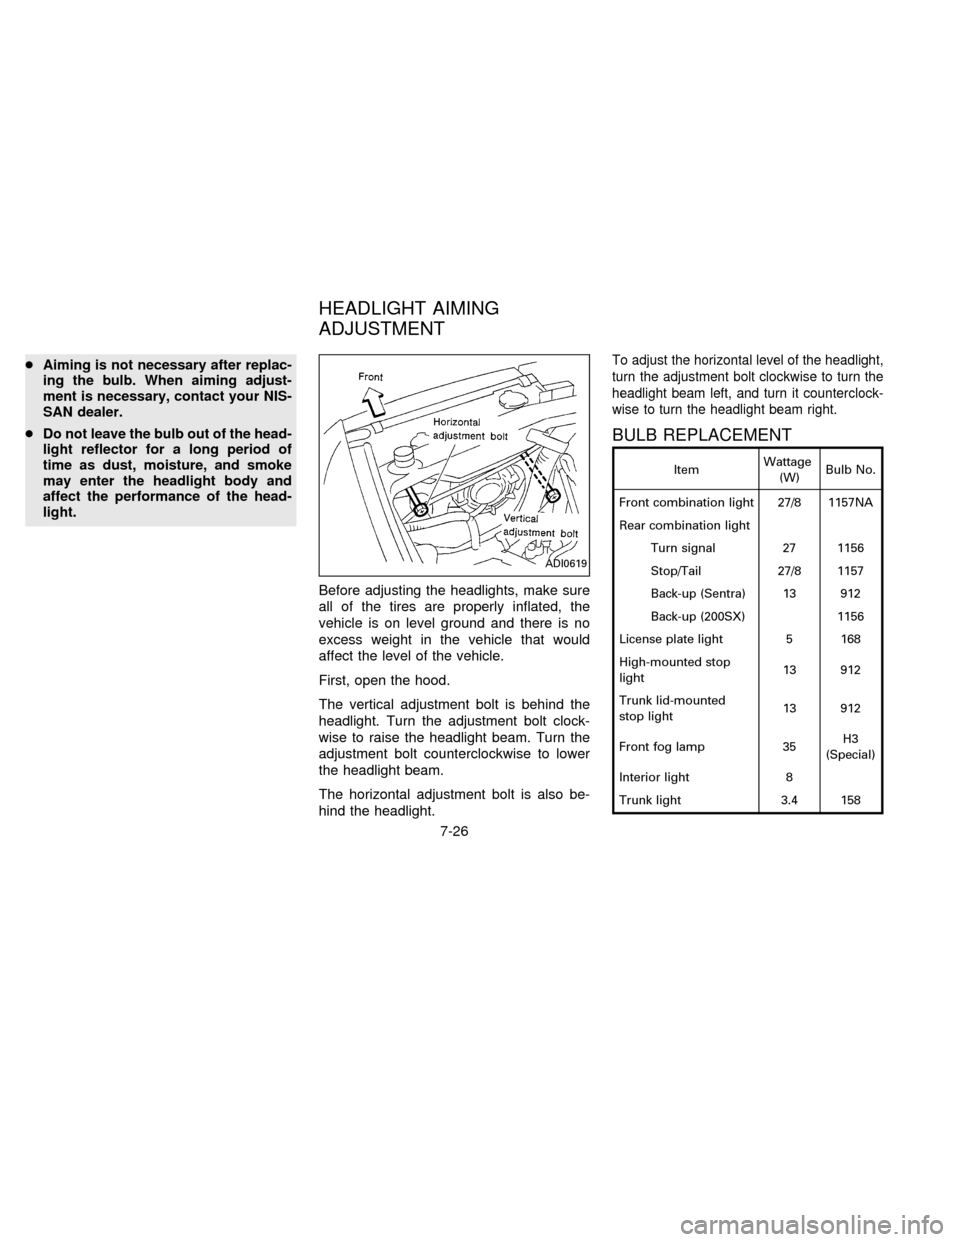
Before adjusting the headlights, make sure
all of the tires are properly inflated, the
vehicle is on level ground and there is no
excess weight in the vehicle that would
affect the level of the vehicle.
First, open the hood.
The vertical adjustment bolt is behind the
headlight. Turn the adjustment bolt clock-
wise to raise the headlight beam. Turn the
adjustment bolt counterclockwise to lower
the headlight beam.
The horizontal adjustment bolt is also be-
hind the headlight.To adjust the horizontal level of the headlight,
turn the adjustment bolt clockwise to turn the
headlight beam left, and turn it counterclock-
wise to turn the headlight beam right.
BULB REPLACEMENT
ItemWattage
(W)Bulb No.
Front combination light 27/8 1157NA
Rear combination light
Turn signal 27 1156
Stop/Tail 27/8 1157
Back-up (Sentra) 13 912
Back-up (200SX) 1156
License plate light 5 168
High-mounted stop
light13 912
Trunk lid-mounted
stop light13 912
Front fog lamp 35H3
(Special)
Interior light 8
Trunk light 3.4 158
ADI0619
HEADLIGHT AIMING
ADJUSTMENT
7-26
ZX
Page 149 of 191
If you have a flat tire, see the ``In case of
emergency'' section.
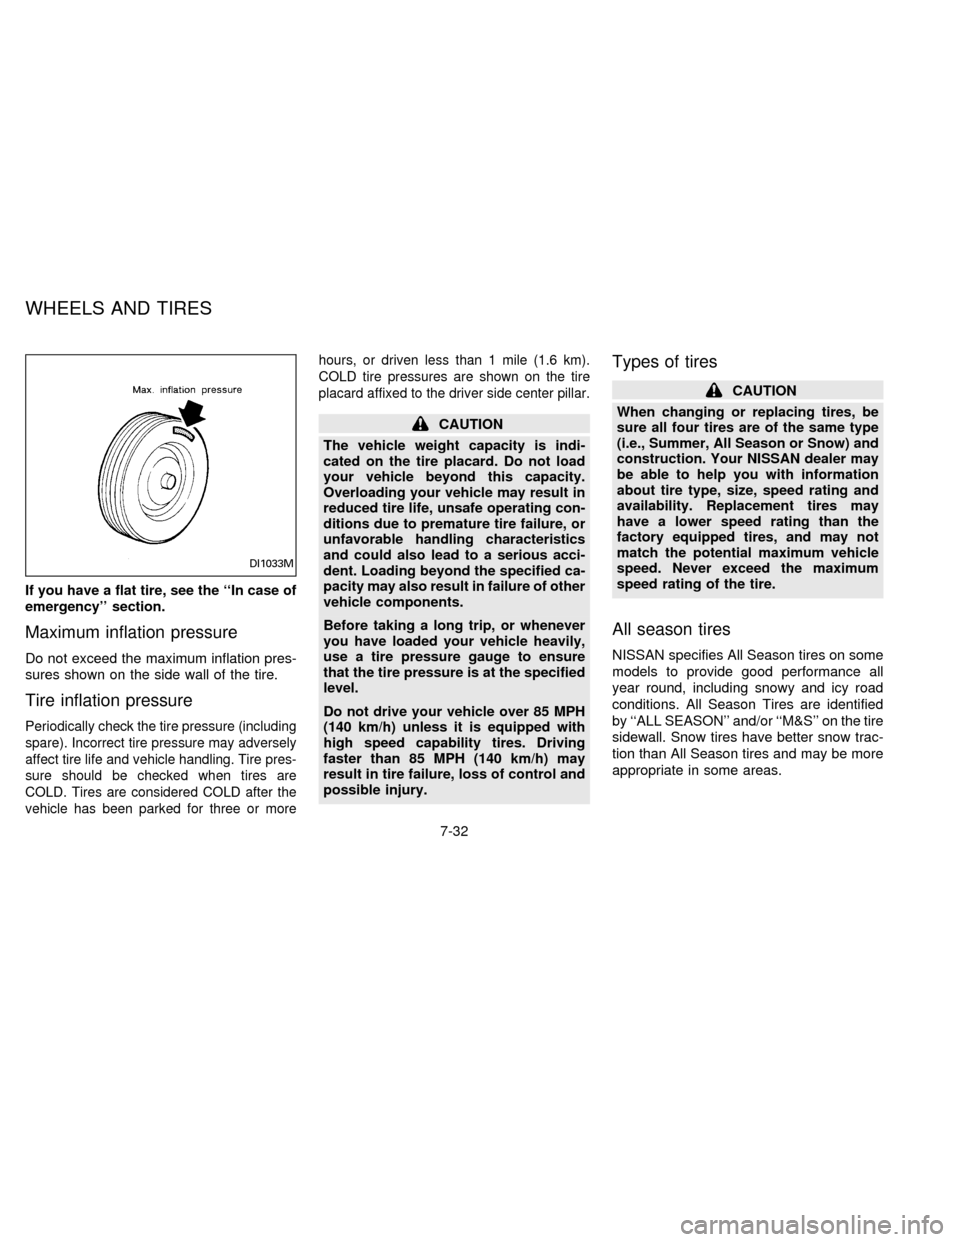
Maximum inflation pressure
Do not exceed the maximum inflation pres-
sures shown on the side wall of the tire.
Tire inflation pressure
Periodically check the tire pressure (including
spare). Incorrect tire pressure may adversely
affect tire life and vehicle handling. Tire pres-
sure should be checked when tires are
COLD. Tires are considered COLD after the
vehicle has been parked for three or morehours, or driven less than 1 mile (1.6 km).
COLD tire pressures are shown on the tire
placard affixed to the driver side center pillar.
CAUTION
The vehicle weight capacity is indi-
cated on the tire placard. Do not load
your vehicle beyond this capacity.
Overloading your vehicle may result in
reduced tire life, unsafe operating con-
ditions due to premature tire failure, or
unfavorable handling characteristics
and could also lead to a serious acci-
dent. Loading beyond the specified ca-
pacity may also result in failure of other
vehicle components.
Before taking a long trip, or whenever
you have loaded your vehicle heavily,
use a tire pressure gauge to ensure
that the tire pressure is at the specified
level.
Do not drive your vehicle over 85 MPH
(140 km/h) unless it is equipped with
high speed capability tires. Driving
faster than 85 MPH (140 km/h) may
result in tire failure, loss of control and
possible injury.
Types of tires
CAUTION
When changing or replacing tires, be
sure all four tires are of the same type
(i.e., Summer, All Season or Snow) and
construction. Your NISSAN dealer may
be able to help you with information
about tire type, size, speed rating and
availability. Replacement tires may
have a lower speed rating than the
factory equipped tires, and may not
match the potential maximum vehicle
speed. Never exceed the maximum
speed rating of the tire.
All season tires
NISSAN specifies All Season tires on some
models to provide good performance all
year round, including snowy and icy road
conditions. All Season Tires are identified
by ``ALL SEASON'' and/or ``M&S'' on the tire
sidewall. Snow tires have better snow trac-
tion than All Season tires and may be more
appropriate in some areas.
DI1033M
WHEELS AND TIRES
7-32
ZX
Page 150 of 191

Summer tires
NISSAN specifies summer tires on some
models to provide superior performance on
dry roads. Summer tire performance in
snow and ice is substantially reduced. Sum-
mer tires do not have the tire traction rating
``M&S'' on the tire sidewall.
If you plan to operate your vehicle in snowy
or icy conditions, NISSAN recommends the
use of ``SNOW'' or ``ALL SEASON'' tires on
all four wheels.
Snow tires
If snow tires are needed, it is necessary to
select tires equivalent in size and load rating
to the original equipment tires. If you do not,
it can adversely affect the safety and han-
dling of your vehicle.
Generally, snow tires have lower speed
ratings than factory equipped tires and may
not match the potential maximum vehicle
speed. Never exceed the maximum speed
rating of the tire.
For additional traction on icy roads, studded
tires may be used. However, some prov-
inces and states prohibit their use. Check
local, state and provincial laws before in-stalling studded tires. Skid and traction ca-
pabilities of studded snow tires on wet or dry
surfaces may be poorer than that of non-
studded snow tires.
Tire chains
Use of tire chains may be prohibited accord-
ing to location. Check the local laws before
installing tire chains. When installing tire
chains, make sure they are of proper size
for the tires on your vehicle and are installed
according to the chain manufacturer's sug-
gestions. Use only SAE class ªSº chains.
Other types may damage your vehicle. Use
chain tensioners when recommended by
the tire chain manufacturer to ensure a tight
fit. Loose end links of the tire chain must be
secured or removed to prevent the possibil-
ity of whipping action damage to the fenders
or underbody. If possible, avoid fully loading
your vehicle when using tire chains. In ad-
dition, drive at a reduced speed. Otherwise,
your vehicle may be damaged and/or ve-
hicle handling and performance may be
adversely affected.
Never install tire chains on a T-type spare
tire. Do not use chains on dry roads.
Tire rotation
NISSAN recommends rotating the tires
every 7,500 miles (12,000 km).
See ``Flat tire'' in the ``In case of emergency''
section for tire replacing procedures.
DI1127M
7-33
ZX