Page 22 of 191

MANUAL WINDOW OPERATION
(If so equipped)
The side windows can be opened or closed
by turning the hand crank on each door. To
open the window, turn the crank counter-
clockwise. To close the window, turn the
crank clockwise.The power windows operate only when the
ignition key is in the ON position.
To open the window, lightly tap the driver
side button until the desired position is
reached. To close the window, lift the switch
upward. The driver side control panel is
equipped with switches to open or close all
the windows.
Locking passengers' windows
When the window lock button is depressed,
only the driver side window can be opened
or closed. Push it again to cancel the win-
dow lock function.The passenger side switch opens or closes
only the corresponding window. To open
the window, push the switch downward. To
close the window, lift the switch upward.
WARNING
cMake sure that all passengers have
their hands, etc. inside the vehicle
before closing the windows.
cDo not leave children unattended in-
side the vehicle. They could unknow-
ingly activate switches.
AIC0630AIC0612AIC0613
POWER WINDOWS
(If so equipped)
1-15
ZX
Page 24 of 191
To tilt the sun roof down, push the switch
toward DOWN/OPEN. Continuing to push
the DOWN/OPEN switch opens the sun
roof.
Sun shade
Open and close the sun shade by sliding it
forward or backward.
WARNING
cBe extremely careful not to have any
part of your body in the sun roof
opening while it is closing.
cDo not stand up or extend any por-
tion of your body out of the opening
while driving.
cRemove water drops, snow, ice or
sand from the sun roof before
opening.
cDo not place any heavy object on the
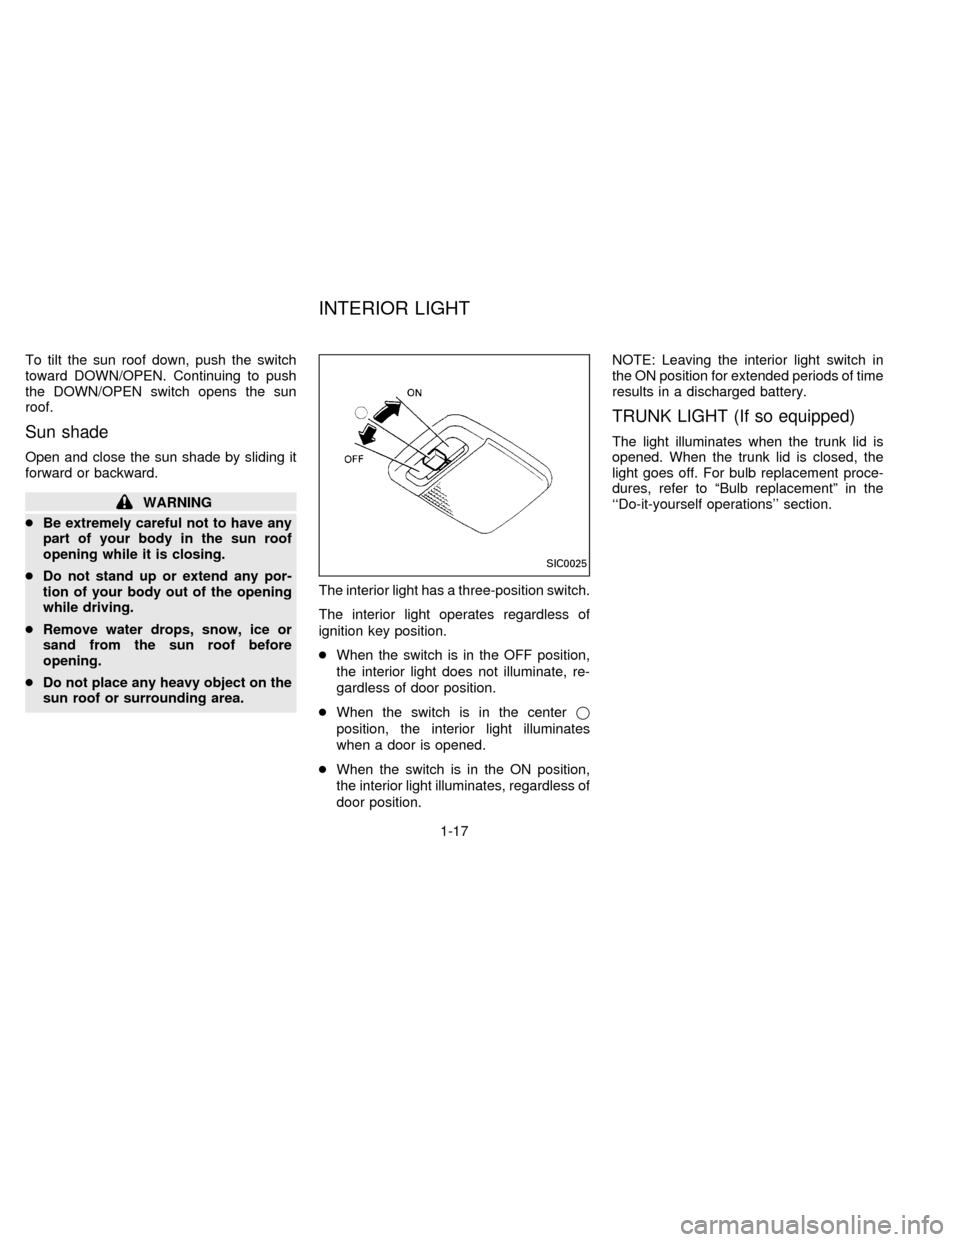
sun roof or surrounding area.The interior light has a three-position switch.
The interior light operates regardless of
ignition key position.
cWhen the switch is in the OFF position,
the interior light does not illuminate, re-
gardless of door position.
cWhen the switch is in the centerj
position, the interior light illuminates
when a door is opened.
cWhen the switch is in the ON position,
the interior light illuminates, regardless of
door position.NOTE: Leaving the interior light switch in
the ON position for extended periods of time
results in a discharged battery.
TRUNK LIGHT (If so equipped)
The light illuminates when the trunk lid is
opened. When the trunk lid is closed, the
light goes off. For bulb replacement proce-
dures, refer to ªBulb replacementº in the
``Do-it-yourself operations'' section.
SIC0025
INTERIOR LIGHT
1-17
ZX
Page 26 of 191

2 Pre-driving checks and adjustments
Key ....................................................................... 2-2
Door locks ............................................................ 2-2
Multi-remote control system (If so equipped) ...... 2-4
Child safety rear door lock ................................... 2-7
Hood release ........................................................ 2-8
Glove box ............................................................. 2-9
Trunk lid lock operation ........................................ 2-9
Fuel filler lid lock operation ................................ 2-11
Front Seats ......................................................... 2-13
Supplemental restraint system
(Air bag system) (If so equipped) ...................... 2-15
Warning labels (If so equipped) ......................... 2-20
Air bag warning light (If so equipped) ................ 2-20
Seat belts ........................................................... 2-22
Child restraints for infants and small children.... 2-28
Tilting steering wheel ......................................... 2-34
Outside mirror control......................................... 2-34
Inside mirror ....................................................... 2-35
Vanity mirror (If so equipped) ............................ 2-35
ZX
Page 31 of 191

Replace the two batteries as follows:
1. Remove the screw and open the lid.
2. Replace the batteries with new ones.
Insert the batteries as illustrated above.Recommended batteries: Sanyo CR2016
or equivalent.
3. Close the lid securely and install the
screw.
4. Press the
button, then thebuttontwo or three times to check the multi-
remote controller operation.
If the batteries are removed for any rea-
son other than replacement, perform
step 4 above.
cAn improperly disposed battery can
hurt the environment. Always confirm
local regulations for battery disposal.
cThe multi-remote controller is water-
resistant; however, if it does get wet,
immediately wipe completely dry.
cThe operational range of the multi-
remote controller extends to approxi-
mately 49 ft (15 m) from the vehicle.
This range may vary with conditions.
FCC Notice:
This device complies with FCC rules part
15. Operation is subject to the following
two conditions: (1) This device may not
cause harmful interference and (2) This
device must accept any interference that
may be received, including interference
that may cause undesired operation.
The transmitter has been tested and
complies with FCC and DOC/MDC rules.
Changes or modifications not expressly
APD0623
BATTERY REPLACEMENT
2-6
ZX
Page 34 of 191
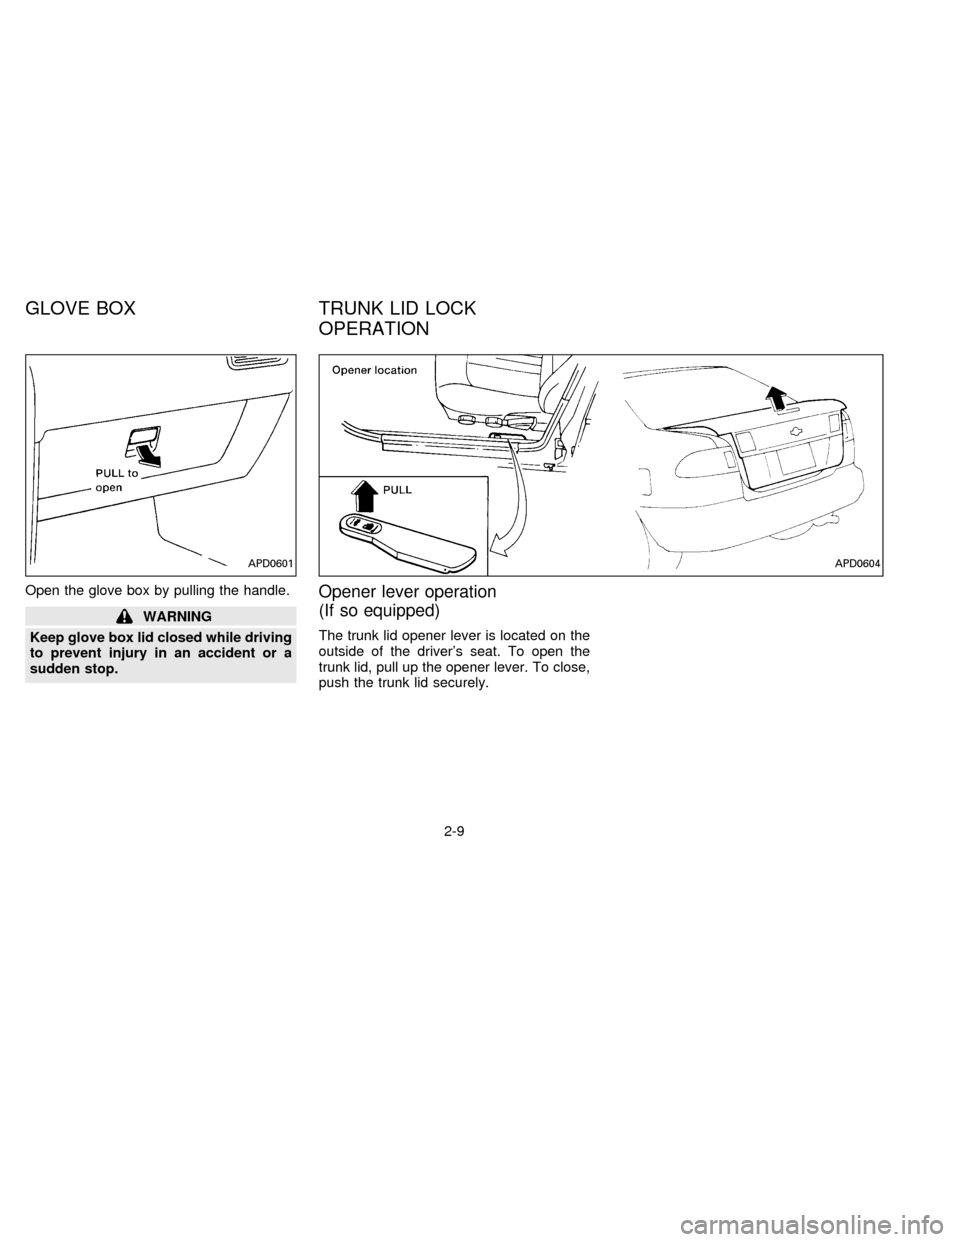
Open the glove box by pulling the handle.
WARNING
Keep glove box lid closed while driving
to prevent injury in an accident or a
sudden stop.
Opener lever operation
(If so equipped)
The trunk lid opener lever is located on the
outside of the driver's seat. To open the
trunk lid, pull up the opener lever. To close,
push the trunk lid securely.
APD0601APD0604
GLOVE BOX TRUNK LID LOCK
OPERATION
2-9
ZX
Page 35 of 191
Key operation
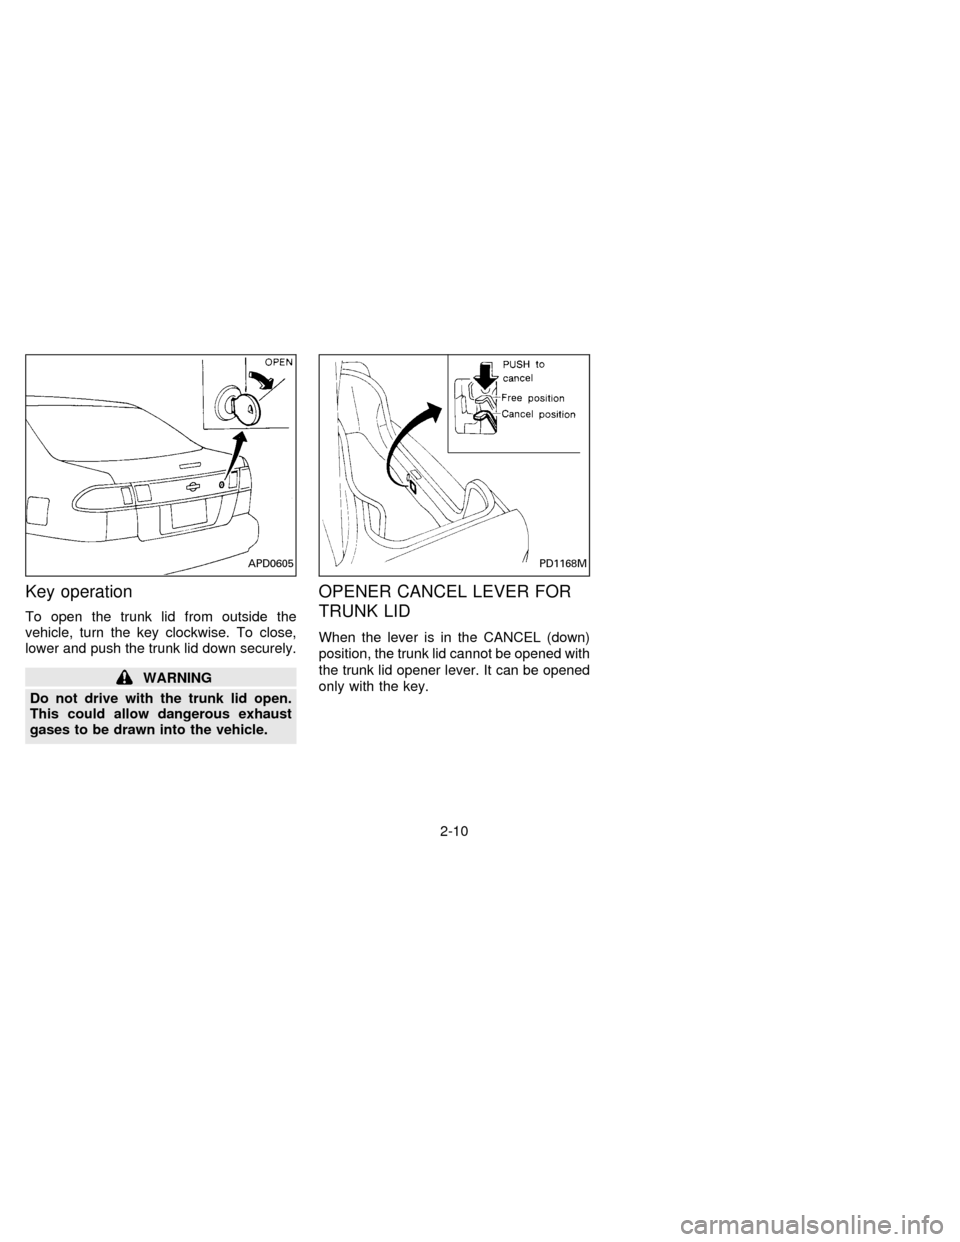
To open the trunk lid from outside the
vehicle, turn the key clockwise. To close,
lower and push the trunk lid down securely.
WARNING
Do not drive with the trunk lid open.
This could allow dangerous exhaust
gases to be drawn into the vehicle.
OPENER CANCEL LEVER FOR
TRUNK LID
When the lever is in the CANCEL (down)
position, the trunk lid cannot be opened with
the trunk lid opener lever. It can be opened
only with the key.
APD0605PD1168M
2-10
ZX
Page 36 of 191
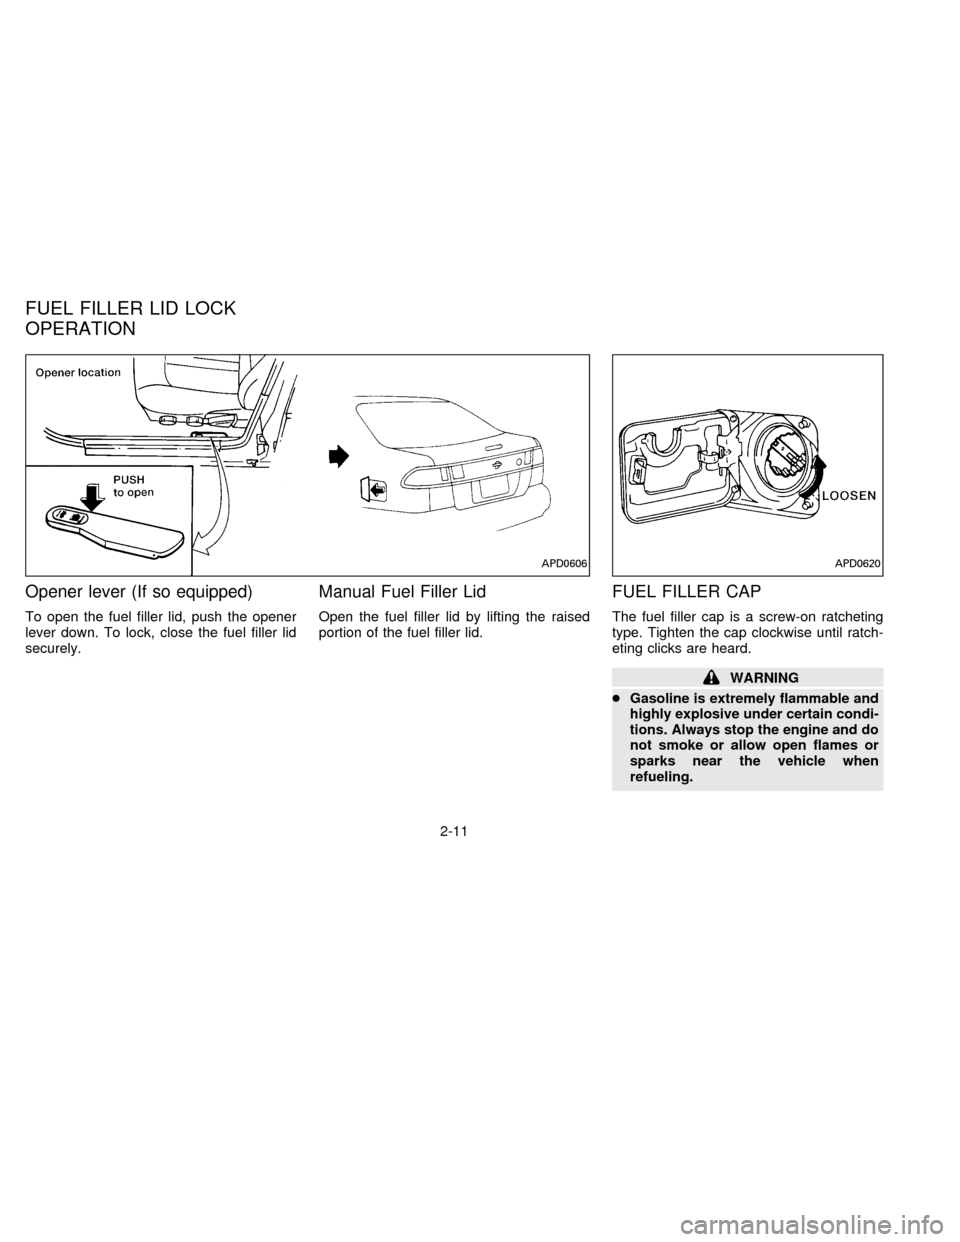
Opener lever (If so equipped)
To open the fuel filler lid, push the opener
lever down. To lock, close the fuel filler lid
securely.
Manual Fuel Filler Lid
Open the fuel filler lid by lifting the raised
portion of the fuel filler lid.
FUEL FILLER CAP
The fuel filler cap is a screw-on ratcheting
type. Tighten the cap clockwise until ratch-
eting clicks are heard.
WARNING
cGasoline is extremely flammable and
highly explosive under certain condi-
tions. Always stop the engine and do
not smoke or allow open flames or
sparks near the vehicle when
refueling.
APD0606APD0620
FUEL FILLER LID LOCK
OPERATION
2-11
ZX
Page 42 of 191
WARNING
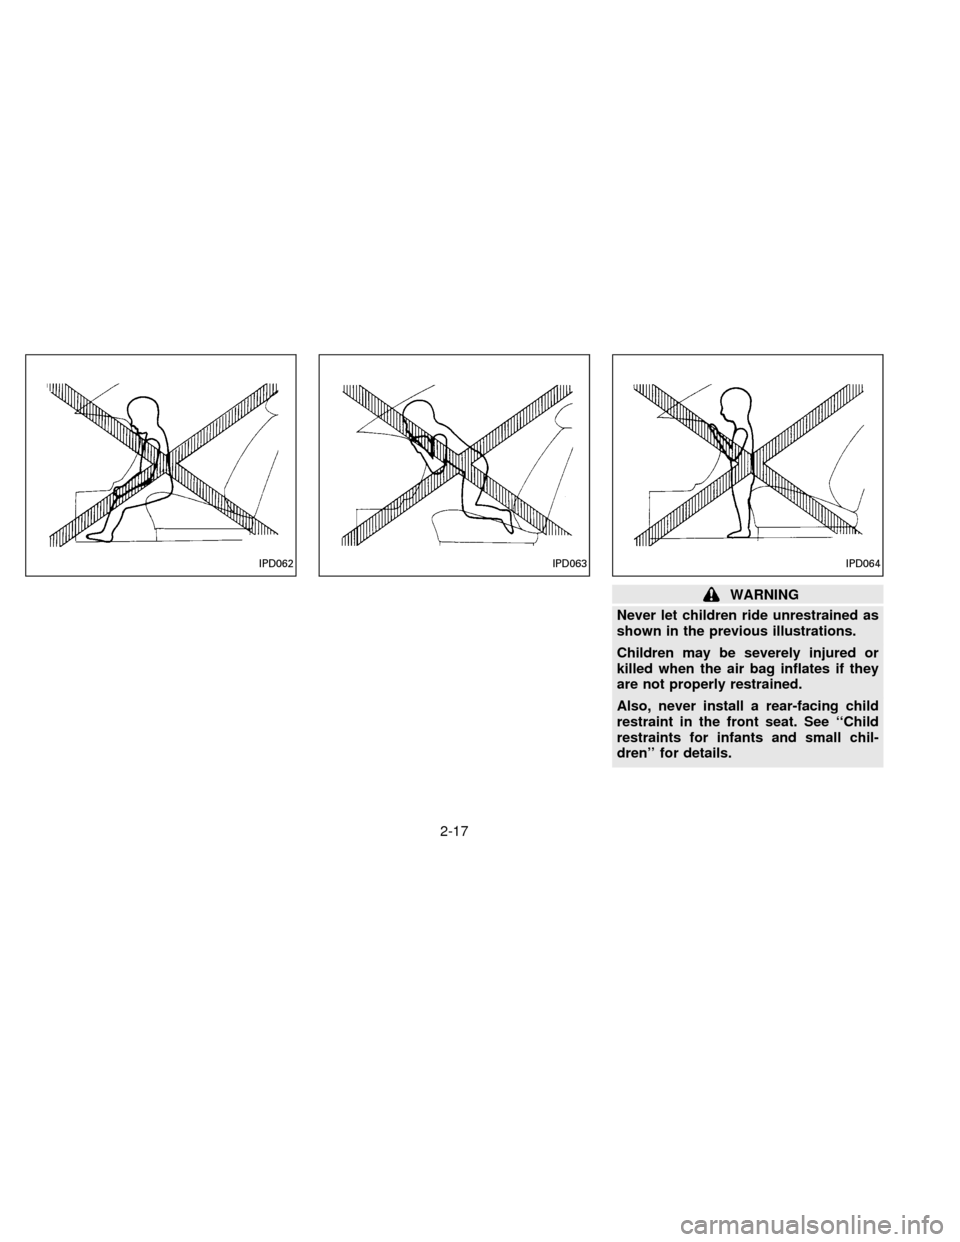
Never let children ride unrestrained as
shown in the previous illustrations.
Children may be severely injured or
killed when the air bag inflates if they
are not properly restrained.
Also, never install a rear-facing child
restraint in the front seat. See ``Child
restraints for infants and small chil-
dren'' for details.
IPD062IPD063IPD064
2-17
ZX