1996 NISSAN QUEST belt
[x] Cancel search: beltPage 195 of 235

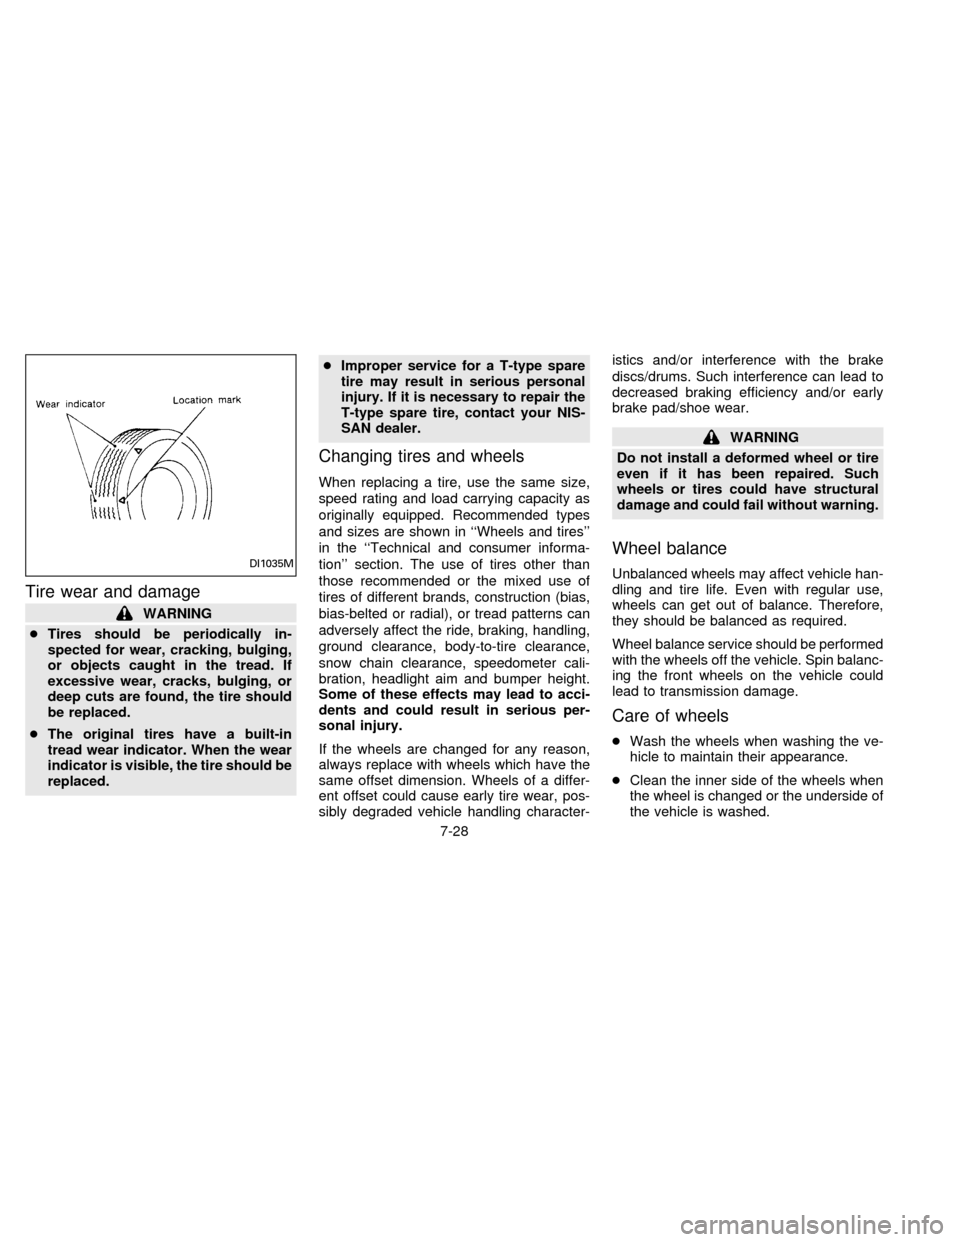
Tire wear and damage
WARNING
cTires should be periodically in-
spected for wear, cracking, bulging,
or objects caught in the tread. If
excessive wear, cracks, bulging, or
deep cuts are found, the tire should
be replaced.
cThe original tires have a built-in
tread wear indicator. When the wear
indicator is visible, the tire should be
replaced.cImproper service for a T-type spare
tire may result in serious personal
injury. If it is necessary to repair the
T-type spare tire, contact your NIS-
SAN dealer.
Changing tires and wheels
When replacing a tire, use the same size,
speed rating and load carrying capacity as
originally equipped. Recommended types
and sizes are shown in ``Wheels and tires''
in the ``Technical and consumer informa-
tion'' section. The use of tires other than
those recommended or the mixed use of
tires of different brands, construction (bias,
bias-belted or radial), or tread patterns can
adversely affect the ride, braking, handling,
ground clearance, body-to-tire clearance,
snow chain clearance, speedometer cali-
bration, headlight aim and bumper height.
Some of these effects may lead to acci-
dents and could result in serious per-
sonal injury.
If the wheels are changed for any reason,
always replace with wheels which have the
same offset dimension. Wheels of a differ-
ent offset could cause early tire wear, pos-
sibly degraded vehicle handling character-istics and/or interference with the brake
discs/drums. Such interference can lead to
decreased braking efficiency and/or early
brake pad/shoe wear.
WARNING
Do not install a deformed wheel or tire
even if it has been repaired. Such
wheels or tires could have structural
damage and could fail without warning.
Wheel balance
Unbalanced wheels may affect vehicle han-
dling and tire life. Even with regular use,
wheels can get out of balance. Therefore,
they should be balanced as required.
Wheel balance service should be performed
with the wheels off the vehicle. Spin balanc-
ing the front wheels on the vehicle could
lead to transmission damage.
Care of wheels
cWash the wheels when washing the ve-
hicle to maintain their appearance.
cClean the inner side of the wheels when
the wheel is changed or the underside of
the vehicle is washed.
DI1035M
7-28
ZB13-DX
Page 200 of 235

make sure no nuts are missing, and check
for any loose nuts. Tighten if necessary.
Tire rotation*Ð Tires should be rotated
every 7,500 miles (12,000 km).
Wheel alignment and balanceÐIfthe
vehicle should pull to either side while driv-
ing on a straight and level road, or if you
detect uneven or abnormal tire wear, there
may be a need for wheel alignment.
If the steering wheel or seat vibrates at
normal highway speeds, wheel balancing
may be needed.
Windshield wiper blades*Ð Check for
cracks or wear if they do not wipe properly.
Doors and engine hoodÐ Check that all
doors and the engine hood operate prop-
erly. Also ensure that all latches lock se-
curely. Lubricate hinges, latches, rollers and
links if necessary. Make sure the secondary
latch keeps the hood from opening when
the primary latch is released.
When driving in areas using road salt or
other corrosive materials, check lubrication
frequently.INSIDE THE VEHICLE
The maintenance items listed here should
be checked on a regular basis, such as
when performing periodic maintenance,
cleaning the vehicle, etc.
Lights*Ð Make sure the headlights, stop
lights, tail lights, turn signal lights, and other
lights are all operating properly and installed
securely. Also check headlight aim.
Warning lights and buzzers/chimesÐ
Make sure all warning lights and
buzzers/chimes are operating properly.
Windshield wiper and washer*Ð Check
that the wipers and washer operate properly
and that the wipers do not streak.
Windshield defrosterÐ Check that the air
comes out of the defroster outlets properly
and in sufficient quantity when operating the
heater or air conditioner.
Steering wheelÐ Check for changes in
the steering conditions, such as excessive
freeplay, hard steering or strange noises.
SeatsÐ Check seat position controls such
as seat adjusters, seatback recliner, etc. to
ensure they operate smoothly and all
latches lock securely in every position.Check that the head restraints move up and
down smoothly and the locks hold securely
in all latched positions. Check that the seat
leg latches lock securely in every anchor
position for the folding down rear seat and
detachable rear seat (if so equipped).
Seat beltsÐ Check that all parts of the seat
belt system (e.g. buckles, anchors, adjust-
ers and retractors) operate properly and
smoothly, and are installed securely. Check
the belt webbing for cuts, fraying, wear or
damage.
Accelerator pedalÐ Check the pedal for
smooth operation and make sure the pedal
does not catch or require uneven effort.
Keep the floor mats away from the pedal.
BrakesÐ Check that the brakes do not pull
the vehicle to one side when applied.
Brake pedal*Ð Check the pedal for
smooth operation and make sure it has the
proper distance under it when depressed
fully. Check the brake booster function. Be
certain to keep floor mats away from the
pedal.
Parking brake*Ð Check that the pedal is
adjusted to specification and confirm that
your vehicle is held securely on a fairly
8-3
ZX
Page 201 of 235

steep hill with only the parking brake ap-
plied.
Automatic transmission ``Park'' mecha-
nismÐ On a fairly steep hill check that your
vehicle is held securely with the selector
lever in the P (Park) position without apply-
ing any brakes.
UNDER THE HOOD AND
VEHICLE
The maintenance items listed here should
be checked periodically, for example, each
time you check the engine oil or refuel.
Windshield washer fluid* ÐCheck that
there is adequate fluid in the tank.
Engine coolant level*Ð Check the cool-
ant level when the engine is cold.
Radiator and hosesÐ Check the front of
the radiator and clean off any dirt, insects,
leaves, etc., that may have accumulated.
Make sure the hoses have no cracks, de-
formation, rot, or loose connections.
Brake fluid level*Ð Make sure the brake
fluid level is between the MAX and MIN
lines on the reservoir.
Battery*Ð Check the fluid level in eachcell. It should be between the MAX and MIN
lines.
Engine drive belts*Ð Make sure no belts
are frayed, worn, cracked or oily.
Engine oil level*Ð Check the level after
parking the vehicle on a level surface and
turning off the engine.
Power steering fluid level* and linesÐ
Check the level when the fluid is cold and
the engine is turned off. Check the lines for
proper attachment, leaks, cracks, etc.
Automatic transmission fluid level*Ð
Check the level after putting the selector
lever in P (Park) with the engine idling.
Exhaust systemÐ Make sure there are no
cracks, holes, loose joints or supports. If the
sound of the exhaust seems unusual or
there is a smell of exhaust fumes, immedi-
ately have the exhaust system inspected by
a qualified individual. (See the carbon mon-
oxide warning in the ``Starting and driving''
section.)
UnderbodyÐ The underbody is frequently
exposed to corrosive substances such as
those used on icy roads or to control dust. It
is very important to remove these sub-stances, otherwise rust forms on the floor
pan, frame, fuel lines and around the ex-
haust system. At the end of winter, the
underbody should be thoroughly flushed
with plain water, being careful to clean
those areas where mud and dirt may accu-
mulate. See the ``Appearance and interior
care'' section for additional information.
Fluid leaksÐ Check under the vehicle for
fuel, oil, water or other fluid leaks after the
vehicle has been parked for a while. Water
dripping from the air conditioner after use is
normal. If you should notice any leaks or if
gasoline fumes are evident, check for the
cause and have it corrected immediately.
8-4
ZX
Page 203 of 235
![NISSAN QUEST 1996 V40 / 1.G Owners Manual SCHEDULE 1
Abbreviations: R = Replace I = Inspect. Correct or replace if necessary. [ ]: At the mileage intervals only
MAINTENANCE OPERATIONMAINTENANCE INTERVAL
Perform at number of miles,
kilometers NISSAN QUEST 1996 V40 / 1.G Owners Manual SCHEDULE 1
Abbreviations: R = Replace I = Inspect. Correct or replace if necessary. [ ]: At the mileage intervals only
MAINTENANCE OPERATIONMAINTENANCE INTERVAL
Perform at number of miles,
kilometers](/manual-img/5/598/w960_598-202.png)
SCHEDULE 1
Abbreviations: R = Replace I = Inspect. Correct or replace if necessary. [ ]: At the mileage intervals only
MAINTENANCE OPERATIONMAINTENANCE INTERVAL
Perform at number of miles,
kilometers or months,
whichever comes first.Miles ý 1,000 3.75 7.5 11.25 15 18.75 22.5 26.25 30 33.75 37.5 41.25 45 48.75 52.5 56.25 60
(km ý 1,000) (6) (12) (18) (24) (30) (36) (42) (48) (54) (60) (66) (72) (78) (84) (90) (96)
Months 3 6 9 12 15 18 21 24 27 30 33 36 39 42 45 48
Emission control system maintenance
Drive belts See NOTE (1).I*
Air cleaner filter See NOTE (2). [R] [R]
Vapor linesI* I*
Fuel linesI* I*
Fuel filter See NOTE (3)*.
Engine coolantReplace every 30,000 miles (48,000 km) or 36 months.*
Engine oilRRRRRRRRRRRRRRRR
Engine oil filter (Use Nissan Premium type or equivalent.)RRRRRRRRRRRRRRRR
Spark plugs[R] [R]
Timing beltReplace every 105,000 miles (168,000 km).
NOTE: (1) After 60,000 miles (96,000 km) or 48 months, inspect every 15,000 miles (24,000 km) or 12 months.
(2) If operating mainly in dusty conditions, more frequent maintenance may be required.
(3) If vehicle is operated under extremely adverse weather conditions or in areas where ambient temperatures are either extremely low or
extremely high, the filters might become clogged. In such an event, replace them immediately.
* Maintenance items and intervals with ``*'' are recommended by NISSAN for reliable vehicle operation. The owner need not perform such
maintenance in order to maintain the emission warranty or manufacturer recall liability. Other maintenance items and intervals are
required.
8-6
ZX
Page 205 of 235
![NISSAN QUEST 1996 V40 / 1.G Owners Manual SCHEDULE 2
Abbreviations: R = Replace I = Inspect. Correct or replace if necessary. [ ]: At the mileage intervals only
MAINTENANCE OPERATIONMAINTENANCE INTERVAL
Perform at number of miles,
kilometers NISSAN QUEST 1996 V40 / 1.G Owners Manual SCHEDULE 2
Abbreviations: R = Replace I = Inspect. Correct or replace if necessary. [ ]: At the mileage intervals only
MAINTENANCE OPERATIONMAINTENANCE INTERVAL
Perform at number of miles,
kilometers](/manual-img/5/598/w960_598-204.png)
SCHEDULE 2
Abbreviations: R = Replace I = Inspect. Correct or replace if necessary. [ ]: At the mileage intervals only
MAINTENANCE OPERATIONMAINTENANCE INTERVAL
Perform at number of miles,
kilometers or months, whichever comes first.Miles ý 1,000 7.5 15 22.5 30 37.5 45 52.5 60
(km ý 1,000) (12) (24) (36) (48) (60) (72) (84) (96)
Months 6 12 18 24 30 36 42 48
Emission control system maintenance
Drive belts See NOTE (1).I*
Air cleaner housing filter[R] [R]
Vapor linesI* I*
Fuel linesI* I*
Fuel filter See NOTE (2)*.
Engine coolant Replace every 30,000 miles (48,000 km) or 36 months.*
Engine oilRRRRRRRR
Engine oil filter (Use Nissan Premium type, or equivalent.) See NOTE (1).RRRRRRRR
Spark plugs[R] [R]
Timing beltReplace every 105,000 miles (168,000 km).
NOTE: (1) After 60,000 miles (96,000 km) or 48 months, inspect every 15,000 miles (24,000 km) or 12 months.
(2) If vehicle is operated under extremely adverse weather conditions or in areas where ambient temperature are either extremely low or
extremely high, the filters might become clogged. In such an event, replace them immediately.
* Maintenance items and intervals with ``*'' are recommended by NISSAN for reliable vehicle operation. The owner need not perform such
maintenance in order to maintain the emission warranty or manufacturer recall liability. Other maintenance items and intervals are
required.
8-8
ZX
Page 207 of 235

EXPLANATION OF
MAINTENANCE ITEMS
Additional information on the following
items with ``*'' is found in the ``Do-it-
yourself operations'' section.
Emission control system mainte-
nance
Drive belts* ÐCheck drive belts for wear,
fraying or cracking and also for proper ten-
sion. Replace the drive belts if found dam-
aged.
Air cleaner filter ÐUnder normal driving
conditions, the air cleaner filter should be
replaced in accordance with the mainte-
nance schedule. However, driving the ve-
hicle in dusty areas may cause more rapid
clogging of the element. Consequently, the
element may have to be replaced more
frequently.
Vapor lines ÐCheck vapor lines and con-
nections for failure or looseness. If leaks are
found, replace them.
Fuel lines ÐCheck the fuel hoses, piping
and connections for leaks, looseness or
deterioration. Replace any parts if they are
damaged.Fuel filter ÐIf the vehicle is operated
under extremely adverse weather condi-
tions or in areas where ambient tempera-
tures are either extremely low or extremely
high, the filter might become clogged. In
such an event, replace the filter immedi-
ately.
Engine coolant* ÐChanging engine cool-
ant can be performed by your NISSAN
dealer or procedures can be found in the
Service Manual. Improper air relief after
changing coolant can result in reduced
heater performance and overheating.
Engine oil & oil filter* ÐUnder normal
driving conditions, the engine oil and oil filter
should be replaced in accordance with the
maintenance schedule. However, under se-
vere driving conditions, they may have to be
replaced more frequently.
Spark plugs* ÐReplace with new plugs
having the correct heat range.
Timing belt ÐReplace the timing belt for
driving the camshaft.
Chassis and body maintenance
Brake lines & cables ÐCheck the brake
lines and hoses (including brake boostervacuum hoses, connections & check valve)
and parking brake cables for proper attach-
ment, leaks, cracks, chafing, abrasion, de-
terioration, etc.
Brake pads, discs, drums & linings Ð
Check these and the other neighboring
brake components for wear, deterioration
and leaks. Under severe driving conditions,
they may have to be inspected more fre-
quently.
Automatic transmission fluid* ÐCheck
the fluid level and visually inspect for signs
of leakage.
Under severe driving conditions, the fluid
should be replaced at the specified interval.
Steering gear & linkage, axle & suspen-
sion parts, and drive shaft boots Ð
Check for damage, looseness and leakage
of oil or grease. Under severe driving con-
ditions, more frequent inspection should be
performed.
Steering linkage ball joints & front sus-
pension ball joints ÐCheck the ball joints
for damage, looseness and grease leakage.
8-10
ZX
Page 216 of 235

ModelVG30E
TypeGasoline, 4-cycle
Cylinder arrangement6-cylinder, V slanted at 60É
Bore ý Stroke in (mm) 3.425 ý 3.268 (87.0 ý 83.0)
Displacement cu in (cm
3) 180.62 (2,960)
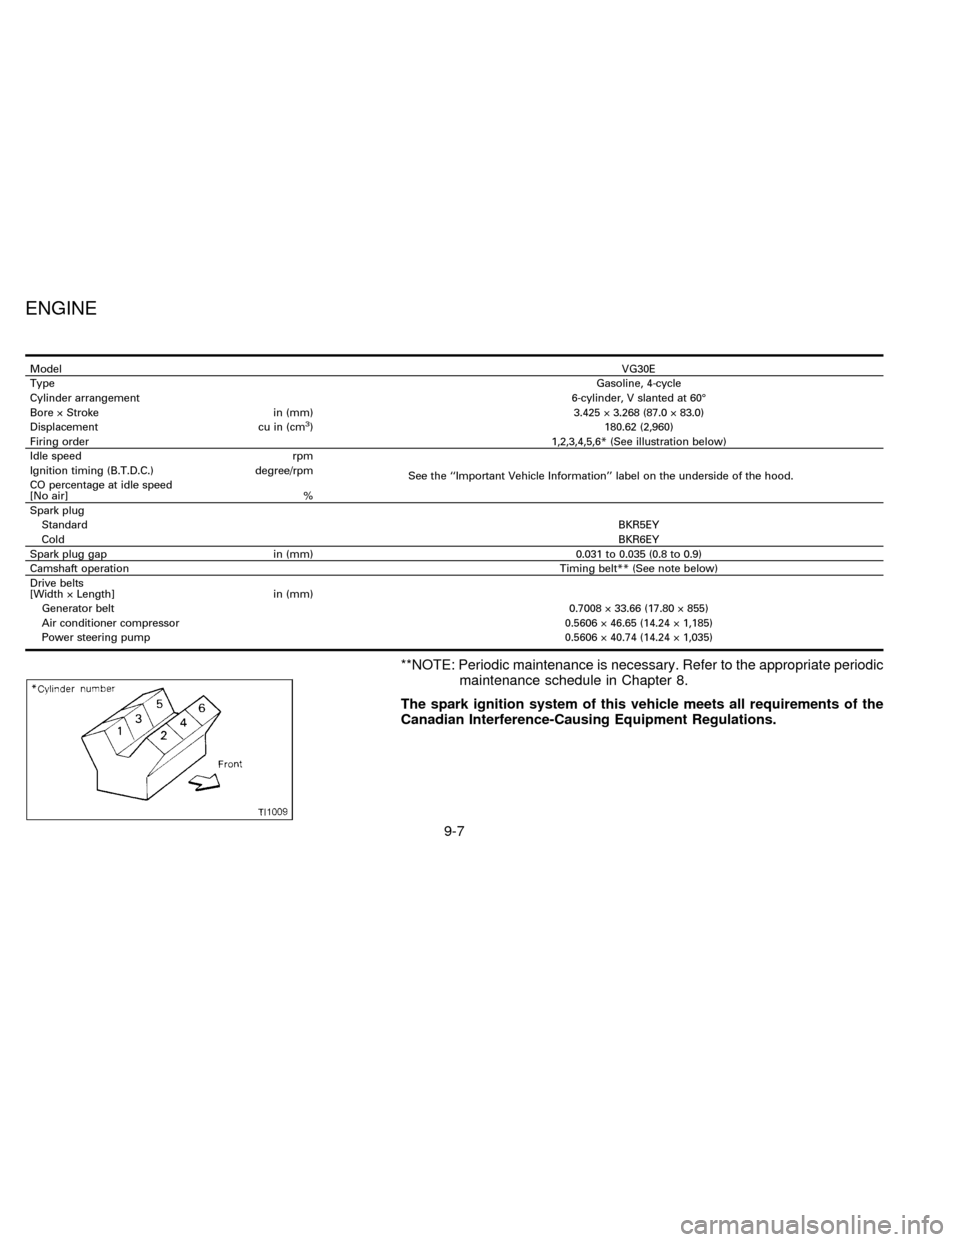
Firing order1,2,3,4,5,6* (See illustration below)
Idle speed rpm
See the ``Important Vehicle Information'' label on the underside of the hood. Ignition timing (B.T.D.C.) degree/rpm
CO percentage at idle speed
[No air] %
Spark plug
StandardBKR5EY
ColdBKR6EY
Spark plug gap in (mm) 0.031 to 0.035 (0.8 to 0.9)
Camshaft operationTiming belt** (See note below)
Drive belts
[Width ý Length] in (mm)
Generator belt0.7008 ý 33.66 (17.80 ý 855)
Air conditioner compressor0.5606 ý 46.65 (14.24 ý 1,185)
Power steering pump0.5606 ý 40.74 (14.24 ý 1,035)
**NOTE: Periodic maintenance is necessary. Refer to the appropriate periodic
maintenance schedule in Chapter 8.
The spark ignition system of this vehicle meets all requirements of the
Canadian Interference-Causing Equipment Regulations.
ENGINE
9-7
ZX
Page 221 of 235

VEHICLE LOADING INFORMATION
WARNING
cIt is extremely dangerous to ride in a
cargo area inside of a vehicle. In a
collision, people riding in these ar-
eas are more likely to be seriously
injured or killed.
cDo not allow people to ride in any
area of your vehicle that is not
equipped with seats and seat belts.
c
Be sure everyone in your vehicle is in
a seat and using a seat belt properly.
Terms
It is important to familiarize yourself with the
following terms before loading your vehicle:
cCurb Weight (actual weight of your ve-
hicle) - vehicle weight including: standard
and optional equipment, fluids, emer-
gency tools, and spare tire assembly.
This weightdoes notinclude passen-
gers and cargo.
cGVW (Gross Vehicle Weight) - curb
weight plus the combined weight of pas-
sengers and cargo.cGVWR (Gross Vehicle Weight Rating) -
maximum total weight (load) limit speci-
fied for the vehicle.
cGAWR (Gross Axle Weight Rating) -
maximum weight (load) limit specified for
the front or rear axle.
cGross combined weight - GVW plus the
total weight of the trailer and all its cargo.
Determining Vehicle Load Capacity
The load capacity of this vehicle is deter-
mined by weight, not by available cargo
space. For example, a luggage rack, bike
carrier, cartop carrier or similar equipment
does not increase load carrying capacity of
your vehicle.
To determine vehicle load capacity:
Vehicle weight can be determined by using
a commercial-grade scale, found at places
such as a truck stop, gravel quarry, grain
elevator, or a scrap metal recycling facility.
1)
Determine the curb weight of your vehicle.
2) Compare the curb weight amount to the
GVWR specified for your vehicle to de-
termine how much more weight your
vehicle can carry.3) After loading (cargo & passengers), re-
weigh your vehicle to determine if either
GVWR or GAWR for your vehicle is
exceeded. If GVWR is exceeded, re-
move cargo as necessary. If either the
front or rear GAWR is exceeded, shift
the load or remove cargo as necessary.
Loading Tips
cThe GVW must not exceed GVWR or
GAWR specified on the FMVSS Certifi-
cation Label.
cDo not load the front and rear axle to the
GAWR. Doing so will exceed the GVWR.
CAUTION
c
Properly secure all cargo to help pre-
vent it from sliding or shifting. In a
sudden stop or collision, unsecured
cargo could cause personal injury.
cDo not load your vehicle any heavier
than the GVWR or the maximum
front and rear GAWRs. If you do,
parts on your vehicle can break, or it
can change the way your vehicle
handles. This could result in loss of
control and cause personal injury.
9-12
ZX