1996 NISSAN ALTIMA steering
[x] Cancel search: steeringPage 26 of 183

2 Pre-driving checks and adjustments
Key ....................................................................... 2-2
Door locks ............................................................ 2-2
Hood release ........................................................ 2-5
Glove box ............................................................. 2-5
Trunk lid lock operation ........................................ 2-6
Fuel filler lid lock operation .................................. 2-7
Front seats ........................................................... 2-9
Rear seat ............................................................ 2-11
Supplemental restraint system (air bag system). 2-12
Warning labels.................................................... 2-15
Air bag warning light .......................................... 2-16
Seat belts ........................................................... 2-17
Child restraints for infants and small children.... 2-23
Tilting steering wheel ......................................... 2-30
Outside mirror remote control ............................ 2-30
Outside mirrors ................................................... 2-30
Inside mirror ....................................................... 2-31
Vanity mirror (If so equipped) ............................ 2-31
ZX
Page 37 of 183
This Supplemental Restraint System sec-
tion contains important information concern-
ing the driver and passenger air bags. The
Supplemental Restraint System Air Bag can
help reduce impact force to the driver and to
the front passenger in certain frontal colli-
sions. The air bags are designed tosupple-
mentthe crash protection provided by the
driver and front passenger seat belts and
arenot a substitutefor them. The seat
belts should always be correctly worn and
the driver and front passenger seated a
suitable distance from the steering wheel
and instrument panel. (See ``Seat belts'' for
instructions and precautions on seat belt
usage.)
The supplemental air bags will operate
only when the ignition switch is in the
``ON'' or ``START'' position.
WARNING
The supplemental air bags ordinarily
will not inflate in the event of a side
impact, rear impact, roll over, or lower
severity frontal collision; so always
wear your seat belts to help reduce the
risk or severity of injury in various
kinds of accidents.
WARNING
The seat belts and the supplemental air
bags are most effective when you are
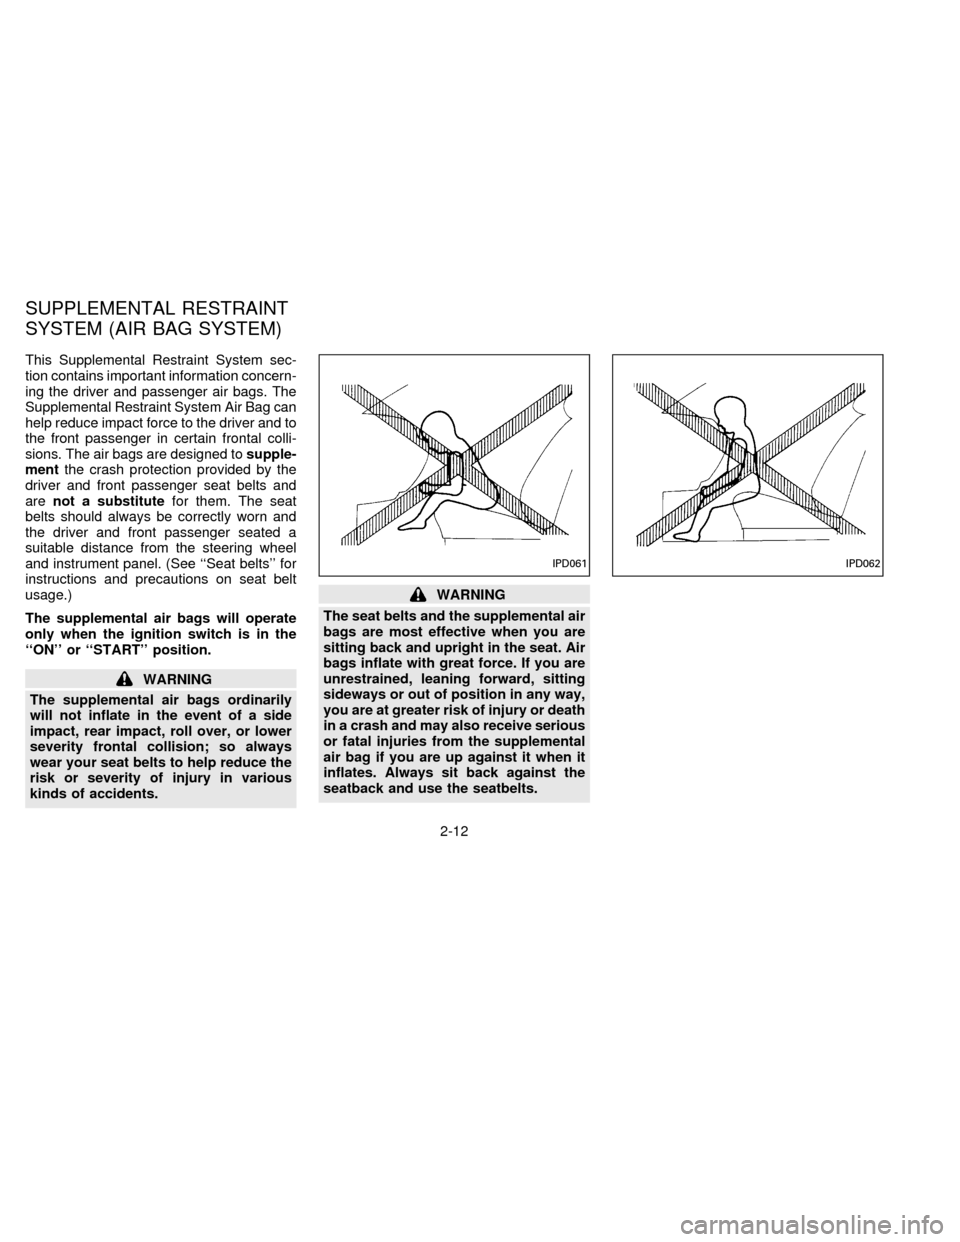
sitting back and upright in the seat. Air
bags inflate with great force. If you are
unrestrained, leaning forward, sitting
sideways or out of position in any way,
you are at greater risk of injury or death
in a crash and may also receive serious
or fatal injuries from the supplemental
air bag if you are up against it when it
inflates. Always sit back against the
seatback and use the seatbelts.
IPD062IPD061
SUPPLEMENTAL RESTRAINT
SYSTEM (AIR BAG SYSTEM)
2-12
ZX
Page 39 of 183
Air bag system
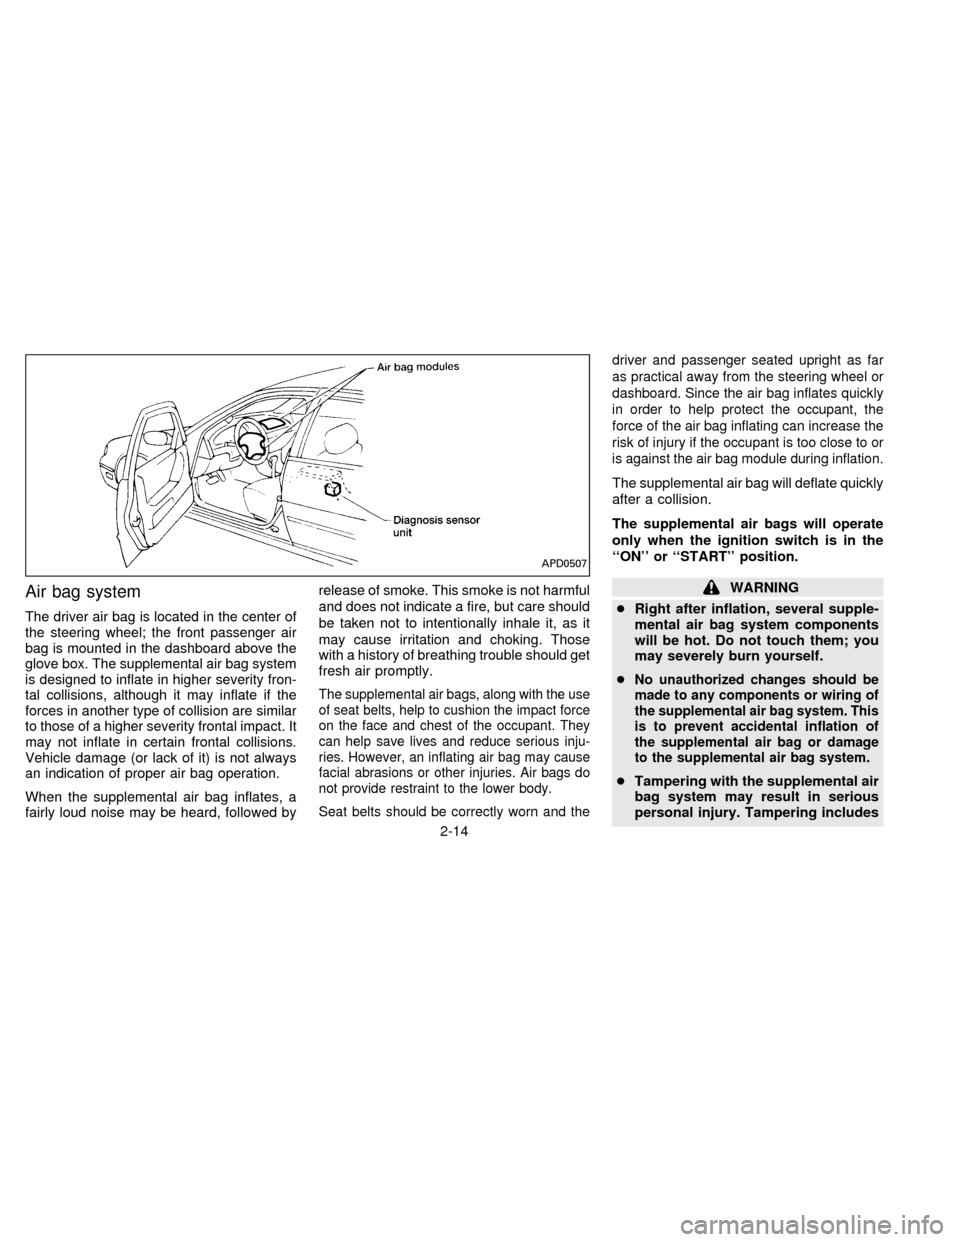
The driver air bag is located in the center of
the steering wheel; the front passenger air
bag is mounted in the dashboard above the
glove box. The supplemental air bag system
is designed to inflate in higher severity fron-
tal collisions, although it may inflate if the
forces in another type of collision are similar
to those of a higher severity frontal impact. It
may not inflate in certain frontal collisions.
Vehicle damage (or lack of it) is not always
an indication of proper air bag operation.
When the supplemental air bag inflates, a
fairly loud noise may be heard, followed byrelease of smoke. This smoke is not harmful
and does not indicate a fire, but care should
be taken not to intentionally inhale it, as it
may cause irritation and choking. Those
with a history of breathing trouble should get
fresh air promptly.
The supplemental air bags, along with the use
of seat belts, help to cushion the impact force
on the face and chest of the occupant. They
can help save lives and reduce serious inju-
ries. However, an inflating air bag may cause
facial abrasions or other injuries. Air bags do
not provide restraint to the lower body.
Seat belts should be correctly worn and thedriver and passenger seated upright as far
as practical away from the steering wheel or
dashboard. Since the air bag inflates quickly
in order to help protect the occupant, the
force of the air bag inflating can increase the
risk of injury if the occupant is too close to or
is against the air bag module during inflation.
The supplemental air bag will deflate quickly
after a collision.
The supplemental air bags will operate
only when the ignition switch is in the
``ON'' or ``START'' position.
WARNING
cRight after inflation, several supple-
mental air bag system components
will be hot. Do not touch them; you
may severely burn yourself.
c
No unauthorized changes should be
made to any components or wiring of
the supplemental air bag system. This
is to prevent accidental inflation of
the supplemental air bag or damage
to the supplemental air bag system.
cTampering with the supplemental air
bag system may result in serious
personal injury. Tampering includes
APD0507
2-14
ZX
Page 40 of 183
changes to the steering wheel and
the instrument panel assembly by
placing material over the steering
wheel pad and above the dashboard,
or by installing additional trim mate-
rial around the supplemental air bag
system.
cDo not place any objects on the
steering wheel pad or on the instru-
ment panel. Also, do not place any
objects between any occupant and
the steering wheel or instrument
panel. Such objects may become
dangerous projectiles and cause in-
jury if the air bag inflates.
cWork around and on the supplemen-
tal air bag system should be done by
an authorized NISSAN dealer. Instal-
lation of electrical equipment should
also be done by an authorized NIS-
SAN dealer. The yellow SRS wiring
should not be modified or discon-
nected. Unauthorized electrical test
equipment and probing devices
should not be used on the supple-
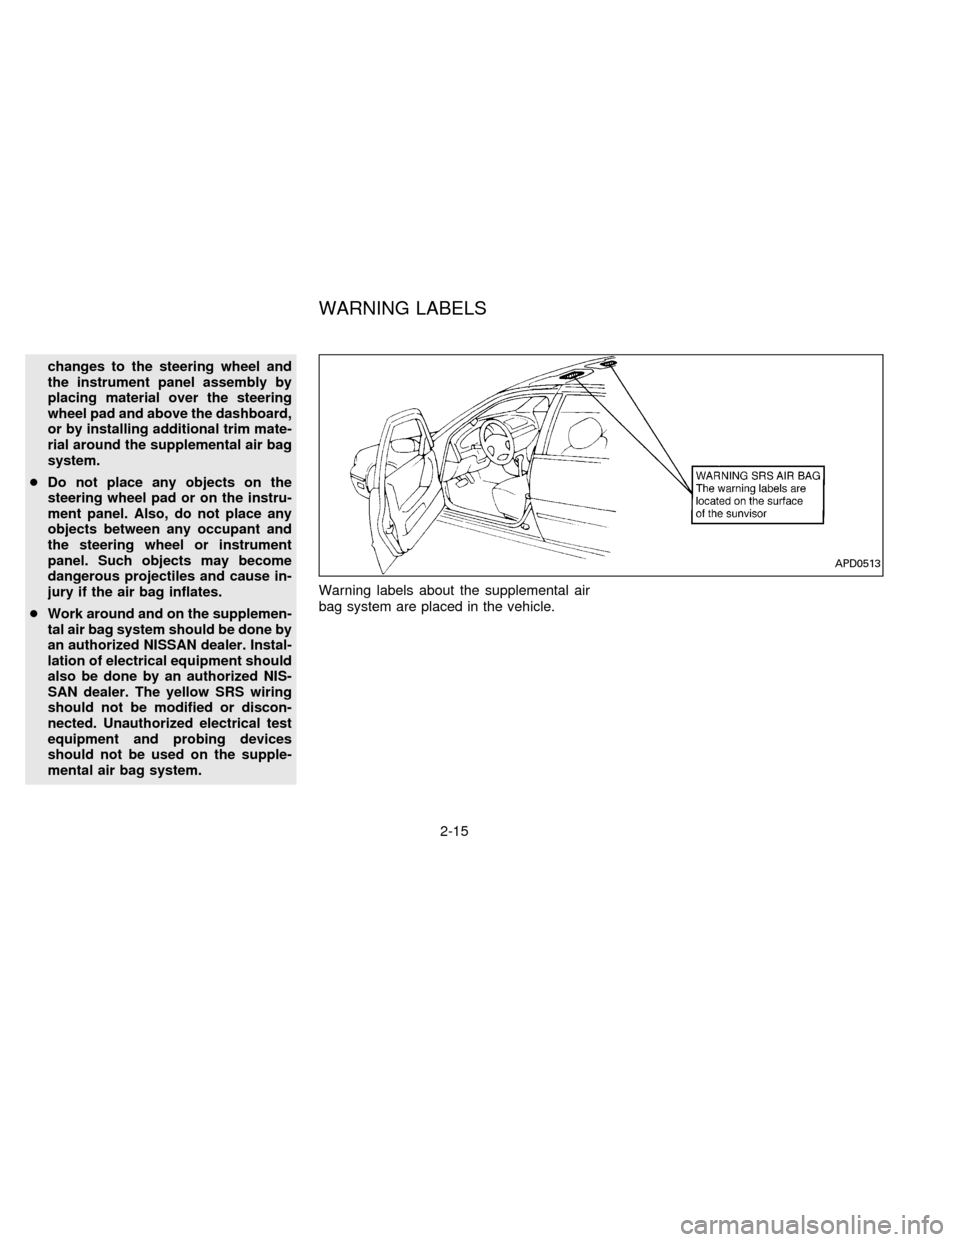
mental air bag system.Warning labels about the supplemental air
bag system are placed in the vehicle.
APD0513
WARNING LABELS
2-15
ZX
Page 55 of 183
Tilt operation
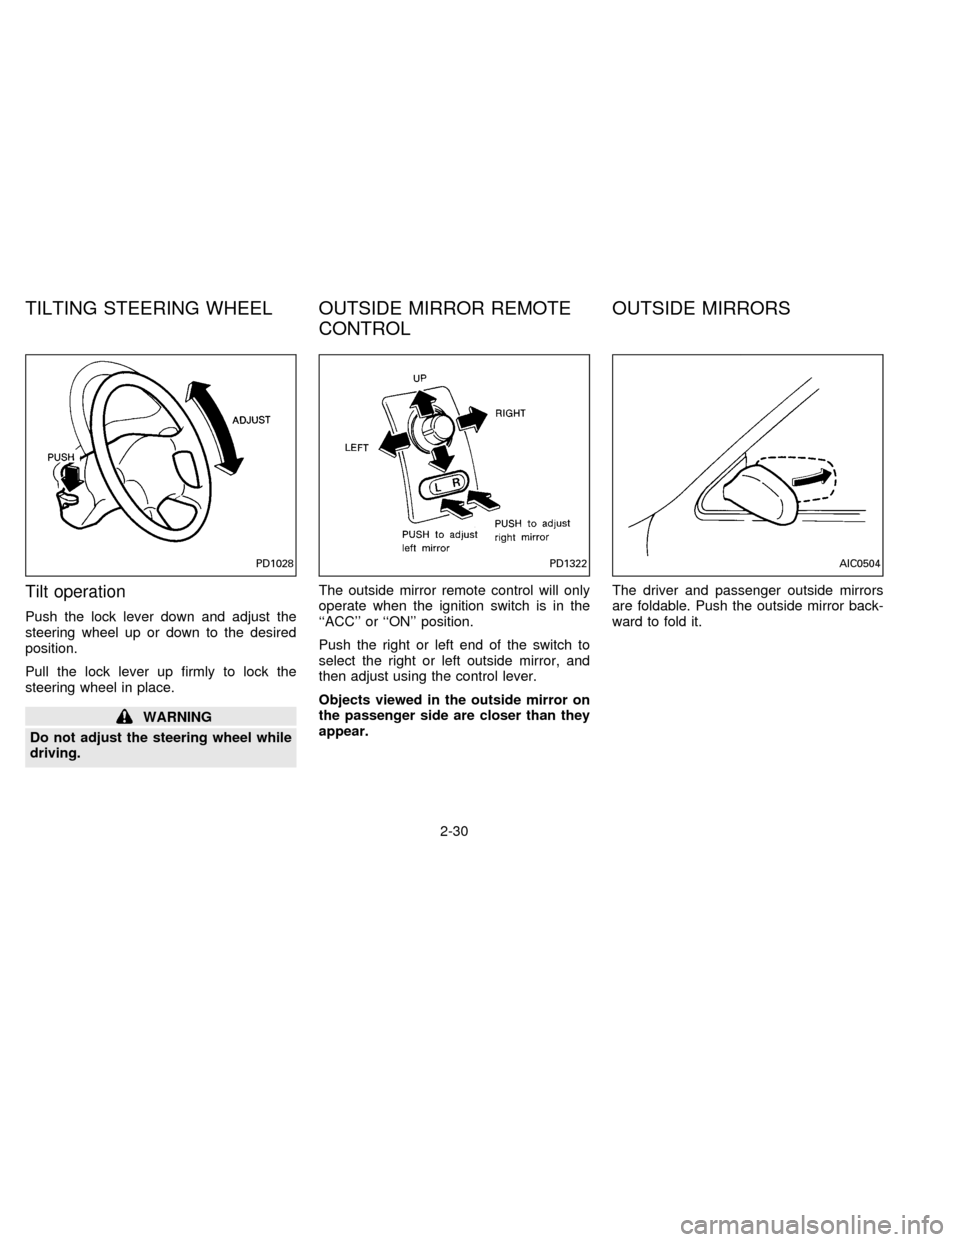
Push the lock lever down and adjust the
steering wheel up or down to the desired
position.
Pull the lock lever up firmly to lock the
steering wheel in place.
WARNING
Do not adjust the steering wheel while
driving.The outside mirror remote control will only
operate when the ignition switch is in the
``ACC'' or ``ON'' position.
Push the right or left end of the switch to
select the right or left outside mirror, and
then adjust using the control lever.
Objects viewed in the outside mirror on
the passenger side are closer than they
appear.The driver and passenger outside mirrors
are foldable. Push the outside mirror back-
ward to fold it.
PD1028PD1322AIC0504
TILTING STEERING WHEEL OUTSIDE MIRROR REMOTE
CONTROLOUTSIDE MIRRORS
2-30
ZX
Page 82 of 183
To help prevent damage
cDo not use leaded gasoline.
Deposits from leaded gasoline will se-
riously reduce the three way cata-
lyst's ability to help reduce exhaust
pollutants.
cKeep your engine tuned up. Malfunc-
tions in the ignition, fuel injection, or
electrical systems can cause overrich
fuel flow into the catalyst, causing it to
overheat. Do not keep driving if the
engine misfires, or if noticeable loss
of performance or other unusual op-
erating conditions are detected. Have
the vehicle inspected promptly by an
authorized NISSAN dealer.
cAvoid driving with an extremely low
fuel level. Running out of fuel could
cause the engine to misfire, damaging
the three way catalyst.
cDo not race the engine while warming
it up.
cDo not push or tow your vehicle to
start the engine.
Avoiding Collision and Rollover
Failure to operate this vehicle in a safe and
prudent manner may result in loss of control
or an accident. Be alert and drive defen-
sively at all times. Obey all traffic regula-
tions. Avoid excessive speed, high speed
cornering, or sudden steering maneuvers,
because these driving practices could
cause you to lose control of your vehicle.As
with any vehicle, a loss of control could
result in a collision with other vehicles or
objects, or cause the vehicle to roll over,
particularly if the loss of control causes
the vehicle to slide sideways.Be attentive
at all times, and avoid driving when tired.
Never drive when under the influence of
alcohol or drugs (including prescription or
over-the-counter drugs which may cause
drowsiness). Always wear your seat belt as
outlined in the ``Seat Belts'' section of this
manual, and also instruct your passengers
to do so.
Drinking Alcohol/Drugs and Driving
WARNING
Alcohol in the blood stream reduces
coordination, delays reaction time and
impairs judgement. Driving after drink-
ing alcohol increases the likelihood of
being involved in an accident injuring
yourself and others. Additionally, if you
are injured in an accident alcohol can
increase the severity of the injury.
Nissan is committed to safe driving. How-
ever, you must choose not to drive under
the influence of alcohol. Every year thou-
sands of people are injured or killed in
alcohol related accidents. Although the local
laws vary on what is considered to be
legally intoxicated, the fact is that alcohol
affects all people differently and most
people underestimate the effects of alcohol.
Remember, drinking and driving don't mix!
And that's true for drugs, too (over the
counter, prescription, and illegal drugs).
Don't drive if your ability to operate your
vehicle is impaired by alcohol, drugs, or
some other physical condition.
4-3
ZX
Page 83 of 183

Manual transmission
The switch includes an anti-theft steering
lock device.
``LOCK'' Normal parking position (0)
The key can only be removed when the
ignition switch is in this position.
On manual transmission models, to turn the
ignition key to ``LOCK'' from ``ACC'' or ``ON'',
turn the key to ``OFF'' and press in the key
release button, then turn the key to ``LOCK''.In order for the steering wheel to be locked,
it must be turned about 1/8 of a turn coun-
terclockwise from the straight up position.
Automatic transmission
On automatic transmission models the igni-
tion lock is designed so the key cannot be
turned to ``LOCK'' and removed until the
shift lever is moved to the ``P'' (Park) posi-
tion.
When removing the key from the ignition,
make sure the shift lever is in the ``P'' (Park)
position.
When the key cannot be turned to the
``LOCK'' position, proceed as follows to re-
move the key:
ASD0022ASD0023
IGNITION SWITCH
4-4
ZX
Page 84 of 183
1) Move the shift lever into the ``P'' (Park)
position.
2) Turn the ignition key slightly in the ``ON''
direction.
3) Turn the key toward the ``LOCK'' posi-
tion.
4) Remove the key.
If the key is removed from the ignition
switch, the shift lever cannot be moved from
``P'' (Park).The shift lever can be moved if
the ignition switch is in the ``ACC'' posi-
tion. The shift lever can also be moved if
the ignition switch is in the ``ON'' posi-
tion and the foot brake pedal is de-
pressed.
There is an ``OFF'' position in between
``LOCK'' and ``ACC'', although it does not
show on the key cylinder. When the ignition
is in ``OFF'' the steering wheel is not locked.
In order for the steering wheel to be locked,
it must be turned about 1/8 of a turn coun-
terclockwise from the straight up position,
and the key must be removed from the
ignition.WARNING
To lock the steering wheel, remove the
key. To unlock the steering wheel, in-
sert the key and turn it gently while
rotating the steering wheel slightly
right and left.
Never remove the key while driving. If
the key is removed, the steering wheel
will lock. This may cause the driver to
lose control of the vehicle and could
result in serious vehicle damage or
personal injury.
``OFF'' (Manual transmission model) (1)
The engine can be turned off without locking
the steering wheel.
``ACC'' (Accessories) (2)
This position activates electrical accesso-
ries such as the radio when the engine is
not running.
``ON'' Normal operating position (3)
This position turns on the ignition system
and the electrical accessories.``START'' (4)
This position activates the starter motor,
which starts the engine.
cMake sure the area around the vehicle is
clear.
cMaintenance items listed here should be
checked periodically, for example, each
time you check engine oil.
cCheck that all windows and lights are
clean.
cVisually inspect tires for their appearance
and condition. Also check tires for proper
inflation.
cLock all doors.
cPosition seat and adjust head restraints.
cAdjust inside and outside mirrors.
cFasten seat belts and ask all passengers
to do likewise.
cCheck the operation of warning lights
when key is turned to the ``ON'' (3) posi-
tion.
BEFORE STARTING THE
ENGINE
4-5
ZX